2014 SUBARU FORESTER sat nav
[x] Cancel search: sat navPage 12 of 106

86 Navigation
Read First
Map Screen
Navigating on the Map
In the navigation menu startup screen, the currently active map is
reduced and displayed in (Show Map).
To enlarge the map, touch (Show Map) to open the Map
screen.
This map shows the current position (shown as the vehicle marked as a
blue arrow), recommended routes (orange lines), and the immediate
surrounding area.
When GPS positioning is not active, the vehicle marker is clear. The
latest confirmed position is displayed. Colored spots are displayed on the circle around the satellite icon in the
top left corner. The more spots ther
e are on the circle, the higher the
accuracy of the GPS positioning.
When GPS positioning is active, th e vehicle marker is displayed in
full-color, and the current position is shown.
Show Map
Show Map
Page 13 of 106
Navigation 87
Read First
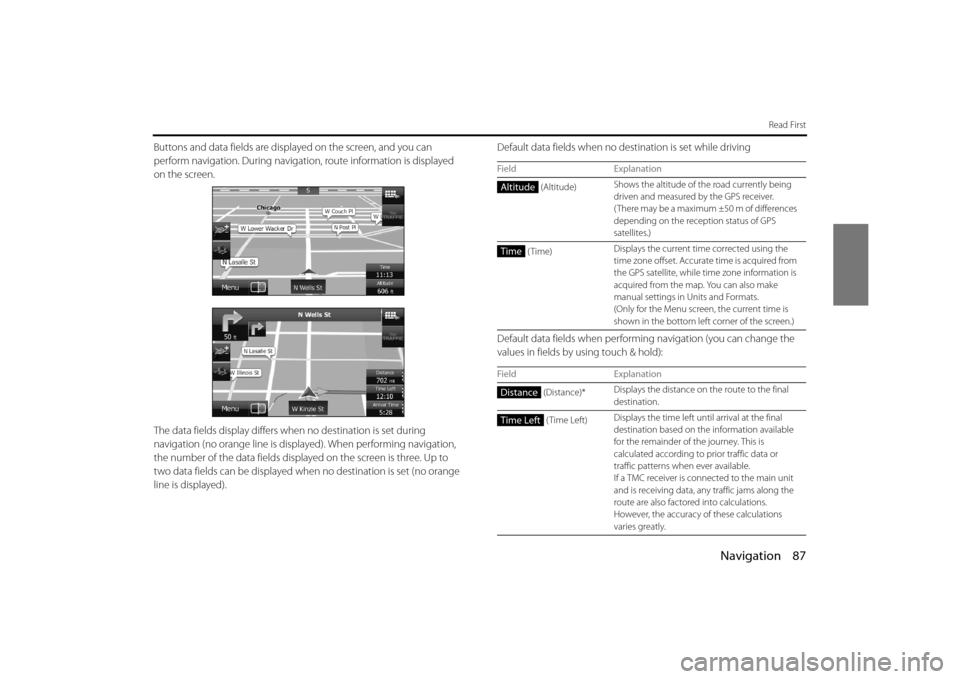
Buttons and data fields are displayed on the screen, and you can
perform navigation. During navigati on, route information is displayed
on the screen.
The data fields display differs wh en no destination is set during
navigation (no orange line is displayed). When performing navigation,
the number of the data fields displa yed on the screen is three. Up to
two data fields can be displayed when no destination is set (no orange
line is displayed). Default data fields when no de
stination is set while driving
Default data fields when performing navigation (you can change the
values in fields by using touch & hold):
Field Explanation
(Altitude) Shows the altitude of the road currently being
driven and measured by the GPS receiver.
( There may be a maximum ±50 m of differences
depending on the rece
ption status of GPS
satellites.)
(Time) Displays the current time corrected using the
time zone offset. Accurate
time is acquired from
the GPS satellite, while ti me zone information is
acquired from the map. You can also make
manual settings in Units and Formats.
(Only for the Menu screen, the current time is
shown in the bottom left corner of the screen.)
Field Explanation
(Distance)* Displays the distance on
the route to the final
destination.
(Time Left) Displays the time left un
til arrival at the final
destination based on th e information available
for the remainder of the journey. This is
calculated according to prior traffic data or
traffic patterns when ever available.
If a TMC receiver is connected to the main unit
and is receiving data, an y traffic jams along the
route are also factored into calculations.
However, the accuracy of these calculations
varies greatly.
Altitude
Time
Distance
Time Left
Page 14 of 106
88 Navigation
Read First
* Time and distance to the destination cannot be displayed when your vehicle is located in the place other than roads and Highways. After the vehicle returns
to a road or Highway, time and distance are displayed.
Position Marker
■Vehicle Marker and Lock-on-Road
If GPS positioning is available, the current position is shown using the
vehicle marker. • When any vehicle is selected, the vehicle marker may not display an
accurate GPS position and direction of travel. If there is a road nearby,
the GPS positioning error is corrected based on the shortest distance
to the road to, and the direction of the icon is adjusted to match the
direction of the road.
■ Selected map location (cursor)
Use one of the following methods to mark a map location.
• Touch the map during navigation.
• Touch the map when the destinatio n you want is displayed in the
search results.
• Touch the map in “Find on Map”. (See Page 128.)
After selecting a map location, a cu rsor is displayed at the point
selected on the map. The cursor is displayed as a red point ( ) and can
be checked at all zoom levels.
You can use the cursor's position as the route's destination, search for
locations around the cursor, and save the position in the destination list.
(Arrival
Time)* Displays the estimated arrival time at the final
destination based on the information available
for the remainder of th
e journey. This is
calculated according to prior traffic data or
traffic patterns when ever available.
If a TMC receiver is conn ected to the main unit
and is receiving data, any traffic jams along the
route are also factored into calculations.
However, the accuracy of these calculations
varies greatly.
(Time) Displays the current time corrected using the
time zone offset. Accurate time is acquired from
the GPS satellite, while time zone information is
acquired from the map. You can also make
manual settings in Units and Formats.
(Only for the Menu screen, the current time is
shown in the bottom left
corner of the screen.)
(Altitude) Shows the altitude of the road currently being
driven and measured by the GPS receiver.
( There may be a maximum ±50 m of differences
depending on the reception status of GPS
satellites.)
Field ExplanationArrival Time
Time
Altitude
Page 25 of 106
Navigation 99
Read First
* You can save routes of up to 100 items.
ButtonExplanation Primary
Location
(Overview) Reduces the scale of the 2D map
to display the entire route. My Route /
Overview
(See Page
135
.)
(Visual
Guidance) Opens the Visual Guidance
settings screen.
More /
Settings /
Visual
Guidance
(See Page
164
.)
( Traffic) Opens the Traffic Summary
screen. To u c h t h e
navigation
menu or the
Map screen's
road icons.
(Avoid) Avoids part of the
recommended route. My Route /
Avoidances
(Trip
Monitor) Opens the trip monitor screen
from which you can manage
your saved trip logs and path
logs. More / Trip
Monitor (See
Page
155.)
(Itinerary) Opens a list of changes in the
route (distances). To u c h t h e t o p
of the Map
screen during
navigation.
(Save
Route)
*
The route being navigated is
saved to be used later. My Route /
More / Save
Route
Overview
Visual Guidance
Traffic
Avoid
Trip Monitor
Itinerary
Save Route
(Load
Route) Changes to a saved, previously
navigated route.
My Route /
More / Load
Route
(Find Places) Searches for your favorite spots
using a variety of methods. Destination /
Find Places
(See Page
114
.)
(Simulate Navigation) The Map screen opens and a
simulation of the route being
navigated starts. My Route /
More /
Simulate
Navigation
(See Page
147
.)
(GPS Info) Opens the GPS information
screen showing satellite
positions and signal strength. Touch the top
of the Map
screen if there
is no GPS
reception.
Button Explanation Primary
LocationLoad Route
Find Places
Simulate Navigation
GPS Info
Page 78 of 106
152 Navigation
Reference Data
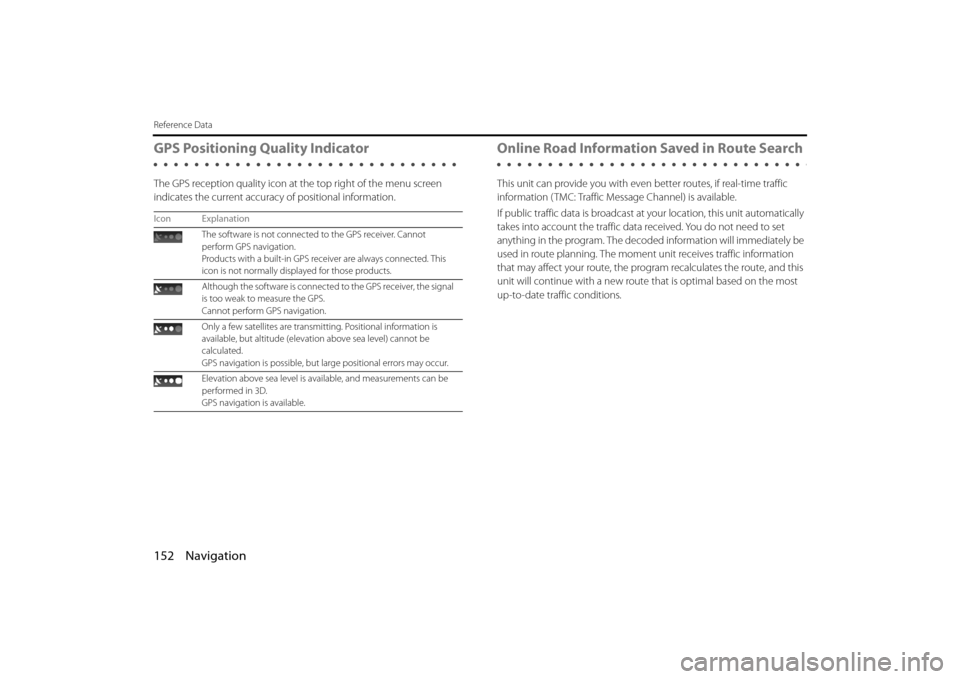
GPS Positioning Quality Indicator
The GPS reception quality icon at the top right of the menu screen
indicates the current accuracy of positional information.
Online Road Information Saved in Route Search
This unit can provide you with even better routes, if real-time traffic
information ( TMC: Traffic Message Channel) is available.
If public traffic data is broadcast at your location, this unit automatically
takes into account the traffic data received. You do not need to set
anything in the program. The decoded information will immediately be
used in route planning. The moment unit receives traffic information
that may affect your route, the program recalculates the route, and this
unit will continue with a new route that is optimal based on the most
up-to-date traffic conditions.
Icon Explanation
The software is not connected to the GPS receiver. Cannot
perform GPS navigation.
Products with a built-in GPS receiver are always connected. This
icon is not normally disp layed for those products.
Although the software is connecte d to the GPS receiver, the signal
is too weak to measure the GPS.
Cannot perform GPS navigation.
Only a few satellites are transmitting. Positional information is
available, but altitude (elevati on above sea level) cannot be
calculated.
GPS navigation is possible, but large positional errors may occur.
Elevation above sea level is available, and measurements can be
performed in 3D.
GPS navigation is available.
Page 79 of 106
Navigation 153
Reference Data
Real-time traffic information (TMC)
TMC ( Traffic Message Channel) offers real-time traffic conditions. This
can help you to avoid traffic jams th at could not be anticipated due to
road closures or accidents.
TMC uses a dedicated XM satellite ra dio to broadcast real-time traffic
information.
The default settings use traffic information when searching for a route.
If traffic data normally broadcast in your region can be accessed, this
received information is automatically taken into account. This does not
need to be manually set. XM sate llite radio stations broadcasting TMC
data are searched for automatica lly, and decoded information is
immediately used to search for routes . If traffic information that might
affect the current route is received , a warning is displayed indicating
that the route will be searched for again, and navigation continues
using a new, optimal route taking into account the latest traffic
conditions.
By delaying the timing before applyi ng a route that has been searched
again, the user can check the route and fine-tune the details creating
the optimal search results. You can se t this from Traffic settings. (See
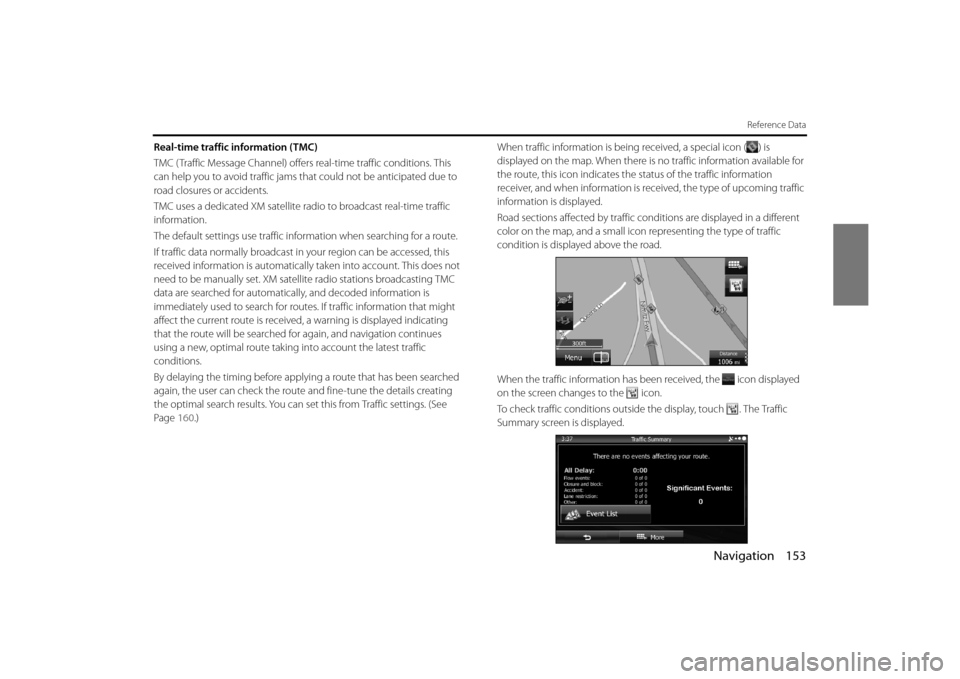
Page 160.) When traffic information is being received, a special icon ( ) is
displayed on the map. When there is no traffic information available for
the route, this icon indicates the status of the traffic information
receiver, and when information is rece
ived, the type of upcoming traffic
information is displayed.
Road sections affected by traffic co nditions are displayed in a different
color on the map, and a small icon representing the type of traffic
condition is displayed above the road.
When the traffic information has be en received, the icon displayed
on the screen changes to the icon.
To check traffic conditions outside the display, touch . The Traffic
Summary screen is displayed.
Page 85 of 106

Navigation 159
Reference Data
*You can save routes of up to 100 items.
(Visual
Guidance) Opens the Visual Guidance settings screen.
More / Settings / Visual Guidance (See Page 164.)
( Traffic) Opens the overall traffic conditions screen.
Touch the navigation menu or the Map screen's
road icons.
(Avoid) Avoids part of the recommended route.
My Route / Avoidances
(Trip Monitor) Opens the trip monitor screen from whic
h you can manage your saved trip logs
and path logs. More / Trip Monitor (See Page
155.)
(Itinerary) Opens a list of changes in the ro
ute (distances). Touch the top of the Map screen during navigation.
(Save Route)
*The route being navigated is saved to be used later. My Route / More / Save Route
(Load Route) Changes to a saved, previously navigate
d route. My Route / More / Load Route
(Find Places) Searches for your favorite spot
s using a variety of methods. Dest ination / Find Places (See Page 114.)
(Simulate Navigation) The Map screen opens and a simulation of
the route being navigated starts. My Route / More / Simulate Navigation (See Page
147 .)
(GPS Info) Opens the GPS information screen showing satellite positions and signal
strength. Touch the top of the Map screen if there is no GPS
reception.
Button
Explanation Primary Location
Visual Guidance
Traffic
Avoid
Trip Monitor
Itinerary
Save Route
Load Route
Find Places
Simulate Navigation
GPS Info
Page 86 of 106

160 Navigation
Reference Data
Tra f f i c
Sets On/Off of traffic information display and the method to use the
received real-time traffic in formation on route search.
• ( Traffic Receiver):
Turns on or off the traffic information display.
• (Detour):
Set to use real-time traffic information when searching for a route.
When searching for a new route, or when it is necessary to search
again based on the traffic information received, it searches for merits
to avoiding the current traffic conditions.
Set so that confirmation is need ed every time you perform another
search by delaying the timing when the search is remade.
- (Never offer detour):
When this button is touched, routes th at do not satisfy traffic conditions are
not searched.
- (Offer detour if
the calculated route saves more than:):
When this button is touched, routes that satisfy traffic conditions are
searched.
Time slider:
Adjust the timing before starting anot her route search. (You can set 0 to 60
every 5 minutes)
- (Do you want to confirm
the offered route?):
You can turn the route confirmation di splay on or off for each new search.
• (Event Types):
Touch this button to open a list of types of traffic conditions, and
select the events to take into consideration when searching for a
route.
Settings button for each type of traffic condition
- (All events in this category will be:):
You can select “Considered” or “I gnored” when searching for a route.
- ( Visible on map):
Yo u c a n t u r n t h e i c o n d i s p lay on the map on or off.Traffic Receiver
Detour
Never offer detour
Offer detour if the calculated route saves more than:
Do you want to confirm the offered route?
Event Types
All events in this category will be:
Visible on map