Page 49 of 64

Disconnection
The connection of a telephone to the device can be disconnected in one of the
following ways.
› By removing the ignition key (or turning off the ignition and opening the driv-
er's door in the case of vehicles with the starter button).
› By switching off the Bluetooth ®
function on the device » page 20, Blue-
tooth ®
settings .
› By switching off the Bluetooth ®
function on the telephone.
› By the separation of the connection in the telephone.
› By removing the telephone from the list of paired devices
» page 44, Delete
the telephone from the list of paired devices .
› By separating the Bluetooth ®
HFP profile » page 39, Bluetooth ®
- connection
profile .
› By turning off the connected phone.
› By the moving of the telephone outside the Bluetooth ®
signal range.
If a telephone is connected to the device and the device is turned off, the con-
nection to the telephone is not lost. The connection is only lost after switching
off the ignition (for vehicles with the start button after switching off the igni-
tion and opening the driver's door).
Dial telephone number
Introduction
This chapter contains information on the following subjects:
Direct entry of the telephone
46
List of telephone contacts
47
Speed dialling a telephone number
48
Call lists
49
First and foremost, pay attention to the safety instructions » page 7 .
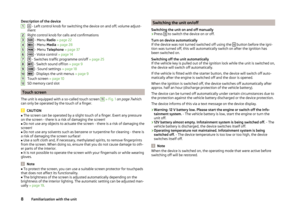
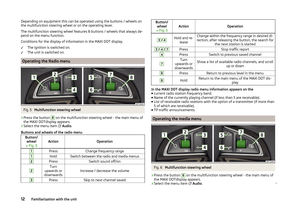
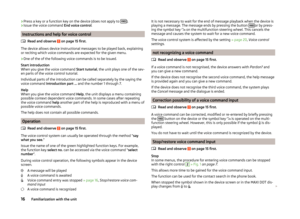
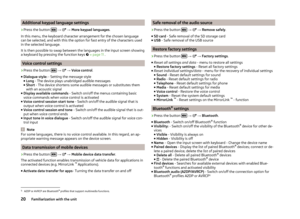
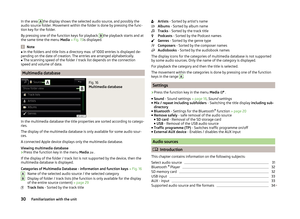
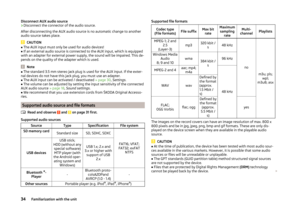
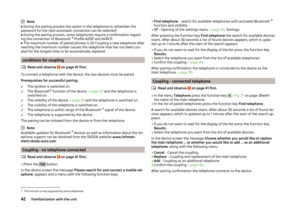
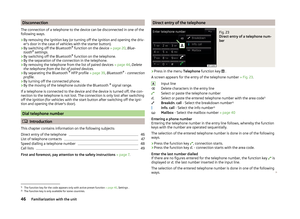
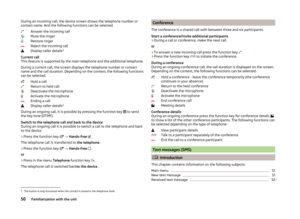
Direct entry of the telephoneFig. 23
Direct entry of a telephone num-
ber
›
Press in the menu Telephone function key
.
A screen appears for the entry of the telephone number » Fig. 23.
Input line
Delete characters in the entry line
Select or paste the telephone number
Select or paste the entered telephone number with the area code 1)
Breakdn. call - Select the breakdown number 2)
Info. call - Select the info number 2)
Mailbox - Select the mailbox number » page 40
Entering a phone number
Entering the telephone number in the entry line follows, whereby the function
keys with the number are operated sequentially.
The selection of the entered telephone number is done in one of the following
ways.
› Press the function key
, connection starts.
› Press the function key
- connection starts with the area code.
Enter the last number dialled
If there are no figures entered for the telephone number, the function key is
displayed or the last number inserted in the input line.
The selection of the entered telephone number is done in one of the following
ways.
A1)
The function key for the code appears only with active preset function
» page 40, Settings .
2)
The function key is only available for some countries.
46Familiarization with the unit
Page 50 of 64

›Press the function key
, connection starts.
› Press the function key
- connection starts with the area code.
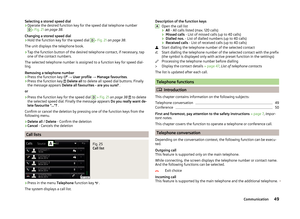
Search for a contact in the list The input screen » Fig. 23 also functions as an alphanumeric keypad that you
can use to search for contacts in the phonebook.
For example, if you enter 32, the unit will display contacts with the letter se-
quence DA, FA, EB, etc.
On the right side next to the numerical keyboard a list of contacts found from
the directory appears according to the lettered specified. By pressing the cor-
responding function key for the respective contact, dialling is started or the
contact details are displayed if the telephone contact has several telephone
numbers.
Enter prefix
Entering the prefix into the input line can be done in one of two ways.
› Enter the characters or numbers of the prefix (e.g.
or enter 00 or similar).
› Enter the telephone number and press the function key
(the connection
with the prefix starts).
The prefix may, for example be used for international calls, telephone calls via
a virtual telephone service provider or distinguishing between business and
private calls and similar.
If the contact number contains a prefix, pressing the function key causes a
further prefix to be added before the number and the connection starts. The
telephone number contains at this time two prefixes and a telephone call is
not initiated.
Dialling breakdown and info numbers
› Press the function key
Breakdn. call , breakdown number is dialled.
A breakdown service will then be called when your vehicle breaks down.
› Press the function key
Info. call
the Info number is dialled.
An information service can be called when information regarding the products
and services of the ŠKODA brand are required.
The breakdown and info numbers are free of charge. Charges are only made
for a telephone call in accordance with the fare conditions of your telephone
service provider.
If no Breakdown or Info. call can be made, then a ŠKODA service partner
should be consulted.The breakdown and info numbers are set country-specific at the factory. If you
want to change the preset numbers, then consult a ŠKODA service partner.
List of telephone contacts
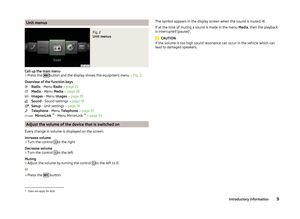
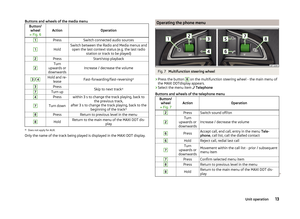
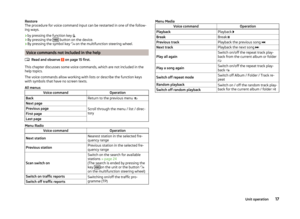
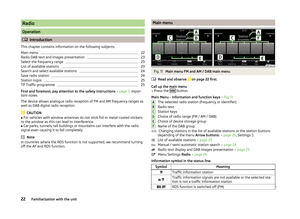
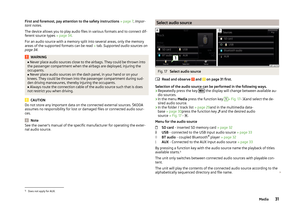
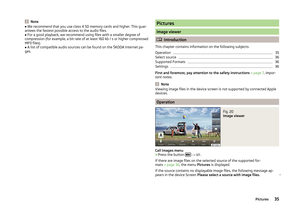
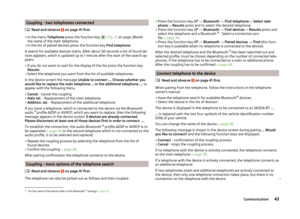
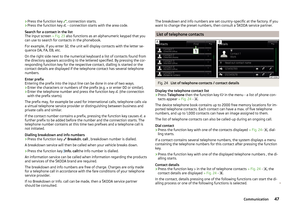
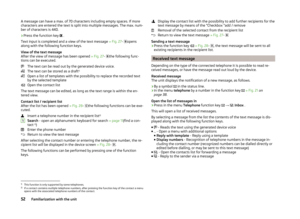
Fig. 24
List of telephone contacts / contact details
Display the telephone contact list
›
Press Telephone then the function key
in the menu - a list of phone con-
tacts appear » Fig. 24 -
.
The device telephone book contains up to 2000 free memory locations for im-
ported telephone contacts. Each contact can have a max. of five telephone
numbers, and up to 1,000 contacts can have an image assigned to them.
The list of telephone contacts can also be called-up during an ongoing call.
Dial contact
›
Press the function key with one of the contacts displayed » Fig. 24-
, dial-
ling starts.
If a contact contains several telephone numbers, the system displays a menu
containing the telephone numbers for this contact after pressing the function
key.
›
Press the function key with one of the displayed telephone numbers , the di-
alling starts.
Contact details
›
Press the function key in the list of telephone contacts
» Fig. 24 -
, the
contact details are displayed » Fig. 24 -
.
In the contact, details pressing one of the following functions can start the di-
alling process or one of the following functions is selected.
47Communication
Page 51 of 64
 1)
» page 51
›
- Start of the connection w")
›
Read out contact name - Reads the contact name using the device gener-
ated voice›
- Opens the menu for sending a text message (SMS) 1)
» page 51
›
- Start of the connection with the prefix (the symbol is displayed only with
active preset function in the settings)
›
- Opens the menu for editing the telephone number of the contact before
dialling
Find contact
›
Press the function key
1
» Fig. 24 -
, the keyboard opens for the contact
search in the telephone book » page 11, Alphanumeric with keyboard .
›
Select the contact from the list of imported phone contacts.
›
Press the function key with the retrieved contact, connection starts. The
contact details appear if the telephone contact has several telephone num-
bers.
Load list
Upon first connection of the main telephone with the device, the device be-
gins to download the telephone book from the telephone and from the SIM
card 2)
into the device memory 3)
. Depending on the number of contacts, the im-
ages and the type of telephone this may take several minutes to complete.
The number of contacts imported can be checked in the menu point Import
contacts » page 40 , Settings .
During the import numbers - xxxx / yyyy - are shown representing the number
of currently imported contacts into the device memory / number of contacts in
the phone.
If the imported list of telephone contacts from the telephone contains more
than 2000 contacts, loading is stopped and the message Contacts not com-
pletely imported. appears on the screen. Only the already downloaded con-
tacts will be available.
Depending on the telephone, contact images for the first 1000 contacts are
imported at the same time.
If an error occurs while loading the list, the following message appears: Import
failed. Please try again and check whether the BT device … allows connec-
tions.
Refresh list
Each time the telephone has established a new connection with the device,
the relevant telephone contacts will be updated.
During the update, the list which was stored after the last completed update
will be available. Newly stored telephone numbers are only shown after the
updating has ended.
The update can be done manually » page 40, Settings by pressing the function
key Import contacts .
Note
The contact list is valid for the main telephone. If the incoming call is accepted
by the additional telephone and you find the telephone number in the contact
list of the main telephone, then the caller details (e.g. name, image, etc.) is dis-
played instead of the number.
Speed dialling a telephone number
You can use the speed dial function keys
D
» Fig. 21 on page 38 to dial previ-
ously assigned telephone numbers instantly.
There are 10 function keys for speed dialling available in the memory groups.
Assigning a telephone number
›
In the menu Telephone press a non-assigned function key for the speed dial
D
» Fig. 21 on page 38 .
or
›
In the menu
→ User profile → Manage favourites press a non-assigned
function key for speed dialling.
The unit displays the telephone book.
›
Tap the function button of the desired telephone contact, if necessary, tap
one of the contact numbers.
The selected telephone number is assigned to a function key for speed dial-
ling.
1)
The icon appears at about the MAP profile associated telephones.
2)
Some telephones do not support downloading of contacts from the SIM card.
3)
With some telephones a confirmation for importing contacts to the device is required.
48Familiarization with the unit
Page 52 of 64

Selecting a stored speed dial›Operate the desired function key for the speed dial telephone numberD
» Fig. 21 on page 38 .
Changing a stored speed dial
›
Hold the function key for the speed dial
D
» Fig. 21 on page 38 .
The unit displays the telephone book.
›
Tap the function button of the desired telephone contact, if necessary, tap
one of the contact numbers.
The selected telephone number is assigned to a function key for speed dial-
ling.
Removing a telephone number
›
Press the function key
→ User profile → Manage favourites .
›
Press the function key
Delete all to delete all speed dial buttons. Finally
the message appears Delete all favourites - are you sure? .
or
›
Press the function key for the speed dial
D
» Fig. 21 on page 38
to delete
the selected speed dial. Finally the message appears Do you really want de-
lete favourite "..."? .
Confirm or cancel the deletion by pressing one of the function keys from the following menu.
›
Delete all / Delete - Confirm the deletion
›
Cancel - Cancels the deletion
Call lists
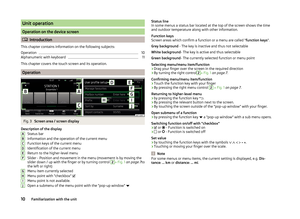
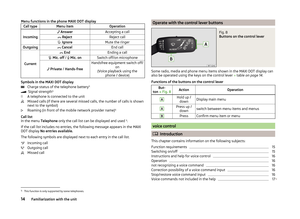
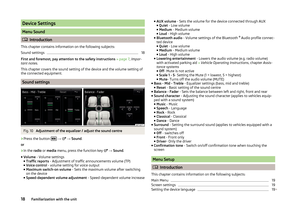
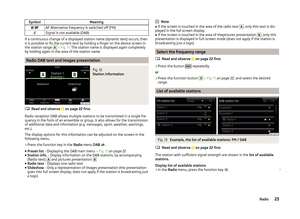
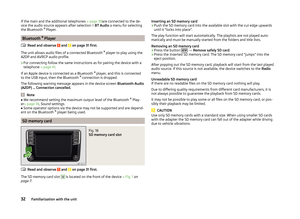
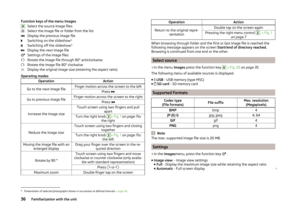
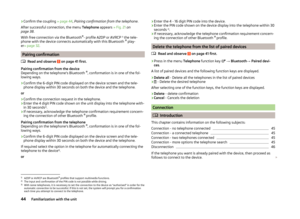
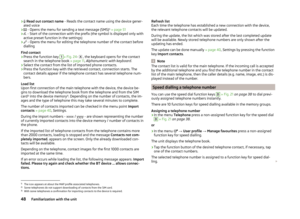
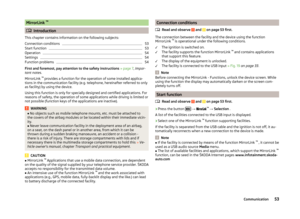
Fig. 25
Call list
›
Press in the menu Telephone function key
.
The system displays a call list.
Description of the function keys Open the call list
› All
- All calls listed (max. 120 calls)
› Missed calls
- List of missed calls (up to 40 calls)
› Dialled nos.
- List of dialled numbers (up to 40 calls)
› Received calls
- List of received calls (up to 40 calls)
Start dialling the telephone number of the selected contact
Start dialling the telephone number of the selected contact with the prefix
(the symbol is displayed only with active preset function in the settings)
Processing the telephone number before dialling
Display the contact details » page 47, List of telephone contacts
The list is updated after each call.
Telephone functions
Introduction
This chapter contains information on the following subjects:
Telephone conversation
49
Conference
50
First and foremost, pay attention to the safety instructions » page 7 , Impor-
tant notes .
This chapter covers the function to operate a telephone or conference call.
Telephone conversation
Depending on the conversation context, the following function can be execu-
ted.
Outgoing call
This feature is supported only on the main telephone.
While connecting, the screen displays the telephone number or contact name.
And the following functions can be selected.
Exit choice
Incoming call
This feature is supported by the main telephone and the additional telephone.
A49Communication
Page 53 of 64

During an incoming call, the device screen shows the telephone number or
contact name. And the following functions can be selected.
Answer the incoming call
Mute the ringer
Restore ringer
Reject the incoming call
Display caller details 1)
Current call
This feature is supported by the main telephone and the additional telephone.
During a current call, the screen displays the telephone number or contact
name and the call duration. Depending on the context, the following functions
can be selected.
Hold a call
Return to held call
Deactivate the microphone
Activate the microphone
Ending a call
Display caller details 1)
During an ongoing call, it is possible by pressing the function key to send
the key tone (DTMF).
Switch to the telephone call and back to the device
During an ongoing call it is possible to switch a call to the telephone and back
to the device.
› Press the function key
→ Hands-free
.
The telephone call is transferred to the telephone .
› Press the function key
→ Hands-free
.
or
› Press in the menu
Telephone function key
.
The telephone call is switched back to the device .Conference
The conference is a shared call with between three and six participants.
Start a conference/invite additional participants›
During a call or conference, make the next call.
or
›
To answer a new incoming call press the function key
.
›
Press the function key
to initiate the conference.
During a conference
During an ongoing conference call, the call duration is displayed on the screen.
Depending on the context, the following functions can be selected.
Hold a conference - leave the conference temporarily (the conference
continues in your absence)
Return to the held conference
Deactivate the microphone
Activate the microphone
End conference call
Meeting details
Conference details
During an ongoing conference press the function key for conference details
to show a list of the other conference participants. The following functions can
be selected depending on the type of telephone
View participant details
Talk to a participant separately of the conference
End the call to a conference participant
Text messages (SMS)
Introduction
This chapter contains information on the following subjects:
Main menu
51
New text message
51
Received text message
52
1)
The button is only functional when the contact is stored in the telephone book.
50Familiarization with the unit
Page 54 of 64

First and foremost, pay attention to the safety instructions » page 7 , Impor-
tant notes .
The device offers the ability to display and send text messages, if your tele-
phone is connected to the device via the Bluetooth ®
profile MAP 1)
.
The MAP profile when connecting connects the device to the telephone using
the Bluetooth ®
profile HFP.
There is the possibility to have message read by the device.
For quick answers (called templates) stored text messages are available in the
device.
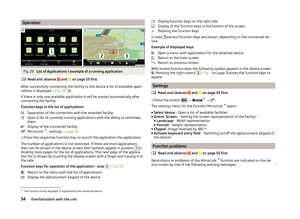
Main menu
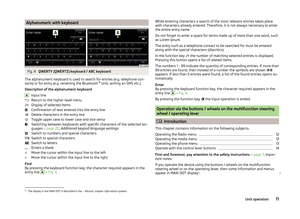
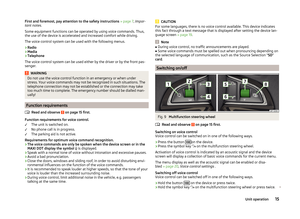
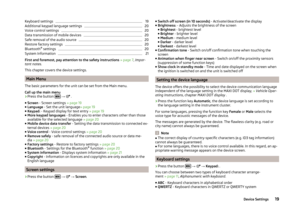
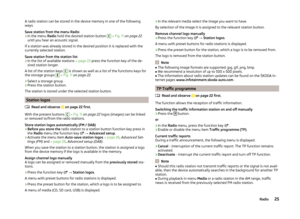
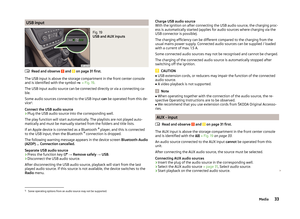
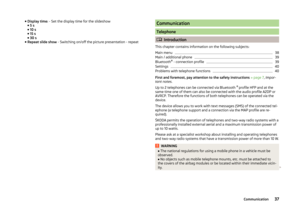
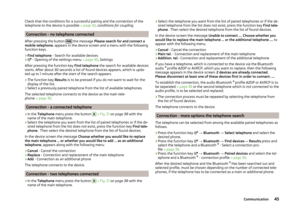
Fig. 26
Main menu text messages
Go to the main menu text messages
›
Press in the menu Telephone function key
.
A menu for text messages appears » Fig. 26.
Depending on the connected telephone just a few function keys of the follow-
ing menus can be displayed.
New text message - Creating and sending the message » page 51, New
text message
Inbox - Open a list of received messages » page 52, Received text mes-
sage
Sent - Open a list of sent messages
Outbox - Open a list of messages ready to be sent
Drafts - Open a list of drafts (messages in progress)
Deleted - Open a list of deleted messages
Open a list for quick answer provided short messages (called templates)
New text message
Fig. 27
Entering a text message / viewing a text message
Fig. 28
Contact list / recipient list
Enter the text message
›
Press in the menu Telephone function key
→
New text mes-
sage » Fig. 26 on page 51 .
An alphanumeric input keyboard is opened » Fig. 27-
.
›
Write the text of the message.
The number of characters entered is displayed in the function key
» Fig. 27 -
.
11)
This function is only supported by some telephones.
51Communication
Page 55 of 64

A message can have a max. of 70 characters including empty spaces. If more
characters are entered the text is split into multiple messages. The max. num-
ber of characters is 440.›
Press the function key
.
Text input is completed and a view of the text message » Fig. 27-
opens
along with the following function keys.
View of the text message
After the view of message has been opened » Fig. 27-
the following func-
tions can be executed.
The text can be read out by the generated device voice.
The text can be stored as a draft 1)
Open a list of templates with the possibility to replace the recorded text
by the selected template
Open the contact list
The text message can be edited, as long as the text range is within the en-
tered view.
Contact list / recipient list
After the list has been opened » Fig. 28-
the following functions can be exe-
cuted.
Insert a telephone number in the recipient list 2)
Search - open an alphanumeric keyboard for search » page 11(find a con-
tact 2)
)
Enter the phone number
Return to view the text message
After selecting the contact number or entering the telephone number, the re-
cipient list will be displayed in the device screen » Fig. 28-
.
The following functions can be performed by pressing one of the function
keys.
1Display the contact list with the possibility to add further recipients for the
text message by means of the “Checkbox ”add / remove
Removal of the selected contact from the recipient list
Return to view the text message » Fig. 27-
Sending a text message
› Press the function key
» Fig. 28 -
, the text message will be sent to all
existing recipients in the recipient list.
Received text message
Depending on the type of the connected telephone it is possible to read re-
ceived messages, or have the message read out loud by the device.
Received message
The unit displays the notification of a new message, as follows.
› By a symbol
in the status line.
› In the menu
telephone by a number in the function key
» Fig. 21 on
page 38 .
Open the list of messages in
› Press in the menu
Telephone function key
→
Inbox .
This will open a list of received messages.
By selecting a message from the list the contents of the text message is dis-
played along with the following function keys.
■ - Reads the text using the generated device voice
■ - Open a menu with additional options
■ Reply with template - Reply using a template
■ Display numbers - Recognition of telephone numbers in the message in-
cluding the contact number (recognized numbers can be dialled directly or
edited before dialling, or may be sent to this text message)
■ - Open the contacts list for forwarding a message
■ - Reply to the sender via a message
1)
This function is only supported by some telephones.
2)
If a contact contains multiple telephone numbers, after pressing the function key of the contact a menu
opens with the associated telephone numbers of the contact.
52Familiarization with the unit
Page 56 of 64

MirrorLink ™
Introduction
This chapter contains information on the following subjects:
Connection conditions
53
Start function
53
Operation
54
Settings
54
Function problems
54
First and foremost, pay attention to the safety instructions » page 7 , Impor-
tant notes .
MirrorLink ™
provides a function for the operation of some installed applica-
tions in the communication facility (e.g. telephone, hereinafter referred to only
as facility) by using the device.
Using this function is only for specially designed and certified applications. For
reasons of safety, the operation of some applications while driving is limited or
not possible (function keys of the applications are inactive).
WARNING■ No objects such as mobile telephone mounts, etc. must be attached to
the covers of the airbag modules or be located within their immediate vicin-
ity.■
Never leave communication facility in the deployment area of an airbag,
on a seat, on the dash panel or in another area, from which it can be
thrown during a sudden braking manoeuvre, an accident or a collision -
there is a risk of injury. There are storage compartments with lids and if
necessary there is the multimedia storage compartments to hold this » Ve-
hicle owner's manual , chapter Transport and practical equipment .
CAUTION
■
MirrorLink ™
Applications that use a mobile data connection, are dependent
on the quality of the signal supplied by your telephone service provider. ŠKODA
accepts no responsibility for the transmitted data volume.■
An intensive use of the function MirrorLink ™
and the work associated with
applications (e.g., GPS, mobile data, fully-backlit display and the like.) can lead
to battery discharge of the connected facility.
Connection conditions
Read and observe
and on page 53 first.
The connection between the facility and the device using the function
MirrorLink ™
is operational under the following conditions.
The ignition is switched on.
The facility supports the function MirrorLink ™
and contains applications
that support this feature.
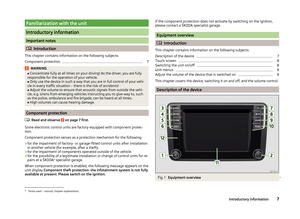
The display of the equipment is unlocked.
The facility is connected to the USB input » Fig. 19 on page 33 .
Note
Before connecting the MirrorLink - Functions, unlock the device screen. While
using the function the display may automatically darken or the screen com-
pletely turns off.
Start function
Read and observe
and on page 53 first.
›
Press the button
→
™
→ Selection .
A list of the facilities connected to the USB input is displayed.
›
Select one of the MirrorLink ™
function supporting facilities.
If the facility is separated from the USB cable and the ignition is not off, it au- tomatically reconnects when a new connection to the device is made.
Note
■ If the facility is connected by means of the function MirrorLink ™
, it cannot be
used as a USB audio source Media menu.■
The list of available facilities and applications, which support the MirrorLink ™
function, can be seed in the ŠKODA Internet pages www.infotainment.skoda-
auto.com
53Communication