2014 Seat Leon 5D radio
[x] Cancel search: radioPage 30 of 64
Audio mode
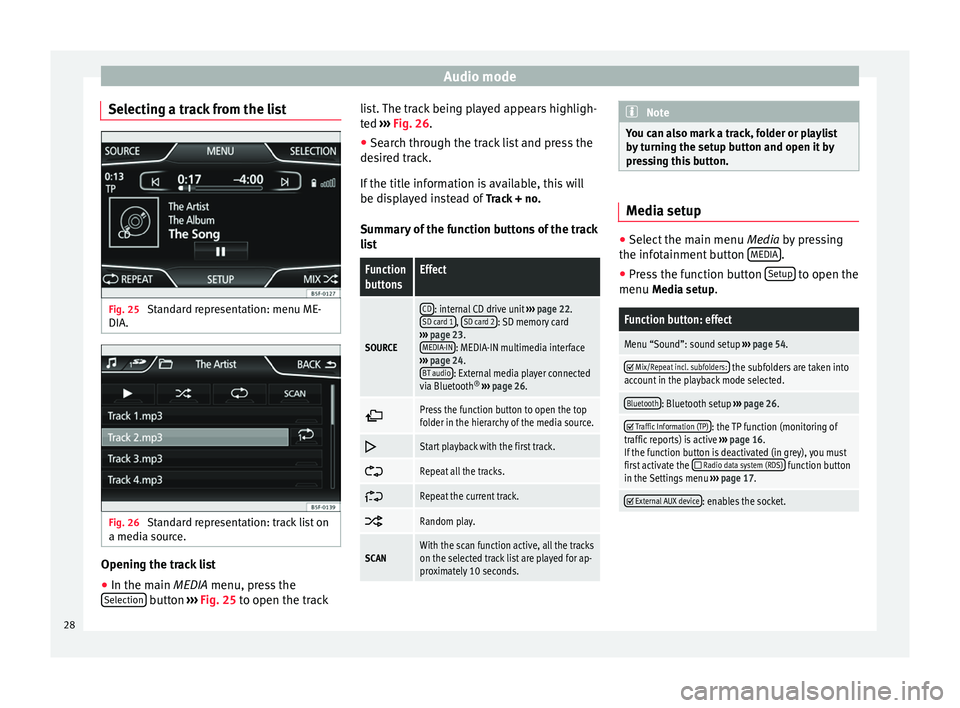
Selecting a track from the list Fig. 25
Standard representation: menu ME-
DIA. Fig. 26
Standard representation: track list on
a media source. Opening the track list
● In the main MEDIA
menu, press the
Sel
ection button
›››
Fig. 25 to open the track li
s t. The track being played appears highligh-
ted ››› Fig. 26
.
● Search through the track list and press the
desired track.
If the title information is available, this will
be displayed instead of Track + no.
Summary of the function buttons of the track
list
Function
buttonsEffect
SOURCE
CD: internal CD drive unit ››› page 22.
SD card 1, SD card 2: SD memory card
››› page 23.
MEDIA-IN
: MEDIA-IN multimedia interface
››› page 24.
BT audio
: External media player connected
via Bluetooth ®
››› page 26.
Press the function button to open the top
folder in the hierarchy of the media source.
Start playback with the first track.
Repeat all the tracks.
Repeat the current track.
Random play.
SCANWith the scan function active, all the tracks
on the selected track list are played for ap-
proximately 10 seconds. Note
You can also mark a track, folder or playlist
by turning the setup button and open it by
pressing this button. Media setup
●
Select the main menu Media by pressing
the inf ot
ainment button MEDIA .
● Press the function button Setup to open the
menu Media setup
.
Function button: effect
Menu “Sound”: sound setup ››› page 54.
Mix/Repeat incl. subfolders: the subfolders are taken into
account in the playback mode selected.
Bluetooth: Bluetooth setup ››› page 26.
Traffic Information (TP): the TP function (monitoring of
traffic reports) is active ››› page 16.
If the function button is deactivated (in grey), you must
first activate the
Radio data system (RDS) function button
in the Settings menu ››› page 17.
External AUX device: enables the socket.
28
Page 32 of 64
Navigation
Note
● Do not remove the memory card while the
navigation data is in use. This could damage
the memory card!
● The navigation memory card may not be
used as memory for other files. The infotain-
ment system will not recognise the files
saved.
● SEAT recommends only using original SEAT
memory cards to use navigation data. The
use of other memory cards could limit its op-
eration. Main menu of navigation
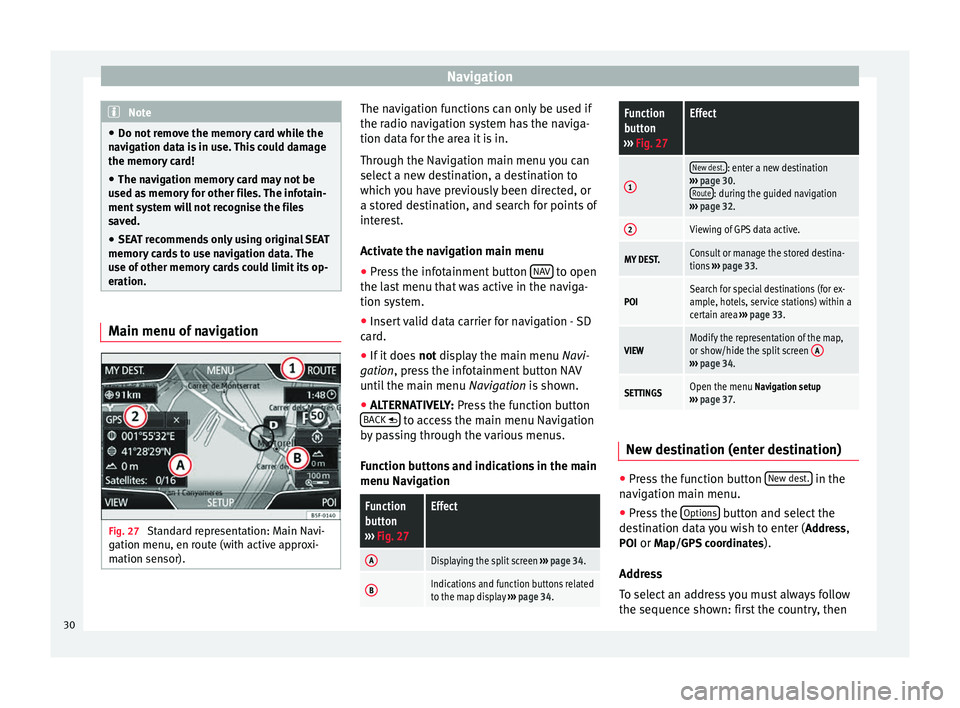
Fig. 27
Standard representation: Main Navi-
gation menu, en route (with active approxi-
mation sensor). The navigation functions can only be used if
the radio navigation system has the naviga-
tion data for the area it is in.
Through the Navigation main menu you can
select a new destination, a destination to
which you have previously been directed, or
a stored destination, and search for points of
interest.
Activate the navigation main menu
● Press the infotainment button NAV to open
the last menu that was active in the naviga-
tion system.
● Insert valid data carrier for navigation - SD
card.
● If it does not display the main menu
Na
vi-
gation, press the infotainment button NAV
until the main menu Navigation is shown.
● ALTERNATIVELY:
Press the function button
BACK to access the main menu Navigation
by passing through the various menus.
Function buttons and indications in the main
menu Navigation
Function
button
››› Fig. 27Effect
ADisplaying the split screen ››› page 34.
BIndications and function buttons related
to the map display ››› page 34.
Function
button
››› Fig. 27Effect
1
New dest.: enter a new destination
››› page 30.
Route
: during the guided navigation
››› page 32.
2Viewing of GPS data active.
MY DEST.Consult or manage the stored destina-
tions ››› page 33.
POISearch for special destinations (for ex-
ample, hotels, service stations) within a
certain area ››› page 33.
VIEWModify the representation of the map,
or show/hide the split screen A
›››
page 34.
SETTINGSOpen the menu Navigation setup
››› page 37. New destination (enter destination)
●
Press the function button New dest. in the
navigation main menu.
● Press the Options button and select the
destination data you wish to enter ( Address,
POI or Map/GPS coordinates ).
Address
To select an address you must always follow
the sequence shown: first the country, then
30
Page 38 of 64
Navigation
In certain circumstances, avoiding conges-
tion due to a TMC traffic report may not save
time if, for example, the detoured section is
already saturated with traffic. The quality of
the dynamic route guidance depends on the
information contained in the TMC traffic re-
ports. The radio stations broadcasting this in-
formation are responsible for the content.
The route to cover can also be blocked man-
ually to force a new route to be calculated
››› page 32 .
TMC tr
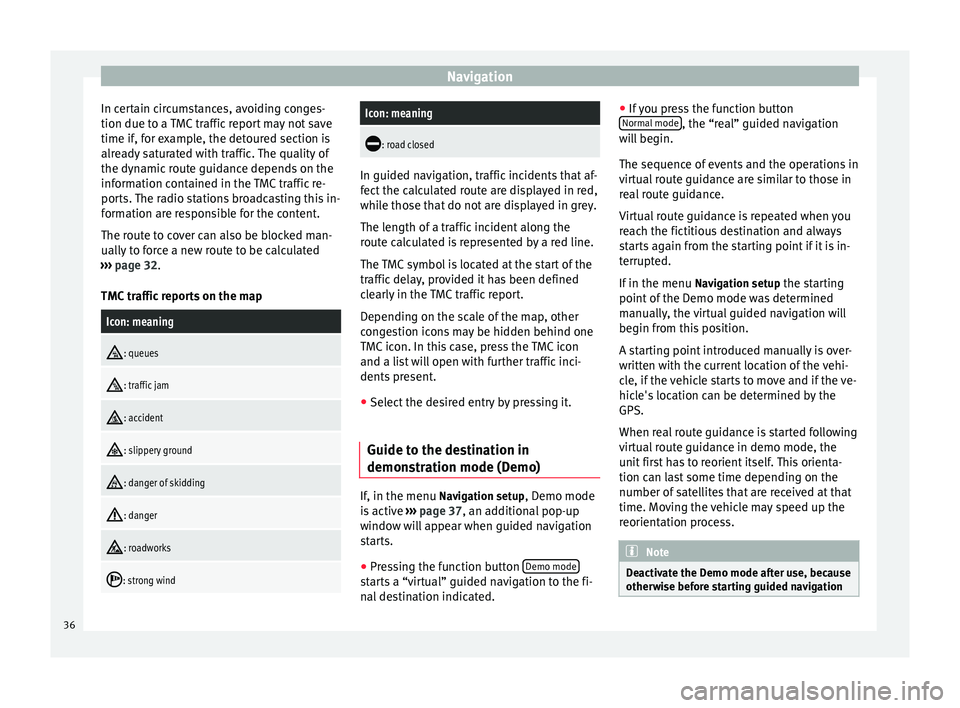
affic reports on the map
Icon: meaning
: queues
: traffic jam
: accident
: slippery ground
: danger of skidding
: danger
: roadworks
: strong wind
Icon: meaning
: road closed
In guided navigation, traffic incidents that af-
fect the calculated route are displayed in red,
while those that do not are displayed in grey.
The length of a traffic incident along the
route calculated is represented by a red line.
The TMC symbol is located at the start of the
traffic delay, provided it has been defined
clearly in the TMC traffic report.
Depending on the scale of the map, other
congestion icons may be hidden behind one
TMC icon. In this case, press the TMC icon
and a list will open with further traffic inci-
dents present.
● Select the desired entry by pressing it.
Guide to the destination in
demonstration mode (Demo) If, in the menu
Navigation setup
, Demo mode
is active ›››
page 37 , an additional pop-up
w indo
w will appear when guided navigation
starts.
● Pressing the function button Demo mode starts a “virtual” guided navigation to the fi-
nal destination indicated.●
If you press the function button
Normal mode , the “real” guided navigation
will begin.
The sequence of events and the operations in
virtual route guidance are similar to those in
real route guidance.
Virtual route guidance is repeated when you
reach the fictitious destination and always
starts again from the starting point if it is in-
terrupted.
If in the menu Navigation setup the starting
point of the Demo mode was determined
manually, the virtual guided navigation will
begin from this position.
A starting point introduced manually is over-
written with the current location of the vehi-
cle, if the vehicle starts to move and if the ve-
hicle's location can be determined by the
GPS.
When real route guidance is started following
virtual route guidance in demo mode, the
unit first has to reorient itself. This orienta-
tion can last some time depending on the
number of satellites that are received at that
time. Moving the vehicle may speed up the
reorientation process. Note
Deactivate the Demo mode after use, because
otherwise before starting guided navigation 36
Page 41 of 64
CAR menu
CAR menu Introduction to managing the
CAR menu Car menu By pressing the “CAR” infotainment button
you will access the main menu with the fol-
lowing options:
● VIEW
● MINIPLAYER (Radio and Media function)
● PREVIOUS-NEXT (to change screen)
● SETUP ›››
Booklet Instruction Manual,
chapter System setup (CAR)
With the function button View you can access
the following information:
● DRIVING DATA
● ECO
● VEHICLE STATUS Driving data
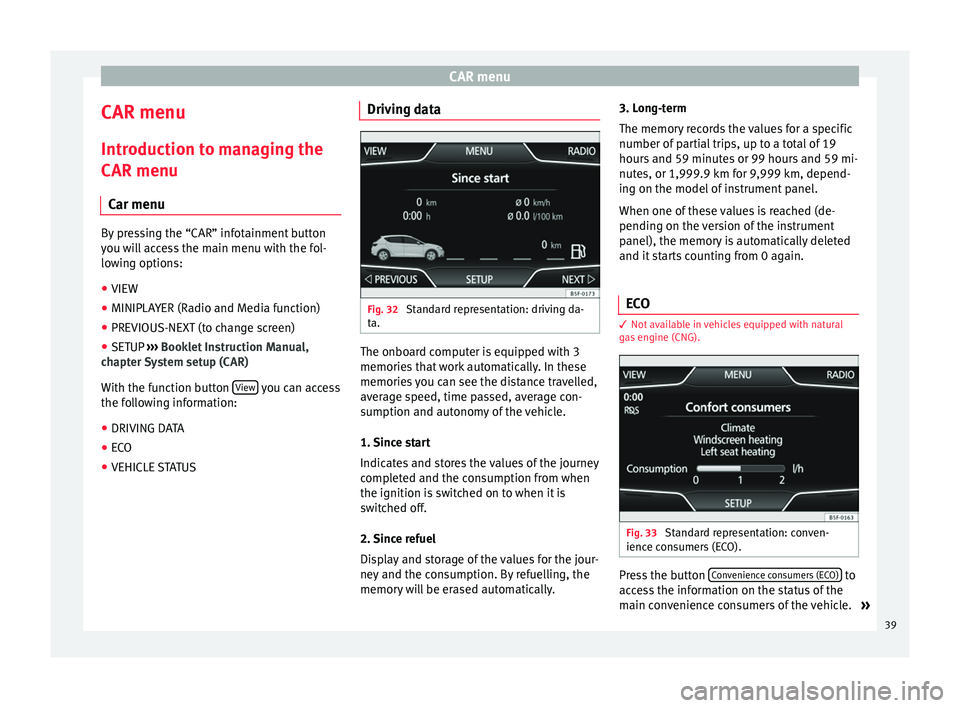
Fig. 32
Standard representation: driving da-
ta. The onboard computer is equipped with 3
memories that work automatically. In these
memories you can see the distance travelled,
average speed, time passed, average con-
sumption and autonomy of the vehicle.
1. Since start
Indicates and stores the values of the journey
completed and the consumption from when
the ignition is switched on to when it is
switched off.
2. Since refuel
Display and storage of the values for the jour-
ney and the consumption. By refuelling, the
memory will be erased automatically.3. Long-term
The memory records the values for a specific
number of partial trips, up to a total of 19
hours and 59 minutes or 99 hours and 59 mi-
nutes, or 1,999.9 km for 9,999 km, depend-
ing on the model of instrument panel.
When one of these values is reached (de-
pending on the version of the instrument
panel), the memory is automatically deleted
and it starts counting from 0 again.
ECO 3
Not available in vehicles equipped with natural
gas engine (CNG). Fig. 33
Standard representation: conven-
ience consumers (ECO). Press the button
Convenience consumers (ECO) to
access the information on the status of the
main convenience consumers of the vehicle. »
39
Page 43 of 64
Telephone management (PHONE)
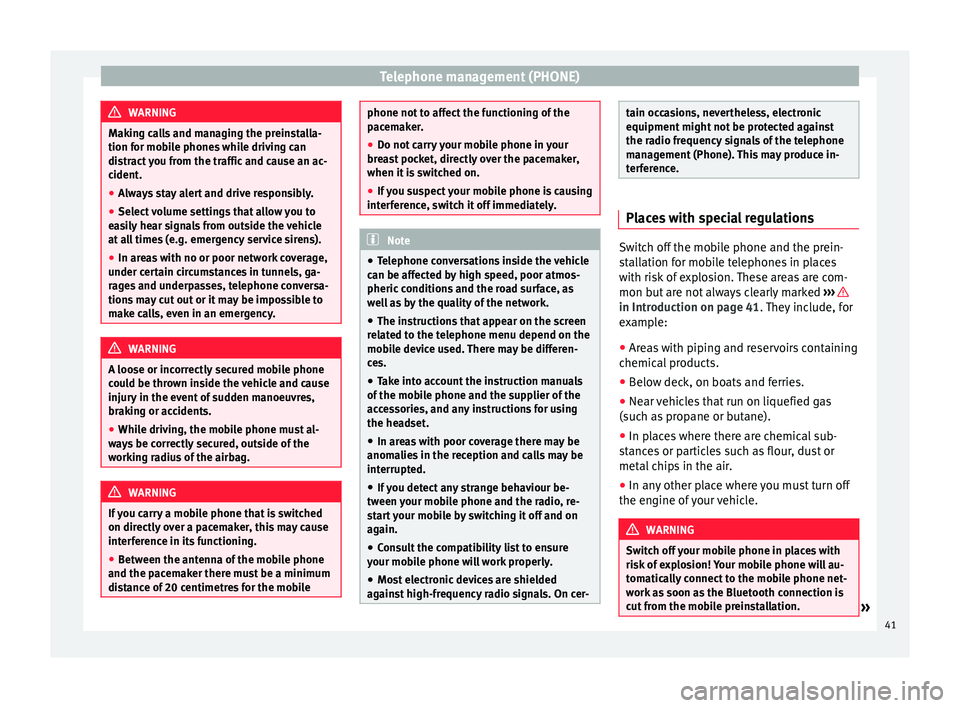
WARNING
Making calls and managing the preinstalla-
tion for mobile phones while driving can
distract you from the traffic and cause an ac-
cident.
● Always stay alert and drive responsibly.
● Select volume settings that allow you to
easily hear signals from outside the vehicle
at all times (e.g. emergency service sirens).
● In areas with no or poor network coverage,
under certain circumstances in tunnels, ga-
rages and underpasses, telephone conversa-
tions may cut out or it may be impossible to
make calls, even in an emergency. WARNING
A loose or incorrectly secured mobile phone
could be thrown inside the vehicle and cause
injury in the event of sudden manoeuvres,
braking or accidents.
● While driving, the mobile phone must al-
ways be correctly secured, outside of the
working radius of the airbag. WARNING
If you carry a mobile phone that is switched
on directly over a pacemaker, this may cause
interference in its functioning.
● Between the antenna of the mobile phone
and the pacemaker there must be a minimum
distance of 20 centimetres for the mobile phone not to affect the functioning of the
pacemaker.
●
Do not carry your mobile phone in your
breast pocket, directly over the pacemaker,
when it is switched on.
● If you suspect your mobile phone is causing
interference, switch it off immediately. Note
● Telephone conversations inside the vehicle
can be affected by high speed, poor atmos-
pheric conditions and the road surface, as
well as by the quality of the network.
● The instructions that appear on the screen
related to the telephone menu depend on the
mobile device used. There may be differen-
ces.
● Take into account the instruction manuals
of the mobile phone and the supplier of the
accessories, and any instructions for using
the headset.
● In areas with poor coverage there may be
anomalies in the reception and calls may be
interrupted.
● If you detect any strange behaviour be-
tween your mobile phone and the radio, re-
start your mobile by switching it off and on
again.
● Consult the compatibility list to ensure
your mobile phone will work properly.
● Most electronic devices are shielded
against high-frequency radio signals. On cer- tain occasions, nevertheless, electronic
equipment might not be protected against
the radio frequency signals of the telephone
management (Phone). This may produce in-
terference.
Places with special regulations
Switch off the mobile phone and the prein-
stallation for mobile telephones in places
with risk of explosion. These areas are com-
mon but are not always clearly marked
››› in Introduction on page 41
. They include, for
e x
ample:
● Areas with piping and reservoirs containing
chemical products.
● Below deck, on boats and ferries.
● Near vehicles that run on liquefied gas
(such as propane or butane).
● In places where there are chemical sub-
stances or particles such as flour, dust or
metal chips in the air.
● In any other place where you must turn off
the engine of your vehicle. WARNING
Switch off your mobile phone in places with
risk of explosion! Your mobile phone will au-
tomatically connect to the mobile phone net-
work as soon as the Bluetooth connection is
cut from the mobile preinstallation. » 41
Page 45 of 64
Telephone management (PHONE)
mobile phone. If they coincide, you must
confirm it on both devices.
Onc e the link
is complete, the main menu
PHONE
will be shown.
Linking and connecting mobile telephones
You can link up to 20
mobile telephones to
the infotainment system, but only one mobile
phone can be connected as hands-free, and
only one device as BT audio at any time.
When you turn on the infotainment system
the connection is automatically established
with the mobile phone that was last connec-
ted. If it cannot establish a connection with
that mobile phone, the telephone manager
will automatically try to establish a connec-
tion with the next mobile phone that appears
on the list of linked devices.
The working radius of the Bluetooth connec-
tion is a maximum of 10 metres . If this work-
ing radius is exceeded, the connection estab-
lished through Bluetooth will be interrupted.
The connection is automatically re-establish-
ed as
soon as this device comes back into
the Bluetooth working radius.
If the maximum number of linked devices is
reached and you wish to link another one to
the system, it will automatically replace the
one that has recently been used the least. If you wish to replace it with another one, the
user must erase it beforehand. To do so:
●
Press the unit button Setup within the tele-
phone context.
● Press the function button Bluetooth setup .
● Press the function button My devices .
● In the list of devices linked, press the func-
tion button remove after the mobile phone to
be deleted and then press Delete to confirm
the process. Note
● The behaviour may vary depending on the
device connected.
● For some android mobile devices you must
accept the request to access the PBAP phone-
book after linking, to be able to access the
phonebook. It is recommended to activate
the option “always” so as not to have to ac-
cept it every time you connect. General information
Please refer to the notes on using a mobile
phone in the vehicle without connection to
exterior antenna
›››
Booklet Instruction Man-
ual, chapter Accessories and technical modi-
fications .
On ly
use devices that support Bluetooth. At
your SEAT dealership, or on the Internet, you will find information about products that sup-
port Bluetooth.
Take into account the instruction manual of
the mobile phone and of the manufacturer of
the accessories. In areas with poor coverage
there may be anomalies in the reception and
calls may be interrupted.
Most electronic devices are shielded against
radio frequency signals (high-frequency). On
some occasions, nevertheless, electronic de-
vices cannot be protected against the radio
frequency signals from the telephone manag-
er. This may produce interference.
Note
● There may be restrictions on the use of
Bluetooth devices in some countries. Infor-
mation is available from the local authorities.
● To connect the telephone manager to a de-
vice via Bluetooth technology, read the corre-
sponding instruction manual for the particu-
lar safety instructions. Only use products
that support Bluetooth. Bluetooth
® Bluetooth
®
Bluetooth technology is used to connect a
mobile phone to the vehicle's telephone
manager. To use the telephone manager with
a mobile phone with Bluetooth, the linking
process must be carried out once. »
43
Page 46 of 64
Telephone management (PHONE)
If a connection has already been established,
some mobile telephones with Bluetooth are
recognised and a connection is established
with them automatically when the ignition is
switched on. For this purpose, the mobile
phone and its Bluetooth must be connected,
and all the live Bluetooth connections with
other devices must be closed.
The Bluetooth wireless connection is free.
Bluetooth R
is a registered trademark of Blue-
tooth ®
SIG, Inc.
Bluetooth ®
profiles
When you connect a mobile phone to the tel-
ephone manager, the data exchange is
through one of the 2 Bluetooth profiles.
● Hands-free Bluetooth profile (HFP): If a mo-
b i
le phone is connected to the telephone
manager through the HFP, calls can be made
wirelessly through the hands-free device.
● Advanced audio profile (A2DP): Bluetooth
profile for transmitting audio signals with
stereo quality.
Voice control Many radio, media, telephone and navigation
functions may be activated through voice
commands. The voice control of the infotainment system
is only available for the language that has
been selected in system settings
››› page 53 .
V oic
e control settings ››› page 54.
When voice control is activated, you can
choose what text and icons take on the col-
our of the different functions:
● Red (RADIO and MEDIA) ››› page 45 and
››› page 45
● Green (PHONE) ››› page 46
● Blue (NAV) ››› page 46
Start and stop the voice control
● To activate the voice control, briefly press
the button on the multi-function steering
wheel . It can also be activated with the
VOICE button in the MIB.
● When voice control is activated, a rising
signal will sound and a menu containing the
main commands will be displayed (the menu
will be displayed if this option ››› page 54 is
activated in the voice control settings). The
spoken instructions will guide you through
the following “dialogue”.
● Pronounce the desired order and follow the
instructions of the “dialogue”. A function can
often be activated with different spoken com-
mands. In case of doubt, try to give a com-
mand. ●
When an action is carried out (e.g. calling a
contact), the voice control automatically de-
activates and must be reactivated when nee-
ded again. There are certain commands after
which the voice control does not end and
waits with What do you wish to do now? .
● To manually end voice control, keep the
button pressed on the multi-function steering
wheel until you hear the corresponding con-
firmation (falling sound), or press the but-
ton on the di
splay. You can also press the
VOICE button twice to deactivate voice con-
trol. (Voice control is deactivated in the fol-
lowing ways: by briefly pressing the VOICE
button or Command on the steering wheel
twice; or by pressing VOICE or Command on
the steering wheel for a few moments, and
touching the screen or any button on the ra-
dio).
Help with voice control
The first time you use the voice control, listen
to the Help.
● Press the function button .
● Give the “
Help” command in the language
established in the System setting, and follow
the dialogue instructions.
Operation during the dialogue
While the infotainment system transmits a
spoken indication, the display will show the
symbol .
44
Page 47 of 64
Telephone management (PHONE)
● Briefly press the button on the multi-
f u
nction steering wheel to interrupt the spo-
ken indication of the infotainment system
and give the next command.
IMPORTANT: The system will ONLY recognise
a command when the
“active” symbol is
displayed on the panel or the touch screen.
If you make a mistake when giving a com-
mand or give an incomplete command, and it
has no effect, you can repeat the command.
The symbol remains active.
● Briefly pr
ess the button of the multi-
function steering wheel to repeat the com-
mand.
Instructions for voice control
For optimum functioning of the voice control,
follow these instructions:
● Speak slowly and clearly, as far as possi-
ble. The system will not recognise mispro-
nounced words, or words and figures in
which syllables are omitted.
● Telephone numbers must be indicated fig-
ure by figure or in blocks of numbers in units,
tens or hundreds.
● Speak at a normal volume, without exag-
gerated intonation or long pauses.
● Avoid noise from the exterior and nearby
(for example, conversations inside the vehi- cle). Close all doors, windows and the sliding
roof.
●
Do not aim the air from the diffusers at the
roof of the passenger compartment.
● If you are driving very fast, speak a little
louder.
You can access the instructions by saying:
“Instructions, tutorial, introduction”. You can
also li
sten to the instructions in parts. These
are divided into 7 blocks. To access them,
give any of the previous commands followed
by “part +
xample “Tutorial
part 1 ”.
Voice control (RADIO) – Red
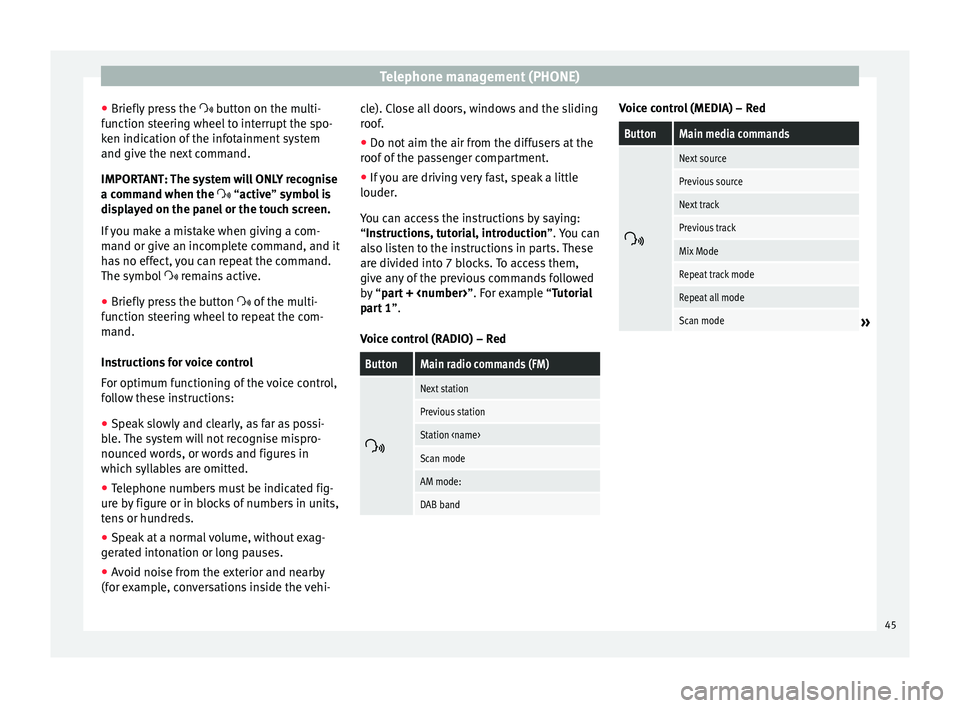
ButtonMain radio commands (FM)
Next station
Previous station
Station
Scan mode
AM mode:
DAB band Voice control (MEDIA) – Red
ButtonMain media commands
Next source
Previous source
Next track
Previous track
Mix Mode
Repeat track mode
Repeat all mode
Scan mode»
45