2014 Peugeot Boxer maintenance
[x] Cancel search: maintenancePage 4 of 240
2
Contents
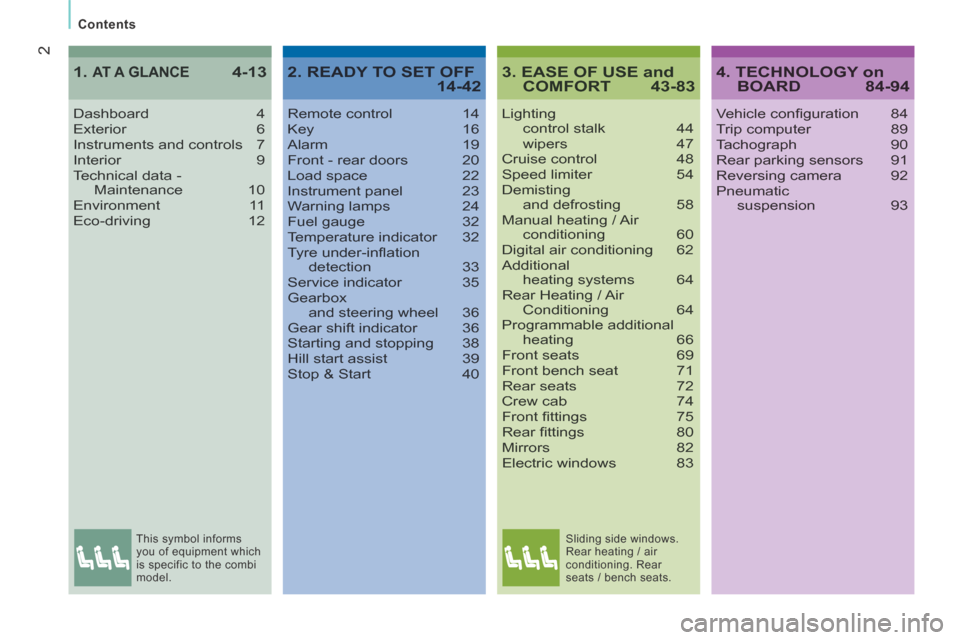
3. EASE OF USE and COMFORT 43-83
Lighting control stalk 44 wipers 47Cruise control 48Speed limiter 54Demisting and defrosting 58Manual heating / Air conditioning 60Digital air conditioning 62Additional heating systems 64Rear Heating / Air Conditioning 64Programmable additional heating 66Front seats 69Front bench seat 71Rear seats 72Crew cab 74Front fi ttings 75Rear fi ttings 80Mirrors 82Electric windows 83
Dashboard 4Exterior 6Instruments and controls 7Interior 9Technical data - Maintenance 10Environment 11Eco-driving 12
1. AT A GLANCE 4-134. TECHNOLOGY on BOARD 84-94
Vehicle confi guration 84Trip computer 89Tachograph 90Rear parking sensors 91Reversing camera 92Pneumatic suspension 93
2. READY TO SET OFF 14-42
Remote control 14Key 16Alarm 19Front - rear doors 20Load space 22Instrument panel 23Warning lamps 24Fuel gauge 32Temperature indicator 32Tyre under-infl ation detection 33Service indicator 35Gearbox and steering wheel 36Gear shift indicator 36Starting and stopping 38Hill start assist 39Stop & Start 40
This symbol informs
you of equipment which
is specific to the combi
model. Sliding side windows.
Rear heating / air
conditioning. Rear
seats / bench seats.
Page 12 of 240
10
Location
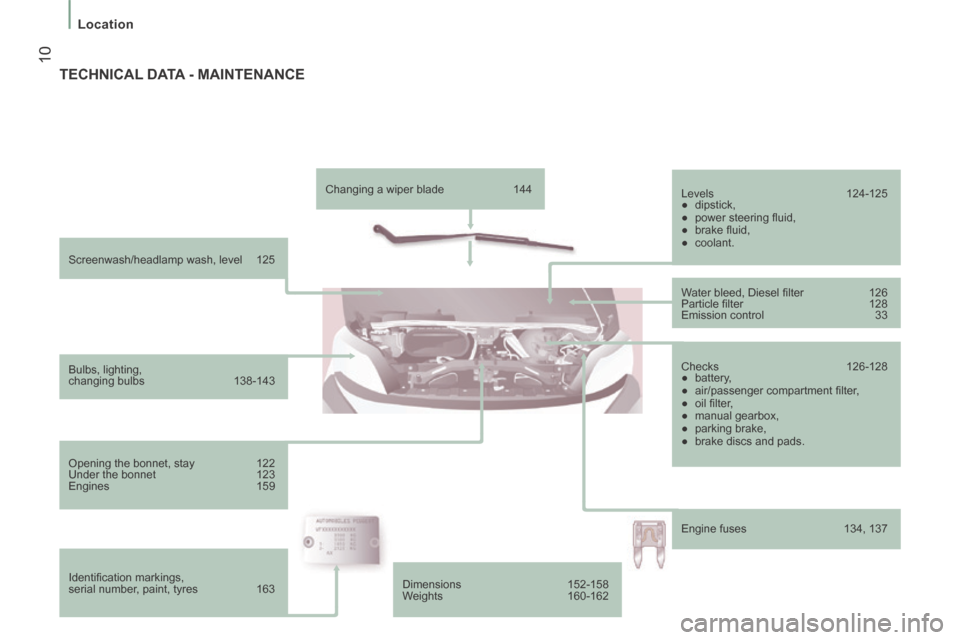
Screenwash/headlamp wash, level 125
Bulbs, lighting,
changing bulbs 138-143
Opening the bonnet, stay 122
Under the bonnet 123
Engines 159
Identifi cation markings,
serial number, paint, tyres 163 Changing a wiper blade
144
Levels 124-125
● dipstick,
● power steering fl uid,
● brake fl uid,
● coolant.
Water bleed, Diesel fi lter 126
Particle fi lter 128
Emission control 33
Checks 126-128
● battery,
● air/passenger compartment fi lter,
● oil fi lter,
● manual gearbox,
● parking brake,
● brake discs and pads.
Engine fuses 134, 137
TECHNICAL DATA - MAINTENANCE
Dimensions 152-158
Weights 160-162
Page 15 of 240
13
1
AT A GLANCE
Limit the causes of excess consumption
Spread loads throughout the vehicle; place the heaviest items in
the bottom of the boot, as close as possible to the rear seats.
Limit the loads carried in the vehicle and reduce wind resistance
(roof bars, roof rack, bicycle carrier, trailer...). Use a roof box in
preference.
Remove roof bars and roof racks after use.
At the end of winter, remove snow tyres and refit your summer
tyres.
Observe the recommendations on maintenance
Check the tyre pressures regularly, when cold, referring to the
label in the door aperture, driver's side.
Carry out this check in particular:
- before a long journey,
- at each change of season,
- after a long period out of use.
Don't forget the spare wheel and the tyres on any trailer or
caravan.
Have your vehicle serviced regularly (engine oil, oil filter, air
filter, cabin filter...) and observe the schedule of operations in the
warranty and maintenance record.
When refuelling, do not continue after the 3
rd cut-off of the nozzle
to avoid any overflow.
At the wheel of your new vehicle, it is only after the first
1 800 miles (3 000 kilometres) that you will see the fuel
consumption settle down to a consistent average.
Page 32 of 240
30
Instruments and controls
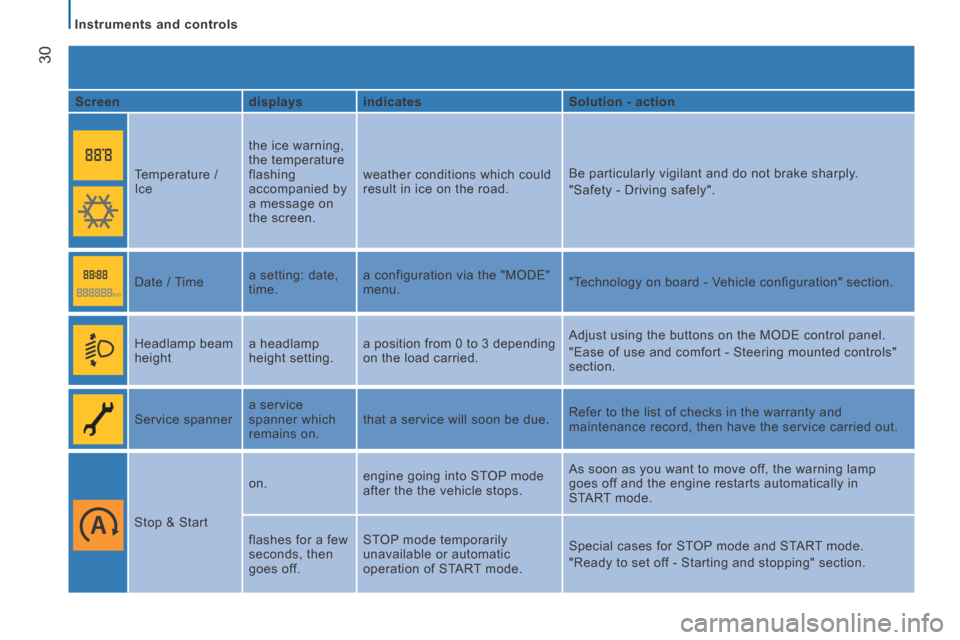
Screen displays indicates Solution - action
Temperature /
Ice the ice warning,
the temperature
flashing
accompanied by
a message on
the screen. weather conditions which could
result in ice on the road.
Be particularly vigilant and do not brake sharply.
"Safety - Driving safely".
Date / Time a setting: date,
time. a configuration via the "MODE"
menu.
"Technology on board - Vehicle configuration" section.
Headlamp beam
height a headlamp
height setting. a position from 0 to 3 depending
on the load carried . Adjust using the buttons on the MODE control panel.
"Ease of use and comfort - Steering mounted controls"
section.
Service spanner a service
spanner which
remains on. that a service will soon be due.
Refer to the list of checks in the warranty and
maintenance record, then have the service carried out.
Stop & Start on.
engine going into STOP mode
after the the vehicle stops. As soon as you want to move off, the warning lamp
goes off and the engine restarts automatically in
START mode.
flashes for a few
seconds, then
goes off. STOP mode temporarily
unavailable or automatic
operation of START mode.
Special cases for STOP mode and START mode.
"Ready to set off - Starting and stopping" section.
Page 37 of 240
35
2
READY TO SET OFF
Instruments and controls
SERVICE INDICATOR
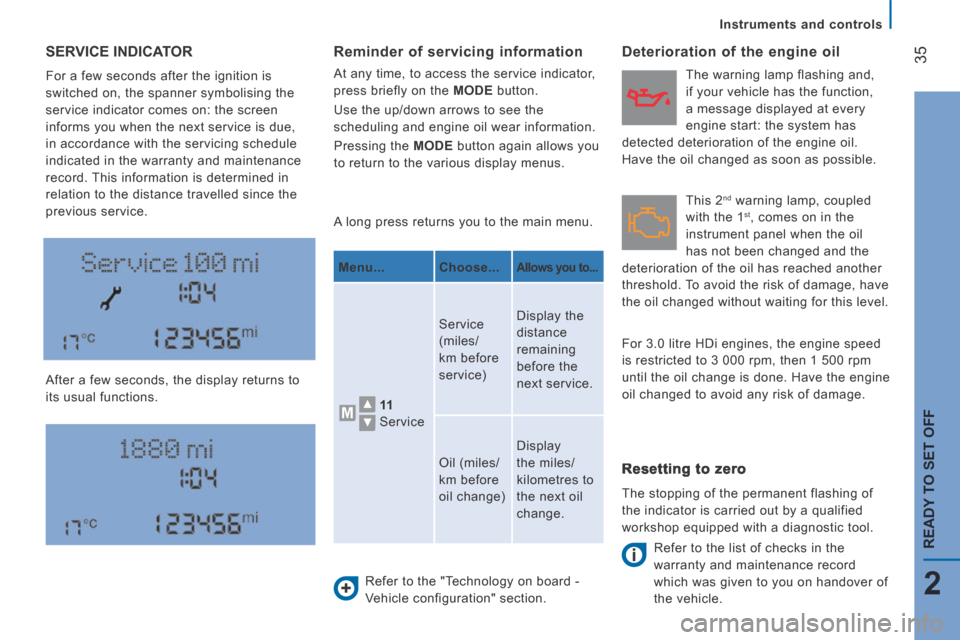
For a few seconds after the ignition is
switched on, the spanner symbolising the
service indicator comes on: the screen
informs you when the next service is due,
in accordance with the servicing schedule
indicated in the warranty and maintenance
record. This information is determined in
relation to the distance travelled since the
previous service.
After a few seconds, the display returns to
its usual functions. A long press returns you to the main menu.
Refer to the "Technology on board -
Vehicle configuration" section.
Deterioration of the engine oil
Refer to the list of checks in the
warranty and maintenance record
which was given to you on handover of
the vehicle.
Reminder of servicing information
At any time, to access the service indicator,
press briefly on the MODE button.
Use the up/down arrows to see the
scheduling and engine oil wear information.
Pressing the MODE button again allows you
to return to the various display menus.
Menu... Choose...
Allows you to...
11
Service Service
(miles/
km before
service)
Display the
distance
remaining
before the
next service.
Oil (miles/
km before
oil change) Display
the miles/
kilometres to
the next oil
change.
Resetting to zero
The stopping of the permanent flashing of
the indicator is carried out by a qualified
workshop equipped with a diagnostic tool. This 2
nd warning lamp, coupled
with the 1 st , comes on in the
instrument panel when the oil
has not been changed and the
deterioration of the oil has reached another
threshold. To avoid the risk of damage, have
the oil changed without waiting for this level. The warning lamp flashing and,
if your vehicle has the function,
a message displayed at every
engine start: the system has
detected deterioration of the engine oil.
Have the oil changed as soon as possible.
For 3.0 litre HDi engines, the engine speed
is restricted to 3 000 rpm, then 1 500 rpm
until the oil change is done. Have the engine
oil changed to avoid any risk of damage.
Page 44 of 240
42
Starting and stopping
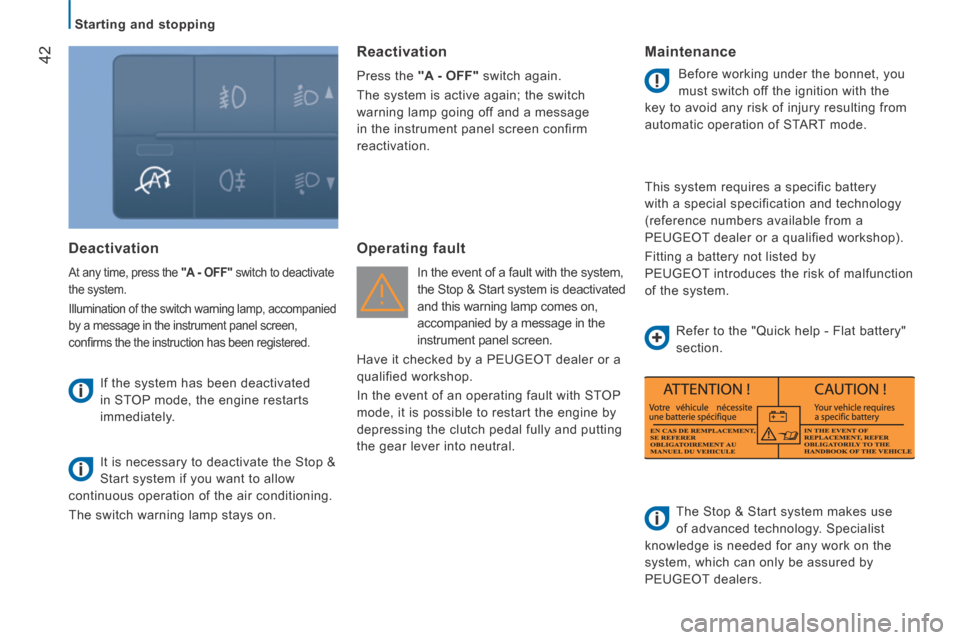
Deactivation
At any time, press the "A - OFF" switch to deactivate
the system.
Illumination of the switch warning lamp, accompanied
by a message in the instrument panel screen,
confi rms the the instruction has been registered.
If the system has been deactivated
in STOP mode, the engine restarts
immediately.
It is necessary to deactivate the Stop &
Start system if you want to allow
continuous operation of the air conditioning.
The switch warning lamp stays on.
Reactivation
Press the "A - OFF" switch again.
The system is active again; the switch
warning lamp going off and a message
in the instrument panel screen confirm
reactivation.
Operating fault
In the event of a fault with the system,
the Stop & Start system is deactivated
and this warning lamp comes on,
accompanied by a message in the
instrument panel screen .
Have it checked by a PEUGEOT dealer or a
qualified workshop.
In the event of an operating fault with STOP
mode, it is possible to restart the engine by
depressing the clutch pedal fully and putting
the gear lever into neutral.
Maintenance
Before working under the bonnet, you
must switch off the ignition with the
key to avoid any risk of injury resulting from
automatic operation of START mode.
This system requires a specific battery
with a special specification and technology
(reference numbers available from a
PEUGEOT dealer or a qualified workshop).
Fitting a battery not listed by
PEUGEOT introduces the risk of malfunction
of the system.
The Stop & Start system makes use
of advanced technology. Specialist
knowledge is needed for any work on the
system, which can only be assured by
PEUGEOT dealers. Refer to the "Quick help - Flat battery"
section.
Page 70 of 240
68
Ventilation
Cancelling the programming
Press this button briefly to clear
the programmed start time.
The screen illumination and the
pre-selection number (e.g. 1) are
switched off.
Good practice
To avoid any risk of poisoning or
asphyxiation, the additional heating must
not be used, even for short periods, in
an enclosed space such as a garage or
workshop which is not fitted with an exhaust
gas extraction system.
The additional heating is supplied by the
vehicle's fuel tank.
Ensure that the fuel gauge indicator lamp is
not at reserve.
Always switch off the additional heating
when filling with fuel to avoid any risk of fire
or explosion.
Do not park the vehicle on an inflammable
surface (dry grass, dead leaves, paper…),
there is a risk of fire.
The temperature near the heater must not
exceed 120 °C. A temperature higher than
this (for example in the case of painting in
an oven) could damage the components of
the electronic circuits.
The additional heating system is fitted with
a temperature limiter which cuts off the
combustion in the event of overheating due
to a lack of coolant.
Top up the coolant, then press the
programme selection control before
switching the heating on again. Have the additional heating system
checked at least once a year at the
beginning of winter. Maintenance and
repairs should only be carried out by a
PEUGEOT dealer.
Use only genuine replacement parts.
Recalling one of the pre-selected start times
Press this button as many times
as necessary until the number
corresponding to the required
pre-selected start time (e.g. 2)
appears.
After ten seconds, the time is cleared but
remains stored for as long as the number
(e.g. 2) and the screen remain on.
Switching off the heating
Press this button.
The heating cycle indicator lamp
and the screen are switched off.
Two different types of equipment
The additional heating is separate and
programmable. Before you enter the vehicle,
it gradually increases the temperature of the
engine to make starting easier.
This also facilitates passenger compartment
heating, demisting and defrosting.
The additional passenger compartment
heating system supplements the
standard equipment. Its operation may be
independent of the engine.
Switching on of the heating may be
programmable.
Page 105 of 240
103
5
SAFETY
Seat belts
The force limiter reduces the pressure of the
seat belt against the body of the occupants.
The pretensioning seat belts are active when
the ignition is switched on.
The inertia reels are fitted with a device
which automatically locks the strap in the
event of a collision or emergency braking or
if the vehicle rolls over.
You can unfasten the seat belt by pressing
the red button on the buckle. Guide the seat
belt after unfastening. Good practice
The driver must ensure that passengers use
the seat belts correctly and that they are all
strapped in securely before moving off.
Wherever you are seated in the vehicle,
always fasten your seat belt, even for short
journeys.
The seat belts are fitted with an inertia reel
which automatically adjusts the length of the
strap to your size.
Do not use accessories (clothes pegs, clips,
safety pins, etc.) which allow the seat belt
straps to fit loosely.
Ensure that the seat belt has reeled in
correctly after use.
After folding or moving a seat or a rear
bench seat, ensure that the seat belt has
reeled in correctly and that the buckle is
ready to accommodate the tongue.
Depending on the nature and seriousness
of any impact, the pretensioning device may
be deployed before and independently of
inflation of the airbags. It instantly tightens
the seat belts against the body of the
occupants.
Deployment of the pretensioners is
accompanied by a slight discharge of
harmless smoke and a noise, due to the
activation of the pyrotechnic cartridge
incorporated in the system. The airbag warning lamp also
comes on if the pretensioners are
deployed. Contact a PEUGEOT
dealer or a qualified workshop.
In order to be effective, a seat belt:
- must restrain one person only,
- must not be twisted, check by pulling in front of you with an even movement,
- must be tightened as close to the body as possible.
The upper part of the seat belt should be
positioned in the hollow of the shoulder.
The lap part should be placed as low as
possible on the pelvis. Do not invert the seat belt buckles as they
will not fulfil their role completely. If the
seats are fitted with armrests, the lap part of
the seat belt should always pass under the
armrest.
Check that the seat belt is fastened correctly
by pulling the strap firmly.
Recommendations for children
Use an appropriate child seat if the
passenger is under 12 years or less than
one and a half metres tall.
Never carry a child on your knees, even with
the seat belt fastened.
For more information on child seats,
refer to the "Safety - Children on board"
section.
In accordance with current safety
regulations, your PEUGEOT dealer can
guarantee all work or any checks, from
testing to maintenance, on your seat belt
equipment.
Have the seat belts checked regularly (even
after a minor impact) by a PEUGEOT dealer
or a qualified workshop: they must not show
any signs of wear, cutting or fraying and they
must not be converted or modified.
Clean the seat belt straps with soapy
water or a textile cleaning product, sold
by PEUGEOT dealers.