2014 Peugeot 308 change time
[x] Cancel search: change timePage 164 of 400
162
Driving
Park Assist
This system provides active assistance with parking, detecting a parking space then controlling the steering to park in the space. It controls the steering while the driver manages the accelerator, brakes, gears and clutch (manual gearbox). During phases of entry into and exit from a parking space, the system provides visual and audible information
to the driver in order to make the manoeuvres safe. It may be necessary to move for wards and backwards more than once.
During a manoeuvre the steering wheel turns quickly: do not hold the steering wheel, do not place your hand between the spokes of the steering wheel and take care with loose and bulky clothing, scarves, handbags... There is a risk of injury.
When Park Assist is activated, it prevents a change to STOP mode of Stop & Start. In STOP mode, activation of Park Assist restarts the engine.
The Park Assist system cannot in any circumstances replace the care and responsibility of the driver. The driver must remain in control of their vehicle ensuring that the space remains clear throughout the manoeuvre. In some circumstances, the sensors may not detect small obstacles located in their blind spots.
The driver can take control at any time by gripping the steering wheel.
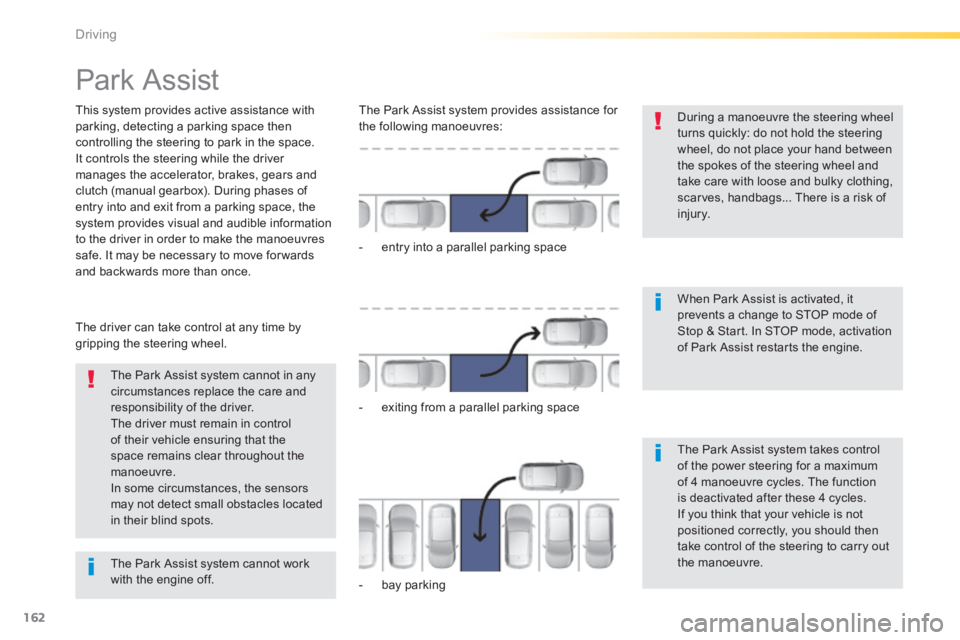
The Park Assist system provides assistance for the following manoeuvres:
- entry into a parallel parking space
- exiting from a parallel parking space
- bay parking
The Park Assist system takes control of the power steering for a maximum of 4 manoeuvre cycles. The function is deactivated after these 4 cycles. If you think that your vehicle is not positioned correctly, you should then take control of the steering to carry out the manoeuvre. The Park Assist system cannot work with the engine off.
Page 191 of 400
189
6
Safety
Tyre under-infl ation detection
The system continuously monitors the pressures on the four tyres, once the vehicle is moving. It compares the information given by the four wheel speed sensors with reference values, which must be reinitialised ever y time the tyre pressures are adjusted or a wheel changed. The system triggers an alert as soon as it detects a drop in the inflation pressure of one or more tyres.
The under-inflation detection system does not replace the vigilance or the responsibility of the driver. This system does not avoid the need to check the tyre pressures (including the spare wheel) every month as well as before a long journey. Driving with under-inflated tyres impairs road holding, extends braking distances and causes premature tyre wear, particularly under arduous condition (high loading, high speed, long journey).
System which automatically checks the pressure of the tyres while driving.
The inflation pressures defined for your vehicle can be found on the tyre pressure label. See the "Identification markings" section. Tyre pressures should be checked when the tyres are "cold" (vehicle stopped for 1 hour or after a journey of less than 6 miles (10 km) at moderate speeds). Other wise, add 0.3 bar to the pressures shown on the label.
Driving with under-inflated tyres increases fuel consumption.
Page 239 of 400
237
7
Practical information
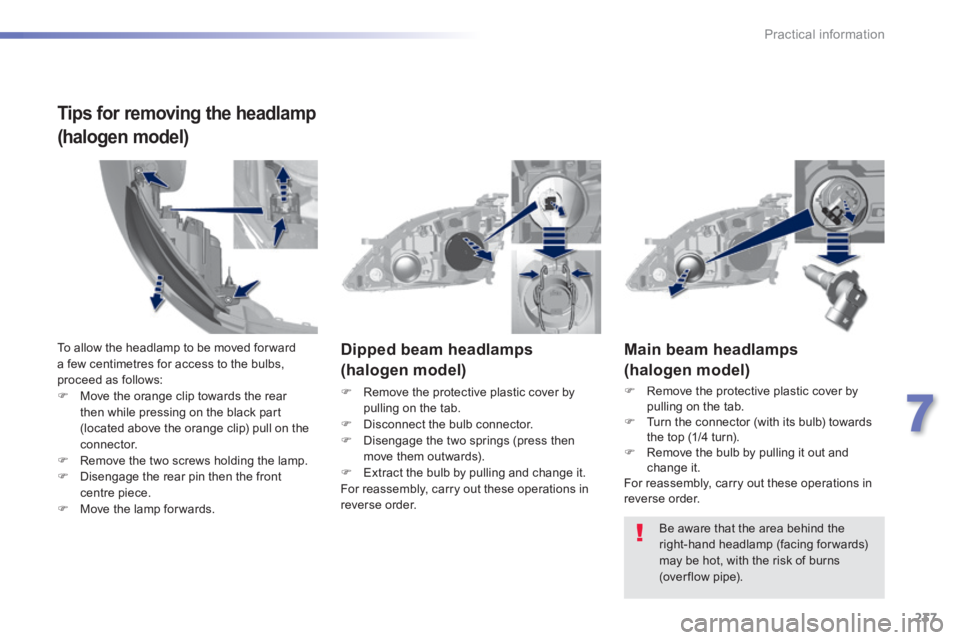
Main beam headlamps
(halogen model)
Remove the protective plastic cover by pulling on the tab. Turn the connector (with its bulb) towards the top (1/4 turn). Remove the bulb by pulling it out and change it. For reassembly, carry out these operations in reverse order.
Dipped beam headlamps
(halogen model)
Remove the protective plastic cover by pulling on the tab. Disconnect the bulb connector. Disengage the two springs (press then move them outwards). Extract the bulb by pulling and change it. For reassembly, carry out these operations in reverse order.
Be aware that the area behind the right-hand headlamp (facing forwards) may be hot, with the risk of burns (over flow pipe).
To allow the headlamp to be moved for ward a few centimetres for access to the bulbs, proceed as follows: Move the orange clip towards the rear then while pressing on the black part (located above the orange clip) pull on the
connector. Remove the two screws holding the lamp. Disengage the rear pin then the front centre piece. Move the lamp for wards.
Tips for removing the headlamp
(halogen model)
Page 240 of 400
238
Practical information
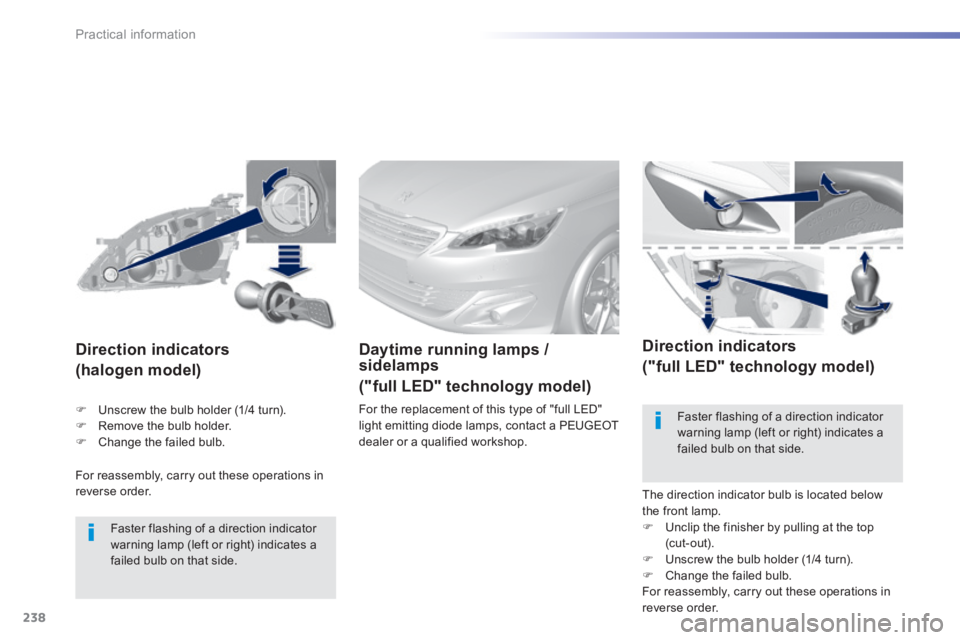
For reassembly, carry out these operations in reverse order.
Direction indicators
(halogen model)
Faster flashing of a direction indicator warning lamp (left or right) indicates a failed bulb on that side.
Daytime running lamps / sidelamps
("full LED" technology model)
For the replacement of this type of "full LED" light emitting diode lamps, contact a PEUGEOT dealer or a qualified workshop.
Direction indicators
("full LED" technology model)
The direction indicator bulb is located below the front lamp. Unclip the finisher by pulling at the top (cut-out). Unscrew the bulb holder (1/4 turn). Change the failed bulb. For reassembly, carry out these operations in reverse order.
Faster flashing of a direction indicator
warning lamp (left or right) indicates a failed bulb on that side.
Unscrew the bulb holder (1/4 turn). Remove the bulb holder. Change the failed bulb.
Page 282 of 400
280
Checks
Checking levels
Take care when working under the bonnet, as certain areas of the engine may be extremely hot (risk of burns) and the cooling fan could start at any time (even with the ignition off).
Oil level
The check is carried out either when the ignition is switched on using the oil level indicator in the instrument panel, or using the dipstick.
Engine oil change
Refer to the warranty and maintenance record for details of the interval for this operation. In order to maintain the reliability of the engine and emission control system, the use of additives in the engine oil is prohibited.
Oil specifi cation
The oil must be the correct grade for your engine and conform to the manufacturer's recommendations.
Check all of these levels regularly, in line with the warranty and maintenance record. Top them up if necessary, unless other wise indicated. If a level drops significantly, have the corresponding system checked by a PEUGEOT dealer or a qualified workshop.
Dipstick
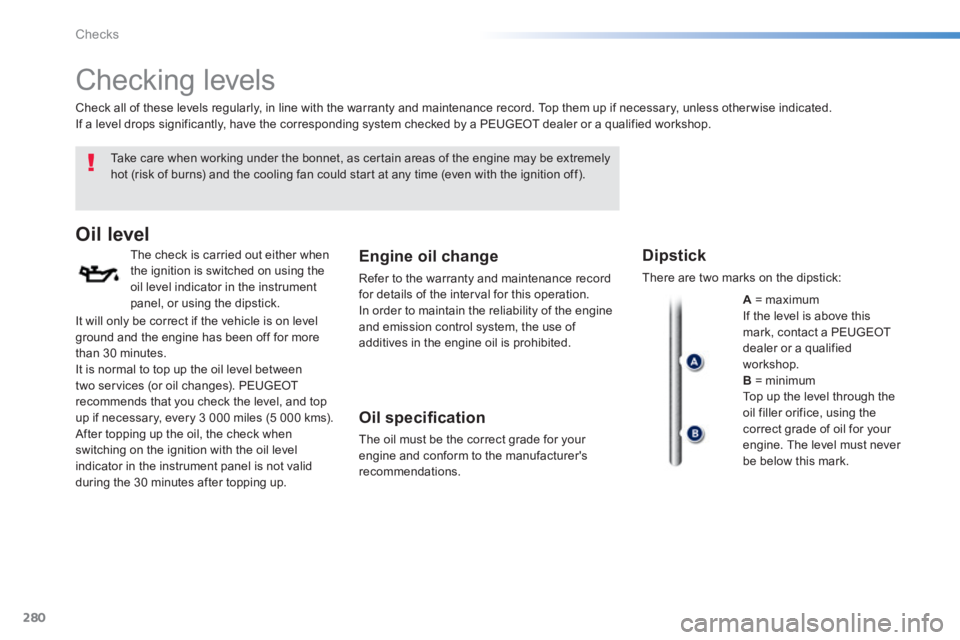
There are two marks on the dipstick:
A = maximum If the level is above this mark, contact a PEUGEOT dealer or a qualified workshop. B = minimum Top up the level through the oil filler orifice, using the correct grade of oil for your engine. The level must never be below this mark.
It will only be correct if the vehicle is on level ground and the engine has been off for more than 30 minutes. It is normal to top up the oil level between two services (or oil changes). PEUGEOT recommends that you check the level, and top up if necessary, every 3 000 miles (5 000 kms). After topping up the oil, the check when switching on the ignition with the oil level indicator in the instrument panel is not valid during the 30 minutes after topping up.
Page 285 of 400
283
8
Checks
Checks
12 V battery
The battery does not require any maintenance. However, check that the terminals are clean and correctly tightened, particularly in summer and winter.
Refer to the warranty and maintenance record for details of the replacement intervals for these components.
Air filter and passenger compartment filter
Replace the oil filter each time the engine oil is changed. Refer to the warranty and maintenance record for details of the replacement interval for this component.
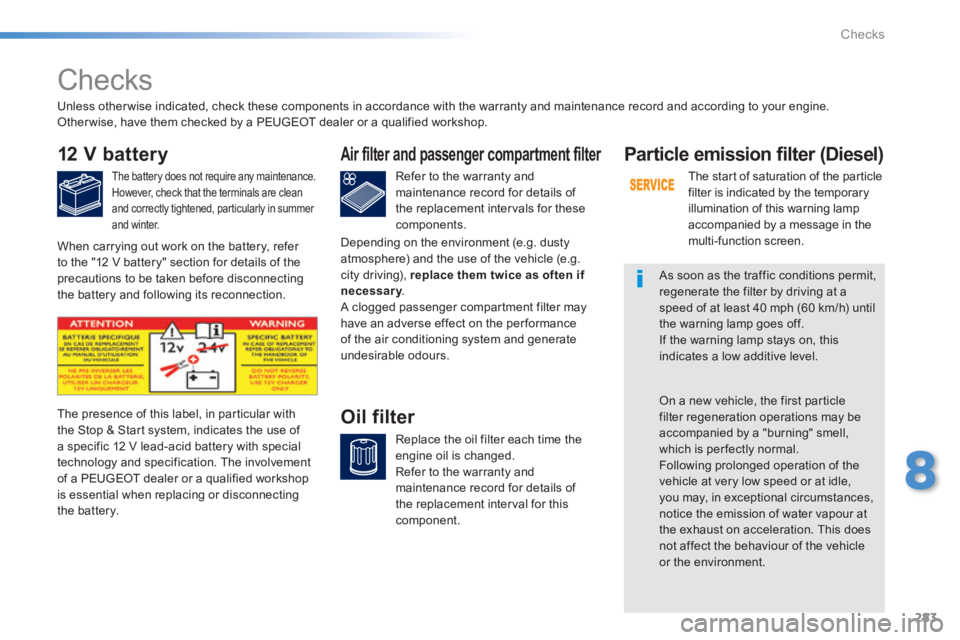
Oil filter The presence of this label, in particular with the Stop & Start system, indicates the use of a specific 12 V lead-acid battery with special technology and specification. The involvement of a PEUGEOT dealer or a qualified workshop is essential when replacing or disconnecting the battery.
Particle emission filter (Diesel)
The start of saturation of the particle filter is indicated by the temporary illumination of this warning lamp accompanied by a message in the multi-function screen.
As soon as the traffic conditions permit, regenerate the filter by driving at a speed of at least 40 mph (60 km/h) until the warning lamp goes off. If the warning lamp stays on, this indicates a low additive level.
On a new vehicle, the first particle filter regeneration operations may be accompanied by a "burning" smell, which is per fectly normal. Following prolonged operation of the vehicle at very low speed or at idle, you may, in exceptional circumstances, notice the emission of water vapour at the exhaust on acceleration. This does not affect the behaviour of the vehicle or the environment.
Unless other wise indicated, check these components in accordance with the warranty and maintenance record and according to your engine. Other wise, have them checked by a PEUGEOT dealer or a qualified workshop.
When carrying out work on the battery, refer to the "12 V battery" section for details of the precautions to be taken before disconnecting the battery and following its reconnection.
Depending on the environment (e.g. dusty atmosphere) and the use of the vehicle (e.g. city driving), replace them twice as often if necessary . necessary . necessary A clogged passenger compartment filter may have an adverse effect on the per formance of the air conditioning system and generate undesirable odours.
Page 311 of 400
04
309
RADIO
If "DAB / FM auto tracking" is activated, there is a difference of a few seconds when the system switches to "FM" analogue radio with sometimes a variation in volume.
When the digital signal is restored, the system automatically changes back to "DAB".
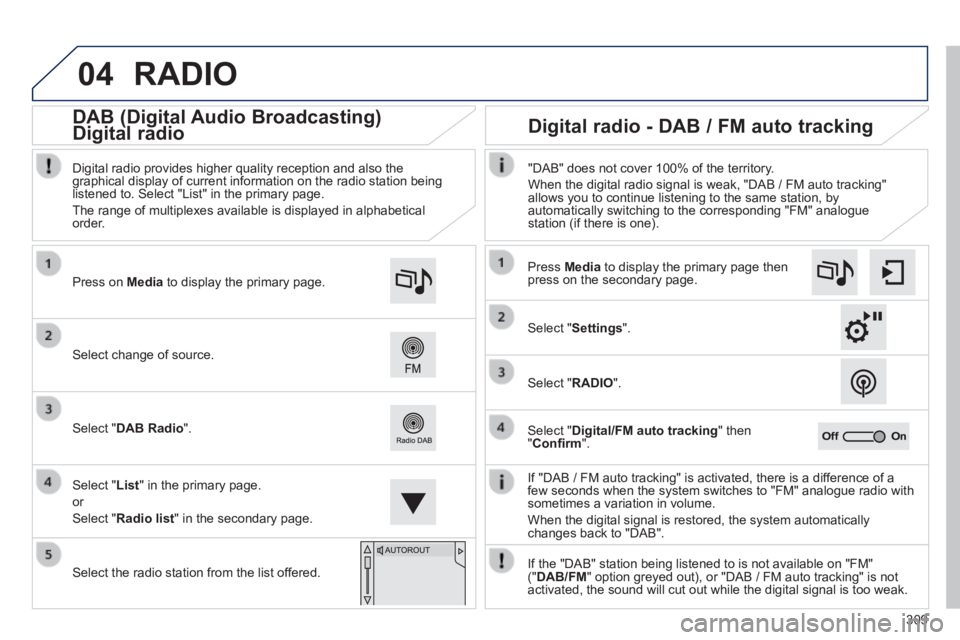
Select change of source.
Press on Media to display the primary page.
Select " DAB Radio ".
Select " List " in the primary page.
or
Select " Radio list " in the secondary page.
Select the radio station from the list offered.
Digital radio provides higher quality reception and also the graphical display of current information on the radio station being listened to. Select "List" in the primary page.
The range of multiplexes available is displayed in alphabetical order.
Press Media to display the primary page then press on the secondary page.
Select " Settings ".
Select " RADIO ".
Select " Digital/FM auto tracking " then " Confi rm ".
"DAB" does not cover 100% of the territory.
When the digital radio signal is weak, "DAB / FM auto tracking" allows you to continue listening to the same station, by automatically switching to the corresponding "FM" analogue station (if there is one).
If the "DAB" station being listened to is not available on "FM" (" DAB/FM " option greyed out), or "DAB / FM auto tracking" is not activated, the sound will cut out while the digital signal is too weak. \
Digital radio - DAB / FM auto tracking
DAB (Digital Audio Broadcasting)
Digital radio
Page 312 of 400
04
310
CD, MP3 CD, USB player, auxiliary input
Insert the CD in the player, insert the USB memory stick in the USB player or connect the USB peripheral to the USB port using a suitable cable (not supplied) .
The system builds playlists (in temporary memory), an operation which can take from a few seconds to several minutes at the fi rst connection.
Reduce the number of non-music fi les and the number of folders to reduce the waiting time.
The playlists are updated every time the ignition is switched off or connection of a USB memory stick. However, the system memorises these lists and if they are not modifi ed, the loading time will be shorter.
Selection of source
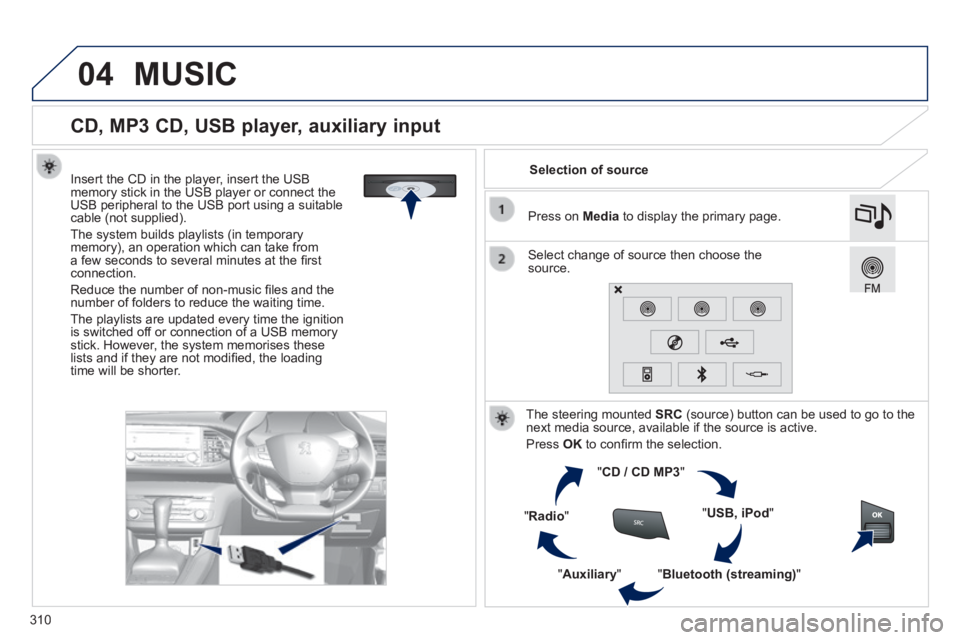
The steering mounted SRC (source) button can be used to go to the next media source, available if the source is active.
Press OK to confi rm the selection.
" CD / CD MP3 "
" USB, iPod "
" Bluetooth (streaming) " " Auxiliary "
" Radio "
Select change of source then choose the source.
Press on Media to display the primary page.
MUSIC