2014 NISSAN QUEST belt
[x] Cancel search: beltPage 175 of 482
3-32Pre-driving checks and adjustments
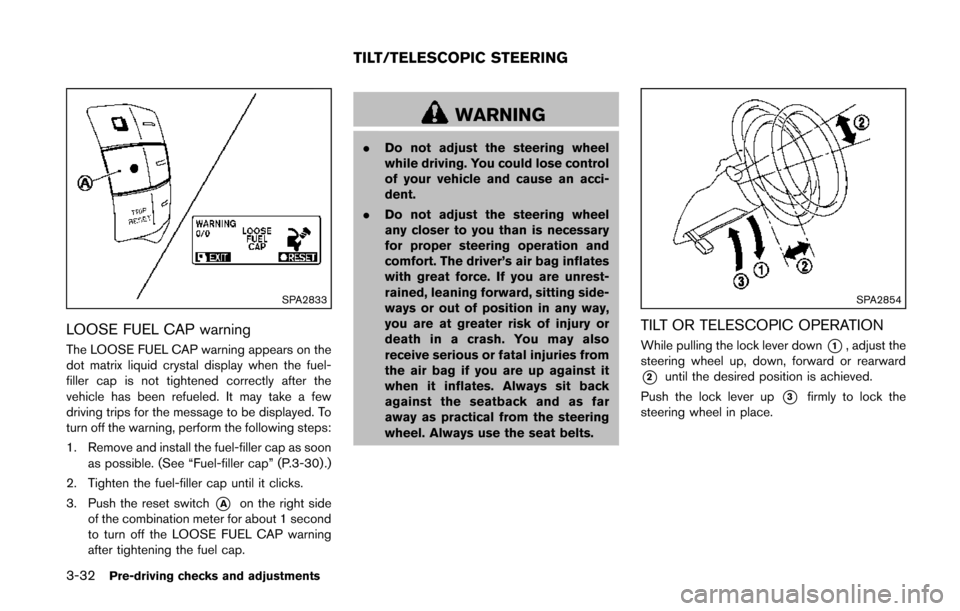
SPA2833
LOOSE FUEL CAP warning
The LOOSE FUEL CAP warning appears on the
dot matrix liquid crystal display when the fuel-
filler cap is not tightened correctly after the
vehicle has been refueled. It may take a few
driving trips for the message to be displayed. To
turn off the warning, perform the following steps:
1. Remove and install the fuel-filler cap as soonas possible. (See “Fuel-filler cap” (P.3-30) .)
2. Tighten the fuel-filler cap until it clicks.
3. Push the reset switch
*Aon the right side
of the combination meter for about 1 second
to turn off the LOOSE FUEL CAP warning
after tightening the fuel cap.
WARNING
. Do not adjust the steering wheel
while driving. You could lose control
of your vehicle and cause an acci-
dent.
. Do not adjust the steering wheel
any closer to you than is necessary
for proper steering operation and
comfort. The driver’s air bag inflates
with great force. If you are unrest-
rained, leaning forward, sitting side-
ways or out of position in any way,
you are at greater risk of injury or
death in a crash. You may also
receive serious or fatal injuries from
the air bag if you are up against it
when it inflates. Always sit back
against the seatback and as far
away as practical from the steering
wheel. Always use the seat belts.
SPA2854
TILT OR TELESCOPIC OPERATION
While pulling the lock lever down*1, adjust the
steering wheel up, down, forward or rearward
*2until the desired position is achieved.
Push the lock lever up
*3firmly to lock the
steering wheel in place.
TILT/TELESCOPIC STEERING
Page 349 of 482
5-6Starting and driving
TPMS with Easy Fill Tire Alert
When adding air to an under-inflated tire, the
TPMS with Easy Fill Tire Alert provides visual
and audible signals outside the vehicle to help
you inflate the tires to the recommended COLD
tire pressure.
Vehicle set-up:
1. Park the vehicle in a safe and level place.
2. Apply the parking brake and place the shiftlever in the P (Park) position.
3. Place the ignition switch in the ON position. Do not start the engine.
Operation:
1. Add air to the tire.
2. Within a few seconds, the hazard indicators will start flashing.
3. When the designated pressure is reached, the horn beeps once and the hazard
indicators stop flashing.
4. Perform the above steps for each tire.
.If the tire is over-inflated to more than approximately 4 psi (30 kPa) , the horn
beeps and the hazard indicators flash 3
times. To correct the pressure, push the
core of the valve stem on the tire briefly to
release pressure. When the pressure
reaches the designated pressure, the horn beeps once.
.If the hazard indicator does not flash
within approximately 15 seconds after
starting to inflate the tire, it indicates that
the TPMS with Easy Fill Tire Alert is not
operating.
.The TPMS will not activate the Easy Fill
Tire Alert under the following conditions:
— If there is interference from an external device or transmitter
— The air pressure from the inflation device is not sufficient to inflate the tire
— There is a malfunction in the TPMS system
— There is a malfunction in the horn or hazard indicators
— The identification code of the tire pres- sure sensor is not registered to the
system
— The battery of the tire pressure sensor is low
.If the TPMS with Easy Fill Tire Alert does
not operate due to TPMS interference,
move the vehicle about 1 m (3 ft)
backward or forward and try again.
If the TPMS with Easy Fill Tire Alert is not
working, use a tire pressure gauge.
AVOIDING COLLISION AND ROLL-
OVER
WARNING
Failure to operate this vehicle in a safe
and prudent manner may result in loss
of control or an accident.
Be alert and drive defensively at all times. Obey
all traffic regulations. Avoid excessive speed,
high speed cornering, or sudden steering
maneuvers, because these driving practices
could cause you to lose control of your vehicle.
As with any vehicle, a loss of control could
result in a collision with other vehicles or
objects, or cause the vehicle to rollover,
particularly if the loss of control causes the
vehicle to slide sideways. Be attentive at all
times, and avoid driving when tired. Never drive
when under the influence of alcohol or drugs
(including prescription or over-the-counter
drugs which may cause drowsiness) . Always
wear your seat belt as outlined in the “Seat
belts” (P.1-15) of this manual, and also instruct
your passengers to do so.
Seat belts help reduce the risk of injury in
collisions and rollovers. In a rollover crash, an
unbelted or improperly belted person is
Page 350 of 482
significantly more likely to be injured or
killed than a person properly wearing a
seat belt.
OFF-ROAD RECOVERY
If the right side or left side wheels leave the road
surface, maintain control of the vehicle by
following the procedure below. Please note that
this procedure is only a general guide. The
vehicle must be driven as appropriate based on
the conditions of the vehicle, road and traffic.
1. Remain calm and do not overreact.
2. Do not apply the brakes.
3. Maintain a firm grip on the steering wheelwith both hands and try to hold a straight
course.
4. When appropriate, slowly release the accel- erator pedal to gradually slow the vehicle.
5. If there is nothing in the way, steer the vehicle to follow the road while the vehicle
speed is reduced. Do not attempt to drive
the vehicle back onto the road surface until
vehicle speed is reduced.
6. When it is safe to do so, gradually turn the steering wheel until both tires return to the
road surface. When all tires are on the road
surface, steer the vehicle to stay in the
appropriate driving lane.
.If you decide that it is not safe to returnthe vehicle to the road surface based on
vehicle, road or traffic conditions, gradu-
ally slow the vehicle to a stop in a safe
place off the road.
RAPID AIR PRESSURE LOSS
Rapid air pressure loss or a “blow-out” can
occur if the tire is punctured or is damaged due
to hitting a curb or pothole. Rapid air pressure
loss can also be caused by driving on under-
inflated tires.
Rapid air pressure loss can affect the handling
and stability of the vehicle, especially at highway
speeds.
Help prevent rapid air pressure loss by main-
taining the correct air pressure and visually
inspect the tires for wear and damage. See
“Wheels and tires” (P.8-30).
If a tire rapidly loses air pressure or “blows-out”
while driving maintain control of the vehicle by
following the procedure below. Please note that
this procedure is only a general guide. The
vehicle must be driven as appropriate based on
the conditions of the vehicle, road and traffic.
WARNING
The following actions can increase the
chance of losing control of the vehicle if
there is a sudden loss of tire air
pressure. Losing control of the vehicle
may cause a collision and result in
personal injury.
. The vehicle generally moves or pulls
in the direction of the flat tire.
. Do not rapidly apply the brakes.
. Do not rapidly release the accelera-
tor pedal.
. Do not rapidly turn the steering
wheel.
1. Remain calm and do not overreact.
2. Maintain a firm grip on the steering wheel with both hands and try to hold a straight
course.
3. When appropriate, slowly release the accel- erator pedal to gradually slow the vehicle.
4. Gradually steer the vehicle to a safe location off the road and away from traffic if possible.
5. Lightly apply the brake pedal to gradually stop the vehicle.
Starting and driving5-7
Page 355 of 482
5-12Starting and driving
.Make sure the area around the vehicle is
clear.
. Check fluid levels such as engine oil, cool-
ant, brake fluid and window washer fluid as
frequently as possible, or at least whenever
you refuel.
. Check that all windows and lights are clean.
. Visually inspect tires for their appearance
and condition. Also check tires for proper
inflation.
. Lock all doors.
. Position seats and adjust head restraints/
headrests.
. Adjust inside and outside mirrors.
. Fasten seat belts and ask all passengers to
do likewise.
. Check the operation of warning lights when
the ignition switch is pushed to the ON
position. (See “Warning/indicator lights and
audible reminders” (P.2-11) .) 1. Apply the parking brake.
2. Move the shift lever to the P (Park) or N
(Neutral) position. (P is recommended.)
The starter is designed not to operate unless
the shift lever is in either of the above
positions.
3. Push the ignition switch to the ON position. Depress the brake pedal and push the
ignition switch to start the engine.
To start the engine immediately, push and
release the ignition switch while depressing
the brake pedal with the ignition switch in
any position.
.If the engine is very hard to start inextremely cold weather or when restart-
ing, depress the accelerator pedal a little
(approximately 1/3 to the floor) and while
holding, crank the engine. Release the
accelerator pedal when the engine starts.
.If the engine is very hard to start becauseit is flooded, depress the accelerator
pedal all the way to the floor and hold it.
Push the ignition switch to the ON
position to start cranking the engine.
After 5 or 6 seconds, stop cranking by
pushing the ignition switch to OFF. After
cranking the engine, release the accel-
erator pedal. Crank the engine with your
foot off the accelerator pedal bydepressing the brake pedal and pushing
the push-button ignition switch to start
the engine. If the engine starts, but fails
to run, repeat the above procedure.
CAUTION
Do not operate the starter for more
than 15 seconds at a time. If the engine
does not start, push the ignition switch
to OFF and wait 10 seconds before
cranking again, otherwise the starter
could be damaged.
4. Warm-up
Allow the engine to idle for at least 30
seconds after starting. Do not race the
engine while warming it up. Drive at
moderate speed for a short distance first,
especially in cold weather. In cold weather,
keep the engine running for a minimum of 2 -
3 minutes before shutting it off. Starting and
stopping the engine over a short period of
time may make the vehicle more difficult to
start.
5. To stop the engine, shift the shift lever to the P (Park) position and push the ignition
switch to the OFF position.
BEFORE STARTING THE ENGINE STARTING THE ENGINE
Page 392 of 482
3. Get out of the vehicle. Look and listen forsteam or coolant escaping from the radiator
before opening the hood. (If steam or
coolant is escaping, turn off the engine.)
Do not open the hood further until no steam
or coolant can be seen.
4. Open the engine hood.
WARNING
If steam or water is coming from the
engine, stand clear to prevent getting
burned.
5. Visually check drive belts for damage or looseness. Also check if the cooling fan is
running. The radiator hoses and radiator
should not leak water. If coolant is leaking,
the water pump belt is missing or loose, or
the cooling fan does not run, stop the
engine.
WARNING
Be careful not to allow your hands, hair,
jewelry or clothing to come into contact
with, or get caught in, engine belts or
the engine cooling fan. The engine cooling fan can start at any time.
6. After the engine cools down, check the coolant level in the reservoir tank with the
engine running. Add coolant to the reservoir
tank if necessary. Have your vehicle repaired
at a NISSAN dealer.
In case of emergency6-13
Page 398 of 482
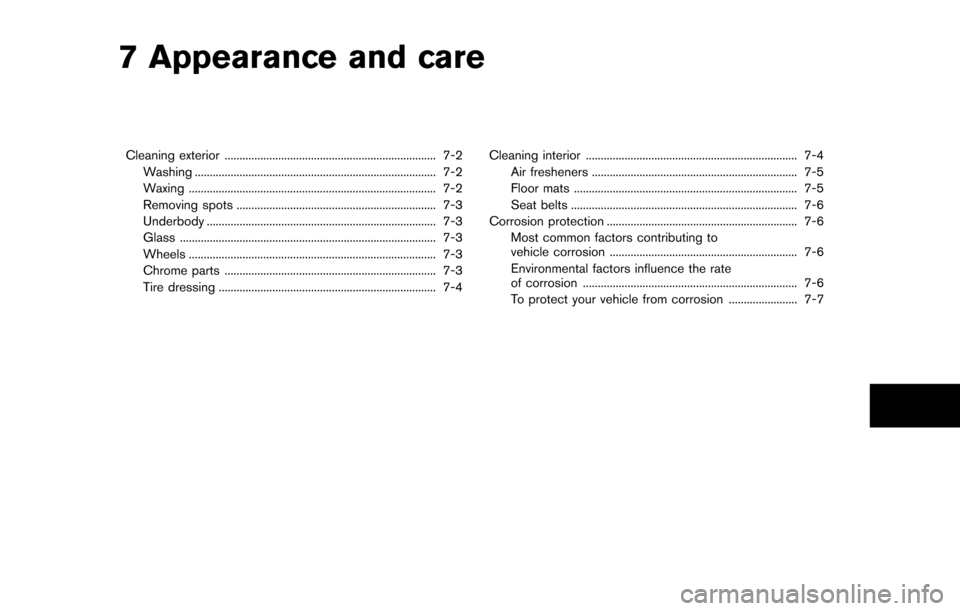
7 Appearance and care
Cleaning exterior ....................................................................... 7-2Washing ........................................................................\
......... 7-2
Waxing ........................................................................\
........... 7-2
Removing spots ................................................................... 7-3
Underbody ........................................................................\
..... 7-3
Glass ........................................................................\
.............. 7-3
Wheels ........................................................................\
........... 7-3
Chrome parts ....................................................................... 7-3
Tire dressing ........................................................................\
. 7-4 Cleaning interior ....................................................................... 7-4
Air fresheners ..................................................................... 7-5
Floor mats ........................................................................\
... 7-5
Seat belts ........................................................................\
.... 7-6
Corrosion protection ................................................................ 7-6 Most common factors contributing to
vehicle corrosion ............................................................... 7-6
Environmental factors influence the rate
of corrosion ........................................................................\
7-6
To protect your vehicle from corrosion ....................... 7-7
Page 403 of 482
7-6Appearance and care
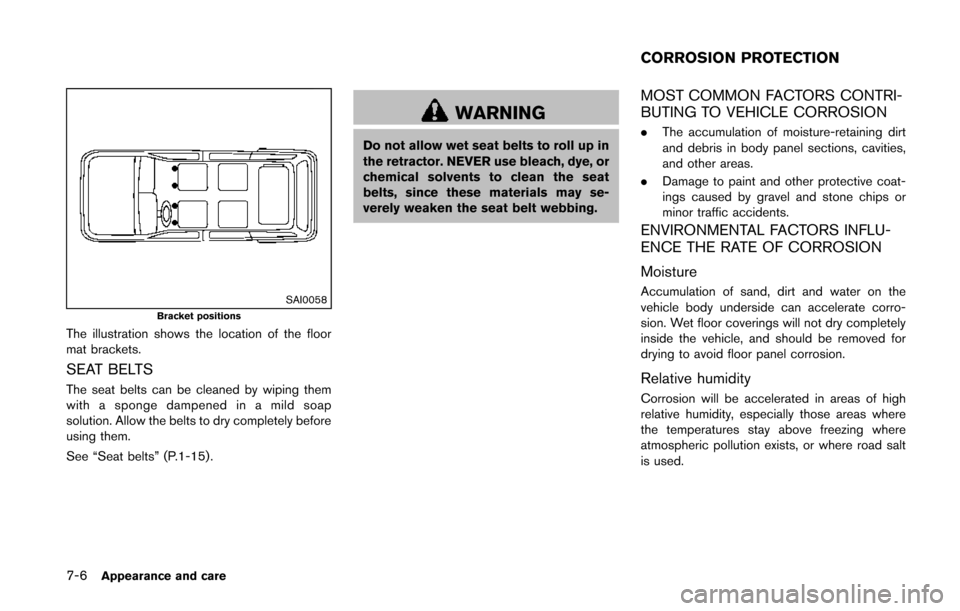
SAI0058Bracket positions
The illustration shows the location of the floor
mat brackets.
SEAT BELTS
The seat belts can be cleaned by wiping them
with a sponge dampened in a mild soap
solution. Allow the belts to dry completely before
using them.
See “Seat belts” (P.1-15).
WARNING
Do not allow wet seat belts to roll up in
the retractor. NEVER use bleach, dye, or
chemical solvents to clean the seat
belts, since these materials may se-
verely weaken the seat belt webbing.
MOST COMMON FACTORS CONTRI-
BUTING TO VEHICLE CORROSION
.The accumulation of moisture-retaining dirt
and debris in body panel sections, cavities,
and other areas.
. Damage to paint and other protective coat-
ings caused by gravel and stone chips or
minor traffic accidents.
ENVIRONMENTAL FACTORS INFLU-
ENCE THE RATE OF CORROSION
Moisture
Accumulation of sand, dirt and water on the
vehicle body underside can accelerate corro-
sion. Wet floor coverings will not dry completely
inside the vehicle, and should be removed for
drying to avoid floor panel corrosion.
Relative humidity
Corrosion will be accelerated in areas of high
relative humidity, especially those areas where
the temperatures stay above freezing where
atmospheric pollution exists, or where road salt
is used.
CORROSION PROTECTION
Page 406 of 482
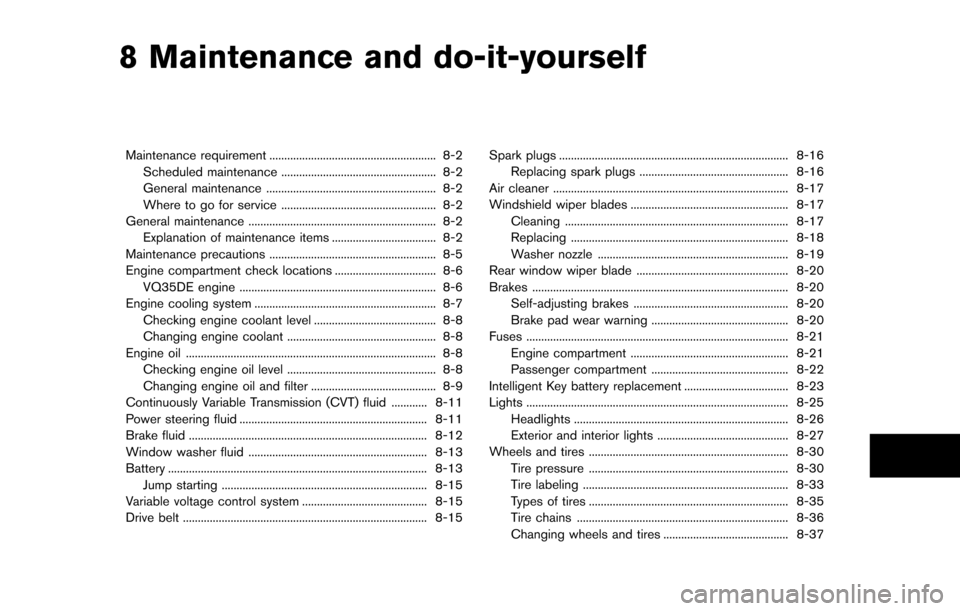
8 Maintenance and do-it-yourself
Maintenance requirement ........................................................ 8-2Scheduled maintenance .................................................... 8-2
General maintenance ......................................................... 8-2
Where to go for service .................................................... 8-2
General maintenance ............................................................... 8-2 Explanation of maintenance items ................................... 8-2
Maintenance precautions ........................................................ 8-5
Engine compartment check locations .................................. 8-6 VQ35DE engine .................................................................. 8-6
Engine cooling system ............................................................. 8-7
Checking engine coolant level ......................................... 8-8
Changing engine coolant .................................................. 8-8
Engine oil ........................................................................\
............ 8-8
Checking engine oil level .................................................. 8-8
Changing engine oil and filter .......................................... 8-9
Continuously Variable Transmission (CVT) fluid ............ 8-11
Power steering fluid ............................................................... 8-11
Brake fluid ........................................................................\
........ 8-12
Window washer fluid ............................................................ 8-13
Battery ........................................................................\
............... 8-13
Jump starting ..................................................................... 8-15
Variable voltage control system .......................................... 8-15
Drive belt ........................................................................\
.......... 8-15 Spark plugs ........................................................................\
..... 8-16
Replacing spark plugs .................................................. 8-16
Air cleaner ........................................................................\
....... 8-17
Windshield wiper blades ..................................................... 8-17 Cleaning ........................................................................\
... 8-17
Replacing ........................................................................\
. 8-18
Washer nozzle ................................................................ 8-19
Rear window wiper blade ................................................... 8-20
Brakes ........................................................................\
.............. 8-20 Self-adjusting brakes .................................................... 8-20
Brake pad wear warning .............................................. 8-20
Fuses ........................................................................\
................ 8-21 Engine compartment ..................................................... 8-21
Passenger compartment .............................................. 8-22
Intelligent Key battery replacement ................................... 8-23
Lights ........................................................................\
................ 8-25
Headlights ........................................................................\
8-26
Exterior and interior lights ............................................ 8-27
Wheels and tires ................................................................... 8-30 Tire pressure ................................................................... 8-30
Tire labeling ..................................................................... 8-33
Types of tires ................................................................... 8-35
Tire chains ....................................................................... 8-36
Changing wheels and tires .......................................... 8-37