2014 NISSAN QUEST language
[x] Cancel search: languagePage 105 of 482
2-26Instruments and controls
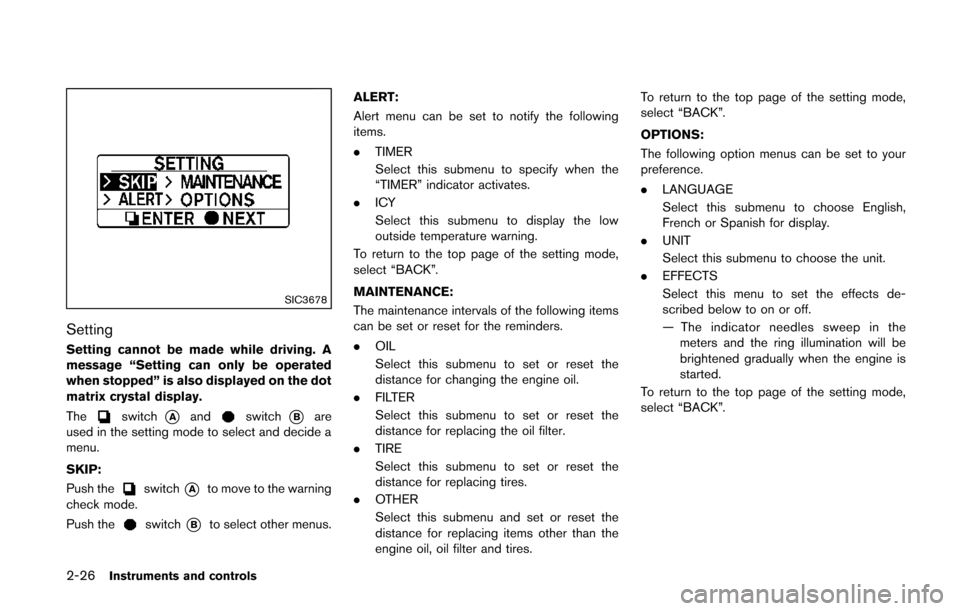
SIC3678
Setting
Setting cannot be made while driving. A
message “Setting can only be operated
when stopped” is also displayed on the dot
matrix crystal display.
The
switch*Aandswitch*Bare
used in the setting mode to select and decide a
menu.
SKIP:
Push the
switch*Ato move to the warning
check mode.
Push the
switch*Bto select other menus. ALERT:
Alert menu can be set to notify the following
items.
.
TIMER
Select this submenu to specify when the
“TIMER” indicator activates.
. ICY
Select this submenu to display the low
outside temperature warning.
To return to the top page of the setting mode,
select “BACK”.
MAINTENANCE:
The maintenance intervals of the following items
can be set or reset for the reminders.
. OIL
Select this submenu to set or reset the
distance for changing the engine oil.
. FILTER
Select this submenu to set or reset the
distance for replacing the oil filter.
. TIRE
Select this submenu to set or reset the
distance for replacing tires.
. OTHER
Select this submenu and set or reset the
distance for replacing items other than the
engine oil, oil filter and tires. To return to the top page of the setting mode,
select “BACK”.
OPTIONS:
The following option menus can be set to your
preference.
. LANGUAGE
Select this submenu to choose English,
French or Spanish for display.
. UNIT
Select this submenu to choose the unit.
. EFFECTS
Select this menu to set the effects de-
scribed below to on or off.
— The indicator needles sweep in the
meters and the ring illumination will be
brightened gradually when the engine is
started.
To return to the top page of the setting mode,
select “BACK”.
Page 201 of 482
4-18Monitor, heater, air conditioner, audio, phone and voice recognition systems
JVH0157M
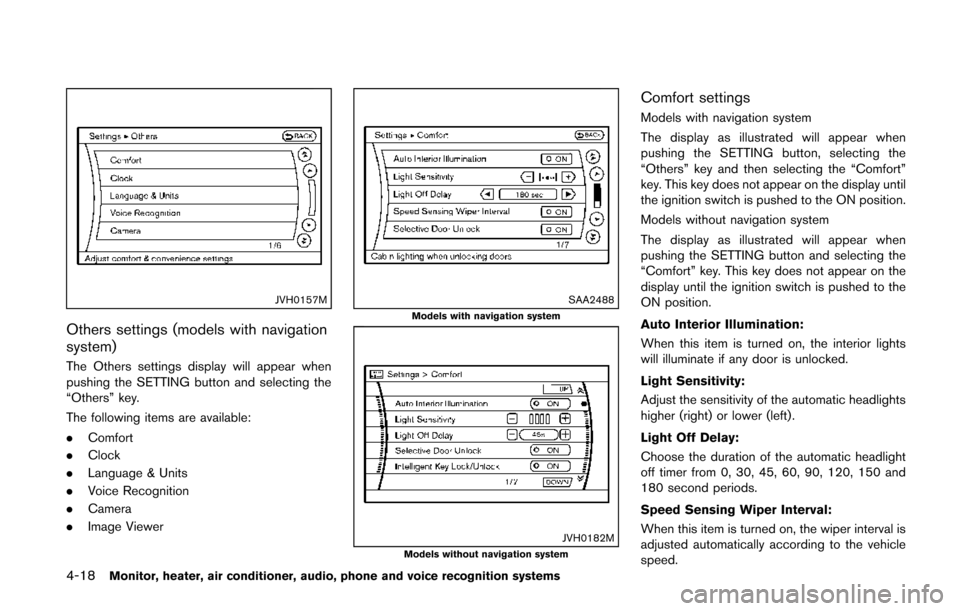
Others settings (models with navigation
system)
The Others settings display will appear when
pushing the SETTING button and selecting the
“Others” key.
The following items are available:
.Comfort
. Clock
. Language & Units
. Voice Recognition
. Camera
. Image Viewer
SAA2488Models with navigation system
JVH0182MModels without navigation system
Comfort settings
Models with navigation system
The display as illustrated will appear when
pushing the SETTING button, selecting the
“Others” key and then selecting the “Comfort”
key. This key does not appear on the display until
the ignition switch is pushed to the ON position.
Models without navigation system
The display as illustrated will appear when
pushing the SETTING button and selecting the
“Comfort” key. This key does not appear on the
display until the ignition switch is pushed to the
ON position.
Auto Interior Illumination:
When this item is turned on, the interior lights
will illuminate if any door is unlocked.
Light Sensitivity:
Adjust the sensitivity of the automatic headlights
higher (right) or lower (left).
Light Off Delay:
Choose the duration of the automatic headlight
off timer from 0, 30, 45, 60, 90, 120, 150 and
180 second periods.
Speed Sensing Wiper Interval:
When this item is turned on, the wiper interval is
adjusted automatically according to the vehicle
speed.
Page 203 of 482
4-20Monitor, heater, air conditioner, audio, phone and voice recognition systems
hour or per minute.
Daylight Saving Time:
Turn this item to ON for daylight saving time
application.
Time Zone:
Choose the time zone from the following
Models with navigation system
.Pacific
. Mountain
. Central
. Eastern
. Atlantic
. Newfoundland
. Hawaii
. Alaska
Models without navigation system
. Eniwetok, Kwajalein
. Midway Island, Samoa
. Hawaii
. Alaska
. Pacific
SAA2490Models with navigation system
SAA1092Models without navigation system
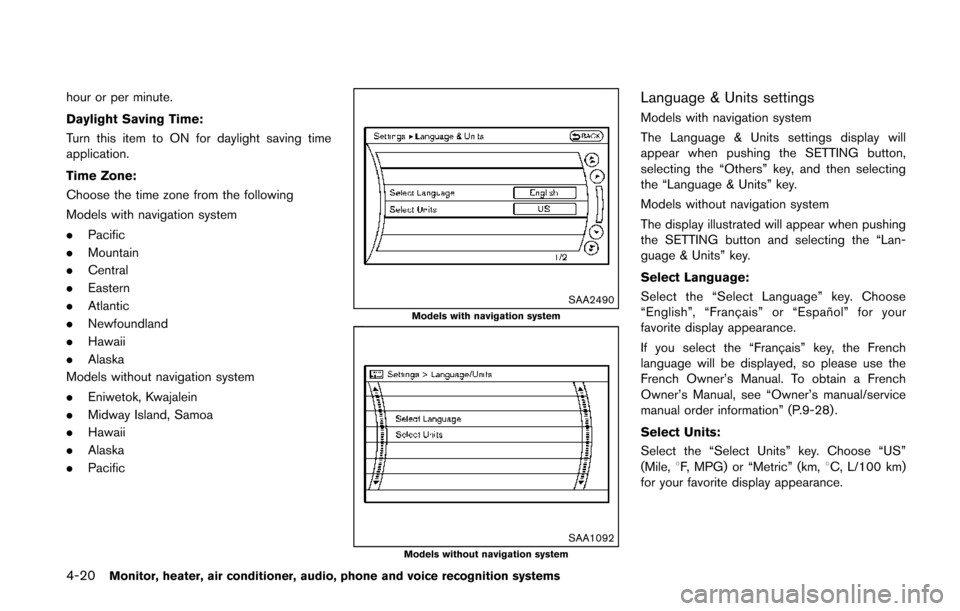
Language & Units settings
Models with navigation system
The Language & Units settings display will
appear when pushing the SETTING button,
selecting the “Others” key, and then selecting
the “Language & Units” key.
Models without navigation system
The display illustrated will appear when pushing
the SETTING button and selecting the “Lan-
guage & Units” key.
Select Language:
Select the “Select Language” key. Choose
“English”, “Franc¸ ais” or “Espan ˜
ol” for your
favorite display appearance.
If you select the “Franc¸ ais” key, the French
language will be displayed, so please use the
French Owner’s Manual. To obtain a French
Owner’s Manual, see “Owner’s manual/service
manual order information” (P.9-28) .
Select Units:
Select the “Select Units” key. Choose “US”
(Mile, 8F, MPG) or “Metric” (km, 8C, L/100 km)
for your favorite display appearance.
Page 211 of 482
4-28Monitor, heater, air conditioner, audio, phone and voice recognition systems
SAA2404Models with navigation system
SAA2606Models without navigation system
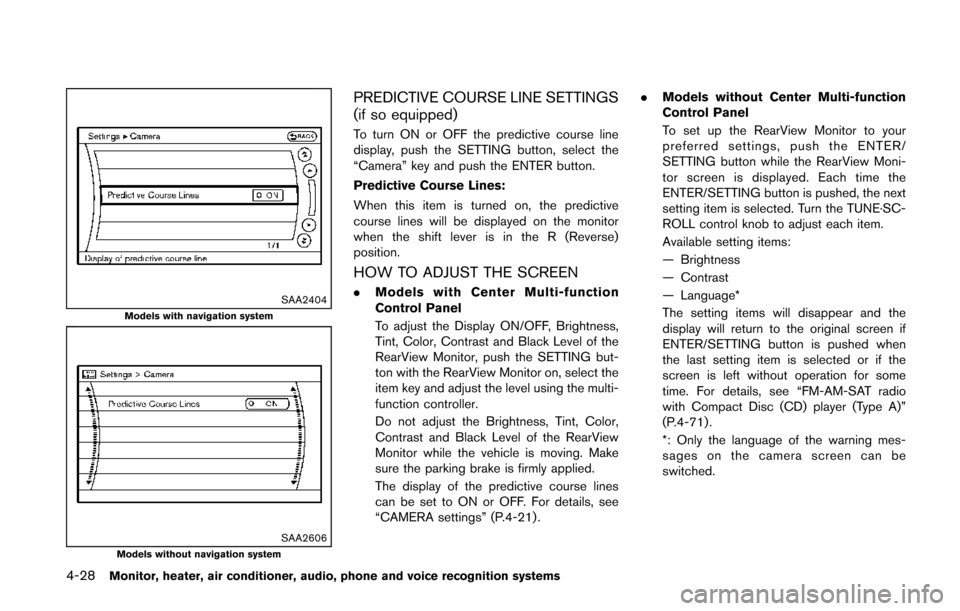
PREDICTIVE COURSE LINE SETTINGS
(if so equipped)
To turn ON or OFF the predictive course line
display, push the SETTING button, select the
“Camera” key and push the ENTER button.
Predictive Course Lines:
When this item is turned on, the predictive
course lines will be displayed on the monitor
when the shift lever is in the R (Reverse)
position.
HOW TO ADJUST THE SCREEN
.Models with Center Multi-function
Control Panel
To adjust the Display ON/OFF, Brightness,
Tint, Color, Contrast and Black Level of the
RearView Monitor, push the SETTING but-
ton with the RearView Monitor on, select the
item key and adjust the level using the multi-
function controller.
Do not adjust the Brightness, Tint, Color,
Contrast and Black Level of the RearView
Monitor while the vehicle is moving. Make
sure the parking brake is firmly applied.
The display of the predictive course lines
can be set to ON or OFF. For details, see
“CAMERA settings” (P.4-21) . .
Models without Center Multi-function
Control Panel
To set up the RearView Monitor to your
preferred settings, push the ENTER/
SETTING button while the RearView Moni-
tor screen is displayed. Each time the
ENTER/SETTING button is pushed, the next
setting item is selected. Turn the TUNE·SC-
ROLL control knob to adjust each item.
Available setting items:
— Brightness
— Contrast
— Language*
The setting items will disappear and the
display will return to the original screen if
ENTER/SETTING button is pushed when
the last setting item is selected or if the
screen is left without operation for some
time. For details, see “FM-AM-SAT radio
with Compact Disc (CD) player (Type A)”
(P.4-71) .
*: Only the language of the warning mes-
sages on the camera screen can be
switched.
Page 241 of 482
4-58Monitor, heater, air conditioner, audio, phone and voice recognition systems
devices, USB hard drives and iPod®players.
Some USB devices may not be supported by
this system.
. Partitioned USB devices may not be played
correctly.
. Some characters used in other languages
(Chinese, Japanese, etc.) are not displayed
properly on display. Using English language
characters with a USB device is recom-
mended.
General notes for USB use:
Refer to your device manufacturer’s owner
information regarding the proper use and care
of the device.
Notes for iPod
®use:
iPod®is a trademark of Apple Inc., registered in
the U.S. and other countries.
. Improperly plugging in the iPod
®may cause
a checkmark to be displayed on and off
(flickering) . Always make sure that the iPod
®
is connected properly.
. An iPod nano®(1st Generation) may remain
in fast forward or rewind mode if it is
connected during a seek operation. In this
case, please manually reset the iPod
®.
. An iPod nano®(2nd Generation) will con-
tinue to fast-forward or rewind if it is
disconnected during a seek operation. .
An incorrect song title may appear when the
Play Mode is changed while using an iPod
nano
®(2nd Generation)
. Audiobooks may not play in the same order
as they appear on an iPod
®.
. Large video files cause slow responses in an
iPod
®. The vehicle center display may
momentarily black out, but will soon recover.
. If an iPod
®automatically selects large video
files while in the shuffle mode, the vehicle
center display may momentarily black out,
but will soon recover.
Compressed Audio Files (MP3/WMA/
AAC)
Explanation of terms:
. MP3 — MP3 is short for Moving Pictures
Experts Group Audio Layer 3. MP3 is the
most well known compressed digital audio
file format. This format allows for near “CD
quality” sound, but at a fraction of the size of
normal audio files. MP3 conversion of an
audio track can reduce the file size by
approximately a 10:1 ratio (Sampling: 44.1
kHz, Bit rate: 128 kbps) with virtually no
perceptible loss in quality. The compression
reduces certain parts of sound that seem
inaudible to most people. .
WMA — Windows Media Audio (WMA) is a
compressed audio format created by Micro-
soft as an alternative to MP3. The WMA
codec offers greater file compression than
the MP3 codec, enabling storage of more
digital audio tracks in the same amount of
space when compared to MP3s at the same
level of quality.
. AAC/M4A (if so equipped) — Advanced
Audio Coding (AAC) is a lossy audio
compression format. Audio files that have
been encoded with AAC are generally
smaller in size and deliver a higher quality
of sound than MP3.
. Bit rate — Bit rate denotes the number of
bits per second used by a digital music file.
The size and quality of a compressed digital
audio file is determined by the bit rate used
when encoding the file.
. Sampling frequency — Sampling frequency
is the rate at which the samples of a signal
are converted from analog to digital (A/D
conversion) per second.
. Multisession — Multisession is one of the
methods for writing data to media. Writing
data once to the media is called a single
session, and writing more than once is
called a multisession.
Page 256 of 482
the ENTER button. You can toggle between
ON and OFF using the TUNE·SCROLL
control knob.
. RDS Display
When this has been set to ON, RDS (radio
data system) information will be shown on
the display. Select RDS Display and then
push the ENTER button. You can toggle
between ON and OFF using the TUNE·SC-
ROLL control knob.
. iPod Menu language
The iPod menu language can be set to
English, French or Spanish.
Select iPod menu language and then push
the ENTER button. Use the TUNE·SCROLL
control knob to select the preferred lan-
guage.
DISP button:
Display of the screen can be canceled by
pushing the DISP button. You can then listen
to music that is being played back. If you want to
display the screen again, either push the DISP
button once more or push the FM·AM, XM or
CD·AUX button. Switching the display:
.
Pushing the CD·AUX button will switch the
displays as follows:
CD ?iPod
®/USB ?AUX ?CD
BACK button:
When the BACK button is pushed, it returns to
the previous display.
FM-AM-SAT radio operation
radio (FM/AM) band select:
Pushing the radio band select button will
change the band as follows:
AM ?FM1 ?FM2 ?AM
radio (SAT) band select:
Pushing the XM band select button will change
the band as follows:
XM1 ?XM2 ?XM3 ?XM1
When the XM band select button is pushed
while the ignition switch is in the ACC or ON
position, the radio will come on at the channel
last played.
The last channel played will also come on when
the PWR button is pushed to ON.
The satellite radio is not available in Alaska,
Hawaii and Guam. If another audio source is playing when the radio
band select button is turned to ON, the audio
source will automatically be turned off and the
last radio channel played will come on.
When the stereo broadcast signal is weak, the
radio will automatically change from stereo to
monaural reception.
TUNE (Tuning):
. For AM and FM radio
Turn the radio TUNE·SCROLL control knob
for manual tuning.
. For SiriusXM Satellite Radio
Turn the radio TUNE·SCROLL control knob
to seek channels from all of the categories
when any category is not selected.SEEK tuning/CAT (category):
. For AM and FM radio
Push the SEEK button
orto tune
from low to high or high to low frequencies
and to stop at the next broadcasting station.
. For SiriusXM Satellite Radio
Push the SEEK button
orto tune
to the first channel of the next or previous
category.
SCAN tuning:
Push the Radio SCAN tuning button to tune
Monitor, heater, air conditioner, audio, phone and voice recognition systems4-73
Page 269 of 482
4-86Monitor, heater, air conditioner, audio, phone and voice recognition systems
“+” side or “−” side.
DRC (DVD-VIDEO, DVD-VR):
DRC (Dynamic Range Compression) automati-
cally adjusts the soundtrack volume level to
maintain a more even sound to the speakers.
DVD Language (DVD-VIDEO, VIDEO-CD):
Select the “DVD Language” key to open the
number entry screen. Input the number corre-
sponding to the preferred language and select
the “OK” key. The DVD top menu language will
be changed to the one specified.
Display:
To adjust the image quality of the screen, select
the preferred adjustment items.
Audio:
Select the preferred language for audio.
Subtitle (DVD-VIDEO, DVD-VR):
Select the preferred language for subtitles.
Display Mode (DVD-VIDEO, VIDEO-CD,
DVD-VR):
Select from the “Full”, “Wide”, “Normal” or
“Cinema” modes.
Title List (DVD-VR):
Select the preferred title from the list. Play Mode:
Select the preferred play mode.
PG/PL Mode (DVD-VR):
Select the “PG” or “PL” mode.
SAA3599
USB MEMORY OPERATION (models
with center multi-function control panel)
Audio main operation
Open the USB port cover and connect a USB
memory as illustrated. Then, push the DISC·AUX
button repeatedly to switch to the USB memory
mode.
If the system has been turned off while the USB
memory was playing, pushing the ON·OFF/VOL
control knob will start the USB memory.
Page 274 of 482
the “OK” key.
The specified folder/file will be played.
. Display
To adjust the image quality of the screen,
select the preferred adjustment items.
. DRC
DRC (Dynamic Range Compression) auto-
matically adjusts the soundtrack volume
level to maintain a more even sound to the
speakers.
. Audio
Select the preferred language for audio.
. Subtitle
Select the preferred language for subtitle.
. Display Mode
Select the “Normal”, “Wide”, “Cinema” or
“Full” mode.Bluetooth®STREAMING AUDIO (mod-
els with navigation system)
Your NISSAN is equipped with Bluetooth®
Streaming Audio. If you have a compatible
Bluetooth®device with streaming audio (A2DP
profile) , you can set up the wireless connection
between your Bluetooth
®device and the in-
vehicle audio system. This connection allows
you to listen to the audio from the Bluetooth
®
device using your vehicle speakers. It also may
allow basic control of the device for playing and
skipping audio files using the AVRCP Blue-
tooth
®profile. All Bluetooth®Devices do not
have the same level of controls for AVRCP.
Please consult the manual for your Bluetooth
®
Device for more details.
Once your Bluetooth®device is connected to
the in-vehicle audio system, it will automatically
reconnect whenever the device is present in the
vehicle and you select Bluetooth
®Audio from
your audio system. You do not need to manually
reconnect for each usage.
Wireless LAN (Wi-Fi) and the Bluetooth
®
functions share the same frequency band (2.4
GHz) . Using the Bluetooth®and the wireless
LAN functions at the same time may slow down
or disconnect the communication and cause
undesired noise. It is recommended that you
turn off the wireless LAN (Wi-Fi) when using the Bluetooth
®functions.
Regulatory information
FCC Regulatory information:
.
CAUTION: To maintain compliance with
FCC’s RF exposure guidelines, use only
the supplied antenna. Unauthorized antenna,
modification, or attachments could damage
the transmitter and may violate FCC regula-
tions.
. Operation is subject to the following two
conditions:
1) This device may not cause interference
and
2) This device must accept any interfer- ence, including interference that may
cause undesired operation of the device
IC Regulatory information:
. Operation is subject to the following two
conditions:
1) This device may not cause interference,
and
2) This device must accept any interfer- ence, including interference that may
cause undesired operation of the device.
. This Class B digital apparatus meets all
requirements of the Canadian Interference-
Causing Equipment Regulations.
Monitor, heater, air conditioner, audio, phone and voice recognition systems4-91