2014 NISSAN PATHFINDER warning
[x] Cancel search: warningPage 6 of 32

4
TiRE PRESSURE MoNi To RiN G SYSTEM (TPMS)
with Easy Fill Tire Alert
A Tire Pressure l ow – Add Air warning message
will appear in the vehicle information display
01 and
the low tire pressure warning light
02 will illuminate
when one or more tires are low on pressure and air
is needed.
•
T
he tire pressures should be checked when the
tires are cold. The tires are considered cold after
the vehicle has been parked for 3 hours or more or
driven less than 1 mi (1.6 km) at moderate speeds.
When adding air to an under-inflated tire, the TPMS with e asy Fill Tire Alert provides visual and
audible signals to help you inflate the tires to the
recommended
c
O
LD tire pressure.
T
o use the e asy Fill Tire Alert:
1.
Move the shift lever to the
P (PARK) position and apply the parking brake.
2.
Place the ignition switc
h in the o N position. Do not start the engine.
3.
Add air to the under-inflated tire and within a few seconds, the hazar\
d warning lights will
start flashing.
4.
W
hen the designated tire pressure is reached, the horn will beep once and the hazard
warning lights will stop flashing.
5.
Repeat this procedure for any additional under-inflated tires.
After tire pressures are adjusted, drive the vehicle at speeds above 16 \
M PH (25 km/h).
The Tire Pressure
l ow – Add Air warning message and low tire pressure warning light
will disappear.
When the low tire pressure warning light flashes for approximately 1 minute and then remains on, the TPMS is not functioning properly. Have the system checked by a NISSAN dealer.
Tire pressure rises and falls depending on the heat caused by the vehicle\
’s operation and the outside temperature. Low outside temperature can lower the temperature o\
f the air inside
the tire, which can cause a lower tire inflation pressure. This may cause the low tire pressure
warning light to illuminate. If the warning light illuminates, check the tire pressure in your tires.
The Tire and Loading Information label contains valuable information. Please refer to section 9, “Technical and consumer information” in your Owner’s Manual for the location of the Tire
and Loading Information label.
For more information, refer to the “instruments and controls (section 2)”, the “Starting and driving (section 5)” and the
“Maintenance and do-it-yourself (section 8)” of your Owner’s Manual.
02
01
esseNtial iNf or matioN
1558965_14b_Pathfinder_QRG_100213.indd 410/2/13 9:27 AM
To view detailed instructional videos regarding these and other features, please go to www.nissanownersinfo.mobi.
Page 7 of 32

5
looSE FUEl CAP
A looSE FUEl CAP warning message will appear
in the vehicle information display
01 when the
fuel-filler cap is not tightened correctly.
To tighten, turn the cap clockwise until a single click
is heard.
The warning message will disappear when the vehicle detects the fuel-filler cap is properly tightened and the
reset
button 02 is pressed for about 1 second.
If the cap is not properly tightened, the Malfunction
Indicator Light
may illuminate.
For more information, refer to the “instruments and controls (section 2)” and the “Pre-driving checks and adjustments
(section 3)” of your Owner’s Manual.
02
01
CloCK SET/ADUSTMENT
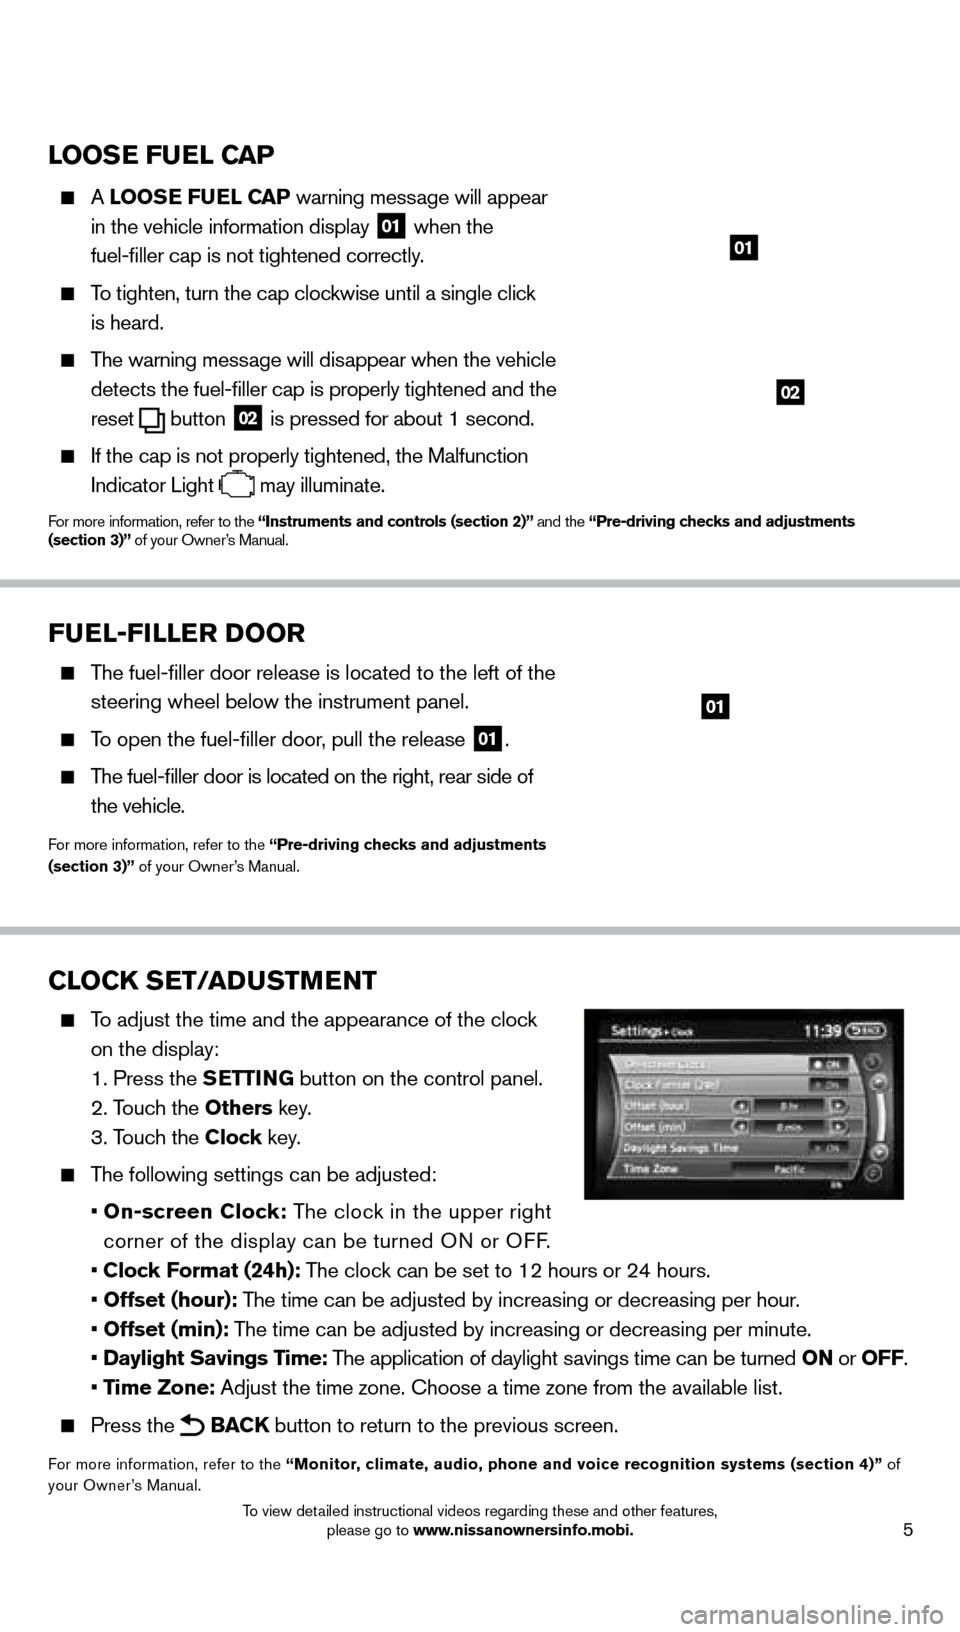
To adjust the time and the appearance of the clock
on the display:
1. Press the SETT
i
N
G button on the control panel.
2. Touch the
o thers key.
3. Touch the Clock key.
The following settings can be adjusted:
•
o n-screen Clock: The clock in the upper right
corner of the display can be turned ON or OFF.
•
Clock Format (24h): The clock can be set to 12 hours or 24 hours.
•
o ffset (hour): The time can be adjusted by increasing or decreasing per hour.
•
o ffset (min): The time can be adjusted by increasing or decreasing per minute.
•
Daylight Savings Time: The application of daylight savings time can be turned o N or o FF.
•
Time Zone: Adjust the time zone. c hoose a time zone from the available list.
Press the BACK button to return to the previous screen.
For more information, refer to the “Monitor, climate, audio, phone and voice recognition systems (section 4)” of
your Owner’s Manual.
FUEl-F ill ER Doo R
The fuel-filler door release is located to the left of the
steering wheel below the instrument panel.
To open the fuel-filler door, pull the release 01.
The fuel-filler door is located on the right, rear side of
the vehicle.
For more information, refer to the “Pre-driving checks and adjustments
(section 3)” of your Owner’s Manual.
01
1558965_14b_Pathfinder_QRG_100213.indd 510/2/13 9:27 AM
To view detailed instructional videos regarding these and other features, please go to www.nissanownersinfo.mobi.
Page 20 of 32

18
vEHiCl E iN Fo RMAT io N DiS P l AY
The vehicle information display 01 displays such items as:
Vehicle settings
Trip computer information
Drive system warnings and settings (if so equipped)
cruise control system
Intelligent key operation information
Indicators and warnings
Tire pressure information
4X4 information (if so equipped)
USI NG TH
e VeH
I c L
e I
NFORMATION DISPLAY
The vehicle information display modes can be changed
using the
button 02 and the ENTER button 03
located on the steering wheel.
Press the button 02 to enter the vehicle information menu items.
Press
the button 04 to navigate through the items in vehicle information.
Press the
E NTER button 03 to change or select an item in the vehicle information display.
Press the button 05 to go back to the previous menu.
R
eSe
TTING TH
e
TRIP
c
O
MPUT e
R
1.
Press the
button 02 until you reach the trip
computer mode 06.
2.
Press the
button 02 again for more than 1.5
seconds to reset average fuel consumption, average
speed, distance to empty and journey time.
S
e
TTINGS
The setting mode allows you to change the information
displayed in the vehicle information display:
Driver assist ance (if so equipped)
Main menu selection
Body color
Maintenance
Alarms
Vehicle settings
Language
Unit
Welcome effect
For more information, refer to the “instruments and controls (section 2)” of your Owner’s Manual.
system guide
01
02
040305
06
1558965_14b_Pathfinder_QRG_100213.indd 1810/2/13 9:28 AM
To view detailed instructional videos regarding these and other features, please go to www.nissanownersinfo.mobi.
Page 32 of 32

Nissan, the Nissan Brand Symbol, Z and
Nissan model names are Nissan trademarks.
©
2013 Nissan North America, Inc.
QR14E 0R52U1Printing: October 2 0 13 (04)
To view detailed instructional videos,
go to www.nissanownersinfo.mobi/2014/pathfinder or snap this barcode with an appropriate barcode reader.
This Quick Reference Guide is intended to provide an overview of some of the uniq\
ue features of your new vehicle. See your
Owner’s Manual, which contains important safety warnings and information about the operation and maintenance of yo\
ur vehicle,
for complete details. Nissan North America, Inc. reserves the right to make changes, at any time, without prior notice, in prices,
colors, materials, equipment, specifications, and models and to discon\
tinue models or equipment. Due to continuous product
development and other pre- and post-production factors, actual vehicle, \
materials and specifications may vary. Some vehicles are
shown with optional equipment. See the actual vehicle for complete accur\
acy. Specifications, options and accessories may differ
in Hawaii, U.S. territories and other countries. For additional information on availability, options or accessories, see your NISSAN
dealer or contact Nissan North America, Inc.
1558965_14b_Pathfinder_QRG_100213.indd 210/2/13 9:27 AM