2014 MITSUBISHI OUTLANDER PHEV tow
[x] Cancel search: towPage 266 of 442

Roof carrier precautionCAUTIONlMake sure that the weight of the luggage
does not exceed the allowable roof load.
If the allowable roof load is exceeded, this may cause damage to the vehicle.
The roof load is the total allowable load on
the roof (the weight of the roof carrier plus
the weight of luggage placed on the roof car- rier).
For the specific value, refer to “Maximum
roof load” on page 12-05.
l When luggage is loaded onto the vehicle,
please make sure to drive slowly and avoid excessive manoeuvres such as sudden brak-ing or quick turning.
In addition, place the luggage on the carrier
so that its weight is distributed evenly with the heaviest items on the bottom. Do not
load items that are wider than the roof carri-
er.
The additional weight on the roof could raise the vehicle’s centre of gravity and affect ve-
hicle handling characteristics.
As a result, driving errors or emergency ma- noeuvres could lead to a loss of control and
result in an accident.
l Before driving and after travelling a short
distance, always check the load to make sure
it is securely fastened to the roof carrier. Check periodically during your travel that
the load remains secure.NOTEl To prevent wind noise or reduction in fuel
economy, remove the roof carrier when not
in use.
l Remove the roof carrier before using an au-
tomatic car wash.
l Be sure that adequate clearance is main-
tained for raising the sunroof (if so equip-
ped) and/or the tailgate when installing a roof carrier.Trailer towing
E00610001746
In order to tow a trailer with your vehicle,
have a trailer towing device mounted that
meets all relevant regulations in your area, consult a MITSUBISHI MOTORS Author-
ized Service Point.
The regulations concerning the towing of a
trailer may differ from country to country. You are advised to obey the regulations in
each area.
CAUTIONl Danger of Accident!
A towing bar should be fitted according to MITSUBISHI MOTORS guidelines.Maximum towable weight with
brake and maximum trailer- nose weight
Never exceed the maximum towable weight
with brake and the maximum trailer-nose weight as listed in the specifications.
(Refer to page 12-05.)
If you tow a trailer at an altitude of more than
1,000 m above sea-level, reduce your weight by 10 % of the gross combination weight for
every increase of 1,000 m above sea-level, as
the engine output is lowered owing to de-
crease in atmospheric pressure.
Towing bar mounting specifi-cations
See the following table for fixing points (A) for the towing bar.
Trailer towing
7-76OGGE14E5Starting and driving7
Page 267 of 442

1698 mm269 mm3369 mm4105 mm5815 mm6441 mm
(at kerb weight condition)7489 mm
(at kerb weight condition) 408 mm
(at laden condition)8527 mm
(at kerb weight condition)9537 mm
(at kerb weight condition)10473 mm11528 mm12583 mm
Operating hints
l Be sure that the driving speed does not
exceed 100 km/h (62 mph) for trailer op-
eration. It is also recommended that you obey the local regulations in case driving speed with a trailer is limited to less than
100 km/h (62 mph).
l To prevent shocks from the overrun
brake, depress the brake pedal lightly at first and then more strongly.
Overheating
This will normally occur as a result of some
mechanical failure. If your vehicle should overheat, stop and check for a loose or bro-ken water pump/alternator drive belt, a
blocked radiator air intake or a low coolant level. If these items are satisfactory the over-
heating could be caused by a number of me-
chanical causes that would have to be
checked at a competent service centre.
CAUTIONl If the engine overheats, reference should be
made to “Engine overheating” section of
“For emergencies” prior to taking any cor- rective action.Parking
It is not recommended to park on a steep
slope while towing trailer.
If parking on a steep slope cannot be avoided,
the road grade should be less than 12% and
the following procedure performed. 1. Apply the parking brake firmly on the
vehicle and the trailer (if fitted).
2. Put the select position in “P”.
3. Place chocks or blocks at the tyres on
both vehicle and trailer.
4. Turn the front wheels into the shoulder
of the road to prevent the vehicle from moving.
Driving on long up hills while towing trailer
When the remaining quantity of the drive bat-tery is low, or high-speed driving on long up
hills at high temperature, the drive battery
output is restricted and the vehicle speed may be decreased.
The vehicle speed may be recovered if the
drive battery quantity is recovered.
Trailer towing
7-77OGGE14E5Starting and driving7
Page 268 of 442

NOTElIn charge mode, if the remaining quantity of
the drive battery can be increased in ad-
vance, it can prevent the vehicle speed from
decreasing on long up hills.
Refer to “Battery charge switch” on page 7-22.
Trailer towing
7-78OGGE14E5Starting and driving7
Page 280 of 442

NOTElIf the blower speed selection switch, air con-
ditioning switch, Mode switch, or air selec- tion switch is operated while the system is
operating in the AUTO mode, the activated
function overrides the corresponding func- tion of automatic control. All other functions
remain under automatic control.Operating the system in man-
ual mode
E00704200239
Blower speed and ventilator mode may be
controlled manually by setting the blower speed selection switch and the MODE switchto the desired positions.
To return to automatic operation, press the AUTO switch.
Demisting of the windscreen
and door windows
E00704302016
CAUTIONl For safety, make sure you have a clear view
through all the windows.For ordinary demisting
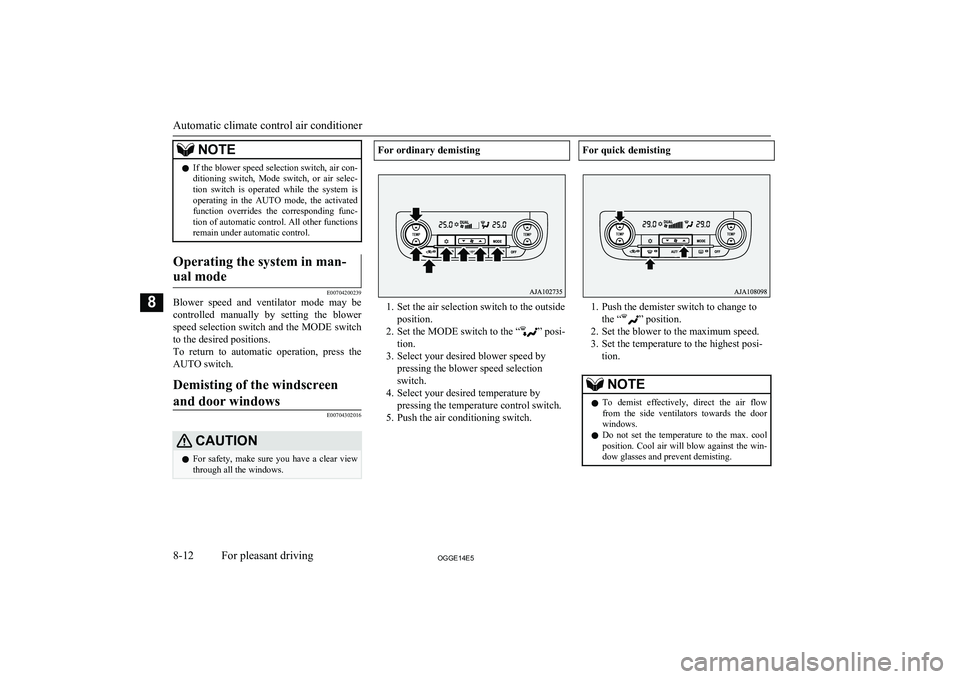
1. Set the air selection switch to the outside
position.
2. Set the MODE switch to the “
” posi-
tion.
3. Select your desired blower speed by pressing the blower speed selection
switch.
4. Select your desired temperature by pressing the temperature control switch.
5. Push the air conditioning switch.
For quick demisting
1. Push the demister switch to change to the “
” position.
2. Set the blower to the maximum speed.
3. Set the temperature to the highest posi- tion.
NOTEl To demist effectively, direct the air flow
from the side ventilators towards the door windows.
l Do not set the temperature to the max. cool
position. Cool air will blow against the win-
dow glasses and prevent demisting.
Automatic climate control air conditioner
8-12OGGE14E5For pleasant driving8
Page 345 of 442

NOTElDo not put luggage on the cover.
To change position
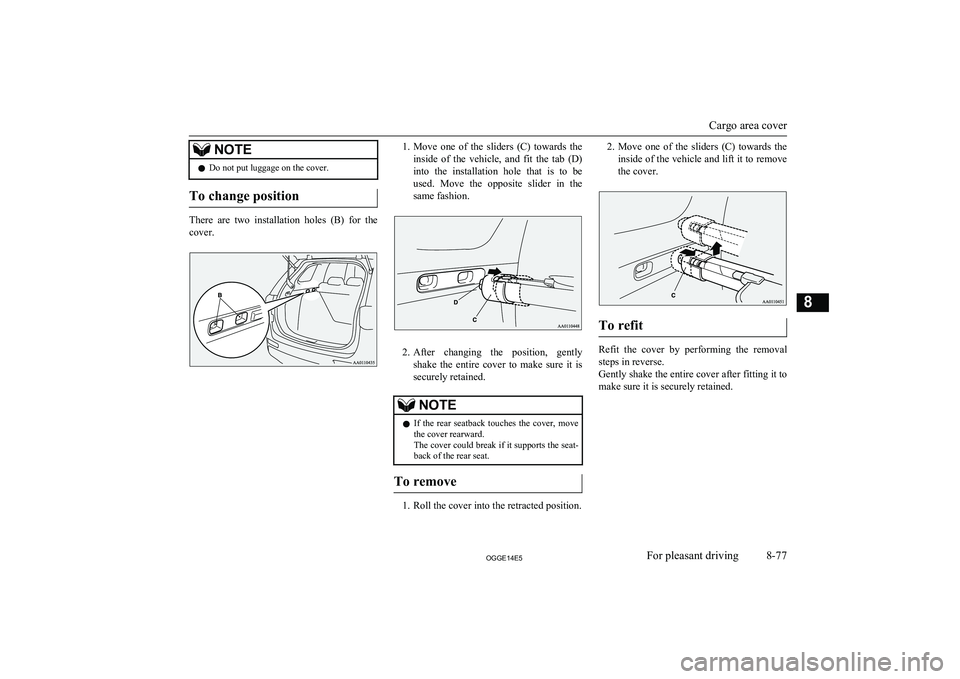
There are two installation holes (B) for the
cover.
1. Move one of the sliders (C) towards the
inside of the vehicle, and fit the tab (D) into the installation hole that is to be
used. Move the opposite slider in the
same fashion.
2. After changing the position, gently
shake the entire cover to make sure it is securely retained.
NOTEl If the rear seatback touches the cover, move
the cover rearward.
The cover could break if it supports the seat- back of the rear seat.
To remove
1. Roll the cover into the retracted position.
2. Move one of the sliders (C) towards the
inside of the vehicle and lift it to remove
the cover.
To refit
Refit the cover by performing the removal steps in reverse.
Gently shake the entire cover after fitting it to make sure it is securely retained.
Cargo area cover
8-77OGGE14E5For pleasant driving8
Page 347 of 442

If the vehicle breaks down.................................................................. 9-02Emergency starting............................................................................. 9-02
Engine overheating............................................................................. 9-04
Tools and jack..................................................................................... 9-06
Tyre repair kit......................................................................................9-07
How to change a tyre.......................................................................... 9-13
Towing................................................................................................ 9-18
Operation under adverse driving conditions....................................... 9-21For emergencies
OGGE14E59
Page 352 of 442

Tools and jackE00800902507
Storage
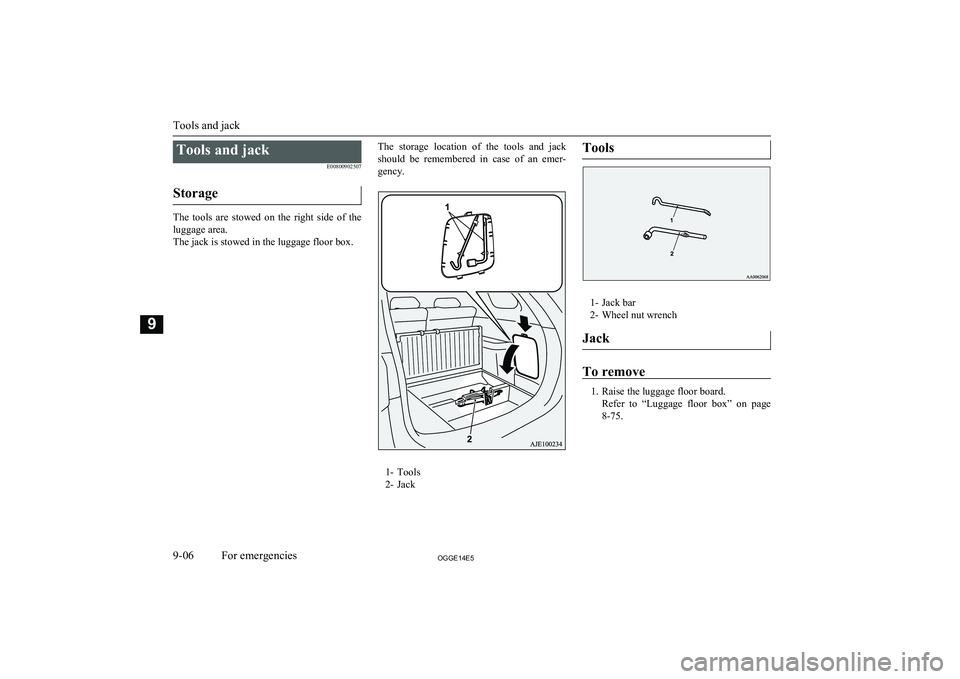
The tools are stowed on the right side of the luggage area.
The jack is stowed in the luggage floor box.
The storage location of the tools and jack
should be remembered in case of an emer-
gency.
1- Tools
2- Jack
Tools
1- Jack bar
2- Wheel nut wrench
Jack
To remove
1. Raise the luggage floor board. Refer to “Luggage floor box” on page
8-75.
Tools and jack
9-06OGGE14E5For emergencies9
Page 357 of 442

(Refer to “Tyre inflation pressures” on
page 11-10.)CAUTIONl The supplied compressor is designed only
for inflation of your vehicle tyres.
l The compressor is designed to run on a vehi-
cle’s 12 V power supply. Do not connect itto any other power source.CAUTIONl The compressor is not waterproof. If you use
it in rain, make sure water does not get on it.
l Any sand or dust sucked into the compressor
could make the compressor break down. Do
not place the compressor directly on any sandy or dusty surface when using it.
l Do not disassemble or modify the compres-
sor. Also, do not subject the air pressure
gauge to shock. It could malfunction.
15. Check and adjust the tyre pressure with
reference to the air pressure gauge on the
compressor. If you overinflate the tyre, release air by loosening the hose’s end
fitting.
If there is a gap between the tyre and
wheel because the tyre has moved in-
ward from the wheel rim, press the pe- riphery of the tyre towards the wheel to
close the gap before running the com- pressor. (With no gaps, the tyre pressure
will rise.)
CAUTIONl Be careful not to get your fingers trapped be-
tween the tyre and wheel as the tyre inflates.CAUTIONl The surface of the compressor will get hot
while the compressor is running. Do not
keep the compressor running continuously for more than 10 minutes. After using the compressor, wait for the compressor to cool
before using it again.
l If the compressor becomes sluggish or hot
while operating, it is overheating. Immedi- ately place the switch in the OFF positionand let the compressor cool down for at least30 minutes.NOTEl If the tyre pressure does not rise to the speci-
fied level within 10 minutes, the tyre may be
so severely damaged that the tyre sealant
cannot be used to effect an emergency re- pair. Please contact a MITSUBISHI
MOTORS Authorized Service Point or an-
other specialist in this event.
16. Turn OFF the compressor switch, then
pull the power cord plug out of the sock- et.
Tyre repair kit
9-11OGGE14E5For emergencies9