2014 MITSUBISHI LANCER SPORTBACK turn signal
[x] Cancel search: turn signalPage 97 of 422
Free-hand Advanced Security Transmitter (F.A.S.T.-key) (if so equipped) 5-30 Features and controls
5
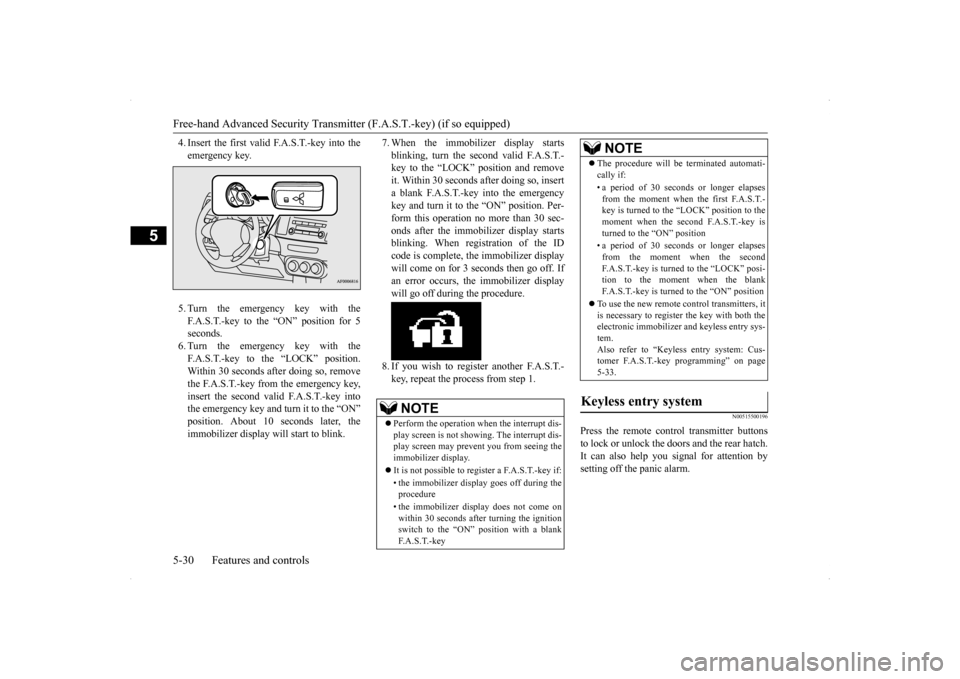
4. Insert the first valid F.A.S.T.-key into the emergency key. 5. Turn the emergency key with the F.A.S.T.-key to the “ON” position for 5 seconds.6. Turn the emergency key with the F.A.S.T.-key to the “LOCK” position. Within 30 seconds after doing so, removethe F.A.S.T.-key from the emergency key,insert the second valid F.A.S.T.-key into the emergency key and turn it to the “ON” position. About 10
seconds later, the
immobilizer display will start to blink.
7. When the immobilizer display starts blinking, turn the second valid F.A.S.T.- key to the “LOCK” position and remove it. Within 30 seconds after doing so, inserta blank F.A.S.T.-key into the emergency key and turn it to the “ON” position. Per- form this operation no more than 30 sec-onds after the immobilizer display starts blinking. When registration of the ID code is complete, the immobilizer displaywill come on for 3 seconds then go off. Ifan error occurs, the immobilizer display will go off during the procedure. 8. If you wish to register another F.A.S.T.- key, repeat the process from step 1.
N00515500196
Press the remote control transmitter buttons to lock or unlock the doors and the rear hatch. It can also help you signal for attention by setting off the panic alarm.
NOTE
Perform the operation when the interrupt dis- play screen is not showing. The interrupt dis- play screen may prevent you from seeing the immobilizer display. It is not possible to regi
ster a F.A.S.T.-key if:
• the immobilizer display goes off during the procedure • the immobilizer display does not come on within 30 seconds after turning the ignition switch to the “ON” position with a blankF. A . S . T. - k e y
The procedure will be terminated automati- cally if: • a period of 30 seconds or longer elapses from the moment when the first F.A.S.T.-key is turned to the “LOCK” position to the moment when the second F.A.S.T.-key is turned to the “ON” position • a period of 30 seconds or longer elapses from the moment when the secondF.A.S.T.-key is turned to the “LOCK” posi- tion to the moment when the blank F.A.S.T.-key is turned to the “ON” position
To use the new remote control transmitters, it is necessary to register the key with both theelectronic immobilizer and keyless entry sys- tem. Also refer to “Keyless entry system: Cus-tomer F.A.S.T.-key programming” on page 5-33.
Keyless entry system
NOTE
BK0200700US.bo
ok 30 ページ 2013年2月15日 金曜日 午後12時17分
Page 98 of 422
Free-hand Advanced Security Transmit
ter (F.A.S.T.-key) (if so equipped)
Features and controls 5-31
5
N00544200049
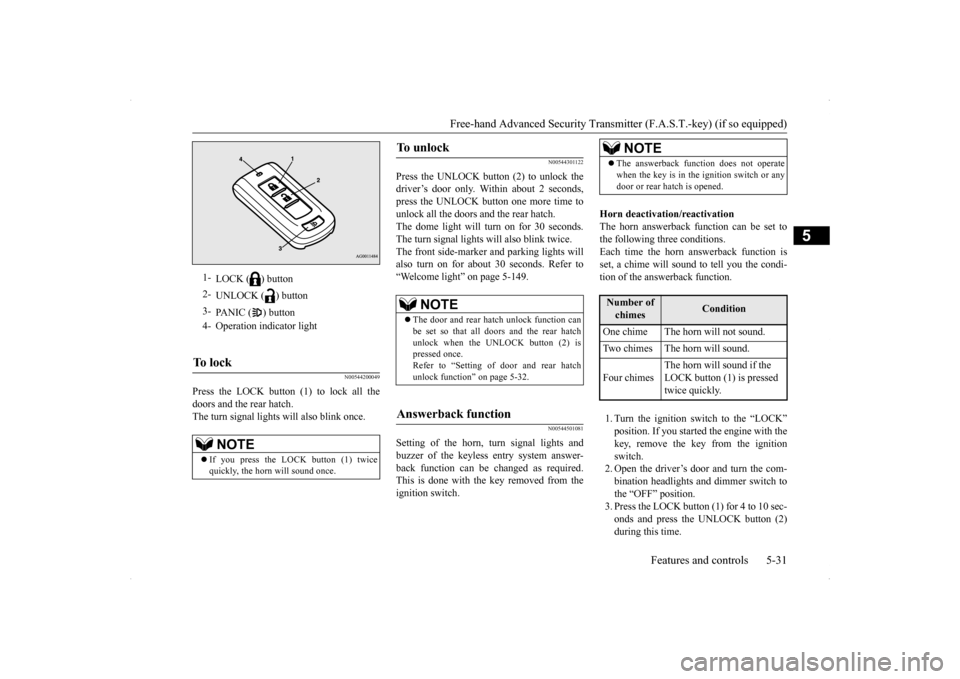
Press the LOCK button (1) to lock all the doors and the rear hatch.The turn signal lights will also blink once.
N00544301122
Press the UNLOCK button (2) to unlock thedriver’s door only. Within about 2 seconds,press the UNLOCK button one more time to unlock all the doors and the rear hatch. The dome light will turn on for 30 seconds.The turn signal lights will also blink twice. The front side-marker and parking lights will also turn on for about 30 seconds. Refer to“Welcome light” on page 5-149.
N00544501081
Setting of the horn, turn signal lights andbuzzer of the keyless entry system answer- back function can be changed as required. This is done with the key removed from theignition switch.
Horn deactivation/reactivation The horn answerback function can be set tothe following three conditions. Each time the horn answerback function is set, a chime will sound to tell you the condi-tion of the answerback function. 1. Turn the ignition switch to the “LOCK” position. If you started the engine with thekey, remove the key from the ignition switch. 2. Open the driver’s door and turn the com-bination headlights and dimmer switch to the “OFF” position. 3. Press the LOCK button (1) for 4 to 10 sec-onds and press the UNLOCK button (2) during this time.
1-
LOCK ( ) button
2-
UNLOCK ( ) button
3-
PANIC ( ) button
4- Operation indicator lightTo l o c k
NOTE
If you press the LOCK button (1) twice quickly, the horn will sound once.
To u n l o c k
NOTE
The door and rear hatch unlock function can be set so that all doors and the rear hatch unlock when the UNLOCK button (2) ispressed once. Refer to “Setting of door and rear hatch unlock function” on page 5-32.
Answerback function
NOTE
The answerback function does not operate when the key is in the ignition switch or any door or rear hatch is opened.Number of chimes
Condition
One chime The horn will not sound. Two chimes The horn will sound. Four chimes
The horn will sound if the LOCK button (1) is pressed twice quickly.
BK0200700US.bo
ok 31 ページ 2013年2月15日 金曜日 午後12時17分
Page 99 of 422
Free-hand Advanced Security Transmitter (F.A.S.T.-key) (if so equipped) 5-32 Features and controls
5
4. Release in sequence the UNLOCK and LOCK buttons within 10 seconds of pressing the UNLOCK button in step 3.
Changing the setting of the turn signal lights answerback functionThe turn signal lights answerback function can be set to the following seven conditions. Each time the turn signal lights answerbackfunction is set, a chime will sound to tell you the condition of the answerback function. 1. Turn the ignition switch to the “LOCK” position. If you started the engine with the key, remove the key from the ignition switch.2. Open the driver’s door and turn the com- bination headlights and dimmer switch to the “OFF” position.
3. Press the UNLOCK button (2) for 4 to 10 seconds and press the LOCK button (1) during this time. 4. Release in sequence the UNLOCK andLOCK buttons within 10 seconds of pressing the LOCK button in step 3.
The buzzer answerback function can be turned ON or OFF as required.
N00544601125
The door and rear hatch unlock function canbe set to the following two conditions. Each time the door and rear hatch unlock function is set, a chime will sound to tell youthe condition of the door and rear hatch unlock function.
1. Turn the ignition switch to the “LOCK” position. If you started the engine with the key, remove the key from the ignition switch.2. Open the driver’s door and turn the com- bination headlights and dimmer switch to the “OFF” position.3. Press the LOCK button (1) for 4 to 10 sec- onds and press the UNLOCK button (2) during this time.4. Release in sequence the LOCK andUNLOCK buttons within 10 seconds of pressing the LOCK button in step 3.
N00544700028
If you are near your vehicle and feel threat-ened, you can activate the alarm to call atten- tion as follows: 1. Press the PANIC button (3) for more than 1 second. 2. The headlights will blink on and off and the horn will sound intermittently forabout 3 minutes. 3. To turn off the alarm, press any button on the remote control transmitter.
Number of chimes
Condition
To l o c k
To u n l o c k
One chime One flash Two flashesTwo chimes One flash No flashThree chimes No flash Two flashesFour chimes Two flashes One flashFive chimes No flash One flashSix chimes Two flashes No flashSeven chimes No flash No flash
Buzzer deactivation/reactivationSetting of door and rear hatch unlock function
Number of chimes
Condition
One chime
All doors and rear hatch unlock
Two chimes Driver’s door unlock only
Using the panic alarm
BK0200700US.bo
ok 32 ページ 2013年2月15日 金曜日 午後12時17分
Page 189 of 422
Multi-information display 5-122 Features and controls
5
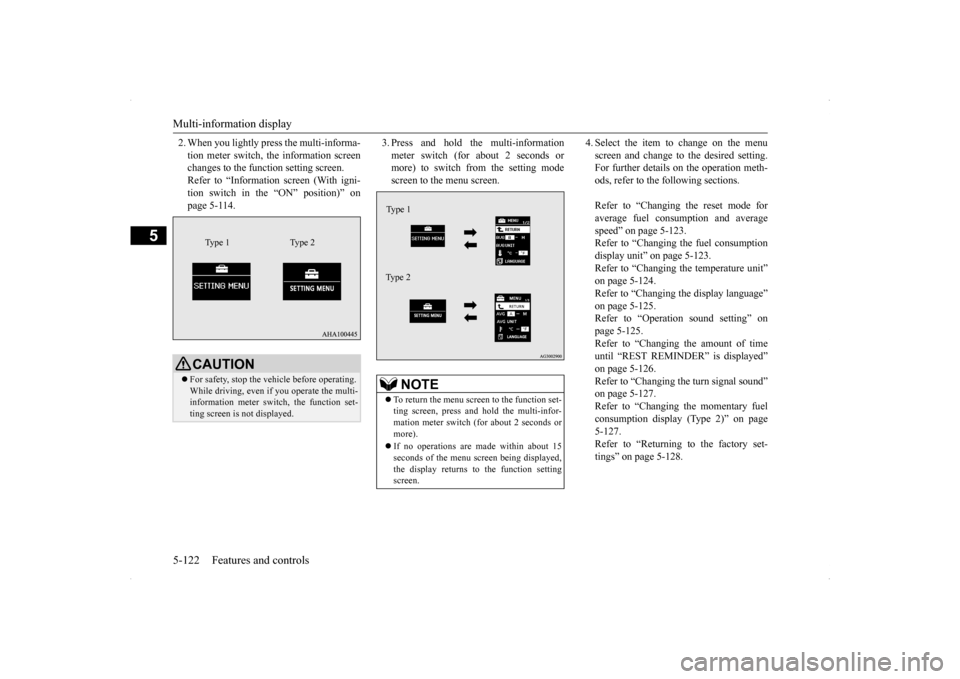
2. When you lightly press the multi-informa- tion meter switch, the information screen changes to the function setting screen. Refer to “Information screen (With igni-tion switch in the “ON” position)” on page 5-114.
3. Press and hold the multi-information meter switch (for about 2 seconds or more) to switch from the setting mode screen to the menu screen.
4. Select the item to change on the menu screen and change to the desired setting. For further details on the operation meth- ods, refer to the following sections. Refer to “Changing the reset mode for average fuel consumption and averagespeed” on page 5-123. Refer to “Changing the fuel consumption display unit” on page 5-123.Refer to “Changing the temperature unit”on page 5-124. Refer to “Changing the display language” on page 5-125.Refer to “Operation sound setting” on page 5-125. Refer to “Changing the amount of timeuntil “REST REMINDER” is displayed” on page 5-126. Refer to “Changing the turn signal sound”on page 5-127. Refer to “Changing the momentary fuel consumption display (Type 2)” on page5-127. Refer to “Returning to the factory set- tings” on page 5-128.
CAUTION For safety, stop the vehicle before operating. While driving, even if you operate the multi- information meter switch, the function set-ting screen is not displayed.
Type 1 Type 2
NOTE
To return the menu screen to the function set- ting screen, press and hold the multi-infor- mation meter switch (for about 2 seconds or more). If no operations are made within about 15 seconds of the menu screen being displayed,the display returns to the function setting screen.Ty p e 1 Type 2
BK0200700US.book
122 ページ 2013年2月15日 金曜日 午後12時17分
Page 194 of 422
Multi-information display
Features and controls 5-127
5
4. Lightly press the multi-information meter switch to select the amount of time until the display appears. 5. Press and hold the multi-informationmeter switch (for about 2 seconds or more) to change the setting to the selected time.
N00563500070
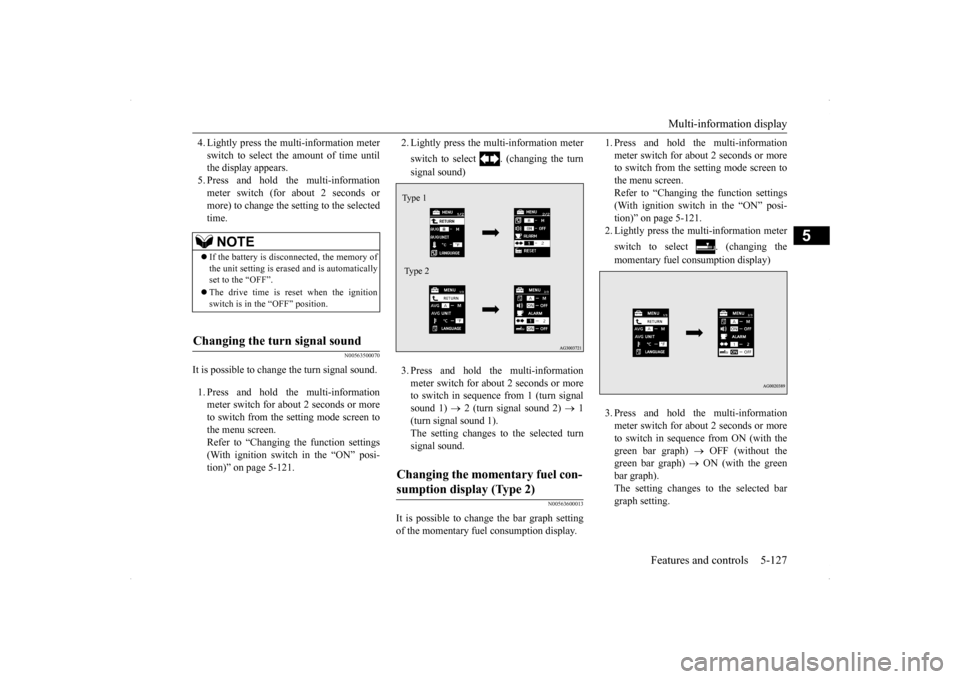
It is possible to change the turn signal sound. 1. Press and hold the multi-information meter switch for about 2 seconds or more to switch from the setting mode screen tothe menu screen. Refer to “Changing the function settings (With ignition switch in the “ON” posi-tion)” on page 5-121.
2. Lightly press the multi-information meter switch to select . (changing the turn signal sound) 3. Press and hold the multi-information meter switch for about 2 seconds or more to switch in sequence from 1 (turn signal sound 1)
2 (turn signal sound 2)
1
(turn signal sound 1). The setting changes to the selected turn signal sound.
N00563600013
It is possible to change the bar graph setting of the momentary fuel consumption display.
1. Press and hold the multi-information meter switch for about 2 seconds or more to switch from the setting mode screen to the menu screen.Refer to “Changing the function settings (With ignition switch in the “ON” posi- tion)” on page 5-121.2. Lightly press the multi-information meter switch to select . (changing the momentary fuel consumption display) 3. Press and hold the multi-information meter switch for about 2 seconds or more to switch in sequence from ON (with thegreen bar graph)
OFF (without the
green bar graph)
ON (with the green
bar graph).The setting changes to the selected bargraph setting.
NOTE
If the battery is disconnected, the memory of the unit setting is erased and is automatically set to the “OFF”. The drive time is reset when the ignition switch is in the “OFF” position.
Changing the turn signal sound
Changing the momentary fuel con- sumption display (Type 2) Ty p e 1 Type 2
BK0200700US.book
127 ページ 2013年2月15日 金曜日 午後12時17分
Page 195 of 422
Multi-information display 5-128 Features and controls
5
N00557600180
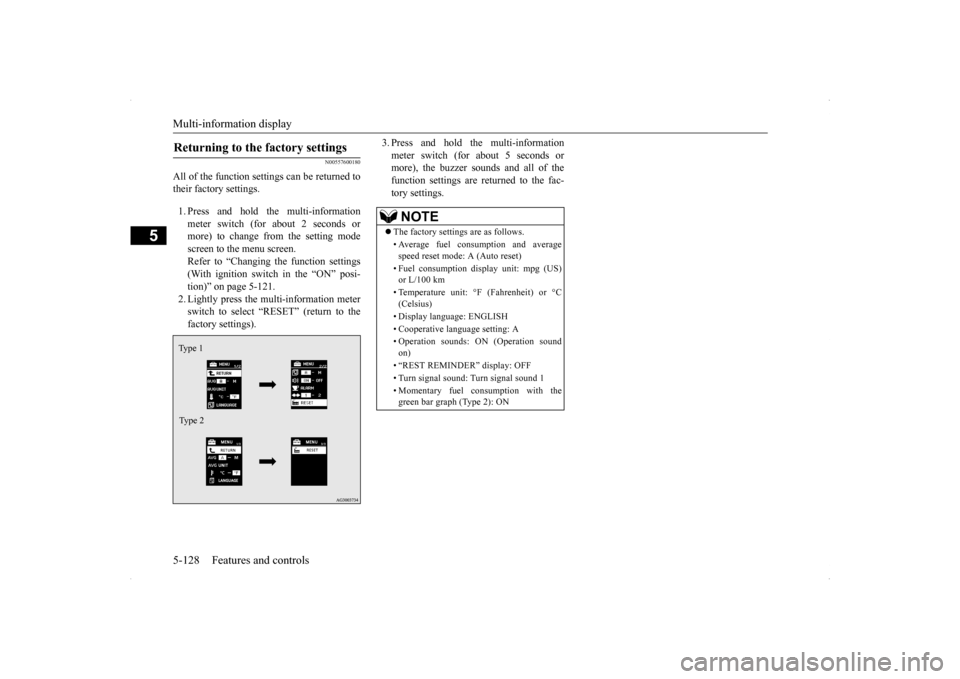
All of the function settings can be returned to their factory settings. 1. Press and hold the multi-information meter switch (for about 2 seconds or more) to change from the setting mode screen to the menu screen.Refer to “Changing the function settings (With ignition switch in the “ON” posi- tion)” on page 5-121.2. Lightly press the multi-information meterswitch to select “RESET” (return to the factory settings).
3. Press and hold the multi-information meter switch (for about 5 seconds or more), the buzzer sounds and all of the function settings are returned to the fac-tory settings.
Returning to the factory settings Ty p e 1 Type 2
NOTE
The factory settings are as follows. • Average fuel consumption and average speed reset mode: A (Auto reset) • Fuel consumption display unit: mpg (US) or L/100 km • Temperature unit: °F (Fahrenheit) or °C (Celsius) • Display language: ENGLISH • Cooperative language setting: A• Operation sounds: ON (Operation sound on) • “REST REMINDER” display: OFF • Turn signal sound: Turn signal sound 1 • Momentary fuel consumption with the green bar graph (Type 2): ON
BK0200700US.book
128 ページ 2013年2月15日 金曜日 午後12時17分
Page 196 of 422

Indicator light, warning light, an
d information screen display list Features and controls 5-129
5
N00557700035 N00557801277
Indicator light, warning light, and information screen display list Indicator and warning light list Type A Type B1- Position indicator
P.5-141
2- High beam indicator
P.5-141
3- Charging system warning light
P.5-143
4- Turn signal indicator/hazard warning
light
P.5-141
5- Front fog light indicator (if so
equipped)
P.5-141
6- Anti-lock braking system warning light
P.5-89
7- Tire pressure monitoring system warn-
ing light
P.5-101
8- Brake warning light
P.5-142
9- Cruise control indicator
P.5-95
10- Seat belt reminder/warning light
P. 4 - 1 2
11- Supplemental Restraint System (SRS)
warning light P.4-29
12- ECO mode indicator (if so equipped)
P. 5 - 1 1 9
13- Engine malfunction indicator (“SER-
VICE ENGINE SOON” or “Checkengine light”)
P.5-142
14- Active stability control (ASC) OFF
indicator (if so equipped)
P.5-93
15- Active stability control (ASC) indicator
P. 5 - 9 3
16- Information screen display list
P.5-130
BK0200700US.book
129 ページ 2013年2月15日 金曜日 午後12時17分
Page 208 of 422
Indicators
Features and controls 5-141
5
N00519900127 N00520000229
The arrows will flash in
time with the corre-
sponding exterior turn signals when the turn signal lever is used. Both arrows will flas
h when the hazard warn-
ing flasher switch is pressed.
N00520100086
A blue light comes on when the headlightsare on high beam.
N00520200218
This indicator comes on while the front foglights are on.
N00551300026
This indicator light illuminates while theposition lights are on.
Screen type 1
Screen type 2
Do this
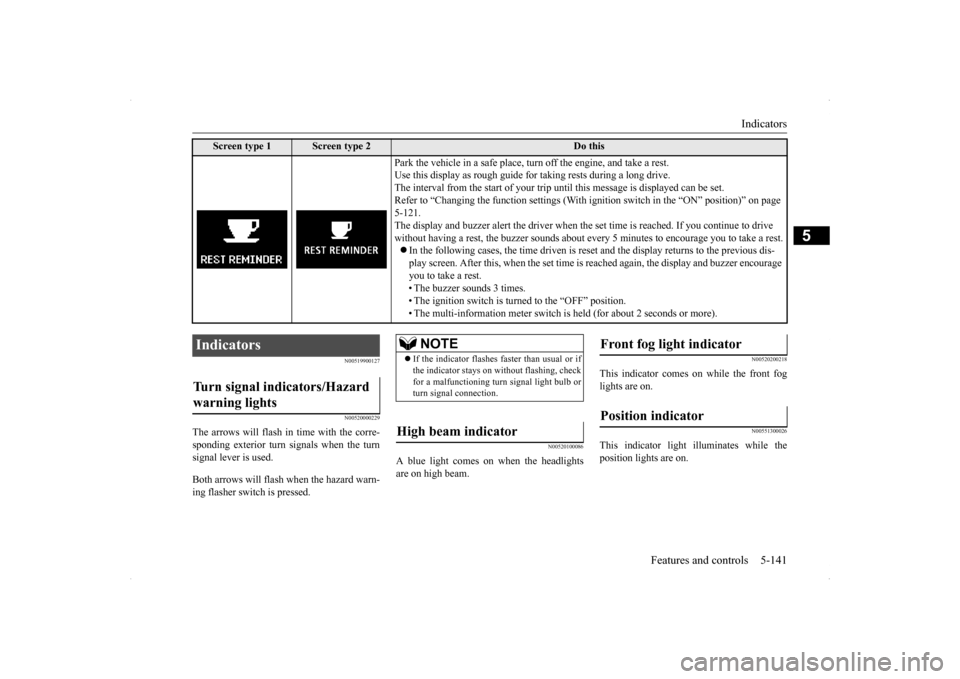
Park the vehicle in a safe place, turn off the engine, and take a rest. Use this display as rough guide for taking rests during a long drive.The interval from the start of your trip until this message is displayed can be set.Refer to “Changing the function settings (With ig
nition switch in the “ON” position)” on page
5-121. The display and buzzer alert the driver when the
set time is reached. If you continue to drive
without having a rest, the buzzer sounds about every 5 minutes to encourage you to take a rest. In the following cases, the time driven is rese
t and the display returns to the previous dis-
play screen. After this, when the set time is
reached again, the display and buzzer encourage
you to take a rest. • The buzzer sounds 3 times. • The ignition switch is turned to the “OFF” position.• The multi-information meter switch is held (for about 2 seconds or more).
Indicators Turn signal indicators/Hazard warning lights
NOTE
If the indicator flashes faster than usual or if the indicator stays on without flashing, check for a malfunctioning turn signal light bulb or turn signal connection.
High beam indicator
Front fog light indicator Position indicator
BK0200700US.book
141 ページ 2013年2月15日 金曜日 午後12時17分