2014 MERCEDES-BENZ SLK ROADSTER reset
[x] Cancel search: resetPage 174 of 357
Deactivating cruise control
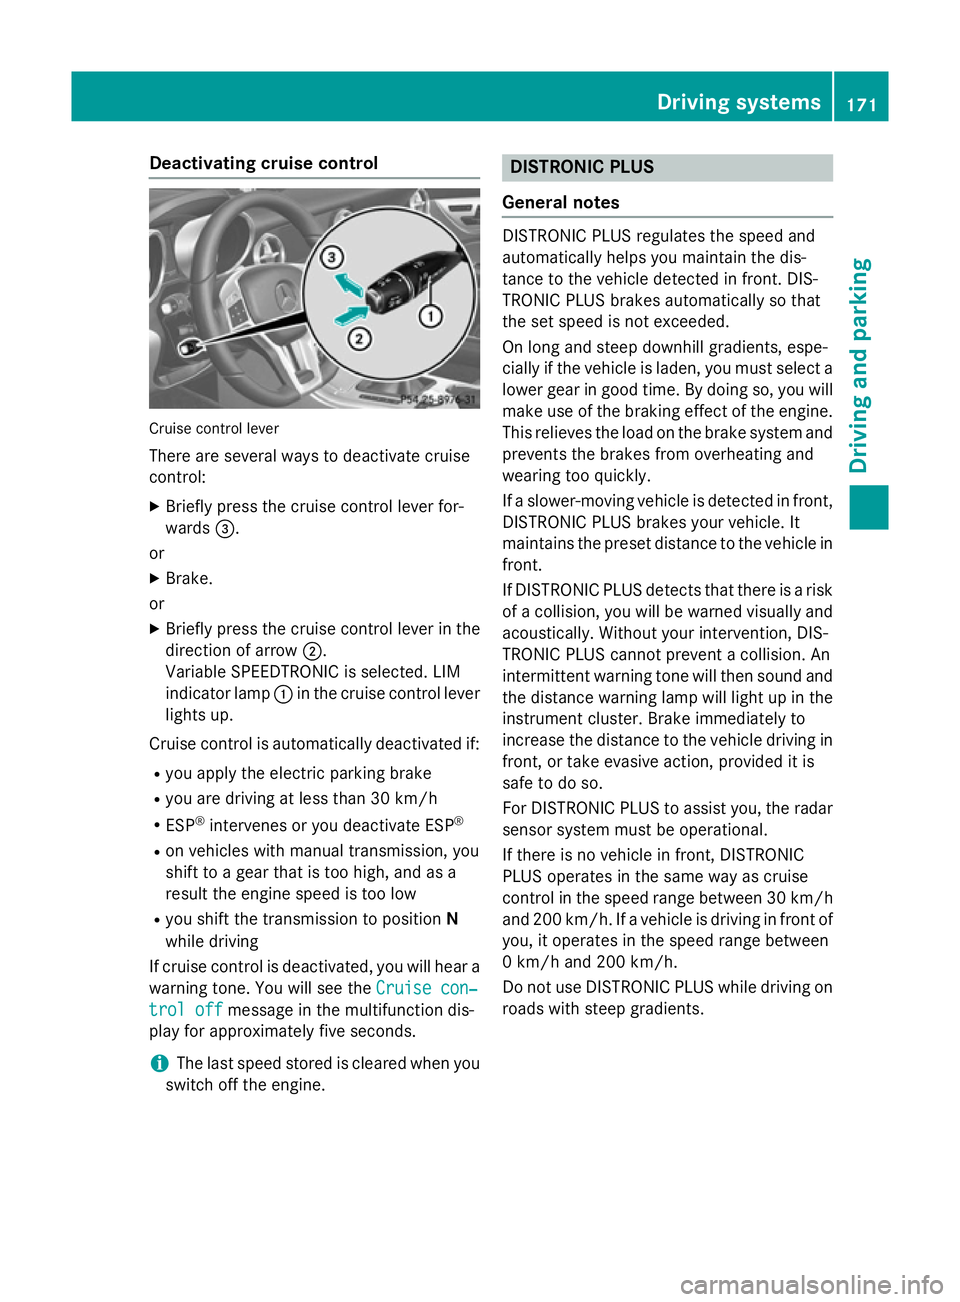
Cruise control lever
There are several ways to deactivate cruise
control:
X Briefly press the cruise control lever for-
wards =.
or
X Brake.
or
X Briefly press the cruise control lever in the
direction of arrow ;.
Variable SPEEDTRONIC is selected. LIM
indicator lamp :in the cruise control lever
lights up.
Cruise control is automatically deactivated if:
R you apply the electric parking brake
R you are driving at less than 30 km/h
R ESP ®
intervenes or you deactivate ESP ®
R on vehicles with manual transmission, you
shift to a gear that is too high, and as a
result the engine speed is too low
R you shift the transmission to position N
while driving
If cruise control is deactivated, you will hear a warning tone. You will see the Cruise con‐
Cruise con‐
trol off trol off message in the multifunction dis-
play for approximately five seconds.
i The last speed stored is cleared when you
switch off the engine. DISTRONIC PLUS
General notes DISTRONIC PLUS regulates the speed and
automatically helps you maintain the dis-
tance to the vehicle detected in front. DIS-
TRONIC PLUS brakes automatically so that
the set speed is not exceeded.
On long and steep downhill gradients, espe-
cially if the vehicle is laden, you must select a lower gear in good time. By doing so, you will make use of the braking effect of the engine.
This relieves the load on the brake system and
prevents the brakes from overheating and
wearing too quickly.
If a slower-moving vehicle is detected in front, DISTRONIC PLUS brakes your vehicle. It
maintains the preset distance to the vehicle infront.
If DISTRONIC PLUS detects that there is a risk
of a collision, you will be warned visually and acoustically. Without your intervention, DIS-
TRONIC PLUS cannot prevent a collision. An
intermittent warning tone will then sound and
the distance warning lamp will light up in the instrument cluster. Brake immediately to
increase the distance to the vehicle driving in
front, or take evasive action, provided it is
safe to do so.
For DISTRONIC PLUS to assist you, the radar
sensor system must be operational.
If there is no vehicle in front, DISTRONIC
PLUS operates in the same way as cruise
control in the speed range between 30 km/h and 200 km/h. If a vehicle is driving in front ofyou, it operates in the speed range between
0 km/h and 200 km/h.
Do not use DISTRONIC PLUS while driving on roads with steep gradients. Driving syste
ms
171Driving an d parking Z
Page 177 of 357
Activating
X Briefly pull the cruise control lever towards
you ?, or press it up :or down A.
DISTRONIC PLUS is activated.
X Keep the cruise control lever pressed up :
or down Auntil the desired speed has
been set.
X Remove your foot from the accelerator
pedal.
Your vehicle adapts its speed to that of the vehicle in front, but only up to the desired
stored speed.
If the vehicle in front has been detected and is
shown in the multifunction display, you can
also activate DISTRONIC PLUS when driving
at speeds below 30 km/h. If the vehicle in
front is no longer detected and displayed, for
example because it has changed lanes, DIS-
TRONIC PLUS is deactivated. You will hear a
warning tone if this is the case.
i If you do not fully release the accelerator
pedal, the DISTRONIC PLUS inactive
DISTRONIC PLUS inactive
message appears in the multifunction dis-
play. The set distance to a slower-moving
vehicle in front will then not be maintained. You will be driving at the speed you deter-
mine by the position of the accelerator
pedal.
Pulling away and driving
DISTRONIC PLUS is deactivated when you
depress the brake, except when the vehicle is
stationary.
X If the vehicle in front pulls away: remove
your foot from the brake pedal.
X Briefly pull the cruise control lever towards
you ?.
or
X Accelerate briefly.
Your vehicle pulls away and adapts its
speed to that of the vehicle in front.
If there is no vehicle in front, DISTRONIC
PLUS operates in the same way as cruise
control. If DISTRONIC PLUS detects that the vehicle in
front has slowed down, it brakes your vehicle.
It maintains the preset distance to the vehicle
in front.
If DISTRONIC PLUS detects that there is a risk of a collision, you will be warned visually and
acoustically. Without your intervention, DIS-
TRONIC PLUS cannot prevent a collision. An
intermittent warning tone will then sound and the distance warning lamp will light up in theinstrument cluster. Brake immediately to
increase the distance to the vehicle driving in
front, or take evasive action, provided it is
safe to do so.
If DISTRONIC PLUS detects a faster-moving
vehicle in front, it increases the driving speed.
However, the vehicle is only accelerated up to the speed you have stored.
Changing lanes
If you wish to move into the overtaking lane (in countries where traffic drives on the right, thepassing lane is the left-hand lane), DIS-
TRONIC PLUS assists you if:
R you are driving faster than 60 km/h
R DISTRONIC PLUS is maintaining the dis-
tance to a vehicle in front
R you have switched on the corresponding
turn signal
R DISTRONIC PLUS does not detect a danger
of collision
If these conditions are met, your vehicle is
accelerated. Acceleration will be interrupted
if changing lanes takes too long or if the dis-
tance between your vehicle and the vehicle in front becomes too small.
Vehicles with COMAND Online
i The following function is not operational
in all countries. 174
Driving systemsDriving and pa
rking
Page 195 of 357
still detects increasing lapses in concentra-
tion, you will be warned again after
15 minutes at the earliest.
ATTENTION ASSIST is reset and starts
assessing your tiredness again when you con- tinue your journey if:
R you switch off the engine
R you take off your seat belt and open the
driver's door, e.g. for a change of drivers or to take a break
Warning and display messages in the
colour multifunction display X
Activate ATTENTION ASSIST using the on-
board computer (Y page 212).
If ATTENTION ASSIST is active, you will be
warned no sooner than 20 minutes after
your journey has begun. You then hear an
intermittent warning tone twice and the
Attention Assist: Take a break!
Attention Assist: Take a break!
message appears in the multifunction dis-
play.
X If necessary, take a break.
X Press the aor% button to confirm
the message.
On long journeys, take regular breaks in good time to allow yourself to rest properly. If you
do not take a break and ATTENTION ASSIST
still detects increasing lapses in concentra-
tion, you will be warned again after
15 minutes at the earliest.
ATTENTION ASSIST is reset and starts
assessing your tiredness again when you con- tinue your journey if:
R you switch off the engine
R you take off your seat belt and open the
driver's door, e.g. for a change of drivers or to take a break
When ATTENTION ASSIST is deactivated, the é symbol appears in the multifunction
display in the assistance graphic display. Speed Limit Assist
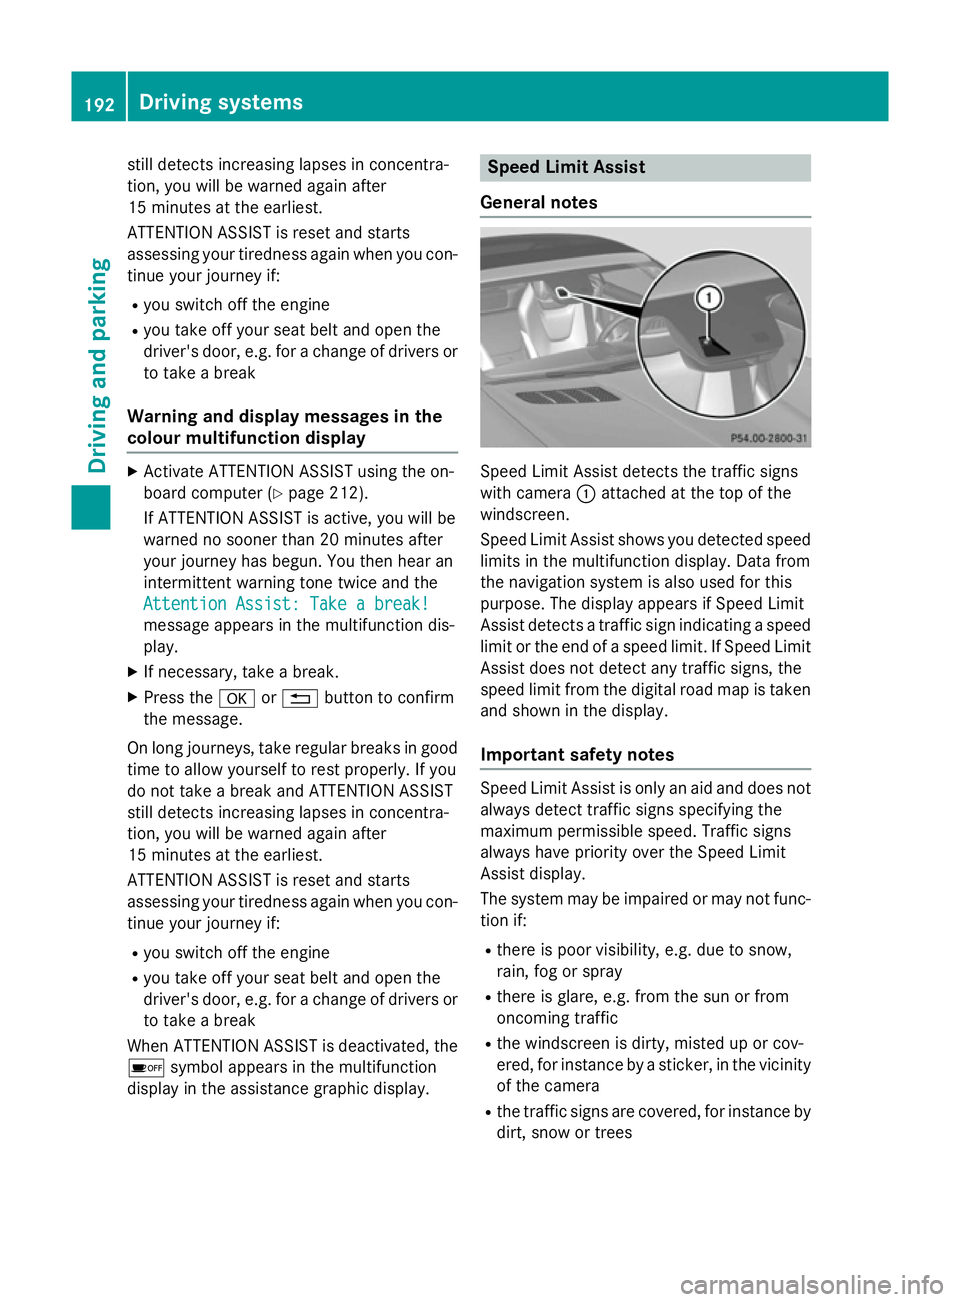
General notes Speed Limit Assist detects the traffic signs
with camera :attached at the top of the
windscreen.
Speed Limit Assist shows you detected speed limits in the multifunction display. Data from
the navigation system is also used for this
purpose. The display appears if Speed Limit
Assist detects a traffic sign indicating a speed
limit or the end of a speed limit. If Speed Limit
Assist does not detect any traffic signs, the
speed limit from the digital road map is taken
and shown in the display.
Important safety notes Speed Limit Assist is only an aid and does not
always detect traffic signs specifying the
maximum permissible speed. Traffic signs
always have priority over the Speed Limit
Assist display.
The system may be impaired or may not func- tion if:
R there is poor visibility, e.g. due to snow,
rain, fog or spray
R there is glare, e.g. from the sun or from
oncoming traffic
R the windscreen is dirty, misted up or cov-
ered, for instance by a sticker, in the vicinity
of the camera
R the traffic signs are covered, for instance by
dirt, snow or trees 192
Driving systemsDriving and parking
Page 207 of 357
Trip menu
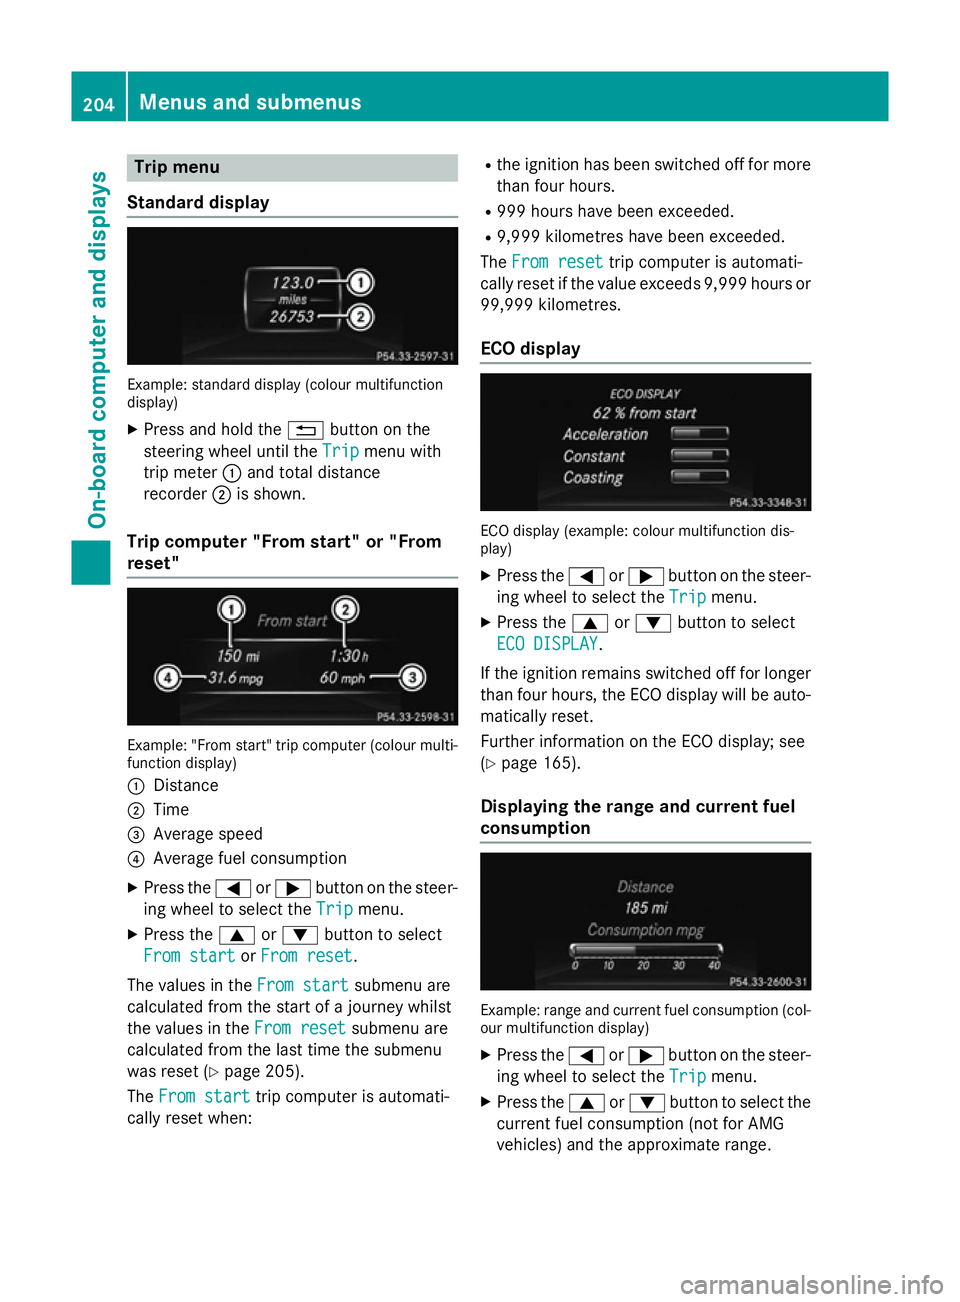
Standard display Example: standard display (colour multifunction
display)
X Press and hold the %button on the
steering wheel until the Trip
Trip menu with
trip meter :and total distance
recorder ;is shown.
Trip computer "From start" or "From
reset" Example: "From start" trip computer (colour multi-
function display)
: Distance
; Time
= Average speed
? Average fuel consumption
X Press the =or; button on the steer-
ing wheel to select the Trip
Trip menu.
X Press the 9or: button to select
From start From start orFrom reset
From reset.
The values in the From start
From startsubmenu are
calculated from the start of a journey whilst
the values in the From reset
From reset submenu are
calculated from the last time the submenu
was reset (Y page 205).
The From start From start trip computer is automati-
cally reset when: R
the ignition has been switched off for more
than four hours.
R 999 hours have been exceeded.
R 9,999 kilometres have been exceeded.
The From reset
From reset trip computer is automati-
cally reset if the value exceeds 9,999 hours or 99,999 kilometres.
ECO display ECO display (example: colour multifunction dis-
play)
X Press the =or; button on the steer-
ing wheel to select the Trip Tripmenu.
X Press the 9or: button to select
ECO DISPLAY
ECO DISPLAY.
If the ignition remains switched off for longer
than four hours, the ECO display will be auto- matically reset.
Further information on the ECO display; see
(Y page 165).
Displaying the range and current fuel
consumption Example: range and current fuel consumption (col-
our multifunction display)
X Press the =or; button on the steer-
ing wheel to select the Trip Tripmenu.
X Press the 9or: button to select the
current fuel consumption (not for AMG
vehicles) and the approximate range. 204
Menus and submenusOn-board computer and displays
Page 208 of 357
The approximate range that can be covered is
calculated according to your current driving
style and the amount of fuel in the tank. If
there is only a small amount of fuel left in the
fuel tank, the display shows a vehicle being
refuelled Cinstead of the range.
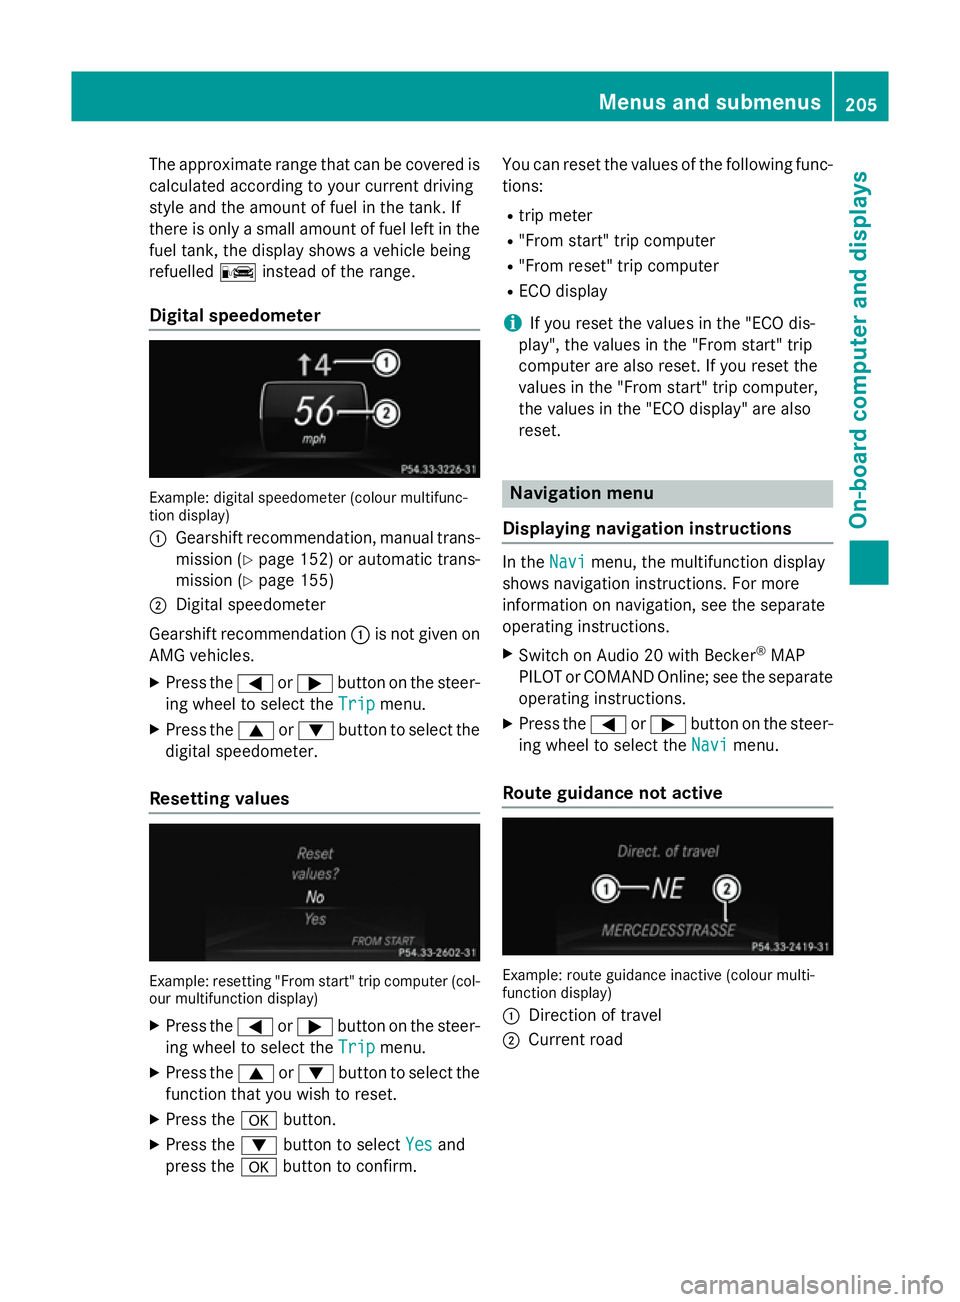
Digital speedometer Example: digital speedometer (colour multifunc-
tion display)
: Gearshift recommendation, manual trans-
mission (Y page 152) or automatic trans-
mission (Y page 155)
; Digital speedometer
Gearshift recommendation :is not given on
AMG vehicles.
X Press the =or; button on the steer-
ing wheel to select the Trip
Trip menu.
X Press the 9or: button to select the
digital speedometer.
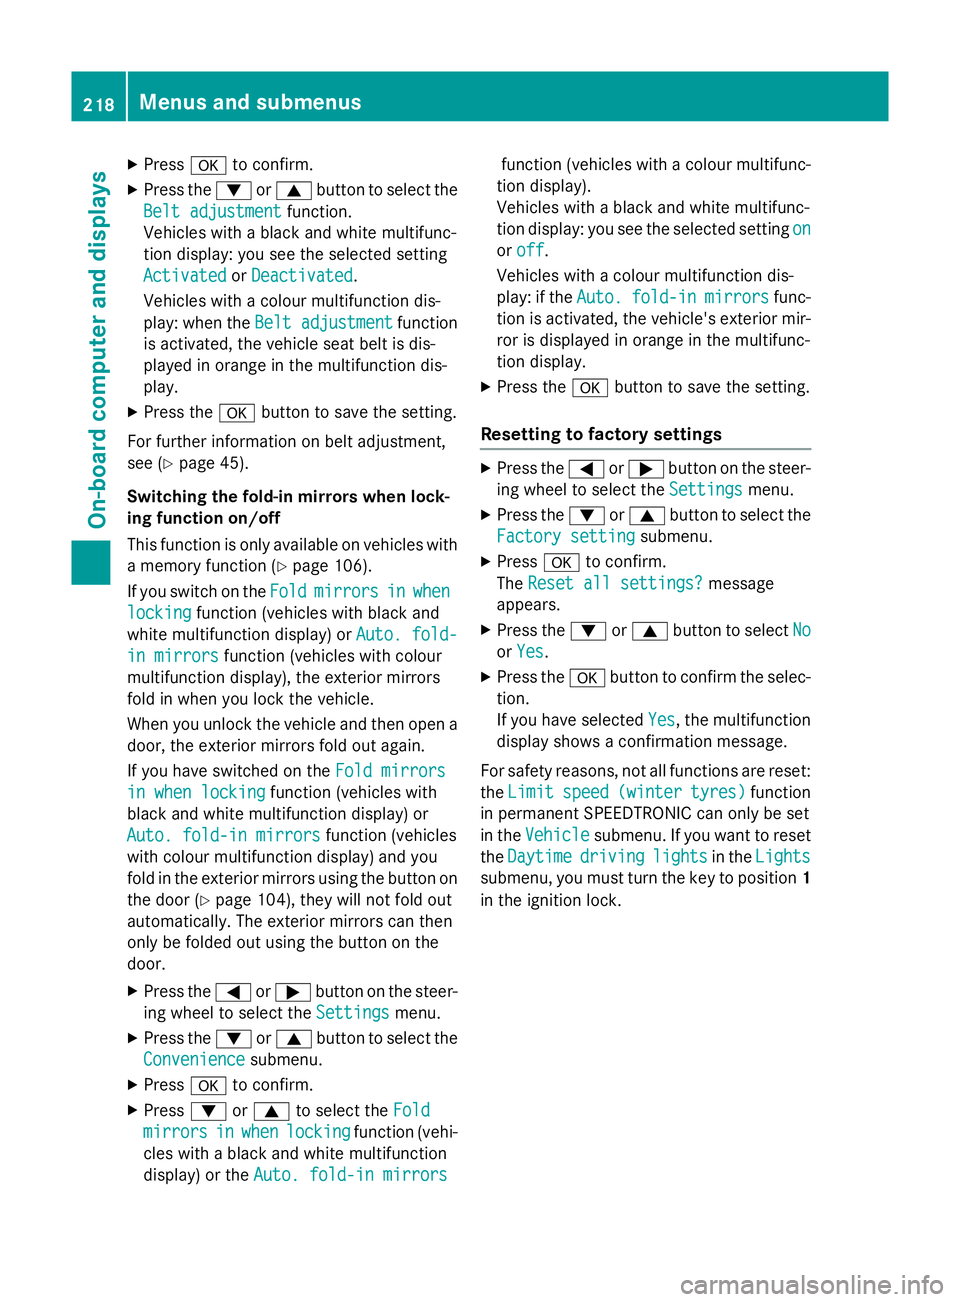
Resetting values Example: resetting "From start" trip computer (col-
our multifunction display)
X Press the =or; button on the steer-
ing wheel to select the Trip
Trip menu.
X Press the 9or: button to select the
function that you wish to reset.
X Press the abutton.
X Press the :button to select Yes
Yes and
press the abutton to confirm. You can reset the values of the following func-
tions:
R trip meter
R "From start" trip computer
R "From reset" trip computer
R ECO display
i If you reset the values in the "ECO dis-
play", the values in the "From start" trip
computer are also reset. If you reset the
values in the "From start" trip computer,
the values in the "ECO display" are also
reset. Navigation menu
Displaying navigation instructions In the
Navi Navimenu, the multifunction display
shows navigation instructions. For more
information on navigation, see the separate
operating instructions.
X Switch on Audio 20 with Becker ®
MAP
PILOT or COMAND Online; see the separate
operating instructions.
X Press the =or; button on the steer-
ing wheel to select the Navi Navimenu.
Route guidance not active Example: route guidance inactive (colour multi-
function display)
:
Direction of travel
; Current road Menus and submenus
205On-board computer and displays Z
Page 221 of 357
X
Press ato confirm.
X Press the :or9 button to select the
Belt adjustment
Belt adjustment function.
Vehicles with a black and white multifunc-
tion display: you see the selected setting
Activated Activated orDeactivated
Deactivated.
Vehicles with a colour multifunction dis-
play: when the Belt adjustment Belt adjustment function
is activated, the vehicle seat belt is dis-
played in orange in the multifunction dis-
play.
X Press the abutton to save the setting.
For further information on belt adjustment,
see (Y page 45).
Switching the fold-in mirrors when lock-
ing function on/off
This function is only available on vehicles with
a memory function (Y page 106).
If you switch on the Fold Foldmirrors
mirrors in
inwhen
when
locking
locking function (vehicles with black and
white multifunction display) or Auto. fold-
Auto. fold-
in mirrors
in mirrors function (vehicles with colour
multifunction display), the exterior mirrors
fold in when you lock the vehicle.
When you unlock the vehicle and then open a door, the exterior mirrors fold out again.
If you have switched on the Fold mirrors
Fold mirrors
in when locking
in when locking function (vehicles with
black and white multifunction display) or
Auto. fold-in mirrors
Auto. fold-in mirrors function (vehicles
with colour multifunction display) and you
fold in the exterior mirrors using the button on
the door (Y page 104), they will not fold out
automatically. The exterior mirrors can then
only be folded out using the button on the
door.
X Press the =or; button on the steer-
ing wheel to select the Settings
Settings menu.
X Press the :or9 button to select the
Convenience
Convenience submenu.
X Press ato confirm.
X Press :or9 to select the Fold Fold
mirrors
mirrors in
inwhen
when locking
locking function (vehi-
cles with a black and white multifunction
display) or the Auto. fold-in mirrors Auto. fold-in mirrors function (vehicles with a colour multifunc-
tion display).
Vehicles with a black and white multifunc-
tion display: you see the selected setting on on
or off off.
Vehicles with a colour multifunction dis-
play: if the Auto. Auto.fold-in
fold-in mirrors
mirrorsfunc-
tion is activated, the vehicle's exterior mir-
ror is displayed in orange in the multifunc-
tion display.
X Press the abutton to save the setting.
Resetting to factory settings X
Press the =or; button on the steer-
ing wheel to select the Settings
Settingsmenu.
X Press the :or9 button to select the
Factory setting
Factory setting submenu.
X Press ato confirm.
The Reset all settings?
Reset all settings? message
appears.
X Press the :or9 button to select No
No
or Yes
Yes.
X Press the abutton to confirm the selec-
tion.
If you have selected Yes Yes, the multifunction
display shows a confirmation message.
For safety reasons, not all functions are reset: the Limit
Limit speed
speed(winter
(winter tyres)
tyres)function
in permanent SPEEDTRONIC can only be set
in the Vehicle
Vehicle submenu. If you want to reset
the Daytime
Daytime driving
drivinglights
lightsin theLights
Lights
submenu, you must turn the key to position 1
in the ignition lock. 218
Menus and submenusOn-board computer and displays
Page 223 of 357
X
Press the =or; button to select
Interm. Time
Interm. Time.
X Press ato confirm.
The intermediate time is displayed for five
seconds.
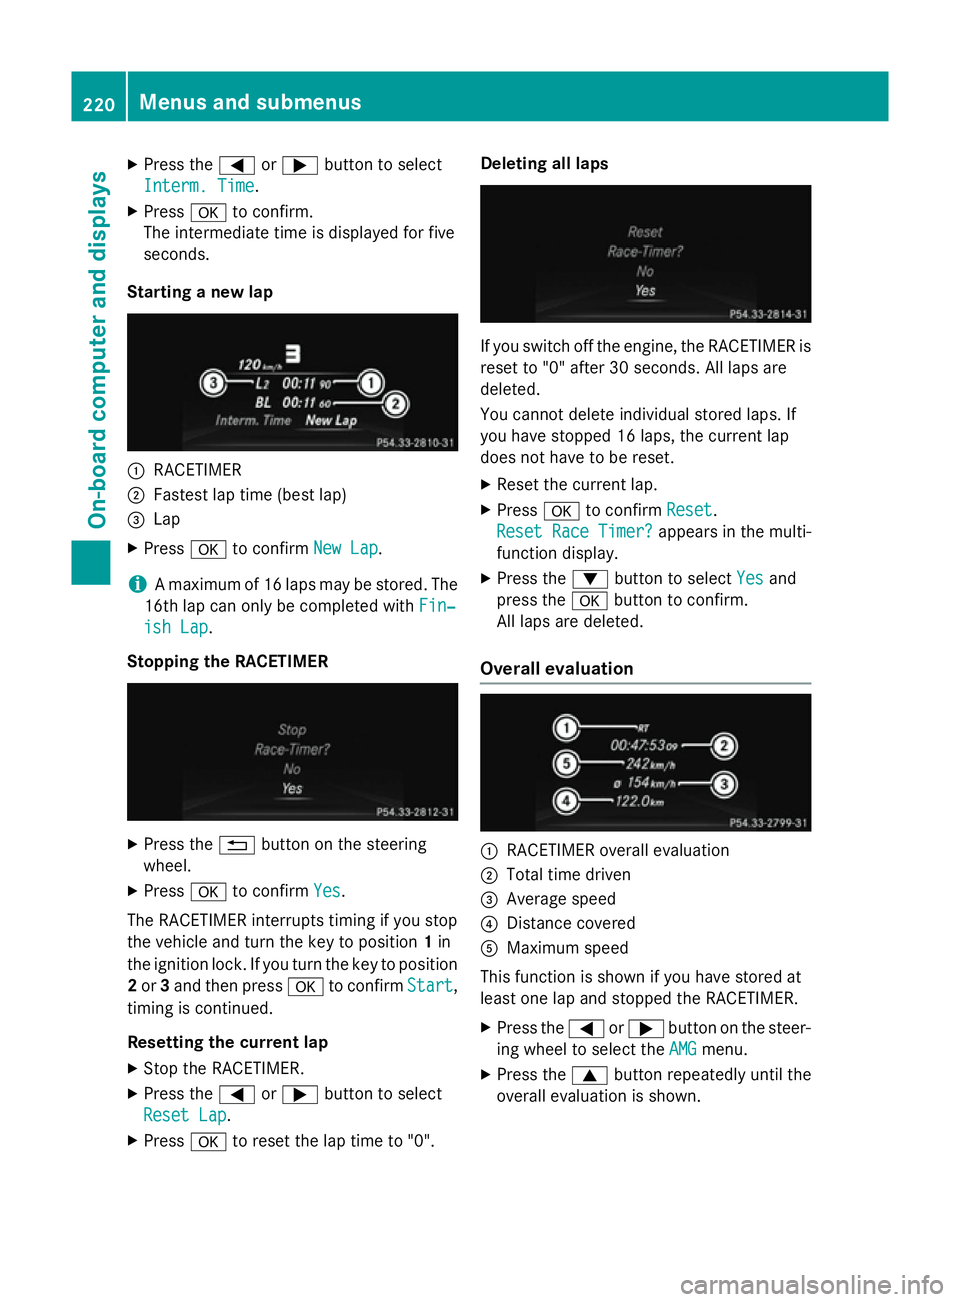
Starting a new lap :
RACETIMER
; Fastest lap time (best lap)
= Lap
X Press ato confirm New Lap
New Lap.
i A maximum of 16 laps may be stored. The
16th lap can only be completed with Fin‐
Fin‐
ish Lap
ish Lap.
Stopping the RACETIMER X
Press the %button on the steering
wheel.
X Press ato confirm Yes
Yes.
The RACETIMER interrupts timing if you stop
the vehicle and turn the key to position 1in
the ignition lock. If you turn the key to position
2 or 3and then press ato confirm Start
Start,
timing is continued.
Resetting the current lap
X Stop the RACETIMER.
X Press the =or; button to select
Reset Lap
Reset Lap.
X Press ato reset the lap time to "0". Deleting all laps
If you switch off the engine, the RACETIMER is
reset to "0" after 30 seconds. All laps are
deleted.
You cannot delete individual stored laps. If
you have stopped 16 laps, the current lap
does not have to be reset.
X Reset the current lap.
X Press ato confirm Reset Reset.
Reset Race Timer?
Reset Race Timer? appears in the multi-
function display.
X Press the :button to select Yes
Yes and
press the abutton to confirm.
All laps are deleted.
Overall evaluation :
RACETIMER overall evaluation
; Total time driven
= Average speed
? Distance covered
A Maximum speed
This function is shown if you have stored at
least one lap and stopped the RACETIMER.
X Press the =or; button on the steer-
ing wheel to select the AMG AMGmenu.
X Press the 9button repeatedly until the
overall evaluation is shown. 220
Menus and submenusOn-board computer and displays
Page 283 of 357
Useful information
i This Owner's Manual describes all mod-
els, series and optional equipment for your
vehicle that were available at the time of
going to press. National variations are pos- sible. Note that your vehicle may not be
equipped with all of the functions descri-
bed. This is also the case for systems and
functions relevant to safety.
i Read the information on qualified special-
ist workshops: (Y page 24). Engine compartment
Bonnet
Important safety notes G
WARNING
An unlocked bonnet may open while driving
and block your view. There is a risk of an acci- dent.
Never unlock the bonnet while driving. G
WARNING
When being opened and closed, the bonnet
may suddenly fall into the closed position.
There is a risk of injury to persons in the range of movement of the bonnet.
Open and close the bonnet only when nobody
is in the range of movement. G
WARNING
If you open the bonnet while the engine is
overheating or while there is a fire in the
engine compartment, you could come into
contact with hot gases or other leaking ser-
vice products. There is a danger of injury.
Allow an overheating engine to cool down
before opening the bonnet. If there is a fire in the engine compartment, leave the bonnet
closed and notify the fire brigade. G
WARNING
There are moving components in the engine
compartment. Certain components may con-
tinue to move or suddenly move again even
after the ignition has been switched off, e.g.
the radiator fan. There is a risk of injury.
If you have to carry out work in the engine
compartment:
R switch off the ignition
R never touch the dangerous areas surround-
ing moving components, e.g. the rotation
area of the fan
R remove jewellery and watches
R keep items of clothing and hair, for exam-
ple, away from moving parts.
Active bonnet (pedestrian protection) Operating principle
! An active bonnet that had been triggered
must be repaired at a qualified specialist
workshop. The active bonnet function will
then be available again. The additional
pedestrian protection provided by the
active bonnet will then be restored.
The active bonnet is only available in certain
countries.
The active bonnet can reduce the risk of injury to pedestrians in certain accident situations.
Raising the active bonnet increases the clear-
ance to hard components, such as the engine.
If the active bonnet has been triggered, it is
raised at the rear in the area around the hinge
by approximately 85 mm. The active bonnet is triggered by pyrotechnics.
For the drive to the workshop, reset the trig-
gered active bonnet yourself. If the active
bonnet has been triggered, pedestrian pro-
tection may be limited.
Resetting G
WARNING
Certain components in the engine compart-
ment could be very hot, e.g. the engine, the
radiator and parts of the exhaust system. 280
Engine compartmentMaintenance and care