2014 MERCEDES-BENZ S-Class change wheel
[x] Cancel search: change wheelPage 232 of 434
Object detection
The rear view camera can detect moving and
stationary objects. If, for example, a
pedestrian or another vehicle is detected,
these objects are marked with bars. The
system is only able to detect and mark
stationary objects when your vehicle is
moving. By contrast, stationary objects will
always be detected and marked.
To ensure that you can use the function, it
must be switched on in COMAND (see the
separate operating instructions). 360° camera (surround view)
General notes The 360° camera is a system consisting of
four cameras.
The system analyzes images from the
following cameras:
R Rear view camera
R Front camera
R Two cameras in the exterior rear view
mirrors
The cameras capture the immediate
surroundings of the vehicle. The system
supports you, e.g. when parking or if vision is
restricted at an exit.
The 360° camera images can be shown in full
screen mode or in seven different split-screen
views on the COMAND display. A split-screen
view also includes a top view of the vehicle.
This view is calculated from the data supplied
by the installed cameras (virtual camera).
The six split-screen views are:
R top view and picture from the rear view
camera (130° viewing angle)
R top view and image from the front camera
(130° viewing angle without displaying the
maximum steering wheel angle)
R top view and enlarged rear view
R top view and enlarged front view R
top view and pictures from the rearward
facing mirror cameras (rear wheel view)
R top view and pictures from the forward
facing mirror cameras (front wheel view)
When the function is active and you shift the
transmission from position Dor Rto N, you
see the view which was active before the
360° view in the COMAND display. The
dynamic guidelines are hidden.
When you change between transmission
positions Dand R, you see the previously
selected front or rear view.
Important safety notes The 360°camera is only an aid and may show
a distorted view of obstacles, show them
incorrectly or not at all. The 360°camera is
not a substitute for attentive driving.
You are always responsible for safe
maneuvering and parking. When
maneuvering or parking, make sure that there
are no persons, animals or objects in the area
in which you are maneuvering.
You are always responsible for safety, and
must always pay attention to your
surroundings when parking and
maneuvering. This applies to the areas
behind, in front of and beside the vehicle. You
could otherwise endanger yourself and
others.
The 360° camera will not function or will
function in a limited manner:
R
if the doors are open
R if the exterior mirrors are folded in
R if the trunk lid is open
R in heavy rain, snow or fog
R at night or in very dark places
R if the cameras are exposed to very bright
light
R if the area is lit by fluorescent light or LED
lighting (the display may flicker)
R if the camera lenses fog up, e.g. when
driving into a heated garage in winter,
causing a rapid change in temperature 230
Driving systemsDriving and parking
Page 246 of 434

G
WARNING
Active Lane Keeping Assist cannot always
clearly detect lane markings.
In such cases, Active Lane Keeping Assist
can:
R give an unnecessary warning and then
make a course-correcting brake application
to the vehicle
R not give a warning or intervene
There is a risk of an accident.
Always pay particular attention to the traffic
situation and keep within the lane, especially
if Active Lane Keeping Assist alerts you.
Terminate the intervention in a non-critical
driving situation.
The system may be impaired or may not
function if:
R there is poor visibility, e.g. due to
insufficient illumination of the road, or due
to snow, rain, fog or spray
R there is glare, e.g. from oncoming traffic,
the sun or reflections (e.g. when the road
surface is wet)
R the windshield is dirty, fogged up, damaged
or covered, for instance by a sticker, in the
vicinity of the camera
R the radar sensors in the front or rear
bumpers or the radiator trim are dirty, e.g.
obscured by snow
R there are no, several or unclear lane
markings for a lane, e.g. in areas with road
construction work
R the lane markings are worn away, dark or
covered up, e.g. by dirt or snow
R the distance to the vehicle in front is too
small and the lane markings thus cannot be
detected
R the lane markings change quickly, e.g.
lanes branch off, cross one another or
merge
R the road is narrow and winding
R there are strong shadows cast on the lane If no vehicle is detected in the adjacent lane
and broken lane markings are detected, no
lane-correcting brake application is made.
Warning vibration in the steering wheel
A warning may be given if a front wheel
passes over a lane marking. It will warn you
by means of intermittent vibration in the
steering wheel for up to 1.5 seconds.
Lane-correcting brake application
If you leave your lane, under certain
circumstances the vehicle will brake briefly
on one side. This is meant to assist you in
bringing the vehicle back to the original lane.
G
WARNING
A lane-correcting brake application cannot
always bring the vehicle back into the original
lane. There is a risk of an accident.
Always steer, brake or accelerate yourself,
especially if Active Lane Keeping Assist warns
you or makes a lane-correcting brake
application. If a lane-correcting brake application occurs,
display
0043appears in the multifunction
display. The brake application also slightly
reduces vehicle speed.
This function is available in the range between
40 mph and 120 mph (60 km/h and
200 km/h).
A lane-correcting brake application can be
made after driving over a lane marking
recognized as being solid or broken. Before
this, a warning must be given by means of
intermittent vibration in the steering wheel. 244
Driving systemsDriving and parking
Page 255 of 434
X
Switch on COMAND; see the separate
operating instructions.
X Use 00E2 on the steering wheel to call up
the list of menus.
X Press the 0064or0063 button on the
steering wheel to select the Navi
Navi menu.
X Confirm by pressing 0076on the steering
wheel.
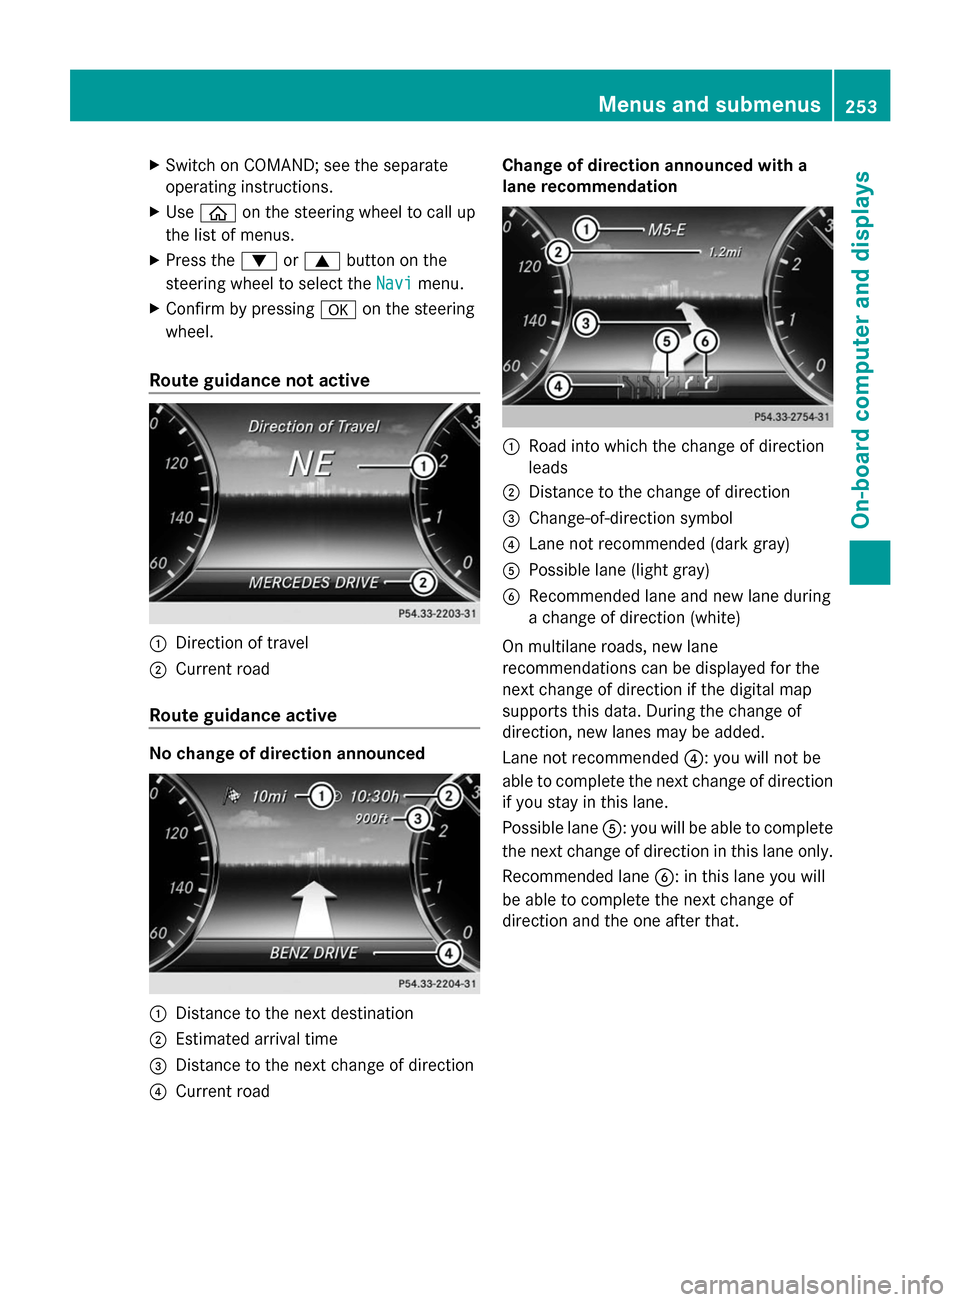
Route guidance not active 0043
Direction of travel
0044 Current road
Route guidance active No change of direction announced
0043
Distance to the next destination
0044 Estimated arrival time
0087 Distance to the next change of direction
0085 Current road Change of direction announced with a
lane recommendation
0043
Road into which the change of direction
leads
0044 Distance to the change of direction
0087 Change-of-direction symbol
0085 Lane not recommended (dark gray)
0083 Possible lane (light gray)
0084 Recommended lane and new lane during
a change of direction (white)
On multilane roads, new lane
recommendations can be displayed for the
next change of direction if the digital map
supports this data. During the change of
direction, new lanes may be added.
Lane not recommended 0085: you will not be
able to complete the next change of direction
if you stay in this lane.
Possible lane 0083: you will be able to complete
the next change of direction in this lane only.
Recommended lane 0084: in this lane you will
be able to complete the next change of
direction and the one after that. Menus and submenus
253On-board computer and displays Z
Page 257 of 434
Station
0044is displayed with the station
frequency or station name. The memory
position is only displayed along with
station 0044if this has been stored.
X Switch on COMAND (see the separate
operating instructions).
X Use 00E2 on the steering wheel to call up
the list of menus.
X Press the 0064or0063 button on the
steering wheel to select the Radio
Radio menu.
X Confirm by pressing 0076on the steering
wheel.
Currently selected station 0044appears in
the multifunction display.
X To open the station list: press0064or
0063 briefly.
X To select a station from the station
list: press 0064or0063 briefly.
X To select a station from the station list
using rapid scrolling: press and briefly
hold the 0064or0063 button.
X To select a waveband or station
memory: press0076briefly.
X Use 0064 or0063 to select the waveband
or station memory.
X Press 0076to confirm.
i To store a station, see the separate
operating instructions.
i SIRIUS XM satellite radio functions like a
normal radio.
For more information on satellite radio
operation, see the separate operating
instructions. Media menu
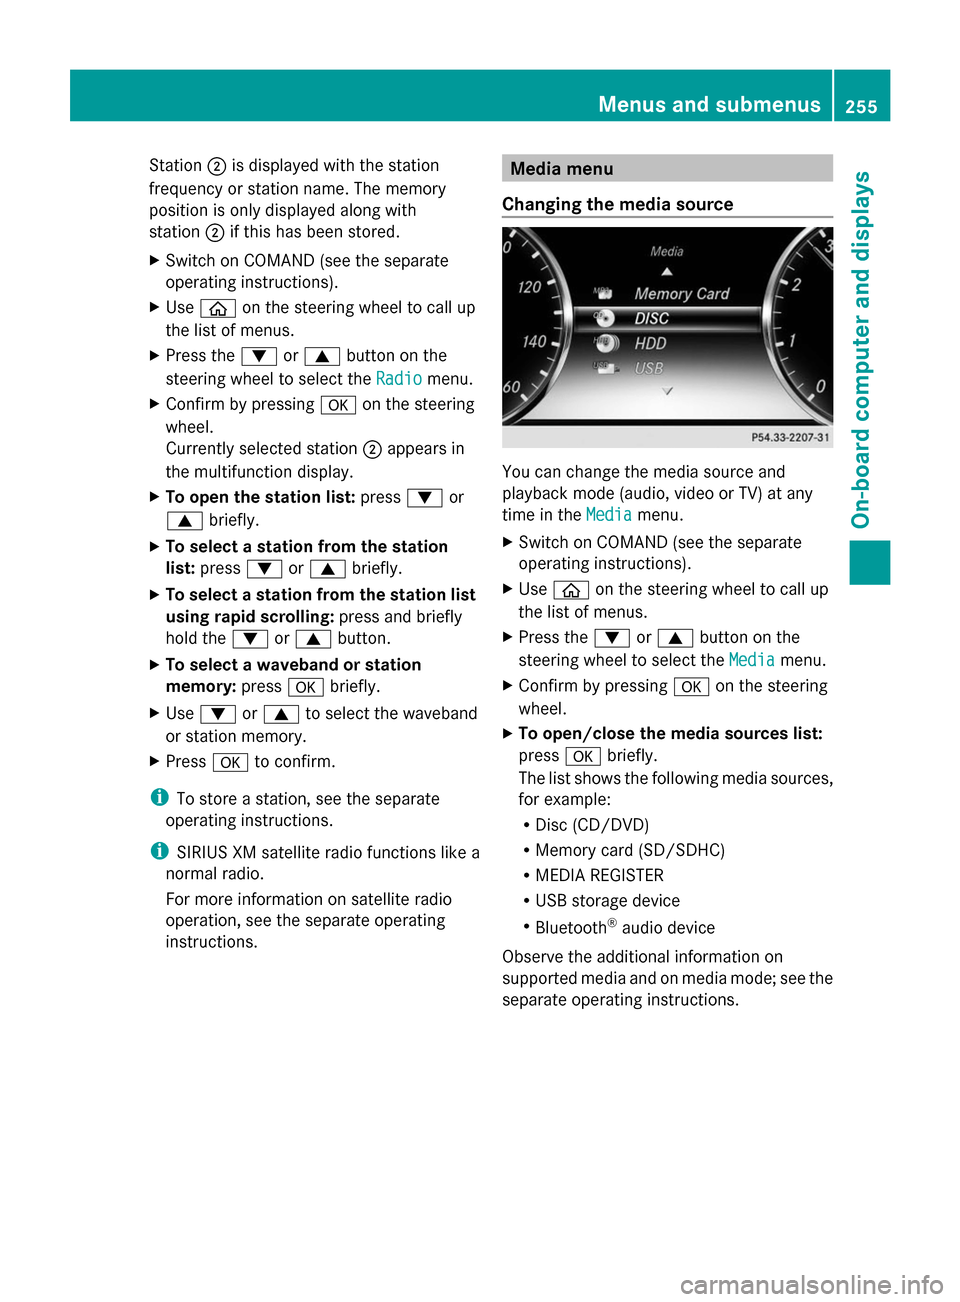
Changing the media source You can change the media source and
playback mode (audio, video or TV) at any
time in the
Media
Media menu.
X Switch on COMAND (see the separate
operating instructions).
X Use 00E2 on the steering wheel to call up
the list of menus.
X Press the 0064or0063 button on the
steering wheel to select the Media Mediamenu.
X Confirm by pressing 0076on the steering
wheel.
X To open/close the media sources list:
press 0076briefly.
The list shows the following media sources,
for example:
R Disc (CD/DVD)
R Memory card (SD/SDHC)
R MEDIA REGISTER
R USB storage device
R Bluetooth ®
audio device
Observe the additional information on
supported media and on media mode; see the
separate operating instructions. Menus and submenus
255On-board computer and displays Z
Page 264 of 434
Activating/deactivating Active Lane
Keeping Assist
X Use 00E2 on the steering wheel to call up
the list of menus.
X Press the 0064or0063 button on the
steering wheel to select the Settings
Settings
menu.
X Confirm by pressing 0076on the steering
wheel.
X Use 0064 or0063 to select the
DriveAssist
DriveAssist submenu.
X Press 0076to confirm.
X Press the 0064or0063 button to select
Lane Keeping Assist Lane Keeping Assist .
X Press 0076to confirm.
The current selection Standard
Standard or
Adaptive Adaptive is displayed.
X To change the setting: press0076again.
For further information about Active Lane
Keeping Assist, see (Y page 243).
Light submenu Switching the spotlight function on or off
X Use 00E2 on the steering wheel to call up
the list of menus.
X Press the 0064or0063 button on the
steering wheel to select the Settings
Settings
menu.
X Confirm by pressing 0076on the steering
wheel.
X Press the 0064or0063 button to select the
Lights
Lights submenu.
X Press 0076to confirm.
X Use 0064 or0063 to select the
Spotlight
Spotlight function.
X Press the 0076button to save the setting.
When the spotlight function is activated,
the assistance graphic shows the
pedestrian symbol.
Further information on the spotlight function
(Y page 238). Switching the daytime running lamps on/
off
This function is not available in Canada.
X
Use 00E2 on the steering wheel to call up
the list of menus.
X Press the 0064or0063 button on the
steering wheel to select the Settings
Settings
menu.
X Confirm by pressing 0076on the steering
wheel.
X Press the 0064or0063 button to select the
Lights Lights submenu.
X Press 0076to confirm.
X Press the 0064or0063 button to select the
Daytime Running Lights Daytime Running Lights function.
If the Daytime Running Lights Daytime Running Lights function
has been switched on, the cone of light and
the 0086 symbol in the multifunction
display are shown in white.
X Press the 0076button to save the setting.
Further information on daytime running
lamps ( Ypage 138).
Instrument cluster submenu Selecting the unit of measurement for
distance
The
Display Unit Speed-/Odometer: Display Unit Speed-/Odometer:
function allows you to choose whether
certain displays appear in kilometers or miles
in the multifunction display.
X Use 00E2 on the steering wheel to call up
the list of menus.
X Press the 0064or0063 button on the
steering wheel to select the Settings Settings
menu.
X Confirm by pressing 0076on the steering
wheel.
X Press the 0064or0063 button to select the
Instrument Cluster
Instrument Cluster submenu.
X Press 0076to confirm. 262
Menus and submenusOn-board computer and displays
Page 265 of 434

X
Press the 0064or0063 button to select the
Display Unit Speed-/Odometer
Display Unit Speed-/Odometer
function.
You will see the selected setting: km
kmor
miles
miles.
X Press the 0076button to save the setting.
The selected unit of measurement for
distance applies to:
R Speedometer
R Digital speedometer in the Trip
Trip menu
R Additional speedometer in the status area
on the multi-function display
The unit in the additional speedometer is
displayed inversely to the selected
distance unit.
R Odometer and the trip odometer
R Trip computer
R Current consumption and the range
R Navigation instructions in the Navi
Navi menu
R Cruise control
R SPEEDTRONIC
R DISTRONIC PLUS
R ASSYST PLUS service interval display
Selecting the permanent display function
Use the Permanent Display Permanent Display function to
switch on the following displays in the status
area of the multifunction display:
R outside temperature
R coolant temperature
X Use 00E2 on the steering wheel to call up
the list of menus.
X Press the 0064or0063 button on the
steering wheel to select the Settings
Settings
menu.
X Confirm by pressing 0076on the steering
wheel.
X Press the 0064or0063 button to select the
Instrument Cluster
Instrument Cluster submenu.
X Press 0076to confirm.
X Press 0064or0063 to select the
Permanent Display
Permanent Display function. X
Press 0076to confirm.
The current selection Outside
Outside
Temperature
Temperature orCoolant
Coolant Temperature
Temperature is
displayed.
X To change the setting: press0076again.
Switching the additional speedometer
on/off
Use the Additional Speedometer Additional Speedometer function
to choose whether the status area in the
multifunction display shows the speed
digitally.
X Use 00E2 on the steering wheel to call up
the list of menus.
X Press the 0064or0063 button on the
steering wheel to select the Settings
Settings
menu.
X Confirm by pressing 0076on the steering
wheel.
X Press the 0064or0063 button to select the
Instrument Cluster Instrument Cluster submenu.
X Press 0076to confirm.
X Use 0064 or0063 to select the
Additional Speedometer
Additional Speedometer function.
The current selection is displayed.
X To activate/deactivate: press the0076
button again.
Restoring the factory settings X
Use 00E2 on the steering wheel to call up
the list of menus.
X Press the 0064or0063 button on the
steering wheel to select the Settings
Settings
menu.
X Confirm by pressing 0076on the steering
wheel.
X Press the 0064or0063 button to select the
Factory Settings
Factory Settings submenu.
X Press 0076to confirm.
The Reset all settings?
Reset all settings? message
appears. Menus and submenus
263On-board computer and displays Z
Page 338 of 434
i
The system has not been able to initiate
a roadside assistance call, if:
R the indicator lamp for roadside
assistance call button 0052is flashing
continuously.
R no voice connection to the Mercedes-
Benz Customer Assistance Center was
established.
This can occur if the relevant mobile phone
network is not available, for example.
The Call Failed
Call Failed message appears in the
multifunction display.
X To end a call: press the0076button on the
multifunction steering wheel.
or
X Press the corresponding button for ending
a phone call on COMAND.
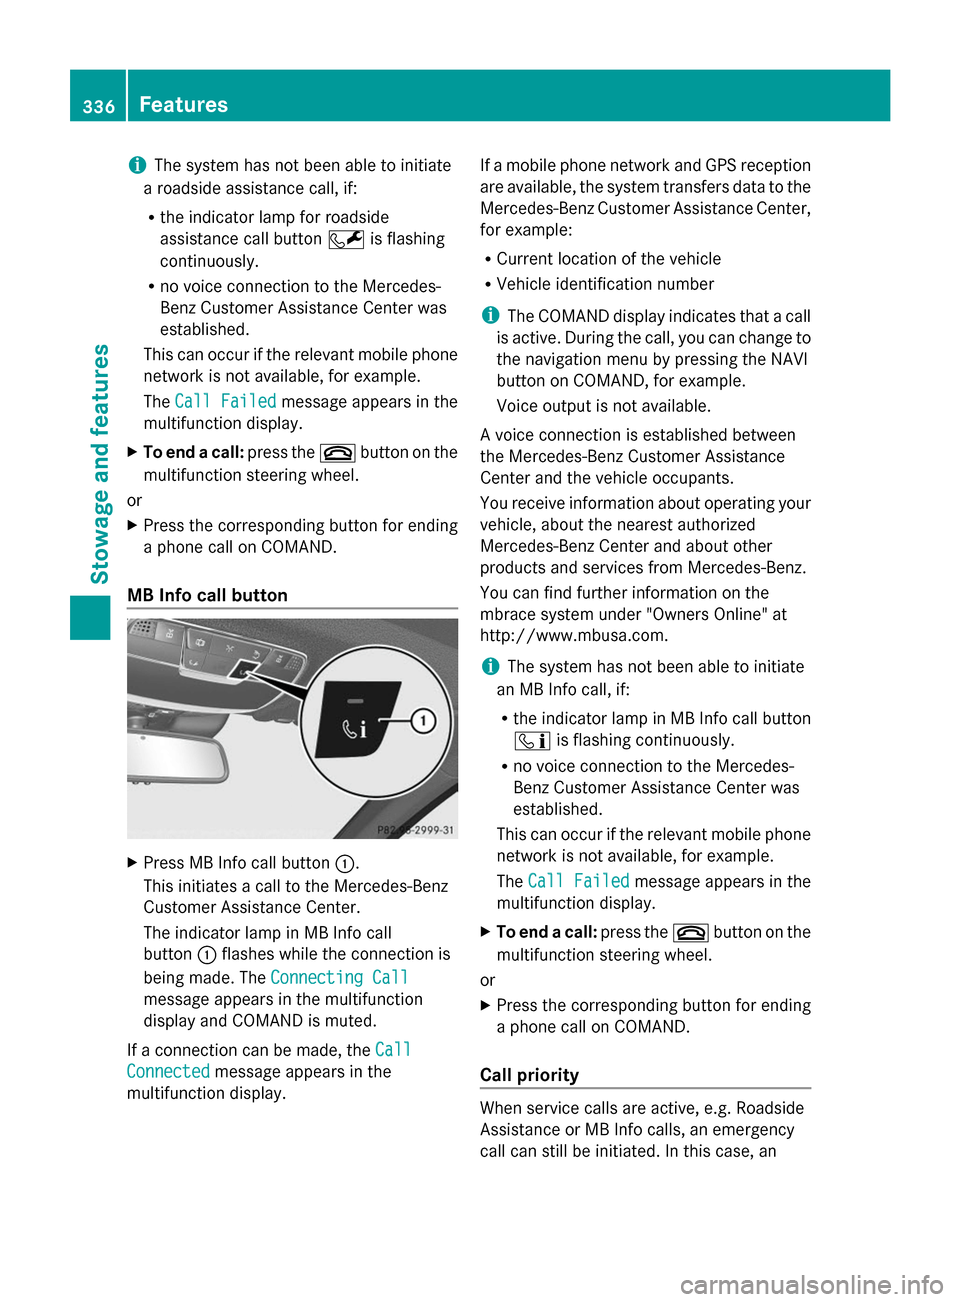
MB Info call button X
Press MB Info call button 0043.
This initiates a call to the Mercedes-Benz
Customer Assistance Center.
The indicator lamp in MB Info call
button 0043flashes while the connection is
being made. The Connecting Call Connecting Call
message appears in the multifunction
display and COMAND is muted.
If a connection can be made, the Call Call
Connected
Connected message appears in the
multifunction display. If a mobile phone network and GPS reception
are available, the system transfers data to the
Mercedes-Benz Customer Assistance Center,
for example:
R
Current location of the vehicle
R Vehicle identification number
i The COMAND display indicates that a call
is active. During the call, you can change to
the navigation menu by pressing the NAVI
button on COMAND, for example.
Voice output is not available.
A voice connection is established between
the Mercedes-Benz Customer Assistance
Center and the vehicle occupants.
You receive information about operating your
vehicle, about the nearest authorized
Mercedes-Benz Center and about other
products and services from Mercedes-Benz.
You can find further information on the
mbrace system under "Owners Online" at
http://www.mbusa.com.
i The system has not been able to initiate
an MB Info call, if:
R the indicator lamp in MB Info call button
00D9 is flashing continuously.
R no voice connection to the Mercedes-
Benz Customer Assistance Center was
established.
This can occur if the relevant mobile phone
network is not available, for example.
The Call Failed
Call Failed message appears in the
multifunction display.
X To end a call: press the0076button on the
multifunction steering wheel.
or
X Press the corresponding button for ending
a phone call on COMAND.
Call priority When service calls are active, e.g. Roadside
Assistance or MB Info calls, an emergency
call can still be initiated. In this case, an336
FeaturesStowage and features
Page 355 of 434

X
Press the 0063or0064 button on the
steering wheel to select the Service
Service menu
and press 0076to confirm.
X Press the 0063or0064 button on the
steering wheel to select the ASSYST PLUS
ASSYST PLUS
submenu and press 0076to confirm.
The service due date appears in the
multifunction display. Information about Service
Resetting the ASSYST PLUS service
interval display !
If the ASSYST PLUS service interval
display has been inadvertently reset, this
setting can be corrected at a qualified
specialist workshop.
Have service work carried out as described
in the Maintenance Booklet. This may
otherwise lead to increased wear and
damage to the major assemblies or the
vehicle.
A qualified specialist workshop, e.g. an
authorized Mercedes-Benz Center, will reset
the ASSYST PLUS service interval display
after the service work has been carried out.
You can also obtain further information on
maintenance work, for example.
Special service requirements The specified maintenance interval takes only
the normal operation of the vehicle into
account. Under arduous operating conditions
or increased load on the vehicle,
maintenance work must be carried out more
frequently, for example:
R regular city driving with frequent
intermediate stops
R if the vehicle is primarily used to travel
short distances
R use in mountainous terrain or on poor road
surfaces
R if the engine is often left idling for long
periods Under these or similar conditions, have, for
example, the air filter, engine oil and oil filter
replaced or changed more frequently. Under
arduous operating conditions, the tires must
be checked more often. Further information
can be obtained at a qualified specialist
workshop, e.g. an authorized Mercedes-Benz
Center.
Driving abroad An extensive Mercedes-Benz Service network
is also available in other countries. You can
obtain further information from any
authorized Mercedes-Benz Center.
Care
General notes
H
Environmental note
Dispose of empty packaging and cleaning
cloths in an environmentally responsible
manner.
! For cleaning your vehicle, do not use any
of the following:
R dry, rough or hard cloths
R abrasive cleaning agents
R solvents
R cleaning agents containing solvents
Do not scrub.
Do not touch the surfaces or protective
films with hard objects, e.g. a ring or ice
scraper. You could otherwise scratch or
damage the surfaces and protective film.
! Do not park the vehicle for an extended
period straight after cleaning it, particularly
after having cleaned the wheels with wheel
cleaner. Wheel cleaners could cause
increased corrosion of the brake discs and
brake pads/linings. For this reason, you
should drive for a few minutes after
cleaning. Braking heats the brake discs and
the brake pads/linings, thus drying them.
The vehicle can then be parked. Care
353Maintenance and care Z