2014 MERCEDES-BENZ S-Class clock
[x] Cancel search: clockPage 352 of 434

Example
X
Pull oil dipstick 0043out of the dipstick guide
tube.
X Wipe off oil dipstick 0043.
X Slowly slide oil dipstick 0043into the guide
tube to the stop, and take it out again.
If the level is between MIN mark 0087and
MAX mark 0044, the oil level is correct.
X If the oil level has dropped to MIN mark
0087 or below, add 1.1 US qt (1.0 liter) of
engine oil.
Adding engine oil G
WARNING
Certain components in the engine
compartment, such as the engine, radiator
and parts of the exhaust system, can become
very hot. Working in the engine compartment
poses a risk of injury.
Where possible, let the engine cool down and
touch only the components described in the
following. G
WARNING
If engine oil comes into contact with hot
components in the engine compartment, it
may ignite. There is a risk of fire and injury.
Make sure that engine oil is not spilled next
to the filler neck. Let the engine cool down
and thoroughly clean the engine oil off the
components before starting the engine. H
Environmental note
When adding oil, take care not to spill any. If
oil enters the soil or waterways, it is harmful
to the environment.
! Only use engine oils and oil filters that
have been approved for vehicles with a
service system. You can obtain a list of the
engine oils and oil filters tested and
approved in accordance with the
Mercedes-Benz Specifications for Service Products at any Mercedes-Benz Service
center.
Damage to the engine or exhaust system is
caused by the following:
R
using engine oils and oil filters that have
not been specifically approved for the
service system
R replacing engine oil and oil filters after
the interval for replacement specified by
the service system has been exceeded
R using engine oil additives.
! Do not add too much oil. adding too much
engine oil can result in damage to the
engine or to the catalytic converter. Have
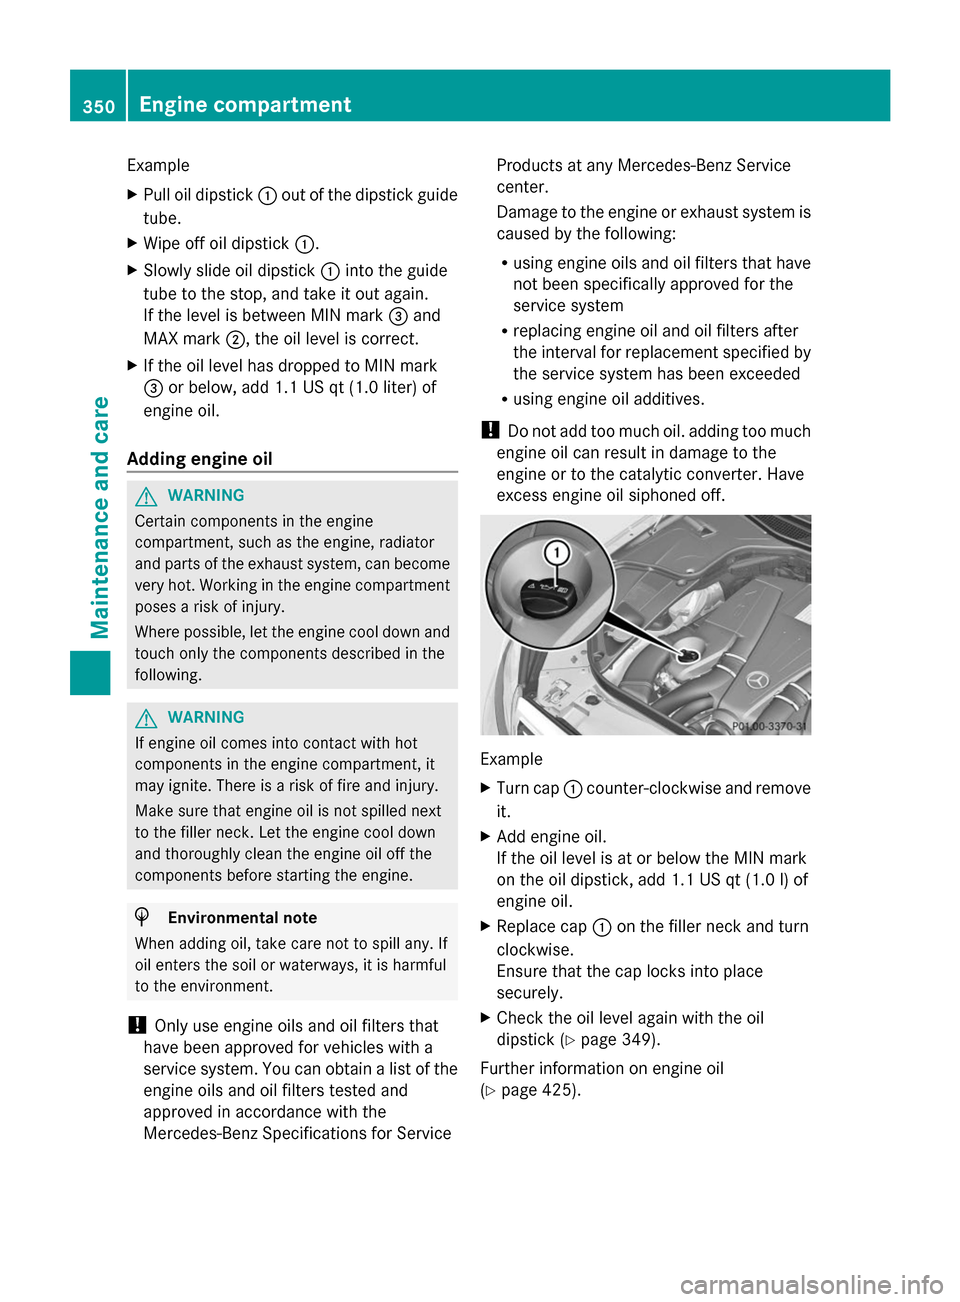
excess engine oil siphoned off. Example
X
Turn cap 0043counter-clockwise and remove
it.
X Add engine oil.
If the oil level is at or below the MIN mark
on the oil dipstick, add 1.1 US qt (1.0 l) of
engine oil.
X Replace cap 0043on the filler neck and turn
clockwise.
Ensure that the cap locks into place
securely.
X Check the oil level again with the oil
dipstick (Y page 349).
Further information on engine oil
(Y page 425). 350
Engine compartmentMaintenance and care
Page 353 of 434

Additional service products
Checking coolant level G
WARNING
Certain components in the engine
compartment, such as the engine, radiator
and parts of the exhaust system, can become
very hot. Working in the engine compartment
poses a risk of injury.
Where possible, let the engine cool down and
touch only the components described in the
following. G
WARNING
The engine cooling system is pressurized,
particularly when the engine is warm. When
opening the cap, you could be scalded by hot
coolant spraying out. There is a risk of injury.
Let the engine cool down before opening the
cap. Wear eye and hand protection when
opening the cap. Open the cap slowly half a
turn to allow pressure to escape. X
Park the vehicle on a level surface.
Only check the coolant level when the
vehicle is on a level surface and the engine
has cooled down.
X Turn the SmartKey to position 2in the
ignition lock (Y page 171).
or
X Press Start/Stop button twice
(Y page 171). X
Check the coolant temperature display in
the instrument cluster.
The coolant temperature must be below
158 ‡ (70 †).
X Turn the SmartKey to position
0(Y page 171) in the ignition lock.
or
X Remove Start/Stop button from ignition
lock (Y page 171).
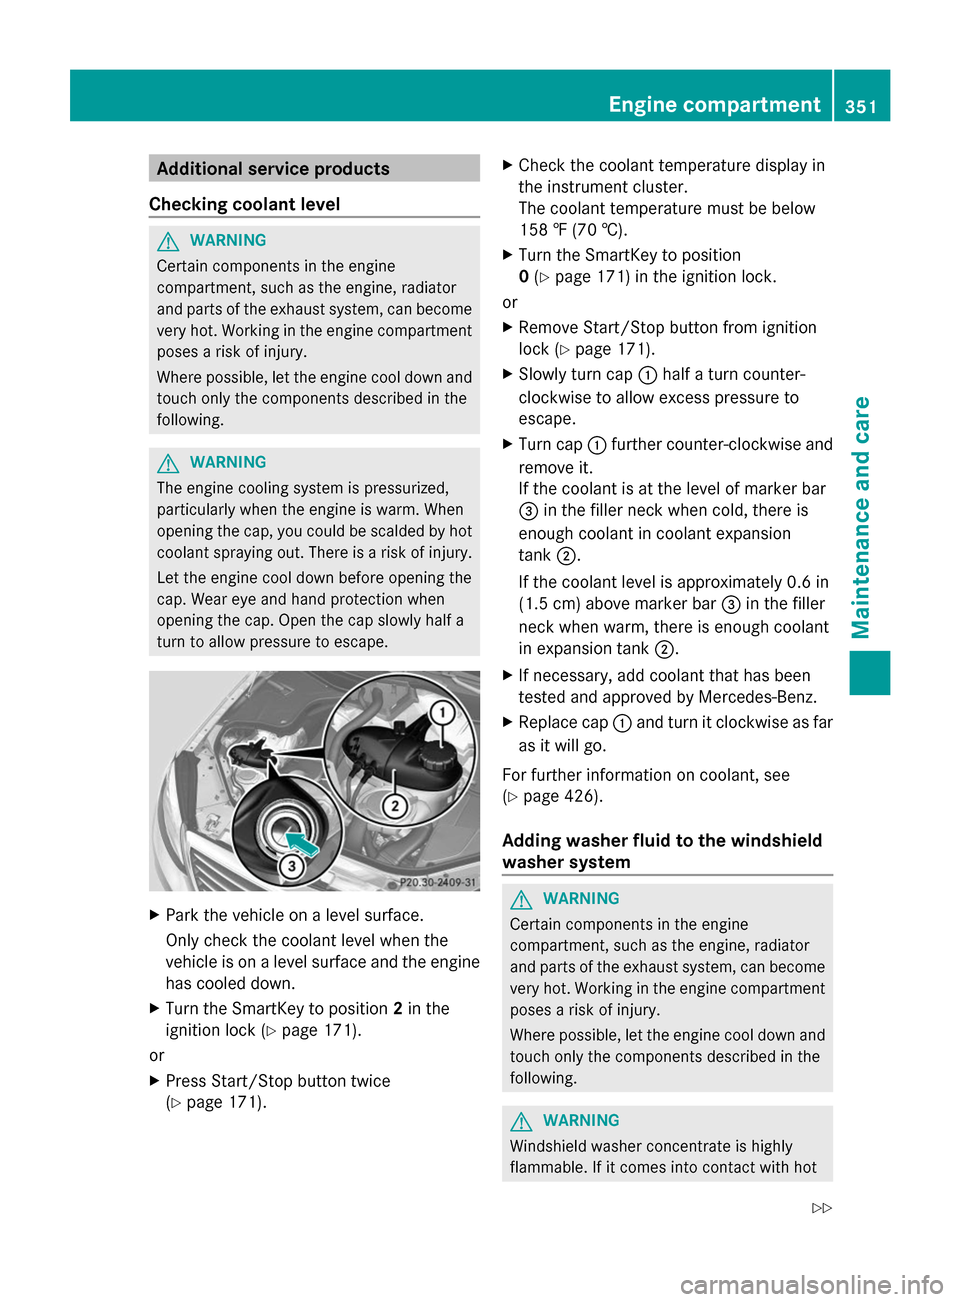
X Slowly turn cap 0043half a turn counter-
clockwise to allow excess pressure to
escape.
X Turn cap 0043further counter-clockwise and
remove it.
If the coolant is at the level of marker bar
0087 in the filler neck when cold, there is
enough coolant in coolant expansion
tank 0044.
If the coolant level is approximately 0.6 in
(1.5 cm) above marker bar 0087in the filler
neck when warm, there is enough coolant
in expansion tank 0044.
X If necessary, add coolant that has been
tested and approved by Mercedes-Benz.
X Replace cap 0043and turn it clockwise as far
as it will go.
For further information on coolant, see
(Y page 426).
Adding washer fluid to the windshield
washer system G
WARNING
Certain components in the engine
compartment, such as the engine, radiator
and parts of the exhaust system, can become
very hot. Working in the engine compartment
poses a risk of injury.
Where possible, let the engine cool down and
touch only the components described in the
following. G
WARNING
Windshield washer concentrate is highly
flammable. If it comes into contact with hot Engine compartment
351Maintenance and care
Z
Page 379 of 434

The battery must be connected and charged.
Otherwise, you:
R cannot turn the SmartKey to position 2in
the ignition lock
R cannot release the electric parking brake
R cannot shift the automatic transmission to
position N
i Disarm the automatic locking feature
before the vehicle is towed (Y page 92). You
could otherwise be locked out when
pushing or towing the vehicle. Installing/removing the towing eye
Installing the towing eye The brackets for the screw-in towing eyes are
located in the bumpers. They are at the rear
and at the front, under covers 0043.
X Remove the towing eye from the vehicle
tool kit/stowage tray (Y page 364).
X Remove cover 0043from the opening.
X Screw in and tighten the towing eye
clockwise to the stop. Removing the towing eye X
Unscrew and remove the towing eye.
X Attach cover 0043to the bumper and press
until it engages.
X Place the towing eye in the vehicle tool kit/
stowage tray. Towing the vehicle with the rear axle
raised
Only vehicles without 4MATIC can be
towed with the rear axle raised.
! The ignition must be switched off if you
are towing the vehicle with the rear axle
raised. Intervention by ESP ®
could
otherwise damage the brake system.
! Vehicles with 4MATIC must not be towed
with either the front or the rear axle raised,
as doing so will damage the transmission.
Vehicles with 4MATIC may either be towed
away with both axles on the ground or be
loaded up and transported.
X Switch on the hazard warning lamps
(Y page 140).
X If necessary, turn the SmartKey in the
ignition lock to position 0and remove the
SmartKey from the ignition lock.
X Take the SmartKey with you when you leave
the vehicle.
When towing your vehicle with the rear axle
raised, it is important that you observe the
safety instructions (Y page 376). Towing a vehicle with both axles on
the ground
It is important that you observe the safety
instructions when towing away your vehicle
(Y page 376).
The automatic transmission automatically
shifts to position Pwhen you open the driver's
or front-passenger door or when you remove
the SmartKey from the ignition lock. Towing and tow-starting
377Breakdown assistance Z
Page 411 of 434

Raising the vehicle
G
WARNING
If you do not position the jack correctly at the
appropriate jacking point of the vehicle, the
jack could tip over with the vehicle raised.
There is a risk of injury.
Only position the jack at the appropriate
jacking point of the vehicle. The base of the
jack must be positioned vertically, directly
under the jacking point of the vehicle.
! The jack is designed exclusively for
jacking up the vehicle at the jacking points.
Otherwise, your vehicle could be damaged.
Observe the following when raising the
vehicle:
R to raise the vehicle, only use the vehicle-
specific jack that has been tested and
approved by Mercedes-Benz. If used
incorrectly, the jack could tip over with the
vehicle raised.
R the jack is designed only to raise and hold
the vehicle for a short time while a wheel
is being changed. It is not suited for
performing maintenance work under the
vehicle.
R avoid changing the wheel on uphill and
downhill slopes.
R before raising the vehicle, secure it from
rolling away by applying the parking brake
and positioning wheel chocks. Do not
disengage the parking brake while the
vehicle is raised.
R the jack must be placed on a firm, flat and
non-slip surface. On a loose surface, a
large, flat load-bearing underlay must be
used. On a slippery surface, a non-slip
underlay must be used, e.g. rubber mats.
R do not use wooden blocks or similar
objects as a jack underlay. Otherwise, the
jack will not be able to achieve its load-
bearing capacity due to the restricted
height. R
make sure that the distance between the
underside of the tires and the ground does
not exceed 1.2 in (3 cm).
R never place your hands and feet under the
raised vehicle.
R do not lie under the vehicle.
R do not start the engine when the vehicle is
raised.
R do not open or close a door or the trunk lid
when the vehicle is raised.
R make sure that no persons are present in
the vehicle when the vehicle is raised.
Vehicles with hub caps: the hub cap covers
the wheel bolts. Before you can unscrew the
wheel bolts, you must remove the hub caps.
Two different variants can be installed. Vehicles with plastic hub caps:
X
To remove: turn the center cover of hub
cap 0043counter-clockwise and remove.
X To install: before installing, ensure that
hub cap 0043is in the open position. To do
so, turn the center cover counter-
clockwise.
X Place hub cap 0043in position and turn the
center cover clockwise until you feel and
hear hub cap 0043engage.
X Make sure that hub cap 0043is installed
securely. Changing a wheel
409Wheels and tires Z
Page 412 of 434

Vehicles with aluminum hub caps:
X To remove: take socket0044and lug wrench
0087 from the vehicle tool kit ( Ypage 364).
X Position socket 0044on hub cap 0043.
X Attach lug wrench 0087to socket 0044and
loosen hub cap 0043counter-clockwise.
X Remove hub cap 0043.
X To install: before installing, check hub
cap 0043and the wheel area for soiling and
clean if necessary.
X Put hub cap 0043in position and turn until it
is in the right position.
X Position socket 0044on hub cap 0043.
X Attach lug wrench 0087to socket 0044and
tighten hub cap 0043.
The tightening torque must be 18 lb-ft
(25 Nm).
i Note that the hub cap should be
tightened to the specified torque of 18 lb-ft
(25 Nm). Mercedes-Benz recommends
that you have the hub cap installed at a
qualified specialist workshop. X
Using lug wrench 0087, loosen the bolts on
the wheel you wish to change by about one
full turn. Do not unscrew the bolts
completely. The jacking points are located just behind the
front wheel housings and just in front of the
rear wheel housings (arrows).
X
Take the ratchet wrench out of the vehicle
tool kit and place it on the hexagon nut of
the jack so that the letters AUFare visible.
AMG vehicles and vehicles with AMG
equipment: to protect the vehicle body, the
vehicle has covers next to the jacking points
on the outer sills. X
AMG vehicles and vehicles with AMG
equipment: fold cover0085upwards. 410
Changing a wheelWheels and tires