2014 MERCEDES-BENZ S-Class 360 camera
[x] Cancel search: 360 cameraPage 234 of 434

X
Make sure that the SmartKey is in position
2 in the ignition lock.
X Make sure that the Activation by R
Activation by R
gear
gear function is selected in COMAND (see
the separate operating instructions).
X To show the 360° camera image: engage
reverse gear.
The area behind the vehicle is shown in the
COMAND display in split-screen mode. You
see the top view of the vehicle and the
image from the rear view camera.
Selecting the split-screen and full
screen displays Switching between split screen views:
X
To switch to the line with the vehicle icons:
slide the controller 00970052.
X To select a vehicle icon: turn the controller.
Switching to full screen mode:
X Turn and press the controller to select
Fullscreen
Fullscreen.
i The full screen option is only available in
the following views:
R Top view with picture from the rear view
camera
R Top view with picture from the front
camera
Displays in the COMAND display Important safety notes
The camera system may show a distorted
view of obstacles, show them incorrectly or
not at all. Obstacles are not shown by the
system in the following locations:
R under the front and rear bumpers
R very close to the front and rear bumpers
R in close range above the handle on the
trunk lid
R very close to the exterior mirrors
R in the transitional areas between the
various cameras in the virtual top view !
Objects not at ground level may appear to
be further away than they actually are, e.g.:
R the bumper of a parked vehicle
R the drawbar of a trailer
R the ball coupling of a trailer tow hitch
R the rear section of an HGV
R a slanted post
Use the guidelines only for orientation.
Approach objects no further than the
bottom-most guideline.
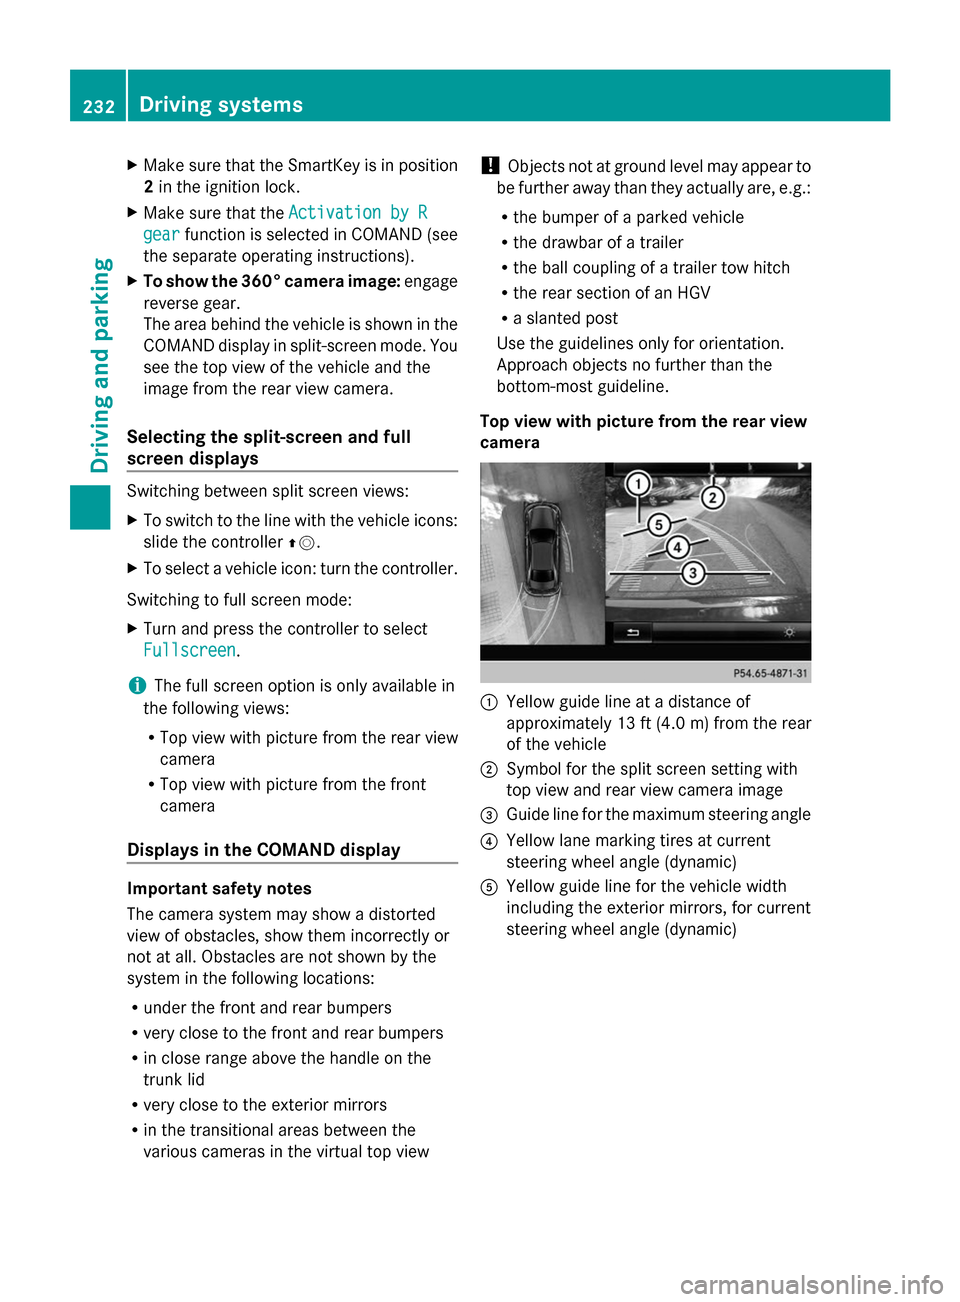
Top view with picture from the rear view
camera 0043
Yellow guide line at a distance of
approximately 13 ft (4.0 m) from the rear
of the vehicle
0044 Symbol for the split screen setting with
top view and rear view camera image
0087 Guide line for the maximum steering angle
0085 Yellow lane marking tires at current
steering wheel angle (dynamic)
0083 Yellow guide line for the vehicle width
including the exterior mirrors, for current
steering wheel angle (dynamic) 232
Driving systemsDriving and parking
Page 236 of 434

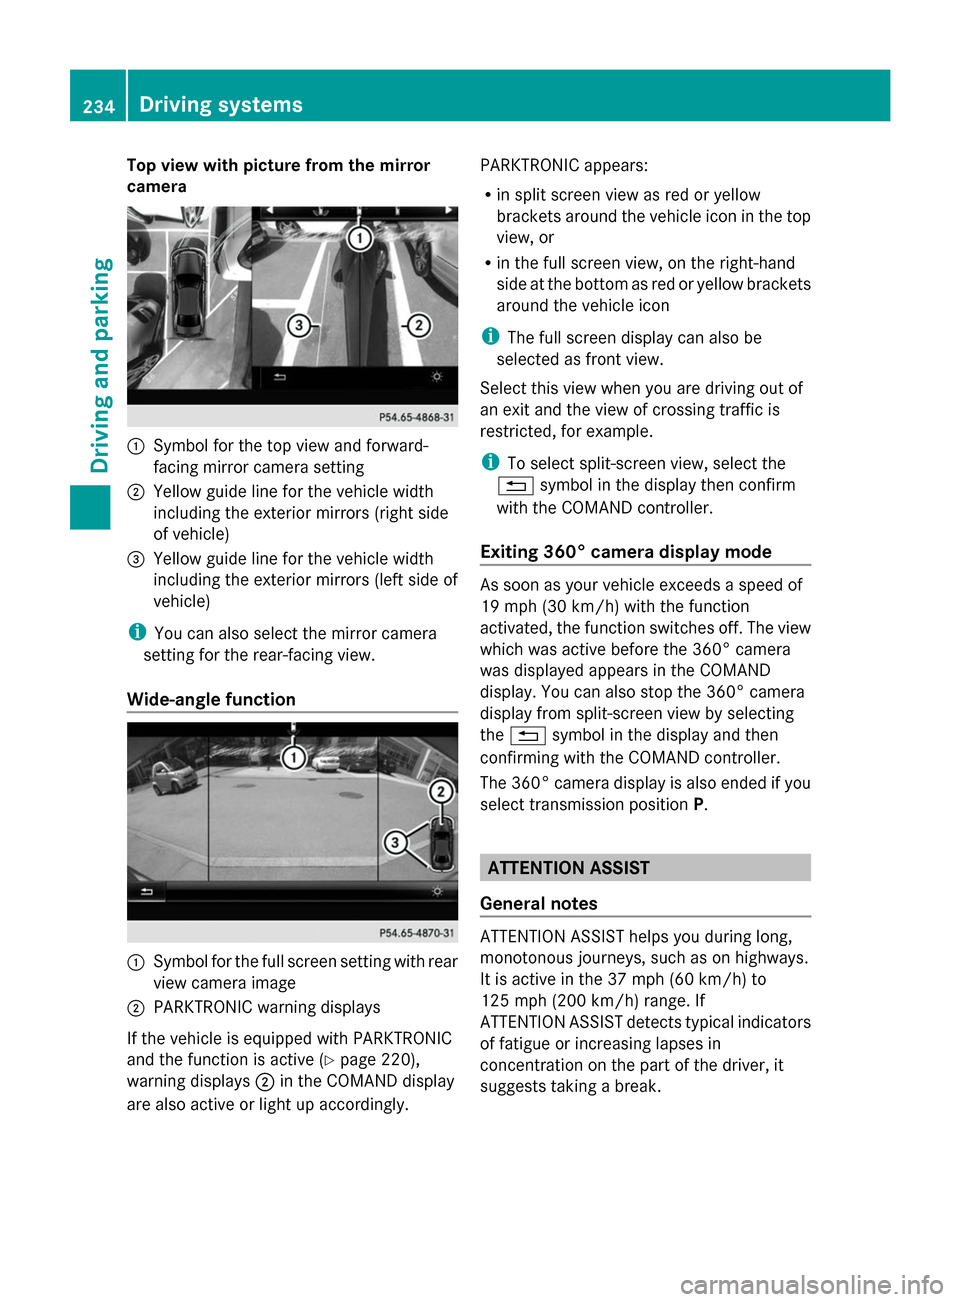
Top view with picture from the mirror
camera 0043
Symbol for the top view and forward-
facing mirror camera setting
0044 Yellow guide line for the vehicle width
including the exterior mirrors (right side
of vehicle)
0087 Yellow guide line for the vehicle width
including the exterior mirrors (left side of
vehicle)
i You can also select the mirror camera
setting for the rear-facing view.
Wide-angle function 0043
Symbol for the full screen setting with rear
view camera image
0044 PARKTRONIC warning displays
If the vehicle is equipped with PARKTRONIC
and the function is active ( Ypage 220),
warning displays 0044in the COMAND display
are also active or light up accordingly. PARKTRONIC appears:
R
in split screen view as red or yellow
brackets around the vehicle icon in the top
view, or
R in the full screen view, on the right-hand
side at the bottom as red or yellow brackets
around the vehicle icon
i The full screen display can also be
selected as front view.
Select this view when you are driving out of
an exit and the view of crossing traffic is
restricted, for example.
i To select split-screen view, select the
0038 symbol in the display then confirm
with the COMAND controller.
Exiting 360° camera display mode As soon as your vehicle exceeds a speed of
19 mph (30 km/h) with the function
activated, the function switches off. The view
which was active before the 360° camera
was displayed appears in the COMAND
display. You can also stop the 360° camera
display from split-screen view by selecting
the 0038 symbol in the display and then
confirming with the COMAND controller.
The 360° camera display is also ended if you
select transmission position P. ATTENTION ASSIST
General notes ATTENTION ASSIST helps you during long,
monotonous journeys, such as on highways.
It is active in the 37 mph (60 km/h) to
125 mph (200 km/h) range. If
ATTENTION ASSIST detects typical indicators
of fatigue or increasing lapses in
concentration on the part of the driver, it
suggests taking a break.234
Driving systemsDriving an
d parking
Page 360 of 434

Cleaning the sensors
!
If you clean the sensors with a power
washer, make sure that you keep a
distance of at least 11.8 in (30 cm) between
the vehicle and the power washer nozzle.
Information about the correct distance is
available from the equipment
manufacturer. X
Clean sensors 0043of the driving systems
with water, car shampoo and a soft cloth.
Cleaning the rear view camera !
Do not clean the camera lens and the area
around the rear view camera with a power
washer. X
Make sure that the vehicle is stationary and
that the SmartKey is in position 2in the
ignition lock.
X To open the cover of the rear view
camera: with COMAND activated call up
the vehicle menu: press the 00D4button.
X To switch to the menu bar: slide 00C5the
controller.
X To select System Settings System Settings: turn and
press the controller.
X To select Rear View Camera
Rear View Camera : turn and
press the controller.
X To select Open Camera Cover
Open Camera Cover: turn and
press the controller.
The rear view camera cover opens.
X To clean the rear view camera: use clear
water and a soft cloth to clean camera
lens 0043.
Cleaning the 360° camera !
Do not clean the camera lens and the area
around the 360° camera with a power
washer.360 X
Make sure that the vehicle is stationary and
that the SmartKey is in position 2in the
ignition lock.
X To open the cover of the 360° camera:
with COMAND activated, call up the vehicle
menu: press the 00D4button.
X To switch to the menu bar: slide 00C5the
controller.
X To select System Settings System Settings: turn and
press the controller. 358
CareMaintenance and care
Page 361 of 434

X
To select the 360°
360°Camera
Camera : turn and press
the controller.
X To select Open Camera Cover
Open Camera Cover: turn and
press the controller.
The cover of the 360° camera opens.
X To clean the 360° camera: clean camera
lens 0043with clean water and a soft cloth.
If you drive at speeds above 20 mph
(30 km/h) or with the SmartKey in position
0 or 1in the ignition lock, the cover of the
360° camera closes automatically.
Cleaning the exhaust pipes !
Do not clean the exhaust pipe with acid-
based cleaning agents such as sanitary
cleansers or wheel cleaners.
Impurities combined with the effects of road
grit and corrosive environmental factors may
cause flash rust to form on the surface. You
can restore the original shine of the exhaust
pipe by cleaning it regularly, especially in
winter and after washing.
X Clean the exhaust pipe with a care product
tested and approved by Mercedes-Benz. Interior care
Cleaning the display !
For cleaning, do not use any of the
following:
R alcohol-based thinner or gasoline
R abrasive cleaning agents
R commercially-available household
cleaning agents
These may damage the display surface. Do
not put pressure on the display surface
when cleaning. This could lead to
irreparable damage to the display. X
Before cleaning the display, make sure that
it is switched off and has cooled down.
X Clean the display surface using a
commercially available microfiber cloth
and TFT/LCD display cleaner.
X Dry the display surface using a dry
microfiber cloth.
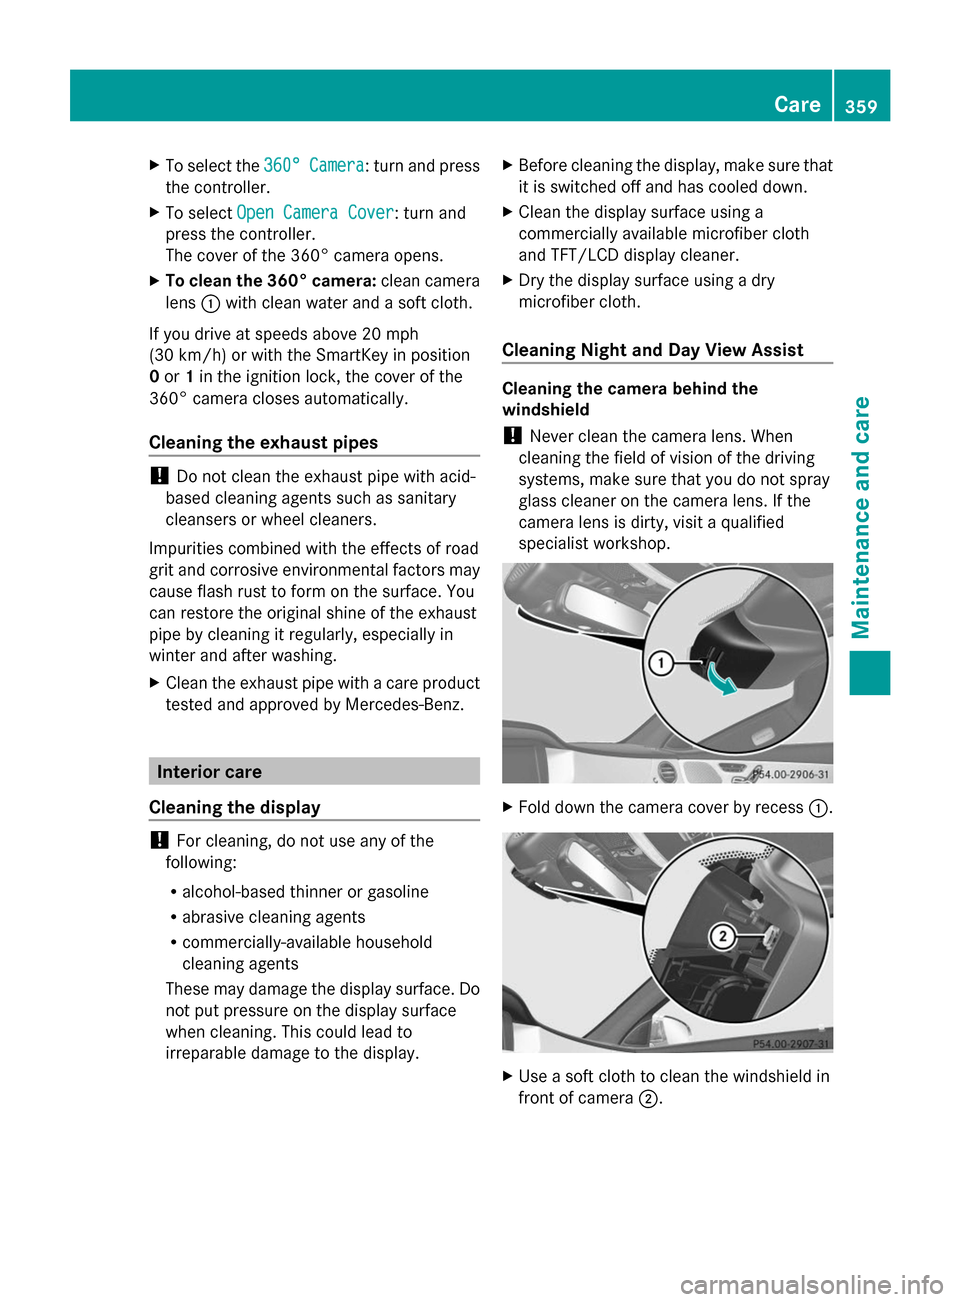
Cleaning Night and Day View Assist Cleaning the camera behind the
windshield
!
Never clean the camera lens. When
cleaning the field of vision of the driving
systems, make sure that you do not spray
glass cleaner on the camera lens. If the
camera lens is dirty, visit a qualified
specialist workshop. X
Fold down the camera cover by recess 0043. X
Use a soft cloth to clean the windshield in
front of camera 0044. Care
359Maintenance and care Z
Page 362 of 434

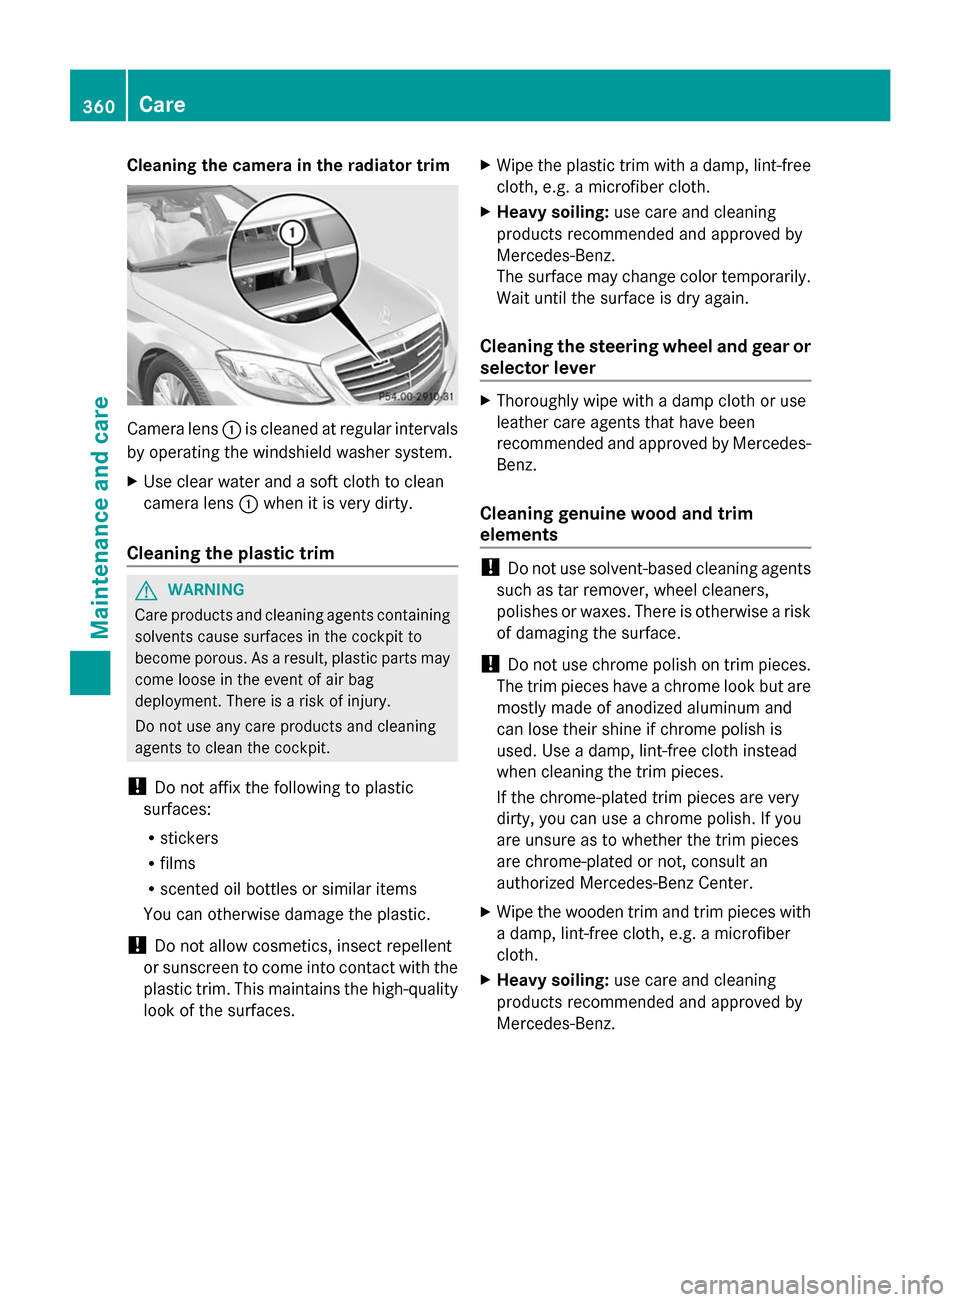
Cleaning the camera in the radiator trim
Camera lens
0043is cleaned at regular intervals
by operating the windshield washer system.
X Use clear water and a soft cloth to clean
camera lens 0043when it is very dirty.
Cleaning the plastic trim G
WARNING
Care products and cleaning agents containing
solvents cause surfaces in the cockpit to
become porous. As a result, plastic parts may
come loose in the event of air bag
deployment. There is a risk of injury.
Do not use any care products and cleaning
agents to clean the cockpit.
! Do not affix the following to plastic
surfaces:
R stickers
R films
R scented oil bottles or similar items
You can otherwise damage the plastic.
! Do not allow cosmetics, insect repellent
or sunscreen to come into contact with the
plastic trim. This maintains the high-quality
look of the surfaces. X
Wipe the plastic trim with a damp, lint-free
cloth, e.g. a microfiber cloth.
X Heavy soiling: use care and cleaning
products recommended and approved by
Mercedes-Benz.
The surface may change color temporarily.
Wait until the surface is dry again.
Cleaning the steering wheel and gear or
selector lever X
Thoroughly wipe with a damp cloth or use
leather care agents that have been
recommended and approved by Mercedes-
Benz.
Cleaning genuine wood and trim
elements !
Do not use solvent-based cleaning agents
such as tar remover, wheel cleaners,
polishes or waxes. There is otherwise a risk
of damaging the surface.
! Do not use chrome polish on trim pieces.
The trim pieces have a chrome look but are
mostly made of anodized aluminum and
can lose their shine if chrome polish is
used. Use a damp, lint-free cloth instead
when cleaning the trim pieces.
If the chrome-plated trim pieces are very
dirty, you can use a chrome polish. If you
are unsure as to whether the trim pieces
are chrome-plated or not, consult an
authorized Mercedes-Benz Center.
X Wipe the wooden trim and trim pieces with
a damp, lint-free cloth, e.g. a microfiber
cloth.
X Heavy soiling: use care and cleaning
products recommended and approved by
Mercedes-Benz. 360
CareMaintenance and care