2014 MERCEDES-BENZ E-SEDAN seats
[x] Cancel search: seatsPage 303 of 430
!
Close the cover of the stowage
compartment before folding the rear seat
armrest back into the seat backrest. X
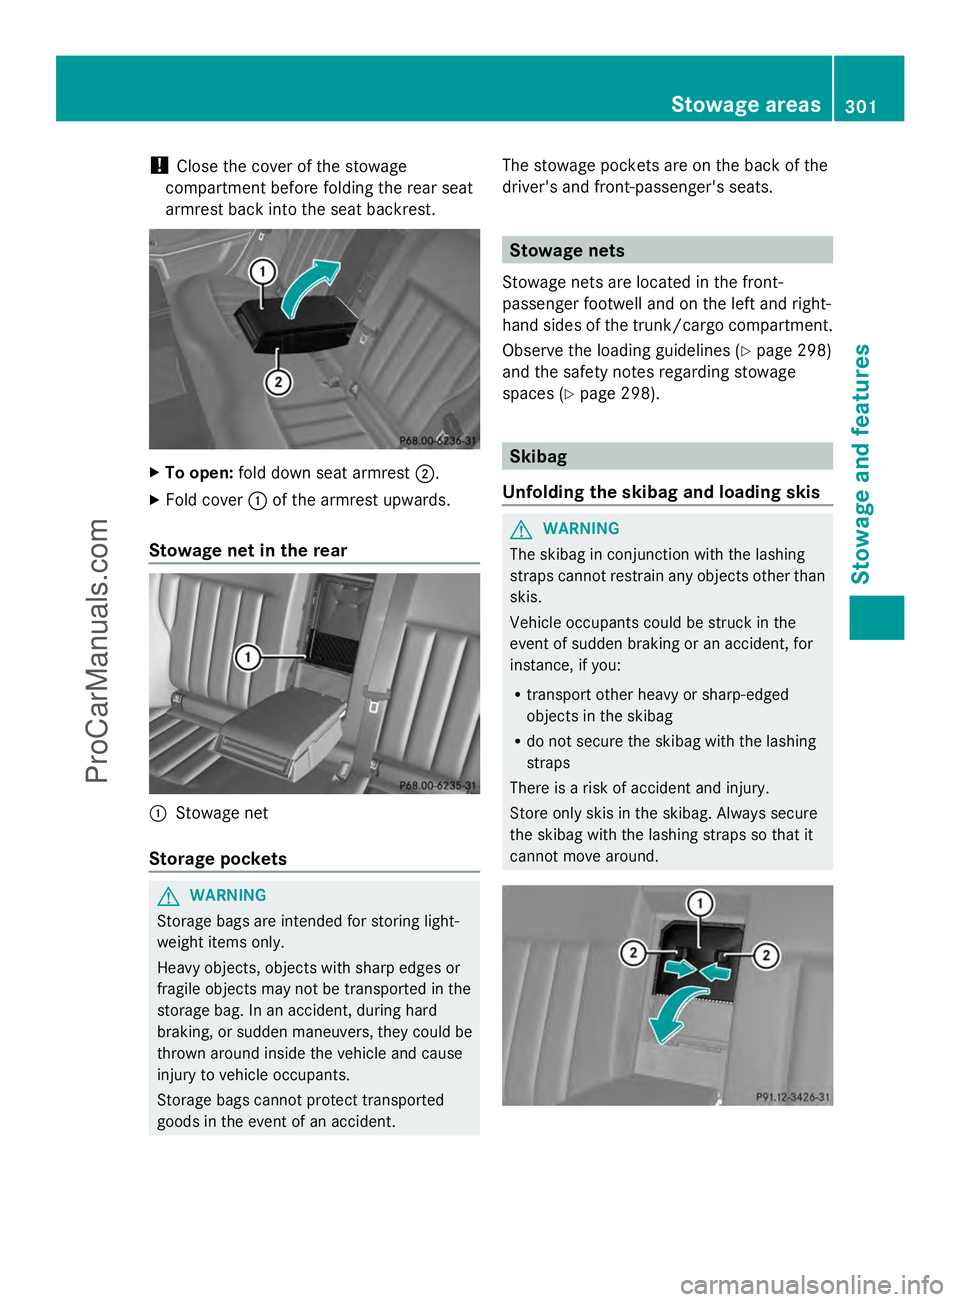
To open: fold down seat armrest ;.
X Fold cover :of the armrest upwards.
Stowage net in the rear :
Stowage net
Storage pockets G
WARNING
Storage bags are intended for storing light-
weight items only.
Heavy objects, objects with sharp edges or
fragile objects may not be transported in the
storage bag. In an accident, during hard
braking, or sudden maneuvers, they could be
thrown around inside the vehicle and cause
injury to vehicle occupants.
Storage bags cannot protect transported
goods in the event of an accident. The stowage pockets are on the back of the
driver's and front-passenger's seats. Stowage nets
Stowage nets are located in the front-
passenger footwell and on the left and right-
hand sides of the trunk/cargo compartment.
Observe the loading guidelines (Y page 298)
and the safety notes regarding stowage
spaces (Y page 298). Skibag
Unfolding the skibag and loading skis G
WARNING
The skibag in conjunction with the lashing
straps cannot restrain any objects other than
skis.
Vehicle occupants could be struck in the
event of sudden braking or an accident, for
instance, if you:
R transport other heavy or sharp-edged
objects in the skibag
R do not secure the skibag with the lashing
straps
There is a risk of accident and injury.
Store only skis in the skibag. Always secure
the skibag with the lashing straps so that it
cannot move around. Stowage areas
301Stowage and features Z
ProCarManuals.com
Page 307 of 430
Folding the rear seat backrest forward
!
When folding the rear seat backrest
forwards, ensure that there are no items
lying on the seat cushions. These items
could otherwise be damaged or could
themselves damage the rear seats. The left-hand and right-hand rear seat
backrests can be folded forwards separately
to increase the cargo compartment capacity.
The combined cargo cover and net can
remain installed.
i When you fold one or both parts of the
rear seat backrests forwards, the
headrests are also lowered if necessary. In
the case of vehicles with memory function,
the respective front seat is moved forwards
slightly to avoid contact with the seat
behind it.
X Vehicles without memory function: if
necessary, move the driver's or front-
passenger seat forwards.
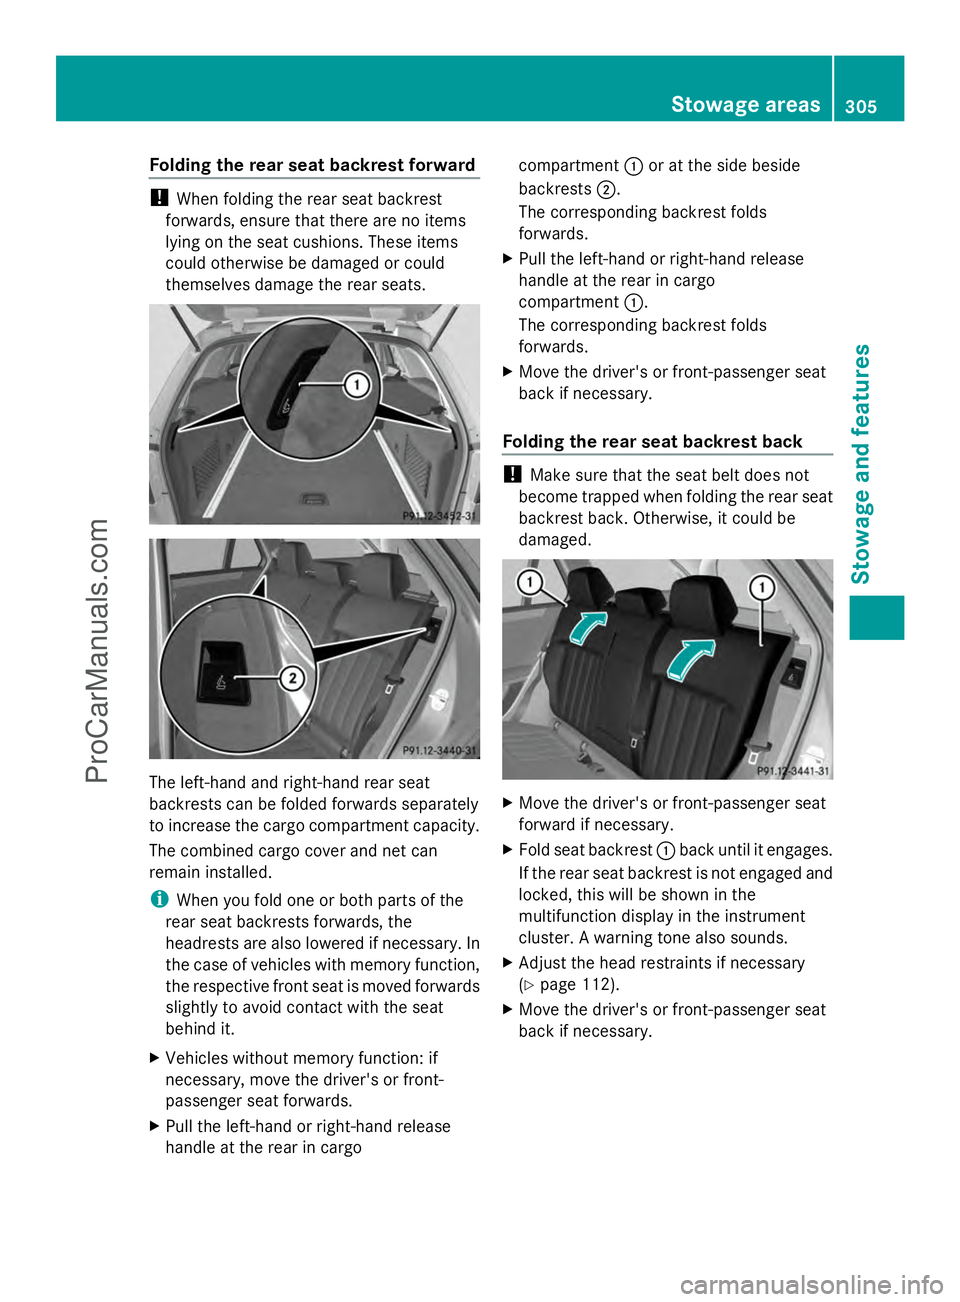
X Pull the left-hand or right-hand release
handle at the rear in cargo compartment
:or at the side beside
backrests ;.
The corresponding backrest folds
forwards.
X Pull the left-hand or right-hand release
handle at the rear in cargo
compartment :.
The corresponding backrest folds
forwards.
X Move the driver's or front-passenger seat
back if necessary.
Folding the rear seat backrest back !
Make sure that the seat belt does not
become trapped when folding the rear seat
backrest back. Otherwise, it could be
damaged. X
Move the driver's or front-passenger seat
forward if necessary.
X Fold seat backrest :back until it engages.
If the rear seat backrest is not engaged and
locked, this will be shown in the
multifunction display in the instrument
cluster. A warning tone also sounds.
X Adjust the head restraints if necessary
(Y page 112).
X Move the driver's or front-passenger seat
back if necessary. Stowage areas
305Stowage and featu res Z
ProCarManuals.com
Page 314 of 430
X
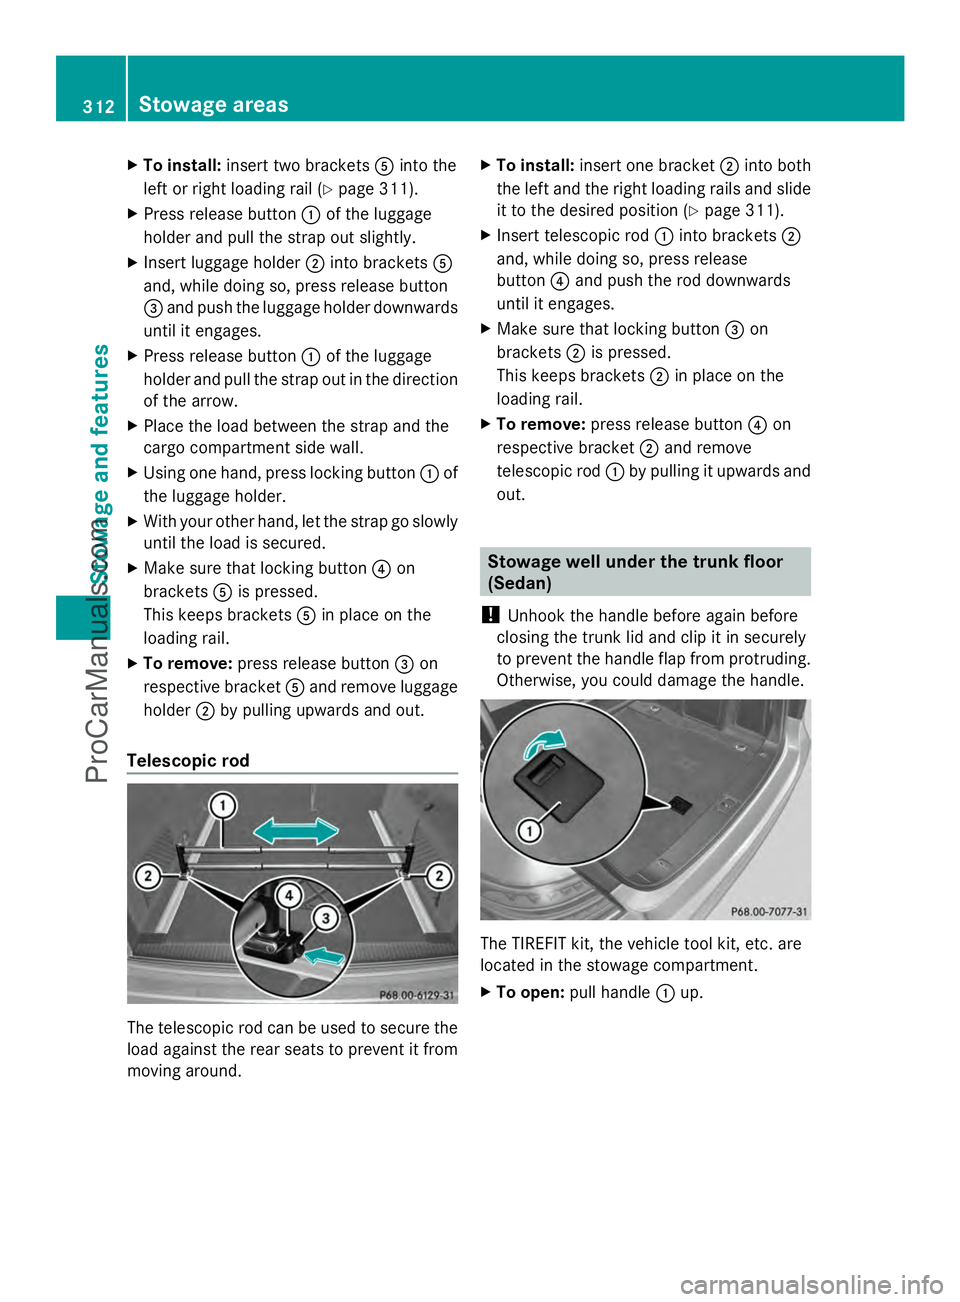
To install: insert two brackets Ainto the
left or right loading rail (Y page 311).
X Press release button :of the luggage
holder and pull the strap out slightly.
X Insert luggage holder ;into brackets A
and, while doing so, press release button
= and push the luggage holder downwards
until it engages.
X Press release button :of the luggage
holder and pull the strap out in the direction
of the arrow.
X Place the load between the strap and the
cargo compartment side wall.
X Using one hand, press locking button :of
the luggage holder.
X With your other hand, let the strap go slowly
until the load is secured.
X Make sure that locking button ?on
brackets Ais pressed.
This keeps brackets Ain place on the
loading rail.
X To remove: press release button =on
respective bracket Aand remove luggage
holder ;by pulling upwards and out.
Telescopic rod The telescopic rod can be used to secure the
load against the rear seats to prevent it from
moving around. X
To install: insert one bracket ;into both
the left and the right loading rails and slide
it to the desired position (Y page 311).
X Insert telescopic rod :into brackets ;
and, while doing so, press release
button ?and push the rod downwards
until it engages.
X Make sure that locking button =on
brackets ;is pressed.
This keeps brackets ;in place on the
loading rail.
X To remove: press release button ?on
respective bracket ;and remove
telescopic rod :by pulling it upwards and
out. Stowage well under the trunk floor
(Sedan)
! Unhook the handle before again before
closing the trunk lid and clip it in securely
to prevent the handle flap from protruding.
Otherwise, you could damage the handle. The TIREFIT kit, the vehicle tool kit, etc. are
located in the stowage compartment.
X
To open: pull handle :up. 312
Stowage areasSto
wage an d features
ProCarManuals.com
Page 360 of 430
X
Pull the tire sealant bottle out of the tire
inflation compressor.
The filler hose remains attached to the tire
sealant bottle.
X Stow the tire sealant bottle and the tire
inflation compressor.
X Drive to the nearest qualified specialist
workshop and have the tire changed there.
X Have the tire sealant bottle replaced as
soon as possible at a qualified specialist
workshop.
X Have the tire sealant bottle replaced every
four years at a qualified specialist
workshop. Battery (vehicle)
Important safety notes
Special tools and expert knowledge are
required when working on the battery, e.g.
removal and installing. You should therefore
have all work involving the battery carried out
at a qualified specialist workshop. G
WARNING
Work carried out incorrectly on the battery
can lead, for example, to a short circuit and
thus damage the vehicle electronics. This can
lead to function restrictions applying to
safety-relevant systems, e.g. the lighting
system, ABS (anti-lock braking system) or
ESP ®
(Electronic Stability Program). The
operating safety of your vehicle may be
restricted. You could lose control of the
vehicle, for example:
R braking
R in the event of abrupt steering maneuver
and/or when the vehicle's speed is not
adapted to the road conditions
There is a risk of an accident.
In the event of a short circuit or a similar
incident, contact a qualified specialist
workshop immediately. Do not drive any
further. You should have all work involving the battery carried out at a qualified specialist
workshop.
For further information about ABS and ESP ®
,
see (Y page 67) and (Y page 72). G
WARNING
Electrostatic build-up can lead to the creation
of sparks, which could ignite the highly
explosive gases of a battery. There is a risk of
an explosion.
Before handling the battery, touch the vehicle
body to remove any existing electrostatic
build-up.
The highly flammable gas mixture forms when
charging the battery as well as when jump-
starting.
Always make sure that neither you nor the
battery is electrostatically charged. A build-
up of electrostatic charge can be caused, for
example:
R by wearing clothing made from synthetic
fibers
R due to friction between clothing and seats
R if you push or pull the battery across the
carpet or other synthetic materials
R if you wipe the battery with a cloth G
WARNING
During the charging process, a battery
produces hydrogen gas. If a short circuit
occurs or sparks are created, the hydrogen
gas can ignite. There is a risk of an explosion.
R Make sure that the positive terminal of a
connected battery does not come into
contact with vehicle parts.
R Never place metal objects or tools on a
battery.
R It is important that you observe the
described order of the battery terminals
when connecting and disconnecting a
battery.
R When jump-starting, make sure that the
battery poles with identical polarity are
connected. 358
Battery (vehicle)Breakdown assistance
ProCarManuals.com
Page 379 of 430
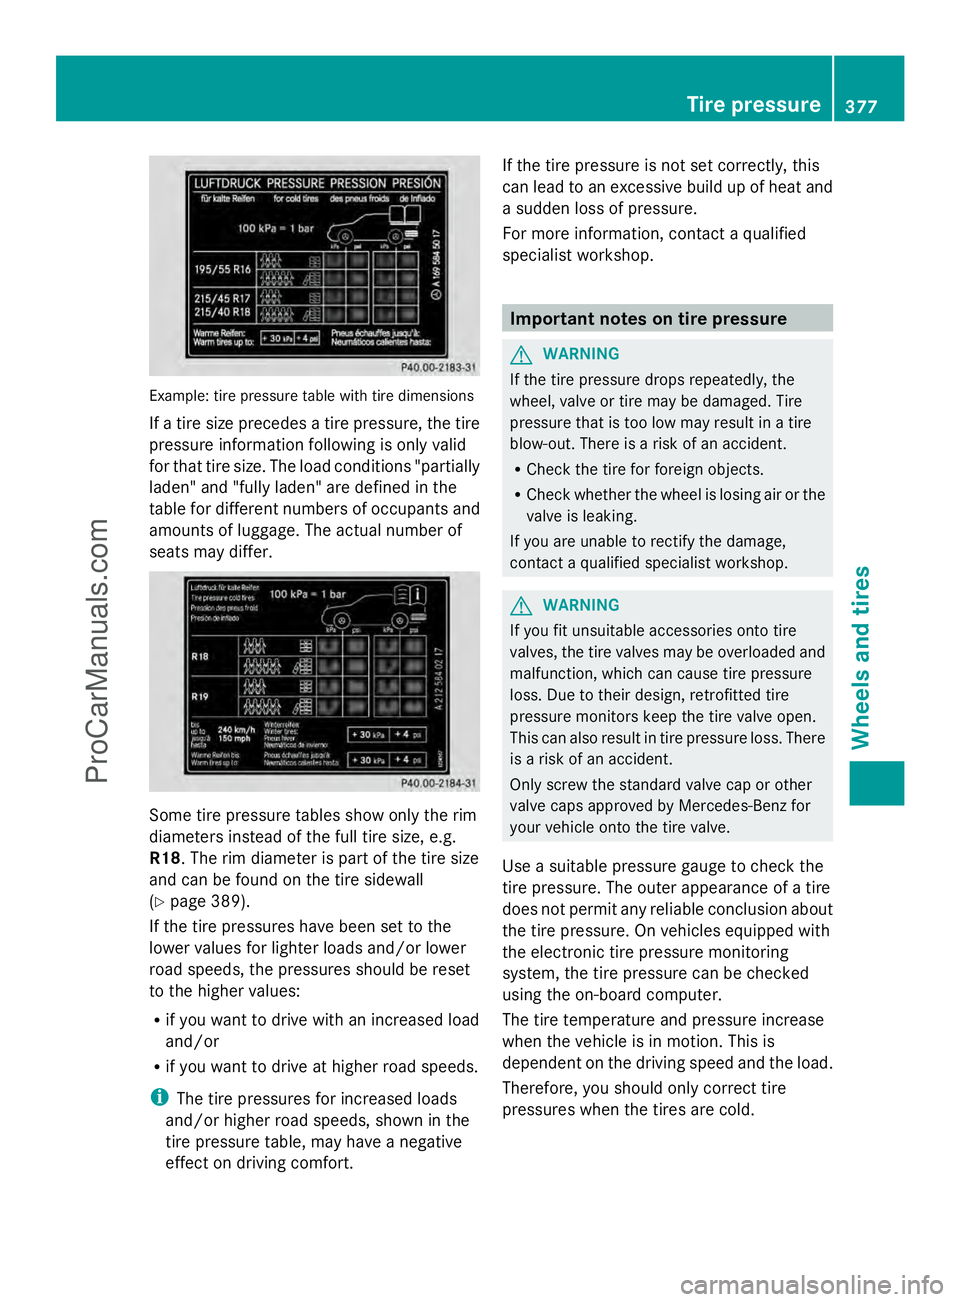
Example: tire pressure table with tire dimensions
If a tire size precedes a tire pressure, the tire
pressure information following is only valid
for that tire size. The load conditions "partially
laden" and "fully laden" are defined in the
table for different numbers of occupants and
amounts of luggage. The actual number of
seats may differ. Some tire pressure tables show only the rim
diameters instead of the full tire size, e.g.
R18 . The rim diameter is part of the tire size
and can be found on the tire sidewall
(Y page 389).
If the tire pressures have been set to the
lower values for lighter loads and/or lower
road speeds, the pressures should be reset
to the higher values:
R if you want to drive with an increased load
and/or
R if you want to drive at higher road speeds.
i The tire pressures for increased loads
and/or higher road speeds, shown in the
tire pressure table, may have a negative
effect on driving comfort. If the tire pressure is not set correctly, this
can lead to an excessive build up of heat and
a sudden loss of pressure.
For more information, contact a qualified
specialist workshop.
Important notes on tire pressure
G
WARNING
If the tire pressure drops repeatedly, the
wheel, valve or tire may be damaged. Tire
pressure that is too low may result in a tire
blow-out. There is a risk of an accident.
R Check the tire for foreign objects.
R Check whether the wheel is losing air or the
valve is leaking.
If you are unable to rectify the damage,
contact a qualified specialist workshop. G
WARNING
If you fit unsuitable accessories onto tire
valves, the tire valves may be overloaded and
malfunction, which can cause tire pressure
loss. Due to their design, retrofitted tire
pressure monitors keep the tire valve open.
This can also result in tire pressure loss. There
is a risk of an accident.
Only screw the standard valve cap or other
valve caps approved by Mercedes-Benz for
your vehicle onto the tire valve.
Use a suitable pressure gauge to check the
tire pressure. The outer appearance of a tire
does not permit any reliable conclusion about
the tire pressure. On vehicles equipped with
the electronic tire pressure monitoring
system, the tire pressure can be checked
using the on-board computer.
The tire temperature and pressure increase
when the vehicle is in motion. This is
dependent on the driving speed and the load.
Therefore, you should only correct tire
pressures when the tires are cold. Tire pressure
377Wheels and tires Z
ProCarManuals.com
Page 386 of 430
your vehicle. Never overload the tires by
exceeding the maximum load.
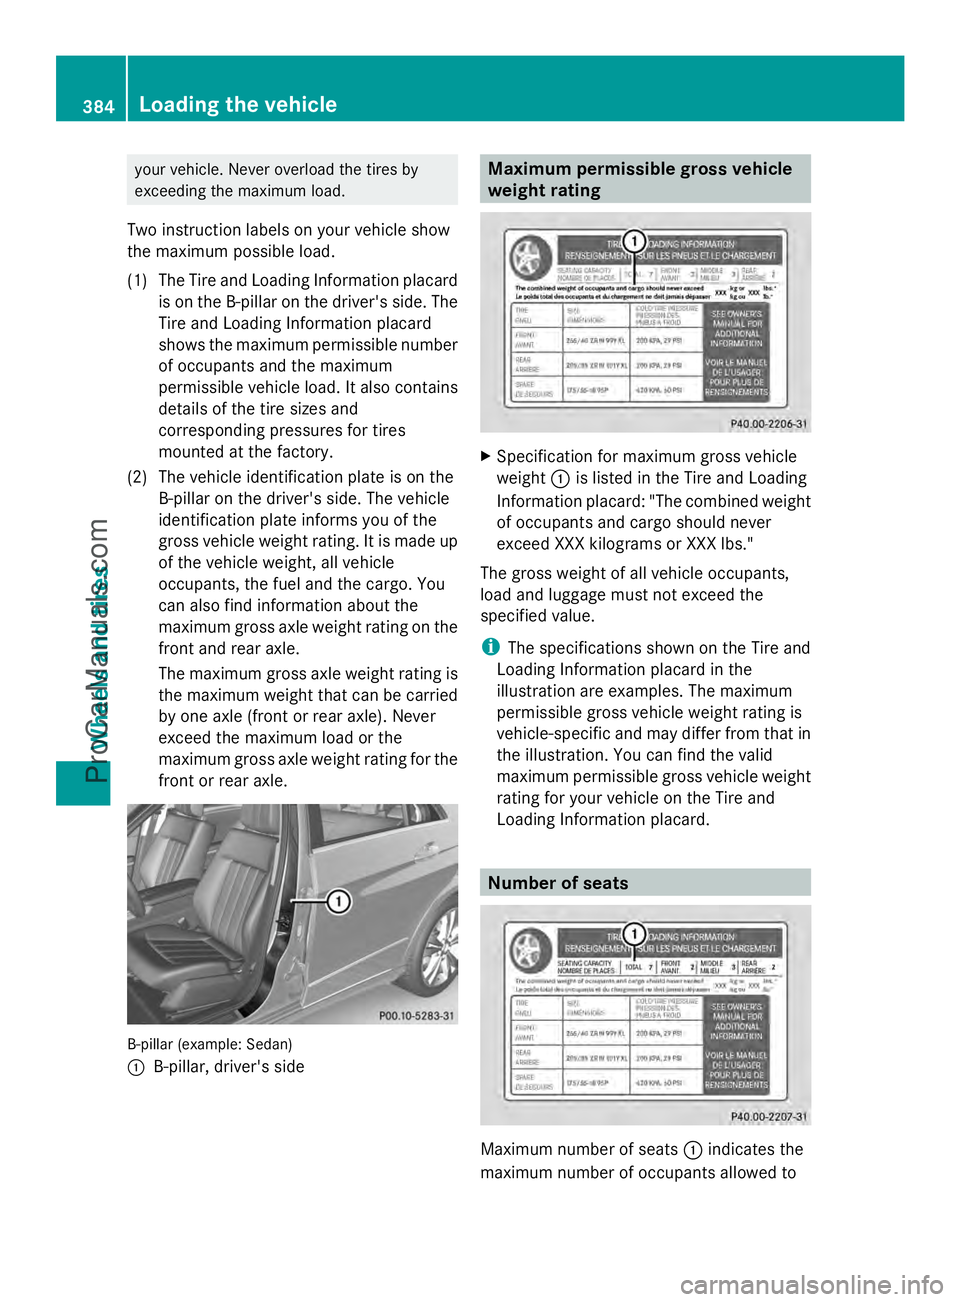
Two instruction labels on your vehicle show
the maximum possible load.
(1) The Tire and Loading Information placard is on the B-pillar on the driver's side. The
Tire and Loading Information placard
shows the maximum permissible number
of occupants and the maximum
permissible vehicle load. It also contains
details of the tire sizes and
corresponding pressures for tires
mounted at the factory.
(2) The vehicle identification plate is on the B-pillar on the driver's side. The vehicle
identification plate informs you of the
gross vehicle weight rating. It is made up
of the vehicle weight, all vehicle
occupants, the fuel and the cargo. You
can also find information about the
maximum gross axle weight rating on the
front and rear axle.
The maximum gross axle weight rating is
the maximum weight that can be carried
by one axle (front or rear axle). Never
exceed the maximum load or the
maximum gross axle weight rating for the
front or rear axle. B-pillar (example: Sedan)
:
B-pillar, driver's side Maximum permissible gross vehicle
weight rating
X
Specification for maximum gross vehicle
weight :is listed in the Tire and Loading
Information placard: "The combined weight
of occupants and cargo should never
exceed XXX kilograms or XXX lbs."
The gross weight of all vehicle occupants,
load and luggage must not exceed the
specified value.
i The specifications shown on the Tire and
Loading Information placard in the
illustration are examples. The maximum
permissible gross vehicle weight rating is
vehicle-specific and may differ from that in
the illustration. You can find the valid
maximum permissible gross vehicle weight
rating for your vehicle on the Tire and
Loading Information placard. Number of seats
Maximum number of seats
:indicates the
maximum number of occupants allowed to 384
Loading the vehicleWheels and ti
res
ProCarManuals.com
Page 387 of 430
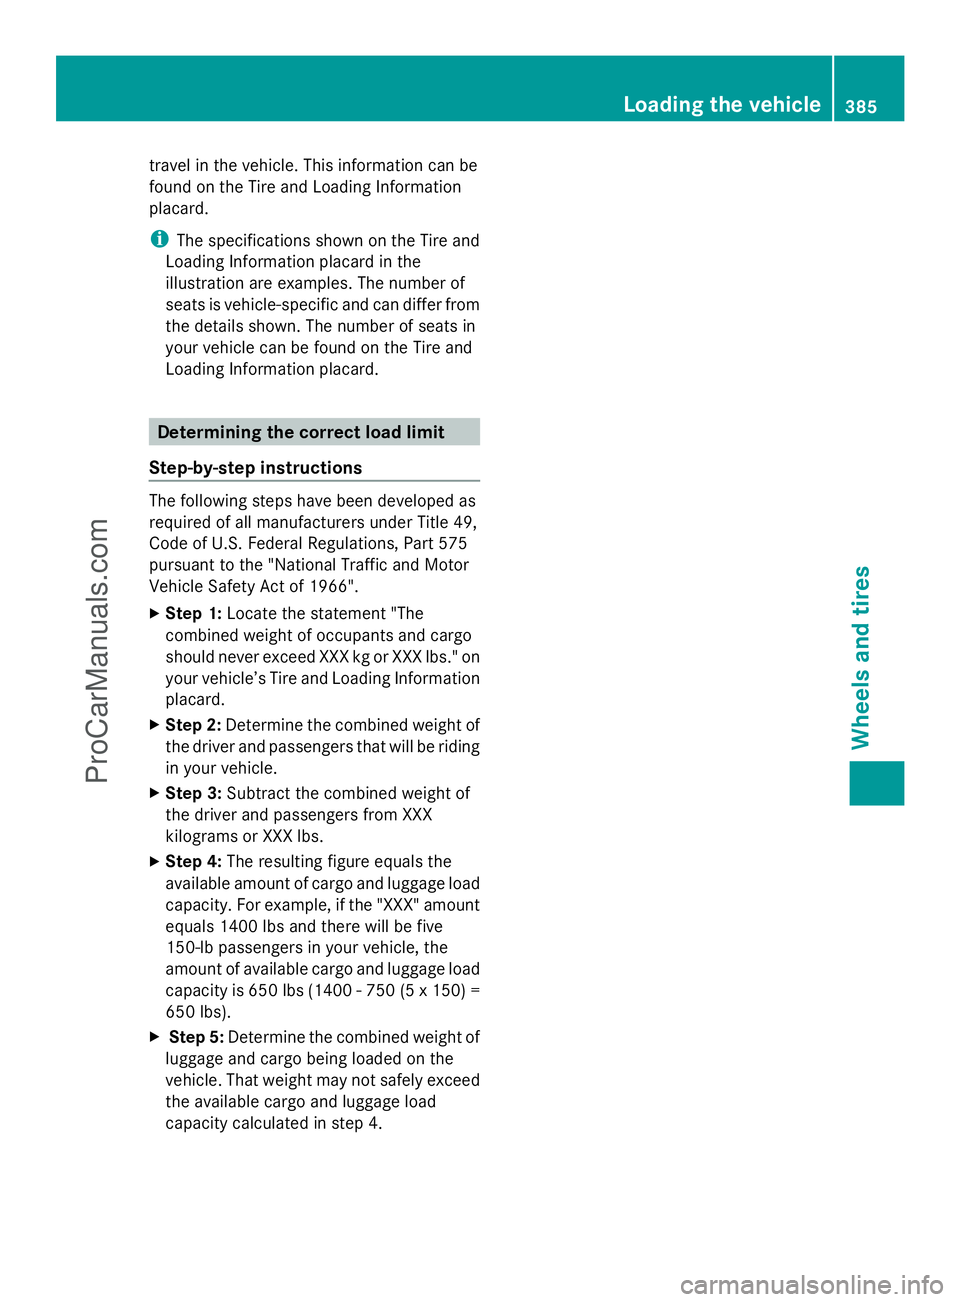
travel in the vehicle. This information can be
found on the Tire and Loading Information
placard.
i The specifications shown on the Tire and
Loading Information placard in the
illustration are examples. The number of
seats is vehicle-specific and can differ from
the details shown. The number of seats in
your vehicle can be found on the Tire and
Loading Information placard. Determining the correct load limit
Step-by-step instructions The following steps have been developed as
required of all manufacturers under Title 49,
Code of U.S. Federal Regulations, Part 575
pursuant to the "National Traffic and Motor
Vehicle Safety Act of 1966".
X Step 1: Locate the statement "The
combined weight of occupants and cargo
should never exceed XXX kg or XXX lbs." on
your vehicle’s Tire and Loading Information
placard.
X Step 2: Determine the combined weight of
the driver and passengers that will be riding
in your vehicle.
X Step 3: Subtract the combined weight of
the driver and passengers from XXX
kilograms or XXX lbs.
X Step 4: The resulting figure equals the
available amount of cargo and luggage load
capacity. For example, if the "XXX" amount
equals 1400 lbs and there will be five
150-lb passengers in your vehicle, the
amount of available cargo and luggage load
capacity is 650 lb s(1400 - 750 (5 x 150) =
650 lbs).
X Step 5: Determine the combined weight of
luggage and cargo being loaded on the
vehicle. That weight may not safely exceed
the available cargo and luggage load
capacity calculated in step 4. Loading the vehicle
385Wheels and tires Z
ProCarManuals.com
Page 397 of 430

Occupant distribution
The distribution of occupants in a vehicle at
their designated seating positions.
Total load limit
Rated cargo and luggage load plus
68 kilograms (150 lb) multiplied by the
number of seats in the vehicle. Changing a wheel
Flat tire
The "Breakdown assistance" section
(Y page 354)c ontains information and notes
on how to deal with a flat tire. Information on
driving with MOExtended tires in the event of
a flat tire can be found under "MOExtended
tires (tires with run-flat characteristics"
(Y page 354).
Vehicle with emergency spare wheel: in
the event of a flat tire, the emergency spare
wheel is mounted as described under
"Mounting a wheel" ( Ypage 396). Rotating the wheels
G
WARNING
Interchanging the front and rear wheels may
severely impair the driving characteristics if
the wheels or tires have different dimensions.
The wheel brakes or suspension components
may also be damaged. There is a risk of
accident.
Rotate front and rear wheels only if the wheels
and tires are of the same dimensions.
! On vehicles equipped with a tire pressure
monitor, electronic components are
located in the wheel.
Tire-mounting tools should not be used
near the valve. This could damage the
electronic components.
Only have tires changed at a qualified
specialist workshop. Always observe the instructions and safety
notes in the "Mounting a wheel" section
(Y
page 396).
The wear patterns on the front and rear tires
differ, depending on the operating conditions.
Rotate the wheels before a clear wear pattern
has formed on the tires. Front tires typically
wear more on the shoulders and the rear tires
in the center.
If your vehicle's tire configuration allows, you
can rotate the wheels according to the
intervals in the tire manufacturer's warranty
book in your vehicle documents. If no
warranty book is available, the tires should be
rotated every 3,000 to 6,000 miles (5,000 to
10,000 km), or earlier if tire wear requires. Do
not change the direction of wheel rotation.
Clean the contact surfaces of the wheel and
the brake disc thoroughly every time a wheel
is rotated. Check the tire pressure and, if
necessary, restart the tire pressure loss
warning system or the tire pressure monitor. Direction of rotation
Tires with a specified direction of rotation
have additional benefits, e.g. if there is a risk
of hydroplaning. You will only gain these
benefits if the correct direction of rotation is
maintained.
An arrow on the sidewall of the tire indicates
its correct direction of rotation. Storing wheels
Store wheels that are not being used in a cool,
dry and preferably dark place. Protect the
tires from oil, grease, gasoline and diesel. Cleaning the wheels
G
WARNING
The water jet from a circular jet nozzle (dirt
blasters) can cause invisible exterior damage
to the tires or chassis components. Changing a wheel
395Wheels and tires
Z
ProCarManuals.com