Page 33 of 417
Cockpit
Function Page
:
Steering wheel gearshift
paddles
173
;
Combination switch 125
=
Instrument cluster 32
?
Horn
A
DIRECT SELECT lever 168
B
PARKTRONIC warning dis-
play
207
C
Overhead control panel 39
D
Climate control systems 138
E
Ignition lock 159
Start/Stop button 159 Function Page
F
Adjusts the steering wheel
manually
113
G
Adjusts the steering wheel
electrically
113
Steering wheel heating 114
H
Cruise control lever 186
I
Parking brake 181
J
Diagnostics connection 25
K
Opens the bonnet 328
L
Releases the parking brake 181
M
Light switch 122
N
Night View Assist Plus 22030
CockpitAt a glance
Page 34 of 417
Function Page
:
Overhead control panel 39
;
PARKTRONIC warning dis-
play 207
=
Combination switch 125
?
Instrument cluster 32
A
Horn
B
DIRECT SELECT lever 168
C
Steering wheel gearshift
paddles
173
D
Light switch 122
E
Night View Assist Plus 220
F
Releases the parking brake 181 Function Page
G
Opens the bonnet 328
H
Diagnostics connection 25
I
Ignition lock 159
Start/Stop button 159
J
Adjusts the steering wheel
manually
113
K
Adjusts the steering wheel
electrically
113
Steering wheel heating 114
L
Cruise control lever 186
M
Parking brake 181
N
Climate control systems 138Cockpit
31At a glance
Page 39 of 417
Centre console
Centre console, upper section
Function Page
:
Audio system/COMAND
Online; see the separate
operating instructions
;
c
Seat heating 111
=
s
Seat ventilation 112
?
c
PARKTRONIC 207
A
¤
start/stop function 163
B
4
PASSENGER AIRBAG
OFF indicator lamp 59 Function Page
C
£
Hazard warning
lamps 126
D
u
Rear-window roller
sunblind (CLS Coupé) 315
Ü
Lowers the rear seat
head restraints (CLS Shoot-
ing Brake) 108
E
&
Auxiliary heating 15036
Centre consoleAt a glance
Page 91 of 417
Problem
Possible causes/consequences and
M
MSolutions The engine cannot be
started using the key. The on-board voltage is too low.
X Switch off non-essential consumers, e.g. seat heating or interior
lighting, and try to start the engine again.
If this does not work:
X Check the starter battery and charge it if necessary
(Y page 353).
or
X Jump-start the vehicle (Y page 355).
or
X Consult a qualified specialist workshop. The engine cannot be
started using KEYLESS-
GO. The key is in the
vehicle. The vehicle is locked.
X Unlock the vehicle and try to start the vehicle again. There is interference from a powerful source of radio waves.
X Start your vehicle with the key in the ignition lock. Doors
Important safety notes
United Kingdom only: G
WARNING
When the double locks are activated, the
doors can no longer be opened from the
inside. People in the vehicle can no longer get out, e.g. in hazardous situations. There is a
risk of injury.
Therefore, do not leave any people unsuper-
vised in the vehicle, particularly children, eld-
erly people or people in need of special assis-
tance. Do not activate the double lock when
people are in the vehicle.
If the vehicle has been locked from the out-
side, the double-lock function is activated as
standard. It is then not possible to open the
doors from inside the vehicle. You can deac-
tivate the double-lock function by deactivat-
ing the interior motion sensor (Y page 79).
The doors can then be opened from the inside after the vehicle has been locked from the
outside. The anti-theft alarm system is trig- gered if the door is opened from the inside.
Switch off the alarm (Y
page 78).
All countries: G
WARNING
If children are left unsupervised in the vehicle, they could:
R open doors, thereby endangering other per-
sons or road users
R get out and be struck by oncoming traffic
R operate vehicle equipment and become
trapped, for example
In addition, the children could also set the
vehicle in motion, for example, if they:
R release the parking brake
R shift the automatic transmission out of park
position P or shift manual transmission into
neutral
R start the engine
There is a risk of an accident and injury.
When leaving the vehicle, always take the key with you and lock the vehicle. Never leave
children and animals unattended in the vehi-
cle. Keep the keys out of the reach of children. 88
DoorsOpening and closing
Page 109 of 417
!
To avoid damage to the seats and the seat
heating, observe the following information:
R do not spill any liquids on the seats. If
liquid is spilled on the seats, dry them as soon as possible.
R if the seat covers are damp or wet, do not
switch on the seat heating. The seat
heating should also not be used to dry
the seats.
R clean the seat covers as recommended;
see "Interior care".
R do not transport heavy loads on the
seats. Do not place sharp objects on the seat cushions, e.g. knives, nails or tools. The seats should only be occupied by
passengers, if possible.
R when the seat heating is in operation, do
not cover the seats with insulating mate-
rials, e.g. blankets, coats, bags, seat cov- ers, child seats or booster seats.
! Make sure that there are no objects in the
footwell under or behind the seats when
moving the seats back. There is a risk that
the seats and/or the objects could be dam- aged.
i The head restraints in the front seats are
fitted with the NECK-PRO system
(Y page 53). For this reason, it is not pos-
sible to remove the head restraints from
the front seats.
For more information, contact a qualified
specialist workshop.
i Further related subjects:
R Through-loading facility in the rear bench
seat (Y page 305)
R Through-loading facility in the rear bench
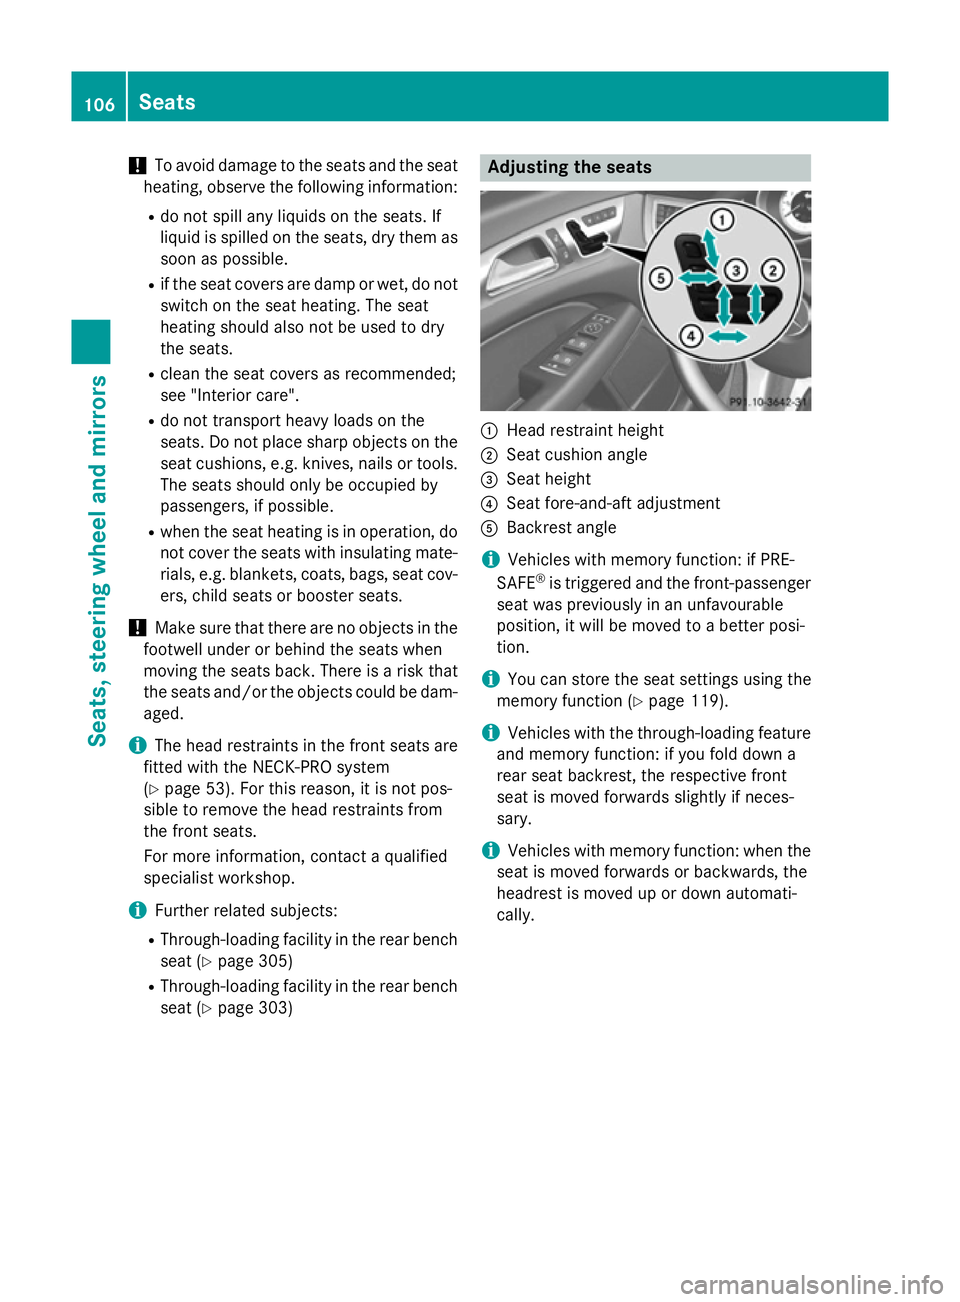
seat (Y page 303) Adjusting the seats
:
Head restraint height
; Seat cushion angle
= Seat height
? Seat fore-and-aft adjustment
A Backrest angle
i Vehicles with memory function: if PRE-
SAFE ®
is triggered and the front-passenger
seat was previously in an unfavourable
position, it will be moved to a better posi-
tion.
i You can store the seat settings using the
memory function (Y page 119).
i Vehicles with the through-loading feature
and memory function: if you fold down a
rear seat backrest, the respective front
seat is moved forwards slightly if neces-
sary.
i Vehicles with memory function: when the
seat is moved forwards or backwards, the
headrest is moved up or down automati-
cally. 106
SeatsSeats, steering wheel and mirrors
Page 114 of 417
Adjusting the lumbar support
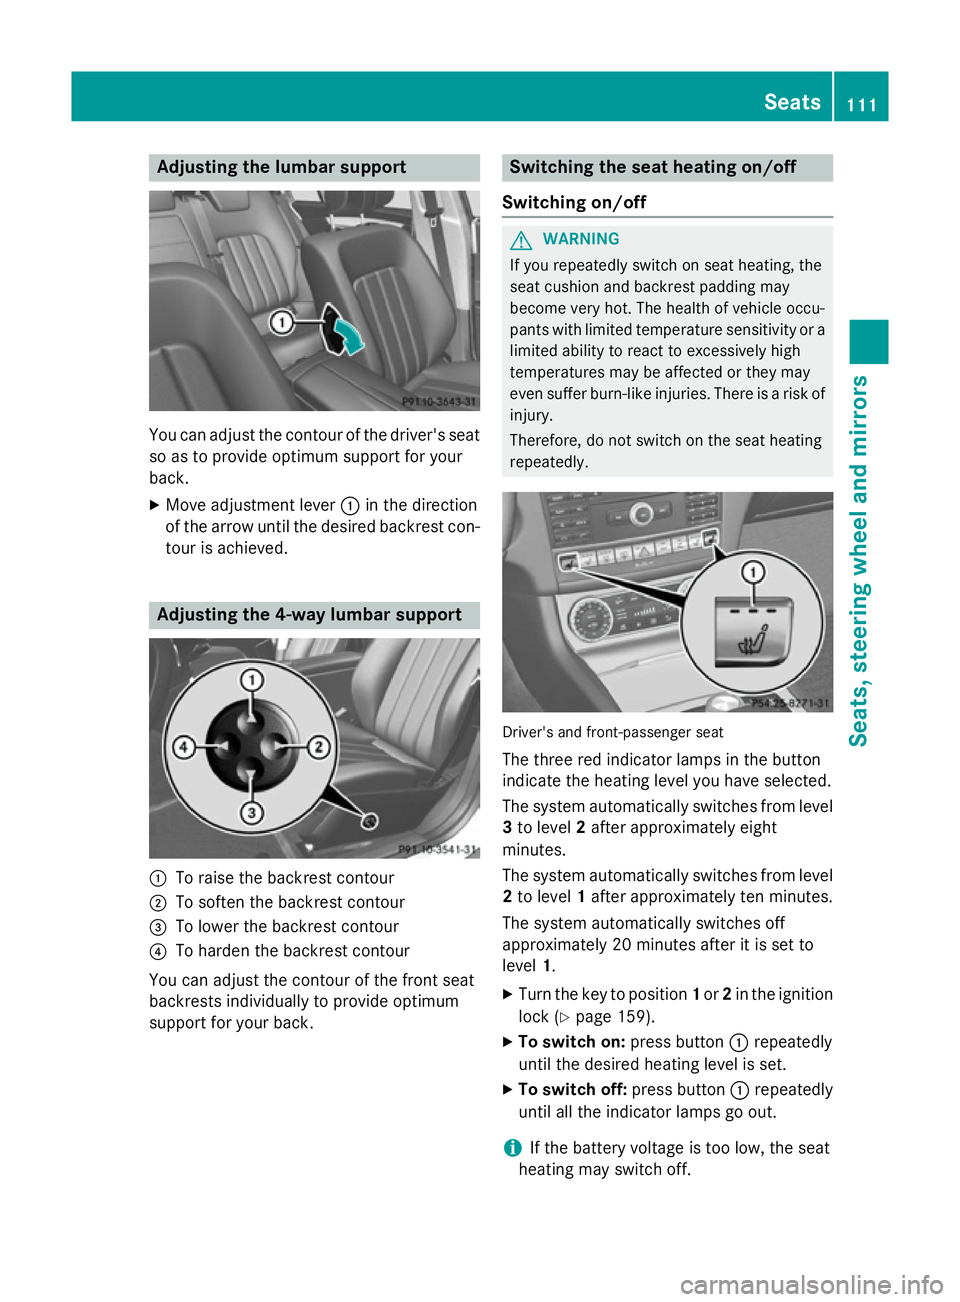
You can adjust the contour of the driver's seat
so as to provide optimum support for your
back.
X Move adjustment lever :in the direction
of the arrow until the desired backrest con- tour is achieved. Adjusting the 4-way lumbar support
:
To raise the backrest contour
; To soften the backrest contour
= To lower the backrest contour
? To harden the backrest contour
You can adjust the contour of the front seat
backrests individually to provide optimum
support for your back. Switching the seat heating on/off
Switching on/off G
WARNING
If you repeatedly switch on seat heating, the
seat cushion and backrest padding may
become very hot. The health of vehicle occu-
pants with limited temperature sensitivity or a limited ability to react to excessively high
temperatures may be affected or they may
even suffer burn-like injuries. There is a risk of
injury.
Therefore, do not switch on the seat heating
repeatedly. Driver's and front-passenger seat
The three red indicator lamps in the button
indicate the heating level you have selected.
The system automatically switches from level 3 to level 2after approximately eight
minutes.
The system automatically switches from level
2 to level 1after approximately ten minutes.
The system automatically switches off
approximately 20 minutes after it is set to
level 1.
X Turn the key to position 1or 2in the ignition
lock (Y page 159).
X To switch on: press button:repeatedly
until the desired heating level is set.
X To switch off: press button:repeatedly
until all the indicator lamps go out.
i If the battery voltage is too low, the seat
heating may switch off. Seats
111Seats, steering wheel and mirrors Z
Page 115 of 417
Problems with the seat heating
Problem
Possible causes/consequences and
M
MSolutions The seat heating has
switched off prema-
turely or cannot be
switched on. The on-board voltage is too low because too many electrical con-
sumers are switched on.
X Switch off electrical consumers that you do not need, such as
the rear window heating or interior lighting.
Once the battery is sufficiently charged, the seat heating will
switch back on automatically. Switching the seat ventilation on/off
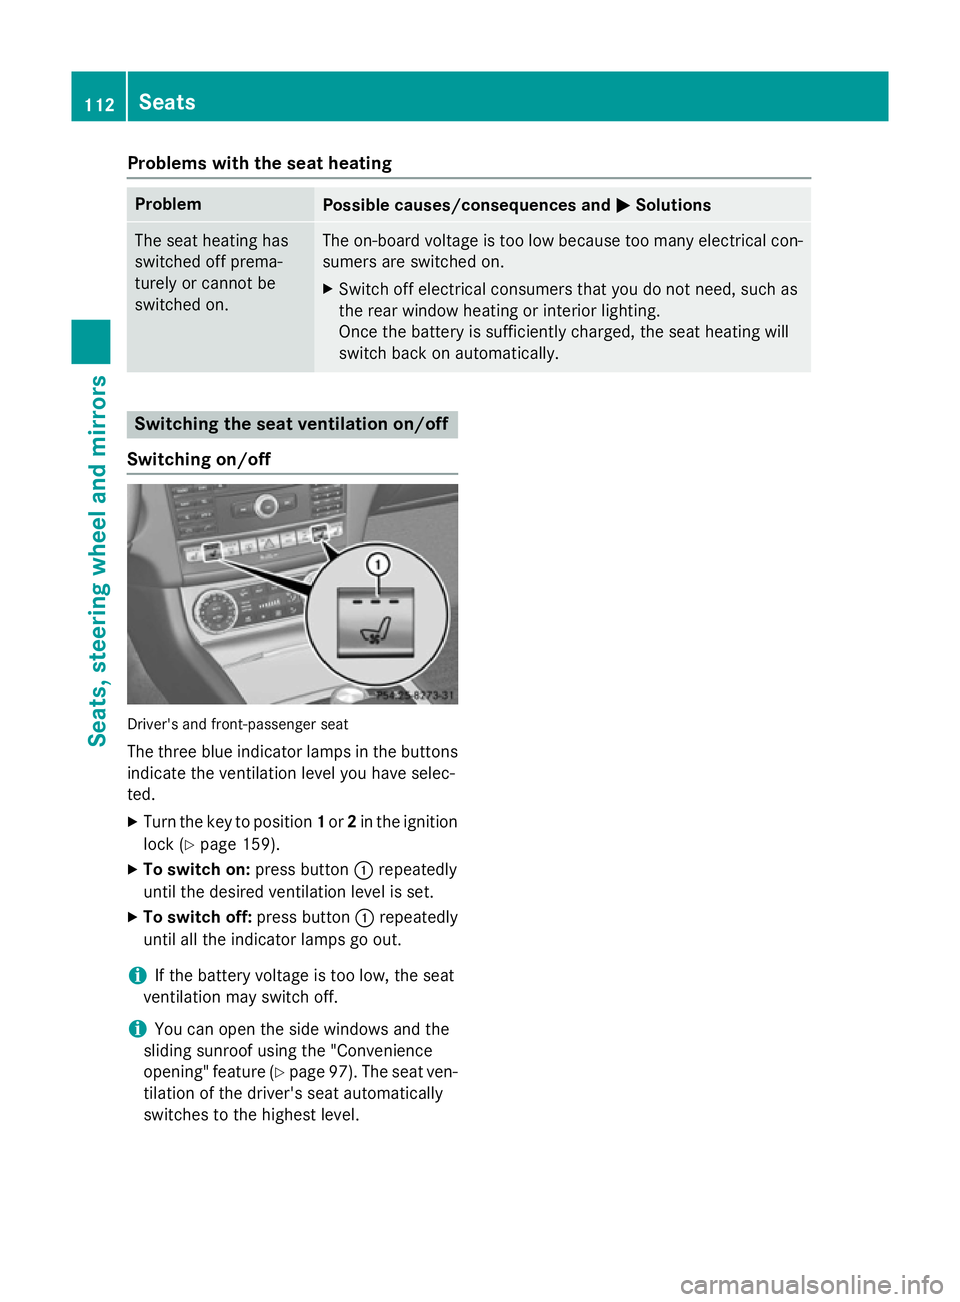
Switching on/off Driver's and front-passenger seat
The three blue indicator lamps in the buttons
indicate the ventilation level you have selec-
ted.
X Turn the key to position 1or 2in the ignition
lock (Y page 159).
X To switch on: press button:repeatedly
until the desired ventilation level is set.
X To switch off: press button:repeatedly
until all the indicator lamps go out.
i If the battery voltage is too low, the seat
ventilation may switch off.
i You can open the side windows and the
sliding sunroof using the "Convenience
opening" feature (Y page 97). The seat ven-
tilation of the driver's seat automatically
switches to the highest level. 112
SeatsSeats, steering wheel and mirrors
Page 116 of 417
Problems with the seat ventilation
Problem
Possible causes/consequences and
M
MSolutions The seat ventilation has
switched off prema-
turely or cannot be
switched on. The on-board voltage is too low because too many electrical con-
sumers are switched on.
X Switch off electrical consumers that you do not need, such as
the rear window heating or interior lighting.
Once the battery is sufficiently charged, the seat ventilation will
switch back on automatically. Steering wheel
Important safety notes
G
WARNING
You could lose control of the vehicle while
driving if you:
R adjust the driver's seat, steering wheel or
mirrors
R fasten the seat belt
There is a risk of an accident.
Adjust the driver's seat, head restraint, steer-
ing wheel and mirrors and fasten your seat
belt before starting the engine. G
WARNING
Children could become trapped by the steer-
ing wheel if they adjust it. There is a risk of
injury.
When leaving the vehicle, always take the key with you and lock the vehicle. Never leave
children unattended in the vehicle. Adjusting the steering wheel man-
ually
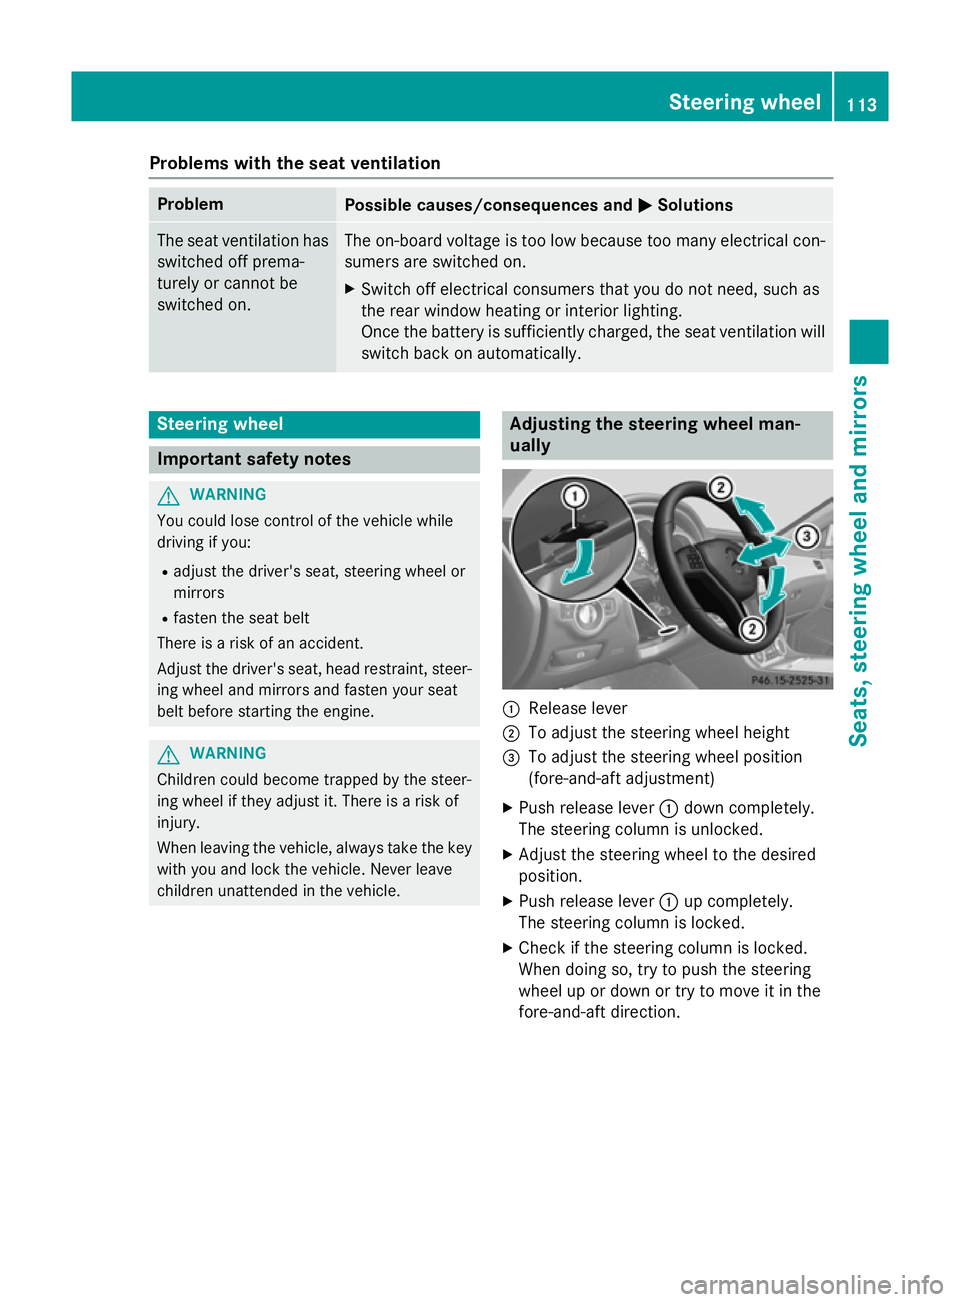
:
Release lever
; To adjust the steering wheel height
= To adjust the steering wheel position
(fore-and-aft adjustment)
X Push release lever :down completely.
The steering column is unlocked.
X Adjust the steering wheel to the desired
position.
X Push release lever :up completely.
The steering column is locked.
X Check if the steering column is locked.
When doing so, try to push the steering
wheel up or down or try to move it in the
fore-and-aft direction. Steering wheel
113Seats, steering wheel and mirrors Z