2014 MERCEDES-BENZ C-CLASS ESTATE ignition
[x] Cancel search: ignitionPage 283 of 489
X
Observe the notes on starting the engine
(Y page 187).
X Turn the key to position 3in the ignition
lock (Y page 188) or press the Start/Stop
button once (Y page 188).
The vehicle is operational when READY indi-
cator :lights up.
Noiseless start The vehicle starts in electric mode without the
internal combustion engine. The internal
combustion engine starts only after the
power demanded by the driver exceeds the
available power that the electric motor can
currently provide.
Noiseless start operation is dependent on the
outside temperature and the operating tem-
perature of the internal combustion engine.
The vehicle is operational when READY indi-
cator :lights up. Pulling away
X Depress the brake pedal and keep it
depressed.
X Shift the transmission to position Dor R.
X Release the brake pedal.
Further information on pulling away
(Y page 189). Driving
AGILITY SELECT switch Drive programs
Use the AGILITY SELECT switch to change the
drive program. Depending on the drive pro-
gram selected, the following vehicle charac-
teristics will change:
R the drive (engine and transmission man-
agement)
R the suspension
R the steering R
the availability of the ECO start/stop func-
tion (Y page 282)
R the climate control settings
- THERMATIC (1-zone) (Y page 153)
- THERMATIC (2-zone) (Y page 157)
- THERMOTRONIC (3-zone) (Y page 160)
R the rear window heating operation period
(Y page 167)
R the performance of the seat heating
(Y page 123)
If the ignition is switched off for less than four
hours, the previously selected drive program
is activated when the engine is next started. If the ignition is switched off for more than four
hours, drive program Cis activated when the
engine is next started. X
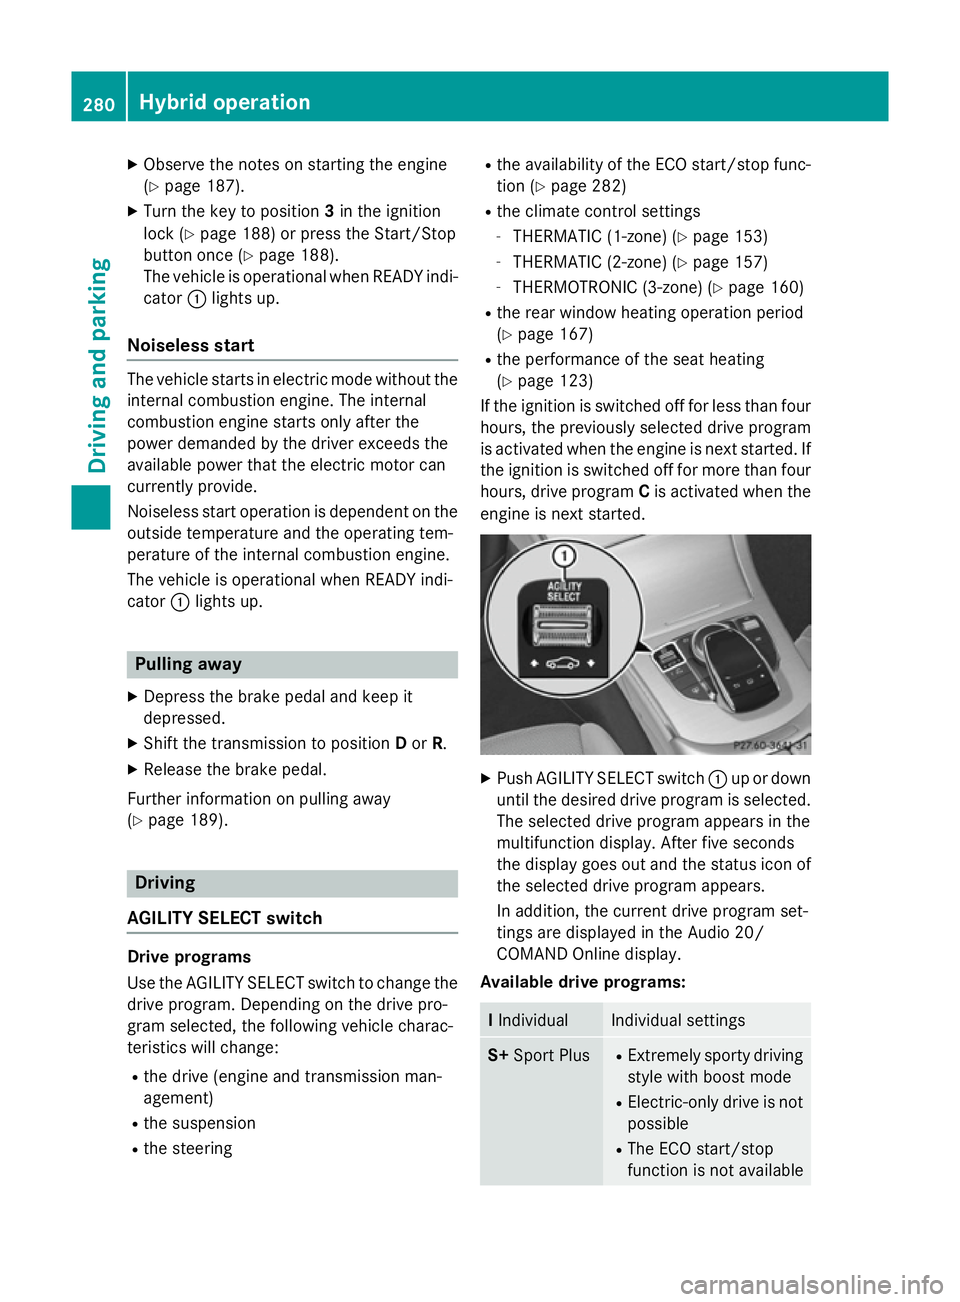
Push AGILITY SELECT switch :up or down
until the desired drive program is selected. The selected drive program appears in the
multifunction display. After five seconds
the display goes out and the status icon of
the selected drive program appears.
In addition, the current drive program set-
tings are displayed in the Audio 20/
COMAND Online display.
Available drive programs: I
Individual Individual settings
S+
Sport Plus R
Extremely sporty driving
style with boost mode
R Electric-only drive is not
possible
R The ECO start/stop
function is not available 280
Hybrid operationDriving and parking
Page 287 of 489
Parking
X Apply the electric parking brake.
The red !indicator lamp in the instru-
ment cluster lights up.
X Use the DIRECT SELECT lever to shift the
automatic transmission to P.
X Switch the ignition off.
The READY indicator in the instrument clus-
ter goes out.
Further information on parking and switching off the internal combustion engine
(Y page 212). 284
Hybrid operationDriving and parking
Page 288 of 489
Problems with hybrid operation
Internal combustion engine Problem
Possible causes/consequences and
M
MSolutions You cannot start the
internal combustion
engine. The multifunc-
tion display shows no
display messages. The
READY indicator in the
multifunction display is
off. For example, the self-diagnosis is not yet complete or the hybrid
system is malfunctioning.
X Switch off the ignition and turn it back on.
X Try to start the internal combustion engine again.
If the internal combustion engine still does not start: X Consult a qualified specialist workshop. You wish to pull away,
but the ECO start/stop
function does not start
the internal combus-
tion engine. The READY
indicator in the multi-
function display is off. The ECO start/stop function has failed. The warning and indicator
lamps in the instrument cluster light up.
X Move the transmission selector lever to P.
X Switch off the ignition and turn it back on.
X Start the engine. The hybrid system is malfunctioning.
X Consult a qualified specialist workshop. Hybrid system
Problem
Possible causes/consequences and
M MSolutions The hybrid system was
deactivated automati-
cally. You have been in an accident.
The hybrid system remains deactivated if:
R the internal combustion engine cannot be restarted after a few
seconds.
R the red SRS warning lamp 6in the instrument cluster is lit.
X Consult a qualified specialist workshop. The hybrid system was
deactivated automati-
cally. The multifunction
display also shows a
display message. An electrical short circuit has occurred in the hybrid system or an
electrical connection has been disconnected.
X Observe the additional display messages in the multifunction
display (Y page 316).
X Consult a qualified specialist workshop. Hybrid operation
285Driving and parking Z
Page 293 of 489
X
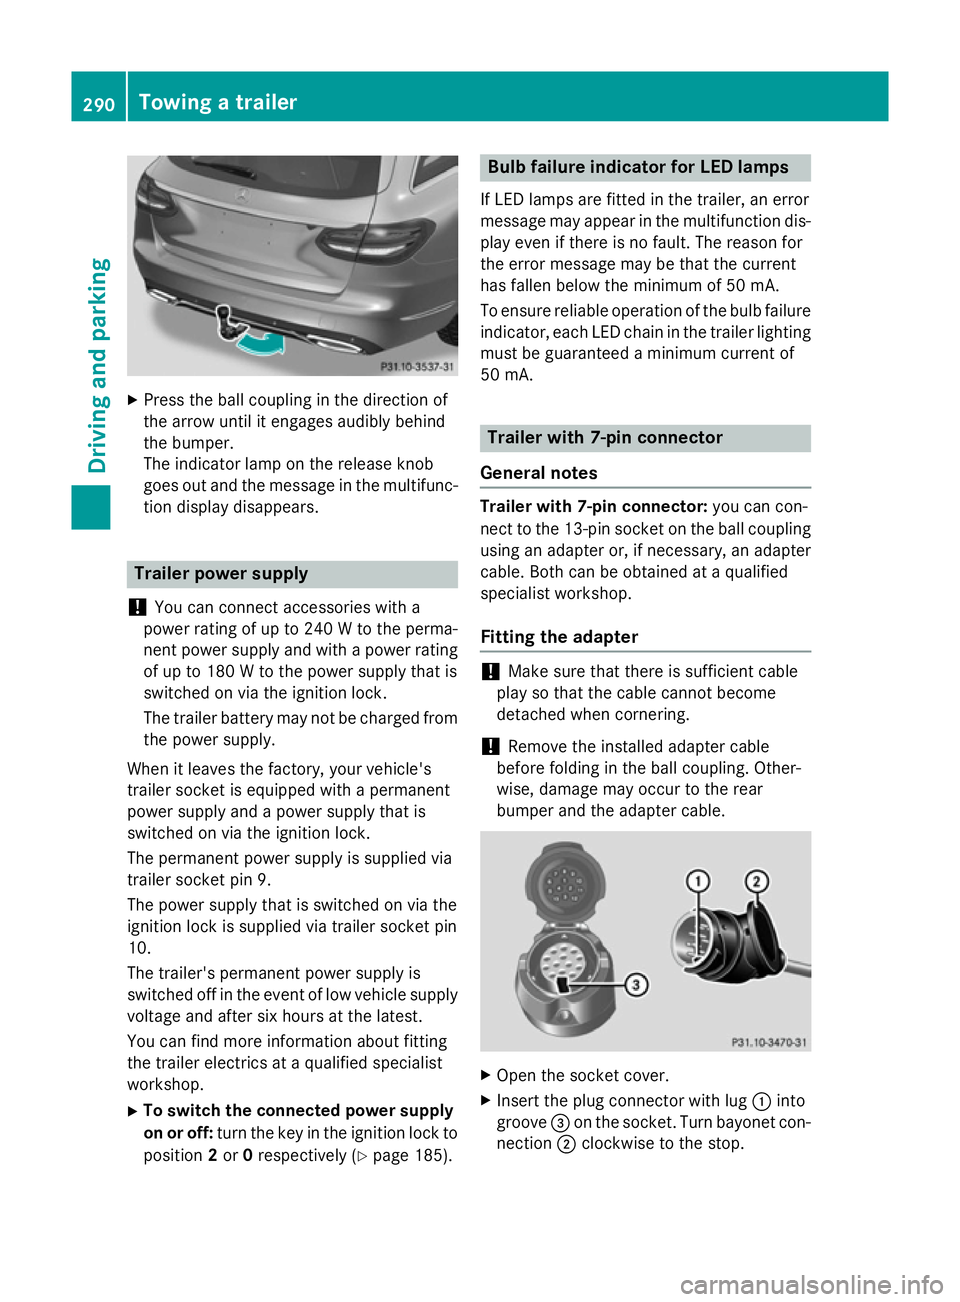
Press the ball coupling in the direction of
the arrow until it engages audibly behind
the bumper.
The indicator lamp on the release knob
goes out and the message in the multifunc-
tion display disappears. Trailer power supply
! You can connect accessories with a
power rating of up to 240 W to the perma-
nent power supply and with a power rating of up to 180 W to the power supply that is
switched on via the ignition lock.
The trailer battery may not be charged from the power supply.
When it leaves the factory, your vehicle's
trailer socket is equipped with a permanent
power supply and a power supply that is
switched on via the ignition lock.
The permanent power supply is supplied via
trailer socket pin 9.
The power supply that is switched on via the
ignition lock is supplied via trailer socket pin
10.
The trailer's permanent power supply is
switched off in the event of low vehicle supply
voltage and after six hours at the latest.
You can find more information about fitting
the trailer electrics at a qualified specialist
workshop.
X To switch the connected power supply
on or off: turn the key in the ignition lock to
position 2or 0respectively (Y page 185). Bulb failure indicator for LED lamps
If LED lamps are fitted in the trailer, an error
message may appear in the multifunction dis-
play even if there is no fault. The reason for
the error message may be that the current
has fallen below the minimum of 50 mA.
To ensure reliable operation of the bulb failure indicator, each LED chain in the trailer lighting
must be guaranteed a minimum current of
50 mA. Trailer with 7-pin connector
General notes Trailer with 7-pin connector:
you can con-
nect to the 13-pin socket on the ball coupling
using an adapter or, if necessary, an adapter
cable. Both can be obtained at a qualified
specialist workshop.
Fitting the adapter !
Make sure that there is sufficient cable
play so that the cable cannot become
detached when cornering.
! Remove the installed adapter cable
before folding in the ball coupling. Other-
wise, damage may occur to the rear
bumper and the adapter cable. X
Open the socket cover.
X Insert the plug connector with lug :into
groove =on the socket. Turn bayonet con-
nection ;clockwise to the stop. 290
Towing a trailerDriving and parking
Page 298 of 489
The segments light up from the stored
speed to the maximum speed.
R Variable SPEEDTRONIC activated
(Y page 223):
The segments light up from the start of the
scale to the selected limit speed.
R DISTRONIC PLUS activated (Y page 226):
One or two segments in the set speed
range light up.
R DISTRONIC PLUS detects a vehicle in front
that is driving at a slower speed than the
stored speed:
The segments between the speed of the
vehicle in front and the stored speed light
up. Rev counter
! Do not drive in the overrevving range.
Doing so will damage the engine.
The red band in the rev counter indicates the engine's overrevving range.
The fuel supply is interrupted to protect the
engine when the red band is reached. Outside temperature display
You should pay special attention to road con- ditions when temperatures are around the
freezing point.
Bear in mind that the outside temperature
display indicates the temperature measured
and does not record the road temperature.
The outside temperature display is in the mul-
tifunction display (Y page 297).
Changes in the outside temperature are dis-
played after a short delay. Coolant temperature gauge
G
WARNING
If you open the bonnet while the engine is
overheating or while there is a fire in the
engine compartment, you could come into contact with hot gases or other leaking ser-
vice products. There is a danger of injury.
Allow an overheating engine to cool down
before opening the bonnet. If there is a fire in
the engine compartment, leave the bonnet
closed and notify the fire brigade.
The analogue coolant temperature gauge is in
the instrument cluster on the right-hand side (Y page 34).
In the on-board computer in the Service Service
menu there is a digital coolant temperature
gauge (Y page 309).
Under normal operating conditions and with
the specified coolant level, the coolant tem-
perature may rise to 120 †.
At high outside temperatures and when driv-
ing uphill, the coolant temperature may rise
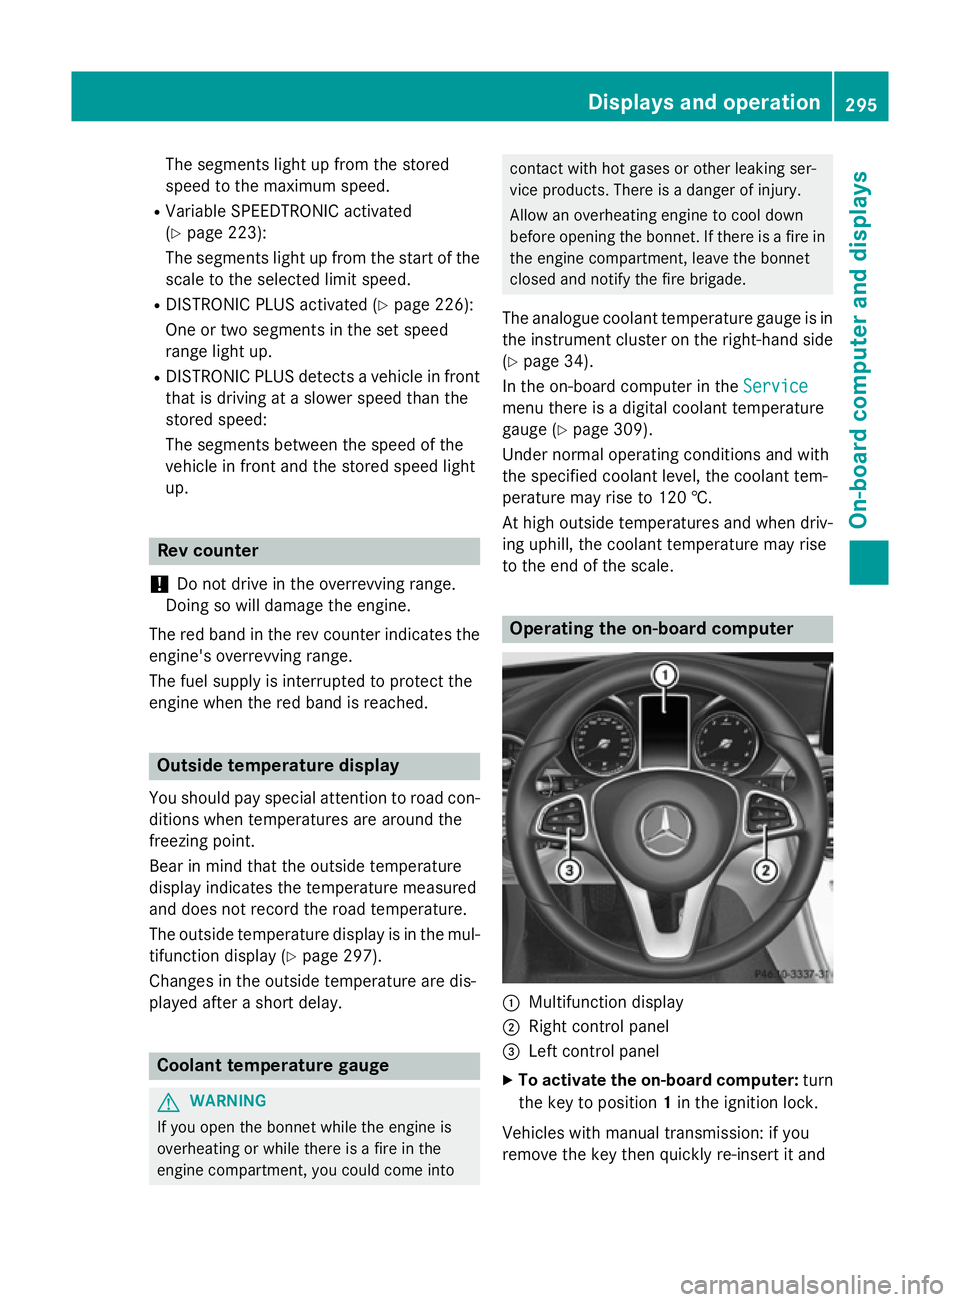
to the end of the scale. Operating the on-board computer
:
Multifunction display
; Right control panel
= Left control panel
X To activate the on-board computer: turn
the key to position 1in the ignition lock.
Vehicles with manual transmission: if you
remove the key then quickly re-insert it and Displays and operation
295On-board computer and displays Z
Page 303 of 489
Trip menu
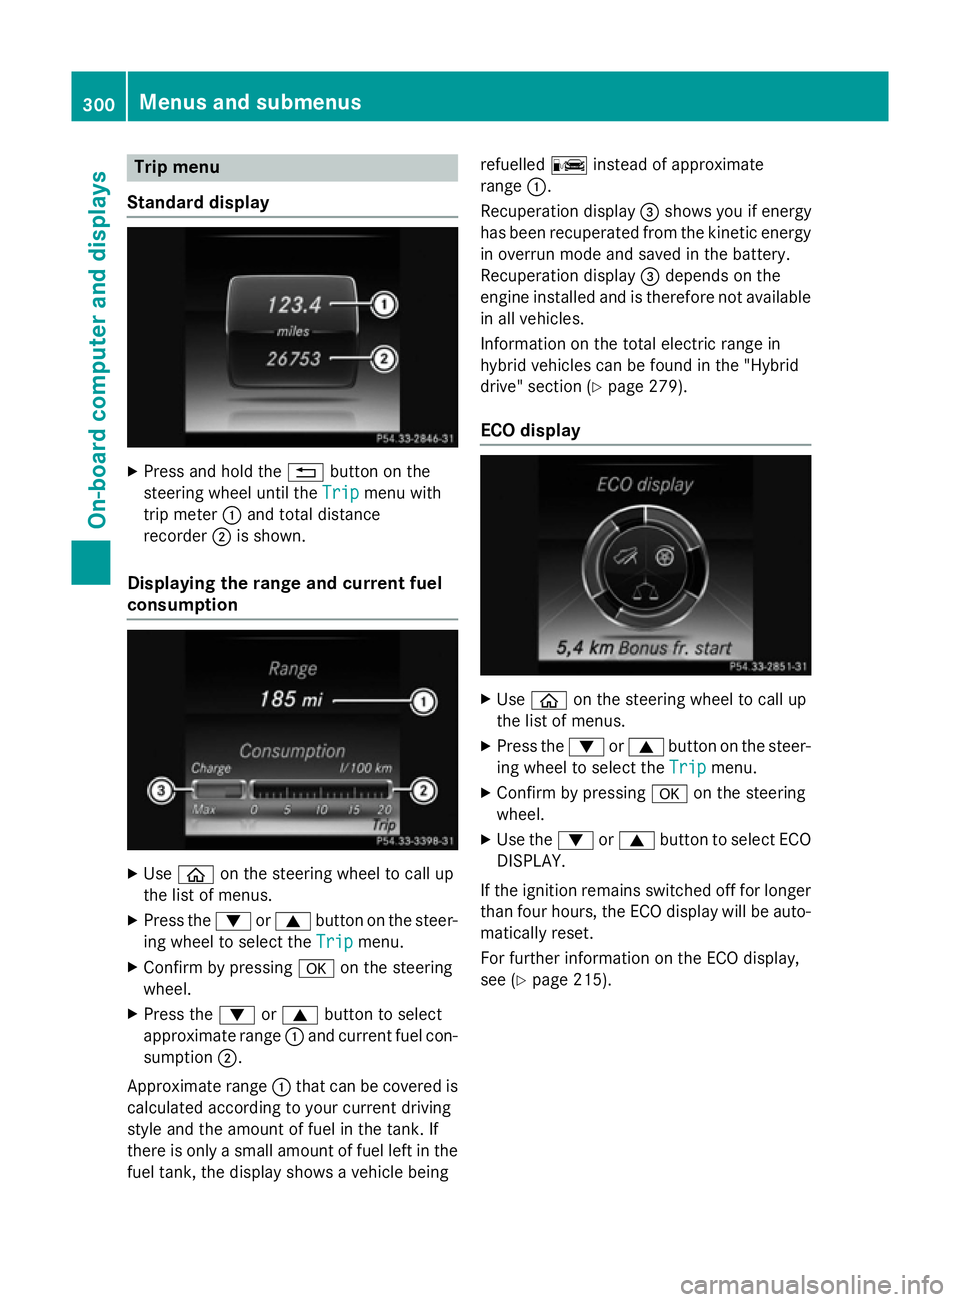
Standard display X
Press and hold the %button on the
steering wheel until the Trip
Tripmenu with
trip meter :and total distance
recorder ;is shown.
Displaying the range and current fuel
consumption X
Use ò on the steering wheel to call up
the list of menus.
X Press the :or9 button on the steer-
ing wheel to select the Trip
Tripmenu.
X Confirm by pressing aon the steering
wheel.
X Press the :or9 button to select
approximate range :and current fuel con-
sumption ;.
Approximate range :that can be covered is
calculated according to your current driving
style and the amount of fuel in the tank. If
there is only a small amount of fuel left in the fuel tank, the display shows a vehicle being refuelled
Cinstead of approximate
range :.
Recuperation display =shows you if energy
has been recuperated from the kinetic energy
in overrun mode and saved in the battery.
Recuperation display =depends on the
engine installed and is therefore not available
in all vehicles.
Information on the total electric range in
hybrid vehicles can be found in the "Hybrid
drive" section (Y page 279).
ECO display X
Use ò on the steering wheel to call up
the list of menus.
X Press the :or9 button on the steer-
ing wheel to select the Trip Tripmenu.
X Confirm by pressing aon the steering
wheel.
X Use the :or9 button to select ECO
DISPLAY.
If the ignition remains switched off for longer than four hours, the ECO display will be auto-
matically reset.
For further information on the ECO display,
see (Y page 215). 300
Menus and submenusOn-board computer and displays
Page 304 of 489
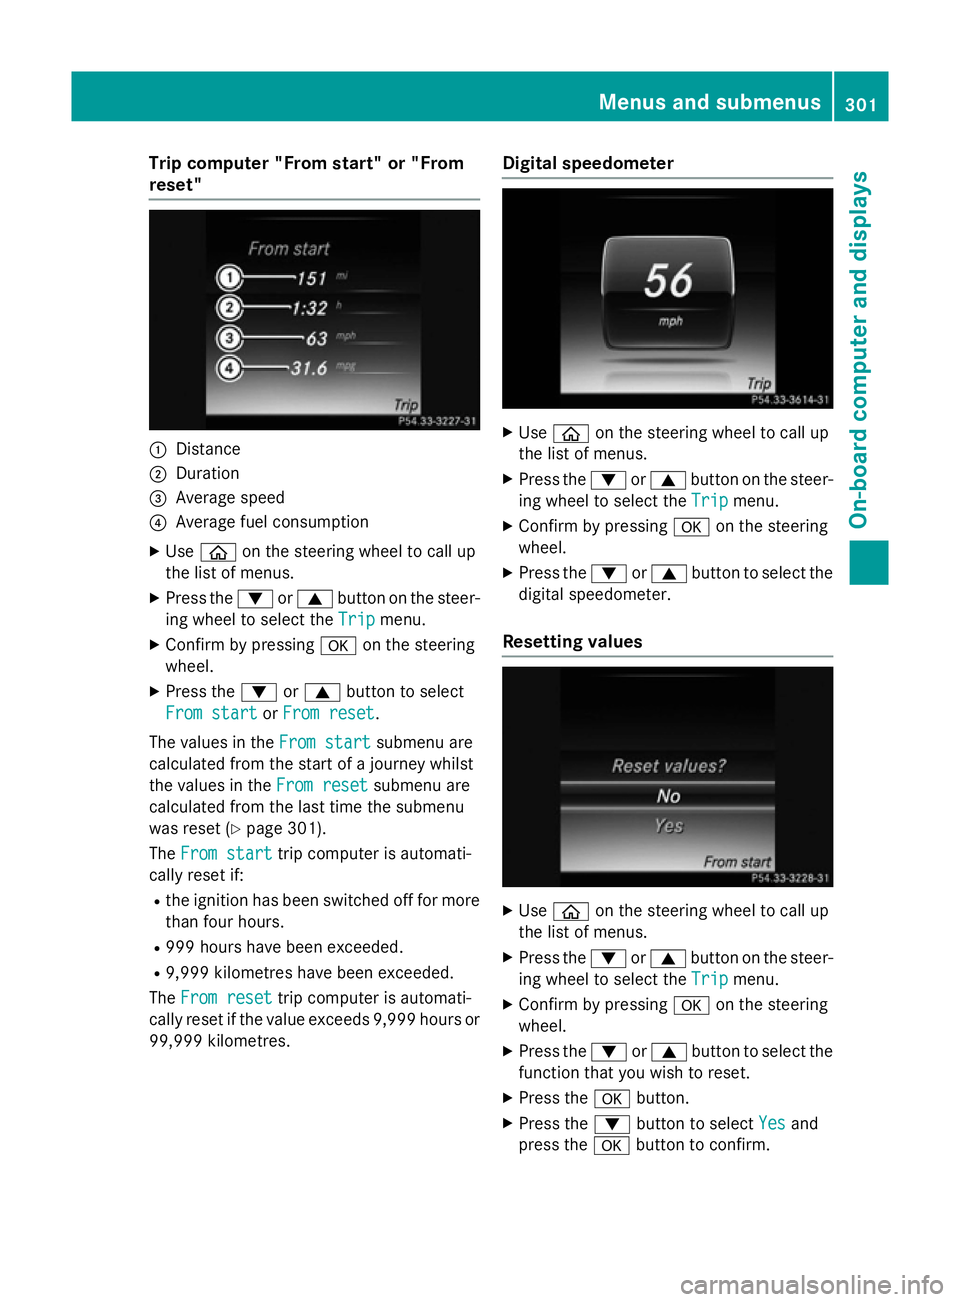
Trip computer "From start" or "From
reset" :
Distance
; Duration
= Average speed
? Average fuel consumption
X Use ò on the steering wheel to call up
the list of menus.
X Press the :or9 button on the steer-
ing wheel to select the Trip
Tripmenu.
X Confirm by pressing aon the steering
wheel.
X Press the :or9 button to select
From start
From start orFrom reset
From reset.
The values in the From start
From startsubmenu are
calculated from the start of a journey whilst
the values in the From reset
From reset submenu are
calculated from the last time the submenu
was reset (Y page 301).
The From start
From start trip computer is automati-
cally reset if:
R the ignition has been switched off for more
than four hours.
R 999 hours have been exceeded.
R 9,999 kilometres have been exceeded.
The From reset
From reset trip computer is automati-
cally reset if the value exceeds 9,999 hours or
99,999 kilometres. Digital speedometer
X
Use ò on the steering wheel to call up
the list of menus.
X Press the :or9 button on the steer-
ing wheel to select the Trip
Tripmenu.
X Confirm by pressing aon the steering
wheel.
X Press the :or9 button to select the
digital speedometer.
Resetting values X
Use ò on the steering wheel to call up
the list of menus.
X Press the :or9 button on the steer-
ing wheel to select the Trip
Tripmenu.
X Confirm by pressing aon the steering
wheel.
X Press the :or9 button to select the
function that you wish to reset.
X Press the abutton.
X Press the :button to select Yes
Yesand
press the abutton to confirm. Menus and submenus
301On-board computer and displays Z
Page 314 of 489
Activating/deactivating PRE-SAFE
®
Brake
PRE ‑SAFE ®
Brake is only available in vehicles
with DISTRONIC PLUS.
X Use ò on the steering wheel to call up
the list of menus.
X Press the :or9 button on the steer-
ing wheel to select the Settings
Settings menu.
X Confirm by pressing aon the steering
wheel.
X Use : or9 to select the Assis‐ Assis‐
tance
tance submenu.
X Press ato confirm.
X Press the :or9 button to select
PRE-SAFE Brake
PRE-SAFE Brake.
X Press ato confirm.
The current selection is displayed.
X To activate/deactivate: press thea
button again.
When PRE-SAFE ®
Brake is deactivated, the
æ symbol appears in the Assistance
Assistance
graphic
graphic menu in the multifunction dis-
play.
For more information on PRE‑SAFE ®
Brake,
see (Y page 84).
Activating/deactivating Blind Spot Assist
X Use ò on the steering wheel to call up
the list of menus.
X Press the :or9 button on the steer-
ing wheel to select the Settings
Settings menu.
X Confirm by pressing aon the steering
wheel.
X Use : or9 to select the Assis‐ Assis‐
tance
tance submenu.
X Press ato confirm.
X Press the :or9 button to select
Blind Spot Assist
Blind Spot Assist .
X Press ato confirm.
The current selection is displayed.
X To activate/deactivate: press thea
button again.
When Blind Spot Assist or Active Blind Spot Assist is activated, grey radar waves prop- agating backwards appear next to the vehi-
cle in the Assistance graphic Assistance graphic menu in
the multifunction display.
For further information about Blind Spot
Assist, see (Y page 263).
For further information about Active Blind
Spot Assist, see (Y page 266).
Setting ATTENTION ASSIST X Use ò on the steering wheel to call up
the list of menus.
X Press the :or9 button on the steer-
ing wheel to select the Settings Settingsmenu.
X Confirm by pressing aon the steering
wheel.
X Use : or9 to select the Assis‐
Assis‐
tance
tance submenu.
X Press ato confirm.
X Press the :or9 button to select
Attention Assist
Attention Assist .
X Press ato confirm.
X Press the :or9 button to set Off
Off,
Standard
Standard orSensitive
Sensitive .
X Press the abutton to confirm the selec-
tion.
When ATTENTION ASSIST is deactivated,
the é symbol appears in the Assis‐ Assis‐
tance graphic
tance graphic menu in the multifunction
display when the ignition is on.
For further information about ATTENTION
ASSIST, see (Y page 258).
Setting Lane Keeping Assist
X Use ò on the steering wheel to call up
the list of menus.
X Press the :or9 button on the steer-
ing wheel to select the Settings Settingsmenu.
X Confirm by pressing aon the steering
wheel.
X Use : or9 to select the Assis‐
Assis‐
tance
tance submenu.
X Press ato confirm.
X Press :or9 to select Lane Keep‐
Lane Keep‐
ing Assist
ing Assist . Menus and submenus
311On-board computer and displays Z