2014 Lancia Thema change time
[x] Cancel search: change timePage 181 of 332
HARD-KEYS
Hard-Keys are located below the
Uconnect® system in the center of the
instrument panel. In addition, there is
a Scroll/Enter control knob located on
the right side of the Climate Controls
in the center of the instrument panel.
Turn the control knob to scroll
through menus and change settings
(i.e., 30, 60, 90), press the center of
the control knob one or more times to
select or change a setting (i.e., ON,
OFF).
SOFT-KEYS
Soft-Keys are accessible on the
Uconnect® touchscreen.
CUSTOMER
PROGRAMMABLE
FEATURES — Uconnect®
8.4 SETTINGS
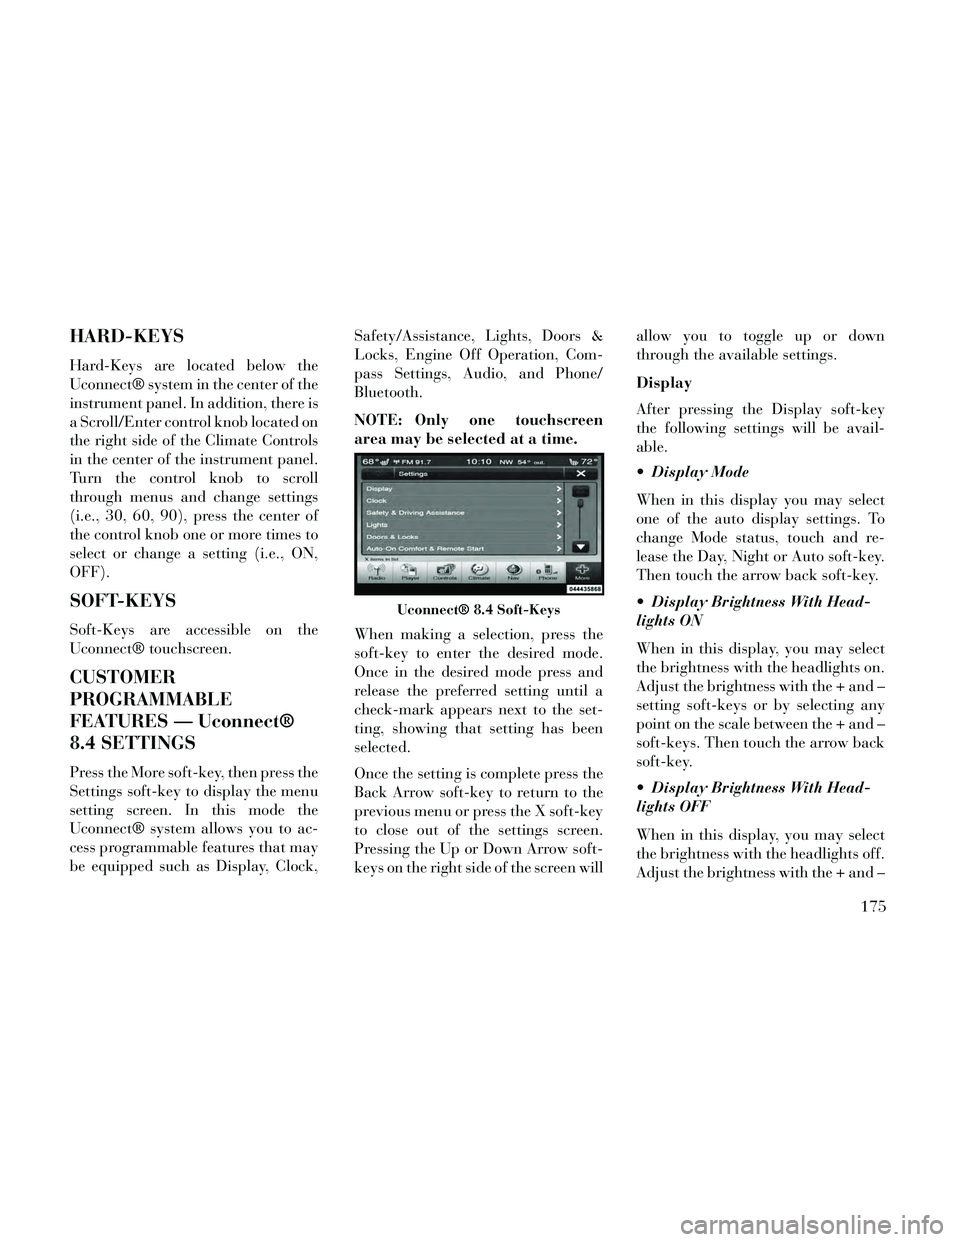
Press the More soft-key, then press the
Settings soft-key to display the menu
setting screen. In this mode the
Uconnect® system allows you to ac-
cess programmable features that may
be equipped such as Display, Clock,Safety/Assistance, Lights, Doors &
Locks, Engine Off Operation, Com-
pass Settings, Audio, and Phone/
Bluetooth.
NOTE: Only one touchscreen
area may be selected at a time.
When making a selection, press the
soft-key to enter the desired mode.
Once in the desired mode press and
release the preferred setting until a
check-mark appears next to the set-
ting, showing that setting has been
selected.
Once the setting is complete press the
Back Arrow soft-key to return to the
previous menu or press the X soft-key
to close out of the settings screen.
Pressing the Up or Down Arrow soft-
keys on the right side of the screen willallow you to toggle up or down
through the available settings.
Display
After pressing the Display soft-key
the following settings will be avail-
able.
Display Mode
When in this display you may select
one of the auto display settings. To
change Mode status, touch and re-
lease the Day, Night or Auto soft-key.
Then touch the arrow back soft-key.
Display Brightness With Head-
lights ON
When in this display, you may select
the brightness with the headlights on.
Adjust the brightness with the + and –
setting soft-keys or by selecting any
point on the scale between the + and –
soft-keys. Then touch the arrow back
soft-key.
Display Brightness With Head-
lights OFF
When in this display, you may select
the brightness with the headlights off.
Adjust the brightness with the + and –
Uconnect® 8.4 Soft-Keys
175
Page 182 of 332
setting soft-keys or by selecting any
point on the scale between the + and –
soft-keys. Then touch the arrow back
soft-key.
Language
Press the Language soft-key to
change this display. When in this dis-
play you may select a different lan-
guage for all display nomenclature,
including the trip functions and the
navigation system (for versions/
markets, where provided). Press the
German, French, Spanish, Italian,
Dutch or English button to select the
language preferred followed by press-
ing the arrow back soft-key. Then, as
you continue, the information will
display in the selected language.
Units
When in this display, you may select
to have the EVIC, odometer, and
navigation system (for versions/
markets, where provided) changed
between US and Metric units of mea-
sure. Touch US or Metric until a
check-mark appears next to the set-
ting, showing that setting has beenselected. Touch the back arrow soft-
key to return to the previous menu.
Voice Response Length
When in this display, you may change
the Voice Response Length settings.
To change the Voice Response Length,
touch the Brief or Detailed soft-key
until a check-mark appears next to
the setting, showing that setting has
been selected. Touch the back arrow
soft-key to return to the previous
menu.
Touchscreen Beep
When in this display, you may turn on
or shut off the sound heard when a
touch screen button (soft-key) is
pressed. Touch the Touchscreen Beep
soft-key until a check-mark appears
next to the setting, showing that set-
ting has been selected. Touch the back
arrow soft-key to return to the previ-
ous menu.
Navigation Turn-By-Turn In
Cluster (for versions/markets,
where provided)
When this feature is selected, the
turn-by-turn directions will appear inthe display as the vehicle approaches
a designated turn within a pro-
grammed route. To make your selec-
tion, touch the Navigation Turn-By-
Turn In Cluster soft-key, until a
check-mark appears next to the set-
ting, showing that setting has been
selected. Touch the back arrow soft-
key to return to the previous menu.
Fuel Saver Display In Cluster
The “ECO” message is located in the
instrument cluster display, this mes-
sage can be turned on or off. To make
your selection, touch the Fuel Saver
Display soft-key, until a check-mark
appears next to the setting, showing
that setting has been selected. Touch
the back arrow soft-key to return to
the previous menu.
Clock
After pressing the Clock soft-key the
following settings will be available.
Sync Time With GPS (for
versions/markets, where provided)
When in this display, you may auto-
matically have the radio set the time.
To change the Sync Time setting
176
Page 183 of 332
touch the Sync with GPS Time soft-
key until a check-mark appears next
to the setting, showing that setting has
been selected. Touch the back arrow
soft-key to return to the previous
menu.
Set Time Hours
When in this display, you may adjust
the hours. The Sync with GPS Time
soft-key must be unchecked. To make
your selection touch the + or - soft-
keys to adjust the hours up or down.
Touch the back arrow soft-key to re-
turn to the previous menu or touch the
X soft-key to close out of the settings
screen.
Set Time Minutes
When in this display, you may adjust
the minutes. The Sync with GPS Time
soft-key must be unchecked. To make
your selection touch the + or - soft-
keys to adjust the minutes up or
down. Touch the back arrow soft-key
to return to the previous menu or
touch the X soft-key to close out of the
settings screen. Time Format
When in this display, you may select
the time format display setting. Touch
the Time Format soft-key until a
check-mark appears next to the 12hrs
or 24hrs setting, showing that setting
has been selected. Touch the back ar-
row soft-key to return to the previous
menu.
Show Time In Status Bar
When in this display, you may turn on
or shut off the digital clock in the
status bar. To change the Show Time
Status setting touch the Show Time in
Status Bar soft-key until a check-
mark appears next to setting, showing
that setting has been selected. Touch
the back arrow soft-key to return to
the previous menu.
Safety / Assistance
After pressing the Safety / Assistance
soft-key the following settings will be
available.
Front Collision Sensitivity (for
versions/markets, where provided)
The Front Collision Warning (FCW)
feature can be can be set to Far, set to
Near or turned Off. The default status
of FCW is the Far setting. This means
the system will warn you of a possible
collision with the vehicle in front of
you when you are farther away. This
gives you the most reaction time. To
change the setting for more dynamic
driving, select the Near setting. This
warns you of a possible collision when
you are much closer to the vehicle in
front of you. This allows for a more
dynamic driving experience. To
change the FCW status, touch and
release the OFF, Near or Far button.
Then touch the arrow back soft-key.
For further information, refer to
“Adaptive Cruise Control (ACC)” in
“Understanding The Features Of
Your Vehicle”.
Park Assist
The Rear Park Assist system will scan
for objects behind the vehicle when
the transmission shift lever is in RE-
VERSE and the vehicle speed is less
177
Page 185 of 332
Rain Sensing Auto Wipers (for
versions/markets, where provided)
When this feature is selected, the sys-
tem will automatically activate the
windshield wipers if it senses moisture
on the windshield. To make your se-
lection, touch the Rain Sensing soft-
key, until a check-mark appears next
to setting, showing that setting has
been selected. Touch the back arrow
soft-key to return to the previous
menu.
Hill Start Assist
When this feature is selected, the Hill
Start Assist (HSA) system is active.
Refer to “Electronic Brake Control
System” in “Starting And Operating”
for system function and operating in-
formation. To make your selection,
touch the Hill Start Assist soft-key,
until a check-mark appears next to
setting, showing that setting has been
selected. Touch the back arrow soft-
key to return to the previous menu.
Lights
After pressing the Lights soft-key the
following settings will be available. Headlight Off Delay
When this feature is selected, the
driver can choose to have the head-
lights remain on for 0, 30, 60, or 90
seconds when exiting the vehicle. To
change the Headlight Off Delay status
touch the 0, 30, 60 or 90 soft-key.
Then touch the arrow back soft-key.
Headlight Illumination On Ap-
proach
When this feature is selected, the
headlights will activate and remain on
for 0, 30, 60, or 90 seconds when the
doors are unlocked with the Remote
Keyless Entry (RKE) transmitter. To
change the Illuminated Approach sta-
tus, touch the + or - soft-key to select
your desired time interval. Touch the
back arrow soft-key to return to the
previous menu.
Headlights With Wipers (for
versions/markets, where provided)
When this feature is selected, and the
headlight switch is in the AUTO posi-
tion, the headlights will turn on ap-
proximately 10 seconds after the wip-
ers are turned on. The headlights willalso turn off when the wipers are
turned off if they were turned on by
this feature. To make your selection,
touch the Headlights With Wipers
soft-key, until a check-mark appears
next to setting, showing that setting
has been selected. Touch the back ar-
row soft-key to return to the previous
menu.
Auto Dim High Beams “Smart-
Beam™” (for versions/markets,
where provided)
When this feature is selected, the high
beam headlights will deactivate auto-
matically under certain conditions. To
make your selection, touch the Auto
High Beams soft-key, until a check-
mark appears next to setting, showing
that setting has been selected. Touch
the back arrow soft-key to return to
the previous menu. Refer to “Lights/
SmartBeam™ (for versions/markets,
where provided)” in “Understanding
The Features Of Your Vehicle” for
further information.
179
Page 186 of 332
Daytime Running Lights (for
versions/markets, where provided)
When this feature is selected, the
headlights will turn on whenever the
engine is running. To make your se-
lection, touch the Daytime Running
Lights soft-key, until a check-mark
appears next to setting, showing that
setting has been selected. Touch the
back arrow soft-key to return to the
previous menu.
Steering Directed Lights (for
versions/markets, where provided)
When this feature is selected, the
headlights turn relative to a change in
direction of the steering wheel. To
make your selection, touch the Steer-
ing Directed Lights soft-key, until a
check-mark appears next to setting,
showing that setting has been se-
lected. Touch the back arrow soft-key
to return to the previous menu.
Headlight Dipped Beam (Traffic
Changeover) (for versions/markets,
where provided)
Low beam headlights have more con-
trol of upward light and direct most oftheir light downward and either to the
left for right hand drive countries or to
the right for left hand drive countries
to provide safe forward visibility
without excessive glare.
Doors & Locks
After pressing the Doors & Locks soft-
key the following settings will be
available.
Auto Lock
When this feature is selected, all doors
will lock automatically when the ve-
hicle reaches a speed of 24 km/h. To
make your selection, touch the Auto
Lock soft-key, until a check-mark ap-
pears next to setting, showing that
setting has been selected. Touch the
back arrow soft-key to return to the
previous menu.
Auto Unlock On Exit
When this feature is selected, all doors
will unlock when the vehicle is
stopped and the transmission is in the
PARK or NEUTRAL position and the
driver's door is opened. To make your
selection, touch the Auto Unlock On
Exit soft-key, until a check-mark ap-
pears next to setting, showing that
setting has been selected. Touch the
back arrow soft-key to return to the
previous menu.
1st Press Of Key Fob Unlocks
When 1st Press Of Key Fob Unlocks is
selected, only the driver's door will
unlock on the first press of the Remote
Keyless Entry (RKE) transmitter UN-
LOCK button. When 1st Press Of Key
Fob Unlocks is selected, you must
press the RKE transmitter UNLOCK
button twice to unlock the passenger's
doors. When Unlock All Doors On 1st
Press is selected, all of the doors will
unlock on the first press of the RKE
transmitter UNLOCK button.
NOTE: If the vehicle is pro-
grammed 1st Press Of Key Fob Un-
locks, all doors will unlock no
matter which Passive Entry
equipped door handle is grasped.
If 1st Press Of Key Fob Unlocks is
programmed, only the driver’s
door will unlock when the driver’s
door is grasped. With Passive En-
try, if 1st Press Of Key Fob Unlocks
180
Page 204 of 332

To Turn Off The Engine Using
ENGINE START/STOP Button
1. Place the shift lever in PARK, then
press and release the ENGINE
START/STOP button.
2. The ignition switch will return to
the OFF position.
3. If the shift lever is not in PARK and
the vehicle speed is above 8 km/h, the
ENGINE START/STOP button must
be held for two seconds before the
engine shuts off. The ignition switch
position will remain in the ACC posi-
tion until the shift lever is in PARK
and the button is pressed twice to the
OFF position. If the shift lever is not
in PARK and the ENGINE START/
STOP button is pressed once, the
EVIC will display a “Vehicle Not In
Park” message and the engine will
remain running. Never leave a vehicle
out of the PARK position, or it could
roll.NOTE: If the ignition switch is left
in the ACC or RUN (engine not run-
ning) position and the transmis-
sion is in PARK, the system will
automatically time out after 30
minutes of inactivity and the igni-
tion will switch to the OFF posi-
tion.
ENGINE START/STOP Button
Functions – With Driver’s Foot
OFF The Brake Pedal (In PARK
Or NEUTRAL Position)
The Keyless Enter-N-Go feature oper-
ates similar to an ignition switch. It
has four positions, OFF, ACC, RUN
and START. To change the ignition
switch positions without starting the
vehicle and use the accessories follow
these steps.
Starting with the ignition switch in
the OFF position:
Press the ENGINE START/STOP button once to change the ignition
switch to the ACC position (ACC
will illuminate), Press the ENGINE START/STOP
button a second time to change the
ignition switch to the RUN position
(RUN will illuminate),
Press the ENGINE START/STOP button a third time to return the
ignition switch to the OFF position
(OFF will illuminate).
EXTREME COLD
WEATHER (BELOW �29°C)
To ensure reliable starting at these
temperatures, use of an externally
powered electric engine block heater
is recommended.
IF ENGINE FAILS TO
START
WARNING!
Never pour fuel or other flam-mable liquids into the throttle
body air inlet opening in an at-
tempt to start the vehicle. This
could result in a flash fire causing
serious personal injury.
(Continued)
198
Page 219 of 332

To disengage AutoStick® mode, hold
the shift lever to the right or press and
hold the (+) shift paddle (for
versions/markets, where provided)
until “D” is once again indicated in
the instrument cluster. You can shift
in or out of the AutoStick® mode at
any time without taking your foot off
the accelerator pedal.
WARNING!
Do not downshift for additional en-
gine braking on a slippery surface.
The drive wheels could lose their
grip and the vehicle could skid,
causing a collision or personal in-
jury.
ALL-WHEEL DRIVE
(AWD) (for versions/
markets, where provided)
This vehicle is equipped with an ac-
tive on-demand All-Wheel Drive
(AWD) system which makes available
optimum traction for a wide variety of
road surface and driving conditions.
The system minimizes wheel slip byautomatically redirecting torque to
the front and rear wheels as necessary.
To maximize fuel economy, your AWD
vehicle automatically defaults to rear-
wheel drive (RWD) when road and
environmental conditions are such
that wheel slip is unlikely to occur.
When specific road and environmen-
tal conditions require increased levels
of road traction, the vehicle automati-
cally shifts into AWD mode. Auto-
matic AWD operation could be acti-
vated by outside temperature, wheel
slip, or other predetermined condi-
tions (there may be a slight delay for
AWD engagement after a wheel slip
condition occurs). AWD can also be
manually selected by moving the shift
lever into the AutoStick® mode (+/-)
(for versions/markets, where pro-
vided) or activating the windshield
wipers for an extended period of time.
Drive mode, RWD or AWD, is dis-
played momentarily in the Electronic
Vehicle Information Center (EVIC) in
the gauge area of the vehicle display
when the transmission is first shifted
into gear, and if the drive mode
changes during vehicle operation.NOTE: If the “SERVICE AWD
SYSTEM” warning message ap-
pears after engine start up, or dur-
ing driving, it means that the AWD
system is not functioning properly
and that service is required. Refer
to “Electronic Vehicle Information
Center (EVIC)” in “Understanding
Your Instrument Panel” for further
information.
CAUTION!
All wheels must have the same size
and type tires. Unequal tire sizes
must not be used. Unequal tire size
may cause failure of the front dif-
ferential and/or the transfer case.
DRIVING ON SLIPPERY
SURFACES
ACCELERATION
Rapid acceleration on snow covered,
wet, or other slippery surfaces may
cause the driving wheels to pull errati-
cally to the right or left. This phenom-
enon occurs when there is a difference
in the surface traction under the rear
(driving) wheels.
213
Page 278 of 332

CAUTION!(Continued)
Car maintenance should be doneat a LANCIA Dealership. For
routine and minor maintenance
operations you wish to carry out
yourself, we do recommend you
have the proper equipment,
genuine LANCIA spare parts and
the necessary fluids; do not how-
ever carry out these operations if
you have no experience.
Your vehicle has been built with improved fluids that protect the
performance and durability of
your vehicle and also allow ex-
tended maintenance intervals. Do
not use chemical flushes in these
components as the chemicals can
damage your engine, transmis-
sion, power steering or air condi-
tioning. Such damage is not cov-
ered by the New Vehicle Limited
Warranty. If a flush is needed be-
cause of component malfunction,
use only the specified fluid for the
flushing procedure.
ENGINE OIL – GASOLINE
ENGINE
Checking Oil Level
To assure proper lubrication of your
vehicle's engine, the engine oil must
be maintained at the correct level.
The best time to check the engine oil
level is about five minutes after a fully
warmed up engine is shut off.
Checking the oil while the vehicle is
on level ground will improve the ac-
curacy of the oil level readings. Main-
tain the oil level in the SAFE level
range. Adding 0.95 Liter of oil when
the level is at the bottom of the SAFE
range will result in the level being at
the top of the SAFE range.
CAUTION!
Overfilling or underfilling the
crankcase will cause aeration or
loss of oil pressure. This could dam-
age your engine.
CAUTION!
Car maintenance should be done at
a LANCIA Dealership. For routine
and minor maintenance operations
you wish to carry out yourself, we
do recommend you have the proper
equipment, genuine LANCIA spare
parts and the necessary fluids; do
not however carry out these opera-
tions if you have no experience.
Change Engine Oil
Refer to the “Maintenance Schedule”
for the proper maintenance intervals.
Engine Oil Selection – 3.6L
Engine
SAE Grade 5W-20 SELENIA K
POWER fully synthetic engine oil that
meets FIAT Qualification 9.55535-
CR1 API SN, ILSAC GF-5 or equiva-
lent.
The engine oil filler cap also shows the
recommended engine oil viscosity for
your vehicle. For information on en-
gine oil filler cap location, refer to
272