2014 FORD FUSION (AMERICAS) lock
[x] Cancel search: lockPage 105 of 458

Doors and Locks
ActionMessage
Displays when the door(s) listed is not completely closed andthe vehicle is moving.X Door Ajar
Displays when the door(s) listed is not completely closed.
Displays when the luggage compartment is not completelyclosed.Trunk ajar
Displays when the hood is not completely closed.Hood ajar
Displays when the door switches have been disabled.Switches InhibitedSecurity Mode
Displayed when there is a system malfunction with the childlocks. Contact your authorized dealer as soon as possible.Child Lock MalfunctionService Required
Displays the factory keypad code after the keypad has beenreset.Factory Keypad CodeXXXXX
Driver Alert
ActionMessage
Stop and rest as soon as it is safe to do so.Driver Alert Warning RestNow
Take a rest break soon.Driver Alert Warning RestSuggested
Fuel
ActionMessage
Displayed as an early reminder of a low fuel condition.Fuel Level Low
Displayed when the fuel fill inlet may not be properly closed.Check Fuel Fill Inlet
Hill Start Assist
ActionMessage
Displays when hill start assist is not available. Contact yourauthorized dealer. See Hill Start Assist (page 166).Hill Start Assist NotAvailable
102Fusion (CC7) , enUSAInformation Displays
Page 112 of 458

Transmission
ActionMessage
See your authorized dealer.Transmission Malfunc-tion Service Now
The transmission is overheating and needs to cool. Stop in asafe place as soon as it is possible.Transmission Over-heating Stop Safely
The transmission has overheated and needs to cool. Stop ina safe place as soon as it is possible.Transmission Overtem-perature Stop Safely
See your authorized dealer.Transmission ServiceRequired
Transmission is getting hot. Stop to let it cool.Transmission Too HotPress Brake
Displays when the transmission has overheated and haslimited functionality. See Automatic Transmission (page154).
Transmission LimitedFunction See Manual
Transmission is too cold. Wait for it to warm up before youdrive.Transmission WarmingUp Please Wait
Displays as a reminder to shift into park.Transmission Not in Park
Displays as a reminder to press the brake pedal in order toselect a gear.Press Brake Pedal
Displays when the transmission has adjusted the shiftstrategy.Transmission Adjusted
Displays when the transmission is adjusting the shift strategy.Transmission AdaptMode
Displays when the transmission shift lever is locked and unableto select gears.Transmission IndicateMode Lockup On
Displays when the transmission shift lever is unlocked andfree to select gears.Transmission IndicateMode Lockup Off
109Fusion (CC7) , enUSAInformation Displays
Page 125 of 458

WARNINGS
Install the head restraint properly tohelp minimize the risk of neck injuryin the event of a collision.
Note:Adjust the seat back to an uprightdriving position before adjusting the headrestraint. Adjust the head restraint so thatthe top of it is level with the top of your headand as far forward as possible. Make surethat you remain comfortable. If you areextremely tall, adjust the head restraint toits highest position.
Front seat and rear seat outboard headrestraints
Rear center head restraint
The head restraints consist of:
An energy absorbing headrestraintA
Two steel stemsB
Guide sleeve adjust and unlockbuttonC
Guide sleeve unlock and removebuttonD
Adjusting the Head Restraint
Raising the Head Restraint
Pull the head restraint up.
Lowering the Head Restraint
1.Press and hold button C.
2.Push the head restraint down.
Removing the Head Restraint
1.Pull the head restraint up until itreaches its highest position.
2.Press and hold buttons C and D.
3.Pull the head restraint up.
Installing the Head Restraint
Align the steel stems into the guide sleevesand push the head restraint down until inlocks.
Tilting Head Restraints
The front head restraints have a tiltingfeature for extra comfort. To tilt the headrestraint, do the following:
122Fusion (CC7) , enUSASeatsE138642 E138645
Page 128 of 458

Saving a Pre-Set Position
1.Switch the ignition on.
2.Adjust the seat and exterior mirrors toyour desired position.
3.Press and hold the desired pre-setbutton until you hear a single chime.
You can save up to three pre-set memorypositions. You can save a memory pre-setat any time.
Recalling a Pre-Set Position
Press and release the pre-set buttonassociated with your desired drivingposition. The seat and mirrors will move tothe position stored for that pre-set.
Note:A pre-set memory position can onlybe recalled when the ignition is off, or whenthe transmission selector lever is in positionP or N (and your vehicle is not moving) ifthe ignition is on.
You can recall a pre-set memory positionby pressing the unlock button on yourremote control or intelligent access key ifit is linked to a pre-set position.
Linking a Pre-Set Position to yourRemote Control or IntelligentAccess Key
Your vehicle can save the pre-set memorypositions for up to three remote controlsor intelligent access (IA) keys.
1.With the ignition on, move the memorypositions to the desired positions.
2.Press and hold the desired pre-setbutton for about five seconds. A chimewill sound after about two seconds.Continue holding until a second chimeis heard.
3.Within three seconds, press the lockbutton on the remote control you arelinking.
To unlink a remote control, follow thesame procedure – except in step 3, pressthe unlock button on the remote control.
Note:To stop seat movement during arecall, press any driver seat adjustmentcontrol, any of the memory buttons, or anymirror control switch.
Seat movement will also stop if you moveyour vehicle.
Note:If more than one linked remotecontrol or intelligent access key is in range,the memory function will move to thesettings of the first key stored.
Easy Entry and Exit Function
If you enable the easy entry and exitfeature, it automatically moves the driverseat position rearward up to fivecentimeters when the transmissionselector lever is in position P and youremove the key or turn off the keyless startignition.
The driver seat will return to the previousposition when you put the key in theignition or you activate the keyless startignition.
You can turn off the easy entry and exitfeature by using the driver informationdisplay.
125Fusion (CC7) , enUSASeatsE142554
Page 132 of 458

HomeLink Wireless ControlSystem (If Equipped)
WARNING
Do not use the system with anygarage door opener that does nothave the safety stop and reversefeature as required by U.S. Federal SafetyStandards (this includes any garage dooropener manufactured before April 1, 1982).A garage door opener which cannot detectan object, signaling the door to stop andreverse, does not meet current federalsafety standards. Using a garage dooropener without these features increasesthe risk of serious injury or death.
Note:Make sure that the garage door andsecurity device are free from obstructionwhen you are programming. Do not programthe system with the vehicle in the garage.
Note:Make sure you keep the originalremote control transmitter for use in othervehicles as well as for future systemprogramming.
Note:We recommend that upon the saleor lease termination of your vehicle, youerase the programmed function buttons forsecurity reasons. See Erasing the functionbutton codes later in this section.
Note:You can program a maximum ofthree devices. To change or replace any ofthe three devices after it has been initiallyprogrammed, you must first erase thecurrent settings. See Erasing the functionbutton codes later in this section.
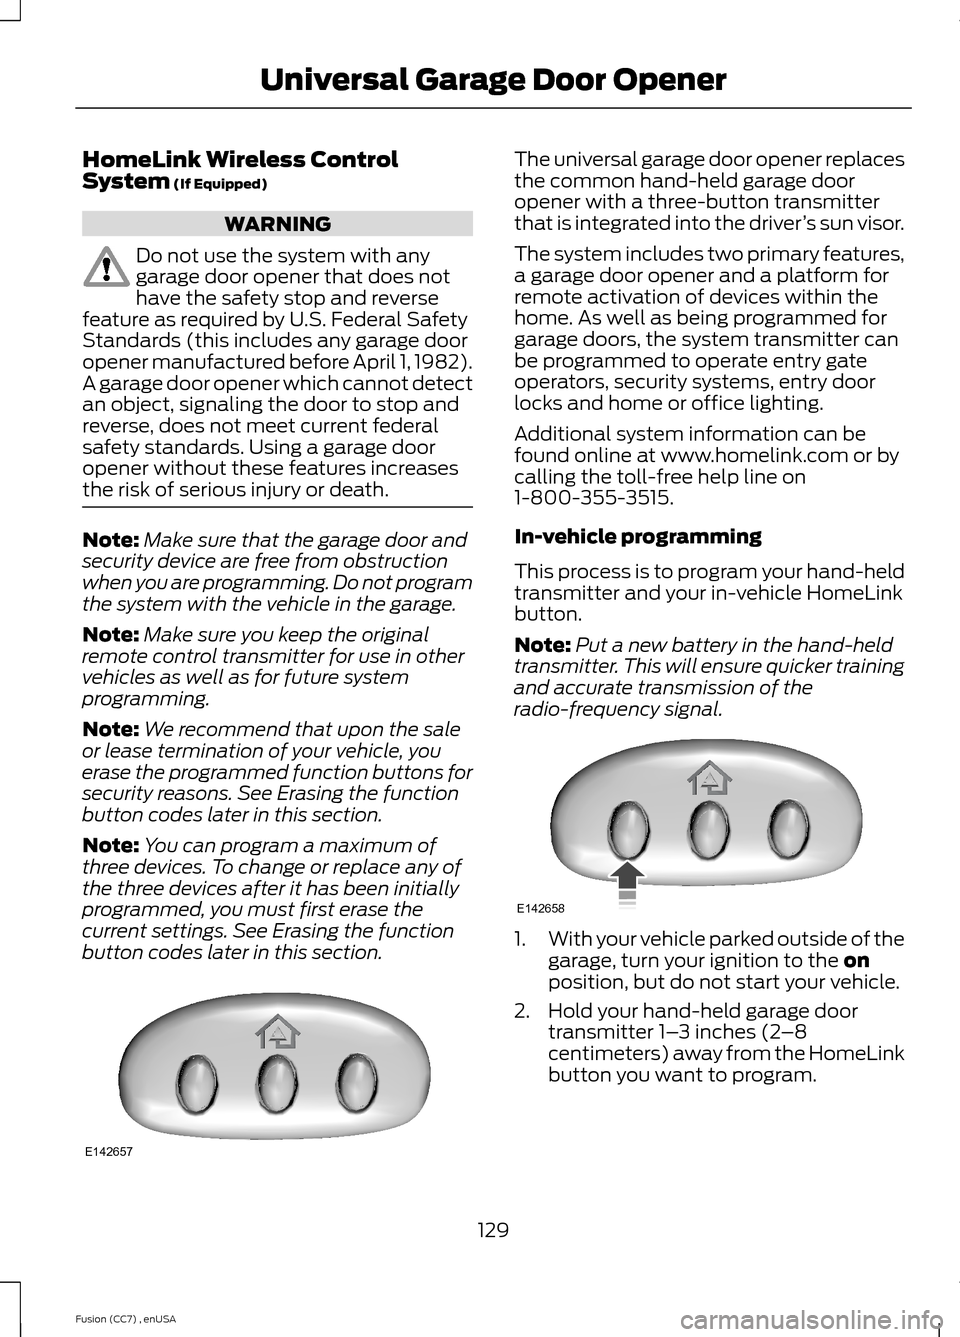
The universal garage door opener replacesthe common hand-held garage dooropener with a three-button transmitterthat is integrated into the driver’s sun visor.
The system includes two primary features,a garage door opener and a platform forremote activation of devices within thehome. As well as being programmed forgarage doors, the system transmitter canbe programmed to operate entry gateoperators, security systems, entry doorlocks and home or office lighting.
Additional system information can befound online at www.homelink.com or bycalling the toll-free help line on1-800-355-3515.
In-vehicle programming
This process is to program your hand-heldtransmitter and your in-vehicle HomeLinkbutton.
Note:Put a new battery in the hand-heldtransmitter. This will ensure quicker trainingand accurate transmission of theradio-frequency signal.
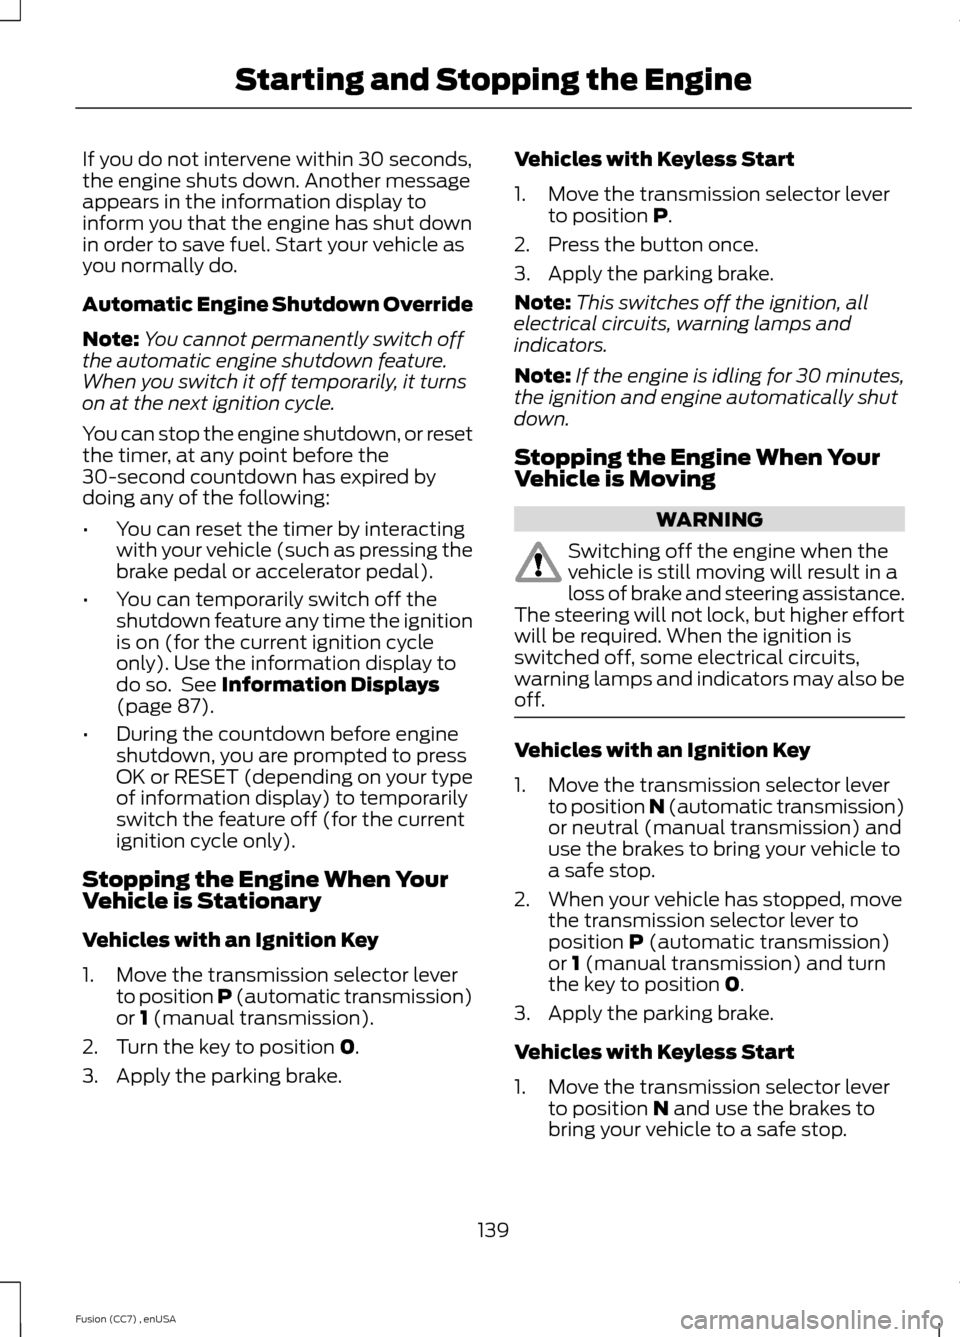
1.With your vehicle parked outside of thegarage, turn your ignition to the onposition, but do not start your vehicle.
2.Hold your hand-held garage doortransmitter 1–3 inches (2–8centimeters) away from the HomeLinkbutton you want to program.
129Fusion (CC7) , enUSAUniversal Garage Door OpenerE142657 E142658
Page 142 of 458

If you do not intervene within 30 seconds,the engine shuts down. Another messageappears in the information display toinform you that the engine has shut downin order to save fuel. Start your vehicle asyou normally do.
Automatic Engine Shutdown Override
Note:You cannot permanently switch offthe automatic engine shutdown feature.When you switch it off temporarily, it turnson at the next ignition cycle.
You can stop the engine shutdown, or resetthe timer, at any point before the30-second countdown has expired bydoing any of the following:
•You can reset the timer by interactingwith your vehicle (such as pressing thebrake pedal or accelerator pedal).
•You can temporarily switch off theshutdown feature any time the ignitionis on (for the current ignition cycleonly). Use the information display todo so. See Information Displays(page 87).
•During the countdown before engineshutdown, you are prompted to pressOK or RESET (depending on your typeof information display) to temporarilyswitch the feature off (for the currentignition cycle only).
Stopping the Engine When YourVehicle is Stationary
Vehicles with an Ignition Key
1.Move the transmission selector leverto position P (automatic transmission)or 1 (manual transmission).
2.Turn the key to position 0.
3.Apply the parking brake.
Vehicles with Keyless Start
1.Move the transmission selector leverto position P.
2.Press the button once.
3.Apply the parking brake.
Note:This switches off the ignition, allelectrical circuits, warning lamps andindicators.
Note:If the engine is idling for 30 minutes,the ignition and engine automatically shutdown.
Stopping the Engine When YourVehicle is Moving
WARNING
Switching off the engine when thevehicle is still moving will result in aloss of brake and steering assistance.The steering will not lock, but higher effortwill be required. When the ignition isswitched off, some electrical circuits,warning lamps and indicators may also beoff.
Vehicles with an Ignition Key
1.Move the transmission selector leverto position N (automatic transmission)or neutral (manual transmission) anduse the brakes to bring your vehicle toa safe stop.
2.When your vehicle has stopped, movethe transmission selector lever toposition P (automatic transmission)or 1 (manual transmission) and turnthe key to position 0.
3.Apply the parking brake.
Vehicles with Keyless Start
1.Move the transmission selector leverto position N and use the brakes tobring your vehicle to a safe stop.
139Fusion (CC7) , enUSAStarting and Stopping the Engine
Page 143 of 458

2.When your vehicle has stopped, movethe transmission selector lever toposition P.
3.Press and hold the button for onesecond, or press it three times withintwo seconds.
4.Apply the parking brake.
Guarding Against Exhaust Fumes
WARNING
If you smell exhaust fumes insideyour vehicle, have your vehiclechecked by your authorized dealerimmediately. Do not drive your vehicle ifyou smell exhaust fumes. Carbonmonoxide is present in exhaust fumes.Take precautions to avoid its dangerouseffects.
Important Ventilating Information
If you stop your vehicle and the leave theengine idling for long periods, werecommend that you do one of thefollowing:
•Open the windows at least 1 inch (2.5centimeters)
•Set your climate control to outside air.
ENGINE BLOCK HEATER (IF
EQUIPPED)
WARNINGS
Failure to follow engine block heaterinstructions could result in propertydamage or serious personal injury.
Do not use your heater withungrounded electrical systems ortwo-pronged adapters. There is a riskof electrical shock.
Note:The heater is most effective whenoutdoor temperatures are below 0°F(-18°C).
The heater acts as a starting aid bywarming the engine coolant. This allowsthe climate control system to respondquickly. The equipment includes a heaterelement (installed in the engine block) anda wire harness. You can connect thesystem to a grounded 120-volt ACelectrical source.
We recommend that you do the followingfor a safe and correct operation:
•Use a 16-gauge outdoor extension cordthat is product certified byUnderwriter’s Laboratory (UL) orCanadian Standards Association(CSA). This extension cord must besuitable for use outdoors, in coldtemperatures, and be clearly markedSuitable for Use with OutdoorAppliances. Do not use an indoorextension cord outdoors. This couldresult in an electric shock or become afire hazard.
•Use as short an extension cord aspossible.
•Do not use multiple extension cords.
•Make sure that when in operation, theextension cord plug and heater cordplug connections are free and clear ofwater. This could cause an electricshock or fire.
•Make sure your vehicle is parked in aclean area, clear of combustibles.
•Make sure the heater, heater cord andextension cord are firmly connected.
•Check for heat anywhere in theelectrical hookup once the system hasbeen operating for approximately 30minutes.
•Make sure the heater system ischecked for proper operation beforewinter.
140Fusion (CC7) , enUSAStarting and Stopping the Engine
Page 144 of 458

Using the Engine Block Heater
The engine block heater plug is located ina housing in the left fog lamp bezel. Openthe hinged, circular door and make surethe receptacle terminals are clean and dryprior to use. Clean them with a dry cloth ifnecessary.
The heater uses 0.4 to 1.0 kilowatt-hoursof energy per hour of use. The system doesnot have a thermostat. It will achievemaximum temperature afterapproximately three hours of operation. Ifyou use the heater longer than three hours,this will not improve system performanceand will use unnecessary electricity.
141Fusion (CC7) , enUSAStarting and Stopping the Engine