2014 FORD FUSION (AMERICAS) fuel
[x] Cancel search: fuelPage 156 of 458

MANUAL TRANSMISSION
Using the Clutch
Note:Failure to fully press the clutch pedalto the floor may cause increased shiftefforts, prematurely wear transmissioncomponents or damage the transmission.
Note:Do not drive with your foot resting onthe clutch pedal or use the clutch pedal tohold your vehicle at a standstill whilewaiting on a hill. These actions will reducethe life of the clutch and could nullify aclutch warranty claim.
Manual transmission vehicles have astarter interlock that prevents cranking theengine unless the clutch pedal is fullypressed.
To start the vehicle:
1.Make sure the parking brake is fully set.
2.Press the clutch pedal to the floor, thenput the gearshift lever in the neutralposition.
3.Start the engine.
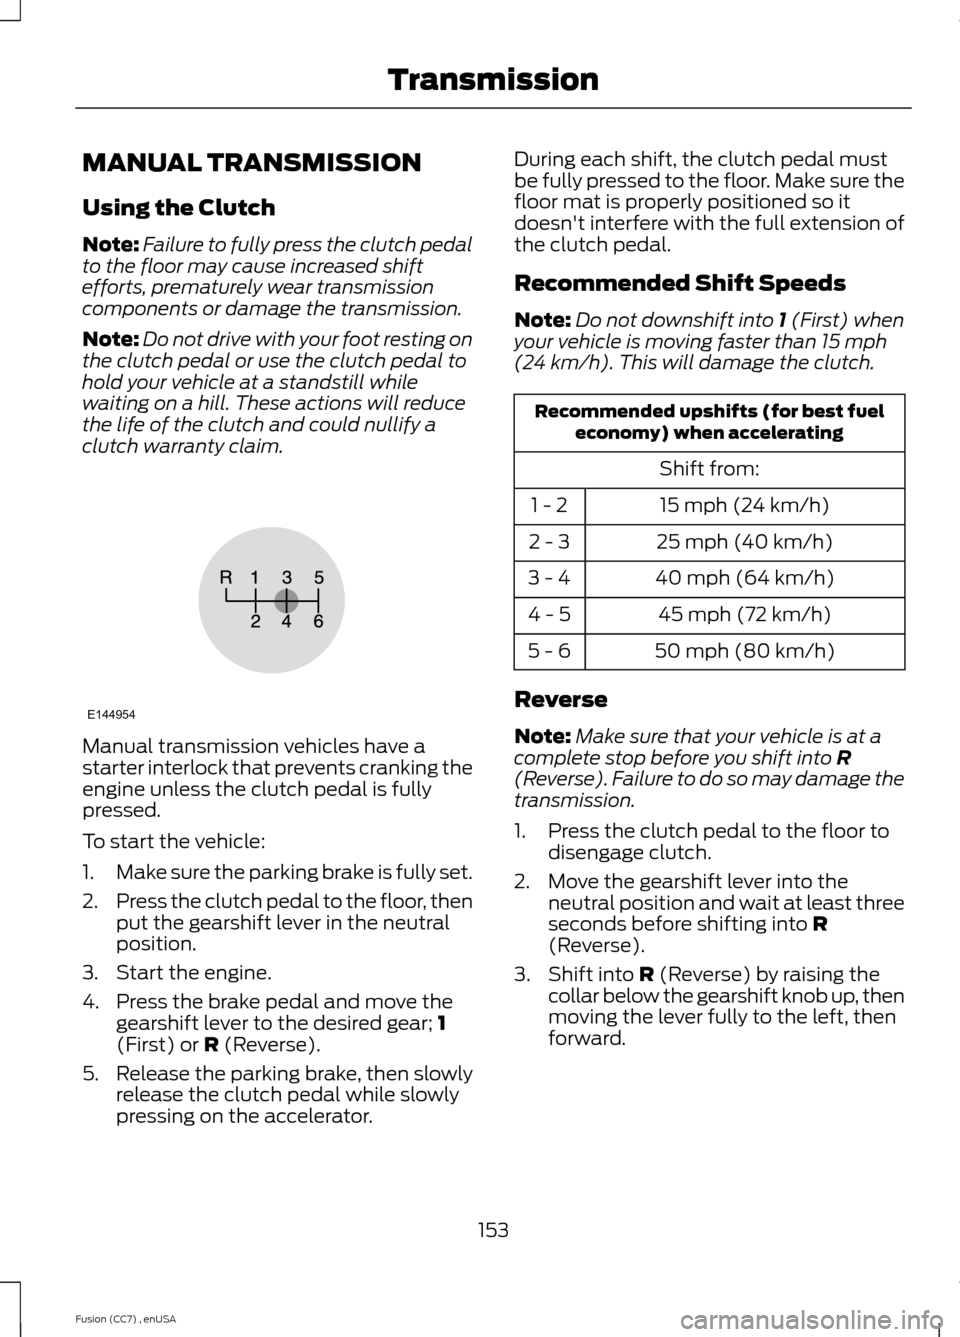
4.Press the brake pedal and move thegearshift lever to the desired gear; 1(First) or R (Reverse).
5.Release the parking brake, then slowlyrelease the clutch pedal while slowlypressing on the accelerator.
During each shift, the clutch pedal mustbe fully pressed to the floor. Make sure thefloor mat is properly positioned so itdoesn't interfere with the full extension ofthe clutch pedal.
Recommended Shift Speeds
Note:Do not downshift into 1 (First) whenyour vehicle is moving faster than 15 mph(24 km/h). This will damage the clutch.
Recommended upshifts (for best fueleconomy) when accelerating
Shift from:
15 mph (24 km/h)1 - 2
25 mph (40 km/h)2 - 3
40 mph (64 km/h)3 - 4
45 mph (72 km/h)4 - 5
50 mph (80 km/h)5 - 6
Reverse
Note:Make sure that your vehicle is at acomplete stop before you shift into R(Reverse). Failure to do so may damage thetransmission.
1.Press the clutch pedal to the floor todisengage clutch.
2.Move the gearshift lever into theneutral position and wait at least threeseconds before shifting into R(Reverse).
3.Shift into R (Reverse) by raising thecollar below the gearshift knob up, thenmoving the lever fully to the left, thenforward.
153Fusion (CC7) , enUSATransmissionE144954
Page 158 of 458

P (Park)
This position locks the transmission andprevents the front wheels from turning.Come to a complete stop before puttingyour vehicle into and out of P (Park)
R (Reverse)
With the gearshift lever in R (Reverse), thevehicle will move backward. Always cometo a complete stop before shifting into andout of R (Reverse).
N (Neutral)
With the gearshift lever in N (Neutral), thevehicle can be started and is free to roll.Hold the brake pedal down while in thisposition.
D (Drive)
The normal driving position for the bestfuel economy. Transmission operates ingears one through six.
S (Sport)
Moving the gearshift lever to S (Sport):
•Provides additional grade (engine)braking and extends lower gearoperation to enhance performance foruphill climbs, hilly terrain ormountainous areas. This will increaseengine RPM during engine braking.
•Provides additional lower gearoperation through the automatictransmission shift strategy.
•Gears are selected more quickly andat higher engine speeds.
SelectShift Automatic™Transmission (If Equipped)
Your SelectShift Automatic transmissiongives you the ability to change gearsmanually.
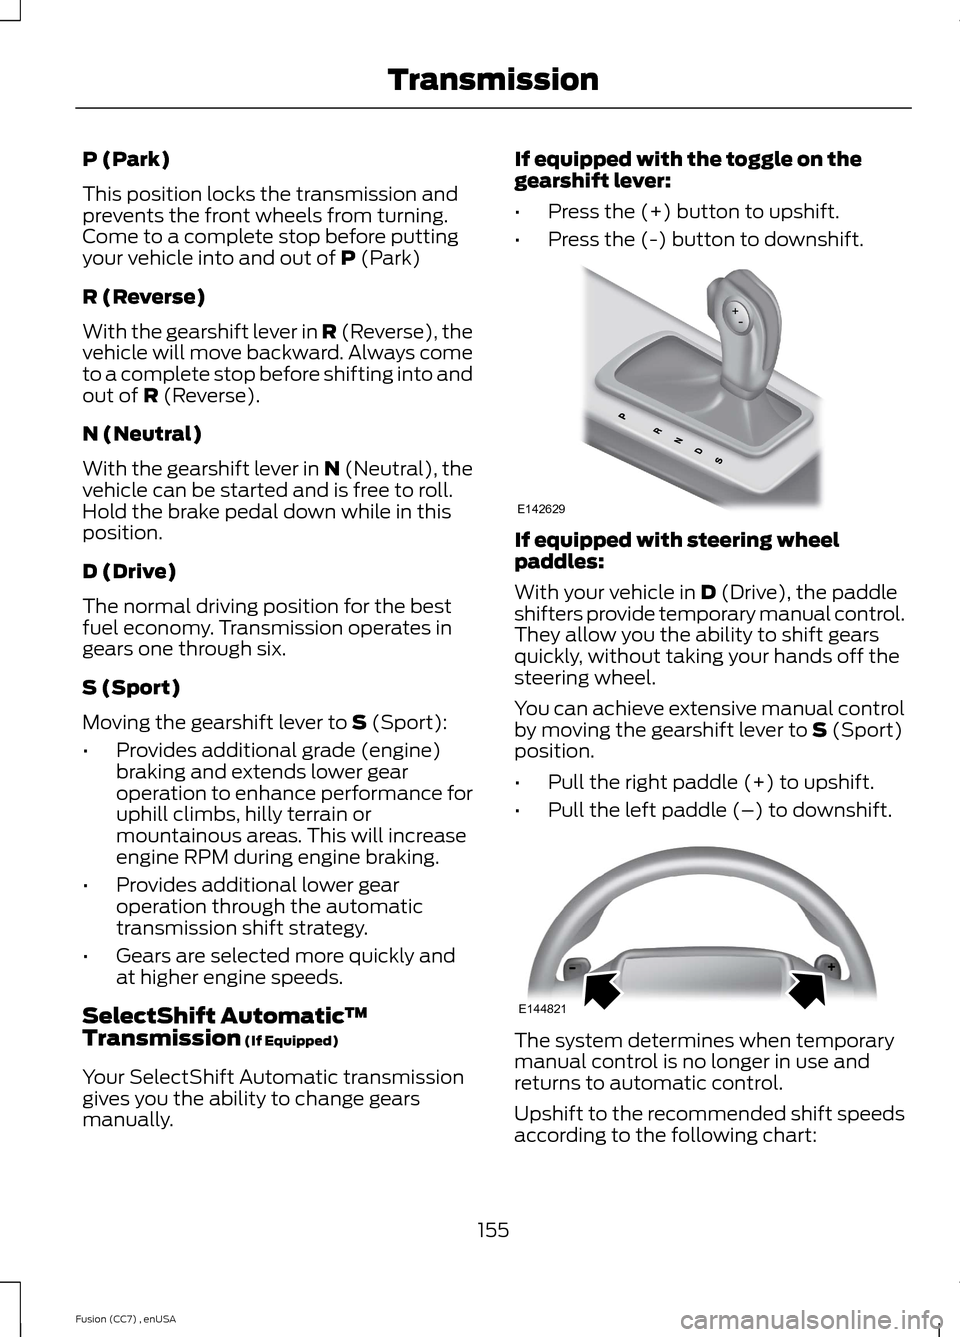
If equipped with the toggle on thegearshift lever:
•Press the (+) button to upshift.
•Press the (-) button to downshift.
If equipped with steering wheelpaddles:
With your vehicle in D (Drive), the paddleshifters provide temporary manual control.They allow you the ability to shift gearsquickly, without taking your hands off thesteering wheel.
You can achieve extensive manual controlby moving the gearshift lever to S (Sport)position.
•Pull the right paddle (+) to upshift.
•Pull the left paddle (–) to downshift.
The system determines when temporarymanual control is no longer in use andreturns to automatic control.
Upshift to the recommended shift speedsaccording to the following chart:
155Fusion (CC7) , enUSATransmissionE142629 E144821
Page 159 of 458

Upshifts when accelerating (recom-mended for best fuel economy)
Shift from:
15 mph (24 km/h)1 - 2
25 mph (40 km/h)2 - 3
40 mph (64 km/h)3 - 4
45 mph (72 km/h)4 - 5
50 mph (80 km/h)5 - 6
The instrument cluster will display yourcurrently selected gear.
The transmission will automatically upshiftif your engine speed is too high ordownshift if your engine speed is too low.
Note:The system will stay in manualcontrol until you make another shift buttonselection. For example,D (Drive).
Note:Engine damage may occur ifexcessive engine revving is held withoutshifting.
Brake-Shift Interlock
WARNINGS
Do not drive your vehicle until youverify that the brake lamps areworking.
When doing this procedure, you willbe taking the vehicle out of parkwhich means the vehicle can rollfreely. To avoid unwanted vehiclemovement, always fully set the parkingbrake prior to doing this procedure. Usewheel chocks if appropriate.
If the parking brake is fully released,but the brake warning lamp remainsilluminated, the brakes may not beworking properly. See your authorizeddealer.
Note:See your authorized dealer as soonas possible if this procedure is used.
Note:For some markets this feature will bedisabled.
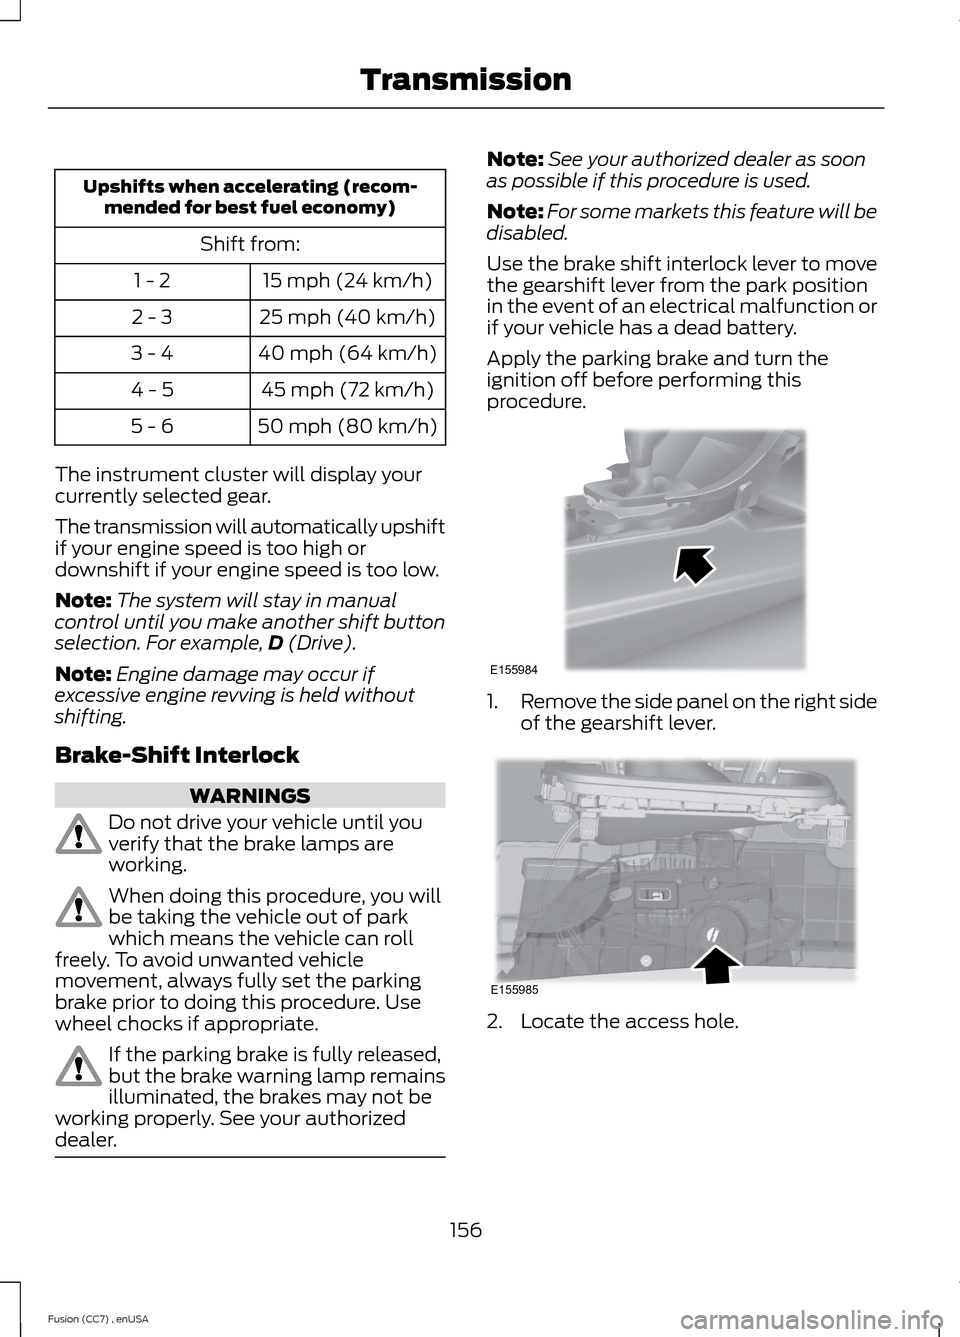
Use the brake shift interlock lever to movethe gearshift lever from the park positionin the event of an electrical malfunction orif your vehicle has a dead battery.
Apply the parking brake and turn theignition off before performing thisprocedure.
1.Remove the side panel on the right sideof the gearshift lever.
2.Locate the access hole.
156Fusion (CC7) , enUSATransmissionE155984 E155985
Page 202 of 458

LOAD LIMIT
Vehicle Loading - with andwithout a Trailer
This section will guide you in theproper loading of your vehicle,trailer or both, to keep your loadedvehicle weight within its designrating capability, with or withouta trailer. Properly loading yourvehicle will provide maximumreturn of vehicle designperformance. Before loading yourvehicle, familiarize yourself with
the following terms fordetermining your vehicle’s weightratings, with or without a trailer,from the vehicle’s Tire Label orSafety Compliance CertificationLabel:
Base Curb Weight - is the weightof the vehicle including a full tankof fuel and all standardequipment. It does not includepassengers, cargo, or optionalequipment.
Vehicle Curb Weight - is theweight of your new vehicle whenyou picked it up from yourauthorized dealer plus anyaftermarket equipment.
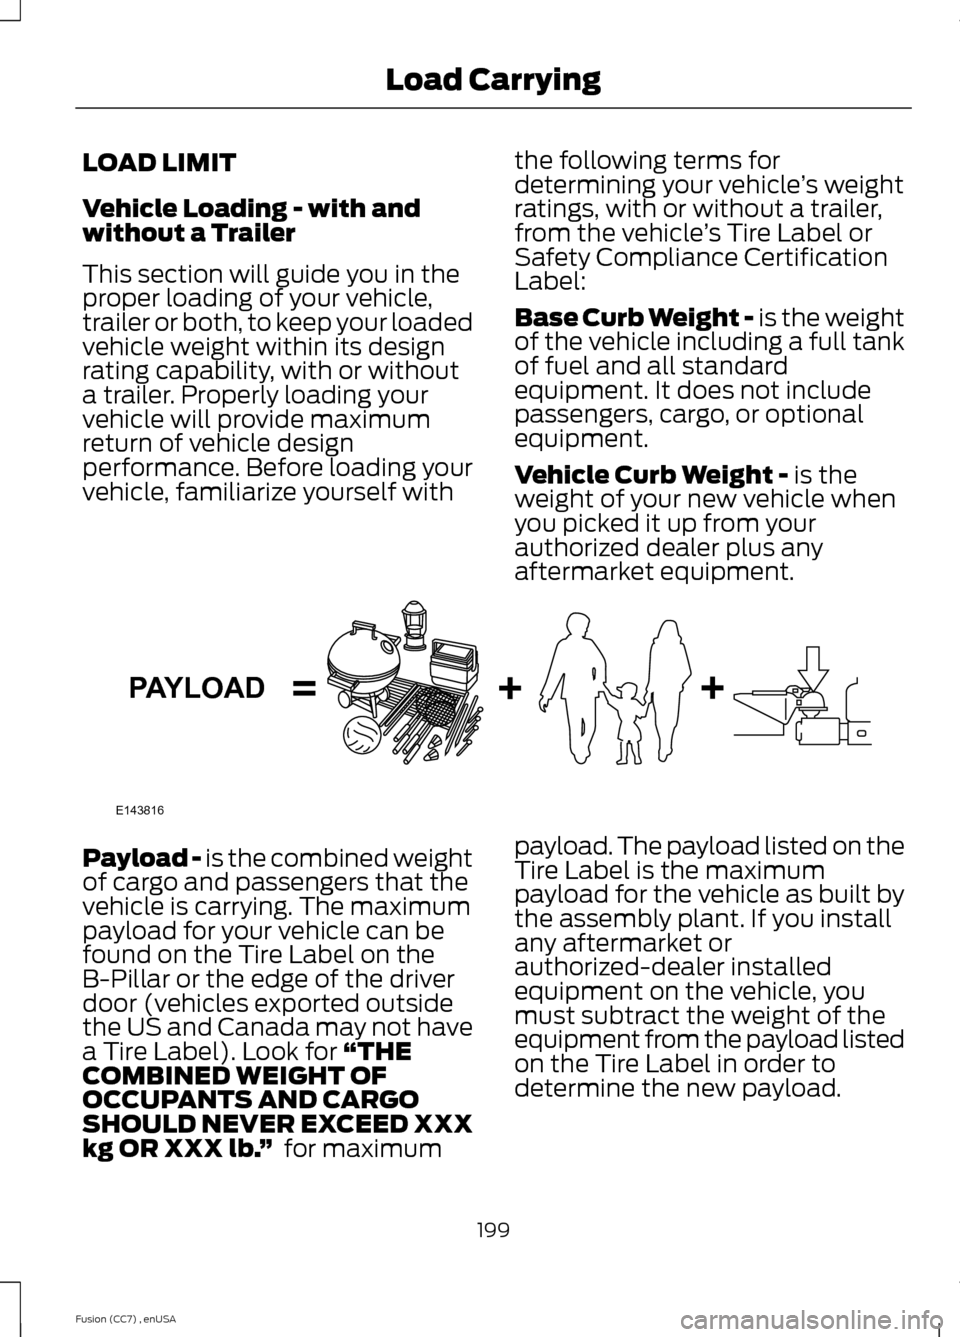
Payload - is the combined weightof cargo and passengers that thevehicle is carrying. The maximumpayload for your vehicle can befound on the Tire Label on theB-Pillar or the edge of the driverdoor (vehicles exported outsidethe US and Canada may not havea Tire Label). Look for “THECOMBINED WEIGHT OFOCCUPANTS AND CARGOSHOULD NEVER EXCEED XXXkg OR XXX lb.” for maximum
payload. The payload listed on theTire Label is the maximumpayload for the vehicle as built bythe assembly plant. If you installany aftermarket orauthorized-dealer installedequipment on the vehicle, youmust subtract the weight of theequipment from the payload listedon the Tire Label in order todetermine the new payload.
199Fusion (CC7) , enUSALoad CarryingE143816PAYLOAD
Page 213 of 458

Trailer lamps are required on most towedvehicles. Make sure all running lights, brakelights, turn signals and hazard lights areworking.
Before Towing a Trailer
Practice turning, stopping and backing-upto get the feel of your vehicle-trailercombination before starting on a trip.When turning, make wider turns so thetrailer wheels clear curbs and otherobstacles.
When Towing a Trailer
•Do not drive faster than 70 mph (113km/h) during the first 500 miles (800kilometers).
•Do not make full-throttle starts.
•Check your hitch, electrical connectionsand trailer wheel lug nuts thoroughlyafter you have traveled 50 miles (80kilometers).
•When stopped in congested or heavytraffic during hot weather, place thegearshift in position P (automatictransmission) or neutral (manualtransmission) to aid engine andtransmission cooling and to help A/Cperformance.
•Turn off the speed control with heavyloads or in hilly terrain. The speedcontrol may turn off automaticallywhen you are towing on long, steepgrades.
•Shift to a lower gear when driving downa long or steep hill. Do not apply thebrakes continuously, as they mayoverheat and become less effective.
•If your transmission is equipped with aGrade Assist or Tow/Haul feature, usethis feature when towing. This providesengine braking and helps eliminateexcessive transmission shifting foroptimum fuel economy andtransmission cooling.
•Allow more distance for stopping witha trailer attached. Anticipate stops andbrake gradually.
•Avoid parking on a grade. However, ifyou must park on a grade:
1.Turn the steering wheel to point yourvehicle tires away from traffic flow.
2.Set your vehicle parking brake.
3.Place the automatic transmission inposition P or manual transmission in alow gear.
4.Place wheel chocks in front and backof the trailer wheels. (Chocks notincluded with vehicle.)
Launching or Retrieving a Boat orPersonal Watercraft (PWC)
Note:Disconnect the wiring to the trailerbefore backing the trailer into the water.
Note:Reconnect the wiring to the trailerafter removing the trailer from the water.
When backing down a ramp during boatlaunching or retrieval:
•Do not allow the static water level torise above the bottom edge of the rearbumper.
•Do not allow waves to break higherthan 6 inches (15 centimeters) abovethe bottom edge of the rear bumper.
Exceeding these limits may allow water toenter vehicle components:
•Causing internal damage to thecomponents.
•Affecting drivability, emissions, andreliability.
Replace the rear axle lubricant anytimethe rear axle has been submerged in water.Water may have contaminated the rearaxle lubricant, which is not normallychecked or changed unless a leak issuspected or other axle repair is required.
210Fusion (CC7) , enUSATowing
Page 216 of 458

BREAKING-IN
You need to break in new tires forapproximately 300 miles (480kilometers). During this time, your vehiclemay exhibit some unusual drivingcharacteristics.
Avoid driving too fast during the first 1000miles (1600 kilometers). Vary your speedfrequently and change up through thegears early. Do not labor the engine.
Do not tow during the first 1000 miles(1600 kilometers).
ECONOMICAL DRIVING
Fuel economy is affected by several thingssuch as how you drive, the conditions youdrive under and how you maintain yourvehicle.
There are some things to keep in mind thatmay improve your fuel economy:
•Accelerate and slow down in a smooth,moderate fashion.
•Drive at steady speeds.
•Anticipate stops; slowing down mayeliminate the need to stop.
•Combine errands and minimizestop-and-go driving.
•When running errands, go to thefurthest destination first and thenwork your way back home.
•Close the windows for high-speeddriving.
•Drive at reasonable speeds. (Travelingat 65 mph/105 kph uses about 15%less fuel than traveling at 75 mph/121kph).
•Keep the tires properly inflated and useonly the recommended size.
•Use the recommended engine oil.
•Perform all regularly scheduledmaintenance.
There are also some things you may wantto avoid doing because they reduce yourfuel economy:
•Avoid sudden or hard accelerations.
•Avoid revving the engine before turningoff the car.
•Avoid long idle periods.
•Do not warm up your vehicle on coldmornings.
•Reduce the use of air conditioning andheat.
•Avoid using speed control in hillyterrain.
•Do not rest your foot on the brakepedal while driving.
•Avoid carrying unnecessary weight(approximately 1 mpg [0.4kilometers/liter] is lost for every 400lbs [180 kilograms] of weight carried).
•Avoid adding particular accessories toyour vehicle (e.g. bug deflectors,rollbars/light bars, running boards, skiracks).
•Avoid driving with the wheels out ofalignment.
DRIVING THROUGH WATER
Note:Driving through deep water abovethe recommended levels can cause vehicledamage.
If driving through deep or standing wateris unavoidable, proceed very slowly. Neverdrive through water that is higher than thebottom of the wheel rims (for cars) or thebottom of the hubs (for trucks).
213Fusion (CC7) , enUSADriving Hints
Page 218 of 458

ROADSIDE ASSISTANCE
Vehicles Sold In The U.S.: GettingRoadside Assistance
To fully assist you should you have avehicle concern, Ford Motor Companyoffers a complimentary roadsideassistance program. This program isseparate from the New Vehicle LimitedWarranty. The service is available:
•24 hours, seven days a week.
•for the coverage period listed on theRoadside Assistance Card included inyour Owner's Manual portfolio.
Roadside assistance will cover:
•a flat tire change with a good spare, ifprovided with the vehicle (exceptvehicles that have been supplied witha tire inflation kit).
•battery jump start.
•lock-out assistance (key replacementcost is the customer's responsibility).
•fuel delivery — Independent ServiceContractors, if not prohibited by state,local or municipal law, shall deliver upto 2.0 gallons (7.5 liters) of gasoline or5.0 gallons (18.9 liters) of diesel fuelto a disabled vehicle. Fuel deliveryservice is limited to two no-chargeoccurrences within a 12-month period.
•winch out — available within 100 feet(30.5 meters) of a paved or countymaintained road, no recoveries.
•towing — Ford and Lincoln eligiblevehicles towed to an authorized dealerwithin 35 miles (56.3 kilometers) of thedisablement location or to the nearestauthorized dealer. If a memberrequests to be towed to an authorizeddealer more than 35 miles (56.3kilometers) from the disablementlocation, the member shall beresponsible for any mileage costs inexcess of 35 miles (56.3 kilometers).
Trailers shall be covered up to $200 if thedisabled eligible vehicle requires service atthe nearest authorized dealer. If the traileris disabled, but the towing vehicle isoperational, the trailer does not qualify forany roadside services.
Vehicles Sold In The U.S. : UsingRoadside Assistance
Complete the roadside assistanceidentification card and place it in yourwallet for quick reference. This card isfound in the owner's information portfolioin the glove compartment.
U.S. Ford vehicle customers who requireRoadside Assistance, call 1-800-241-3673.
If you need to arrange roadside assistancefor yourself, Ford Motor Company willreimburse a reasonable amount for towingto the nearest dealership within 35 miles(56.3 kilometers). To obtainreimbursement information, U.S. Fordvehicle customers call 1-800-241-3673.Customers will be asked to submit theiroriginal receipts.
Vehicles Sold In Canada : GettingRoadside Assistance
Canadian customers who require roadsideassistance, call 1-800-665-2006.
Vehicles Sold In Canada : UsingRoadside Assistance
For your convenience, you may completethe roadside assistance identification cardfound in the centerfold of your warrantyguide and retain for future reference.
Canadian roadside coverage and benefitsmay differ from the U.S. coverage. If yourequire more information, please refer tothe coverage section of your warrantyguide, call us in Canada at1-800-665-2006, or visit our website atwww.ford.ca.
215Fusion (CC7) , enUSARoadside Emergencies
Page 219 of 458

HAZARD WARNING FLASHERS
Note:If used when the vehicle is notrunning, the battery will lose charge. Theremay be insufficient power to restart yourvehicle.
The hazard warning button islocated on the instrument panel.Use it when your vehicle iscreating a safety hazard for othermotorists.
•Press the button to turn on the hazardwarning function, and the front andrear direction indicators will flash.
•Press the button again to turn themoff.
FUEL SHUTOFF
WARNING
Failure to inspect and, if necessary,repair fuel leaks after a collision mayincrease the risk of fire and seriousinjury. Ford Motor Company recommendsthat the fuel system be inspected by anauthorized dealer after any collision.
In the event of a moderate to severecollision, this vehicle includes a fuel pumpshutoff feature that stops the flow of fuelto the engine. Not every impact will causea shutoff.
Should your vehicle shut off after acollision, you may restart your vehicle. Forvehicles equipped with a key system:
1.Switch off the ignition.
2.Switch on the ignition.
3.Repeat Steps 1 and 2 to re-enable thefuel pump.
For vehicles equipped with a push buttonstart system:
1.Press the START/STOP button toswitch off the ignition.
2.Press the brake pedal and press theSTART/STOP button to start thevehicle.
3.Remove your foot from the brake pedaland press the START/STOP buttonto switch off the ignition.
4.You can either attempt to start theengine by pressing the brake pedal andthe START/STOP button, or switchon the ignition only by pressing theSTART/STOP button withoutpressing the brake pedal. Both waysre-enable the fuel system.
Note:When you try to restart your vehicleafter a fuel shutoff, the vehicle makes surethat various systems are safe to restart.Once your vehicle determines that thesystems are safe, then the vehicle will allowyou to restart.
Note:In the event that your vehicle doesnot restart after your third attempt, contactan authorized dealer.
JUMP STARTING THE VEHICLE
WARNINGS
The gases around the battery canexplode if exposed to flames, sparks,or lit cigarettes. An explosion couldresult in personal injury or vehicle damage.
Batteries contain sulfuric acid whichcan burn skin, eyes and clothing, ifcontacted.
Use only an adequate-sized cablewith insulated clamps.
216Fusion (CC7) , enUSARoadside Emergencies