2014 FORD FUSION (AMERICAS) radio
[x] Cancel search: radioPage 133 of 458

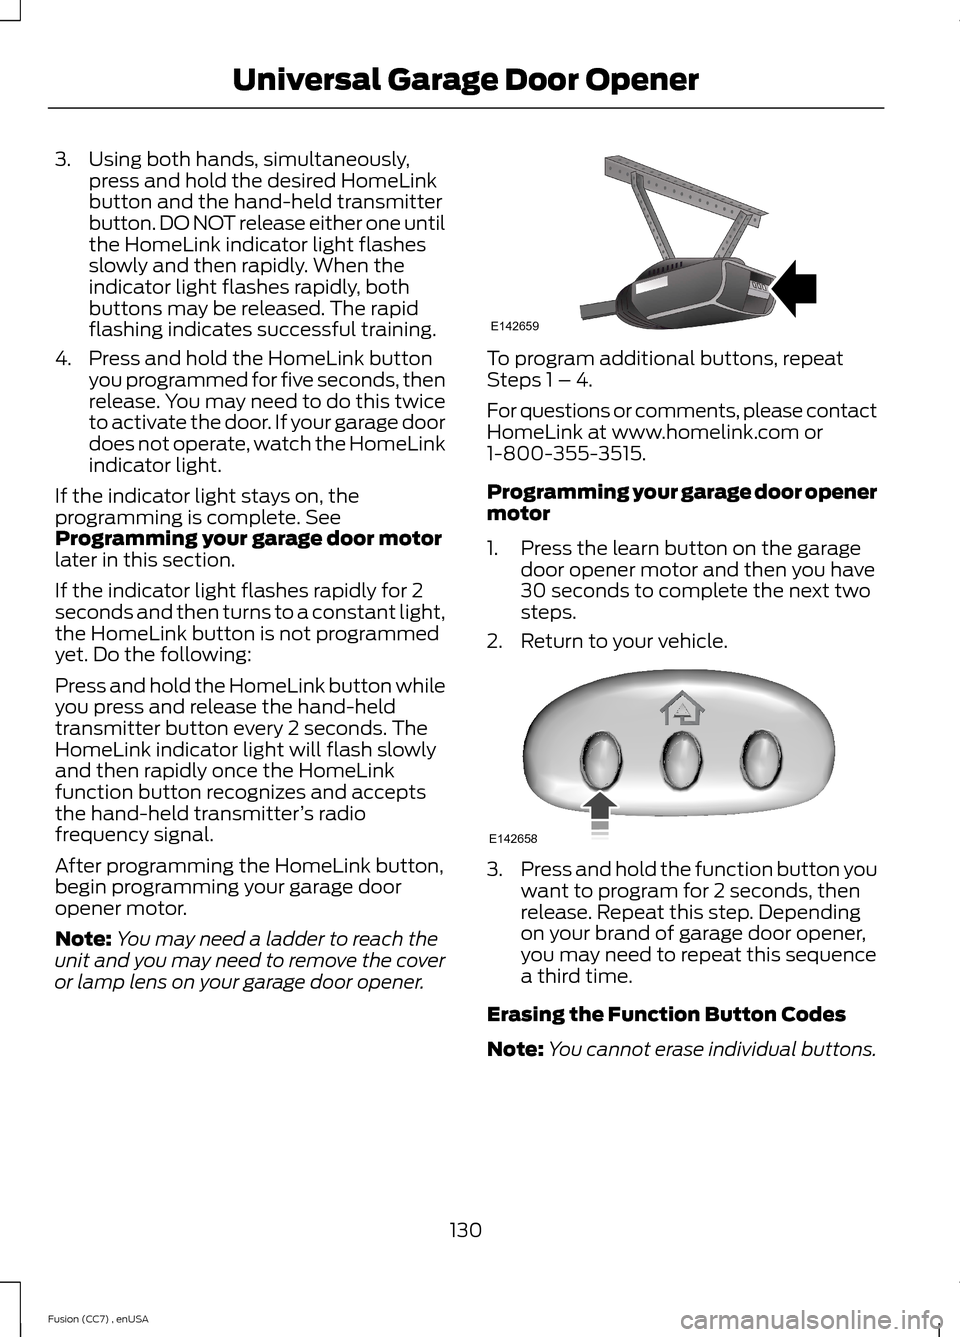
3.Using both hands, simultaneously,press and hold the desired HomeLinkbutton and the hand-held transmitterbutton. DO NOT release either one untilthe HomeLink indicator light flashesslowly and then rapidly. When theindicator light flashes rapidly, bothbuttons may be released. The rapidflashing indicates successful training.
4.Press and hold the HomeLink buttonyou programmed for five seconds, thenrelease. You may need to do this twiceto activate the door. If your garage doordoes not operate, watch the HomeLinkindicator light.
If the indicator light stays on, theprogramming is complete. SeeProgramming your garage door motorlater in this section.
If the indicator light flashes rapidly for 2seconds and then turns to a constant light,the HomeLink button is not programmedyet. Do the following:
Press and hold the HomeLink button whileyou press and release the hand-heldtransmitter button every 2 seconds. TheHomeLink indicator light will flash slowlyand then rapidly once the HomeLinkfunction button recognizes and acceptsthe hand-held transmitter’s radiofrequency signal.
After programming the HomeLink button,begin programming your garage dooropener motor.
Note:You may need a ladder to reach theunit and you may need to remove the coveror lamp lens on your garage door opener.
To program additional buttons, repeatSteps 1 – 4.
For questions or comments, please contactHomeLink at www.homelink.com or1-800-355-3515.
Programming your garage door openermotor
1.Press the learn button on the garagedoor opener motor and then you have30 seconds to complete the next twosteps.
2.Return to your vehicle.
3.Press and hold the function button youwant to program for 2 seconds, thenrelease. Repeat this step. Dependingon your brand of garage door opener,you may need to repeat this sequencea third time.
Erasing the Function Button Codes
Note:You cannot erase individual buttons.
130Fusion (CC7) , enUSAUniversal Garage Door OpenerE142659 E142658
Page 139 of 458

GENERAL INFORMATION
WARNINGS
Extended idling at high enginespeeds can produce very hightemperatures in the engine andexhaust system, creating the risk of fire orother damage.
Do not park, idle or drive your vehicleon dry grass or other dry groundcover. The emission system heats upthe engine compartment and exhaustsystem, creating the risk of fire.
Do not start the engine in a closedgarage or in other enclosed areas.Exhaust fumes can be toxic. Alwaysopen the garage door before you start theengine.
If you smell exhaust fumes insideyour vehicle, have your vehiclechecked by an authorized dealerimmediately. Do not drive your vehicle ifyou smell exhaust fumes.
If you disconnect the battery, your vehiclemay exhibit some unusual drivingcharacteristics for approximately 5 miles(8 kilometers) after you reconnect it. Thisis because the engine management systemmust realign itself with the engine. You candisregard any unusual drivingcharacteristics during this period.
The powertrain control system meets allCanadian interference-causing equipmentstandard requirements regulating theimpulse electrical field or radio noise.
When you start the engine, avoid pressingthe accelerator pedal before and duringoperation. Only use the accelerator pedalwhen you have difficulty starting theengine.
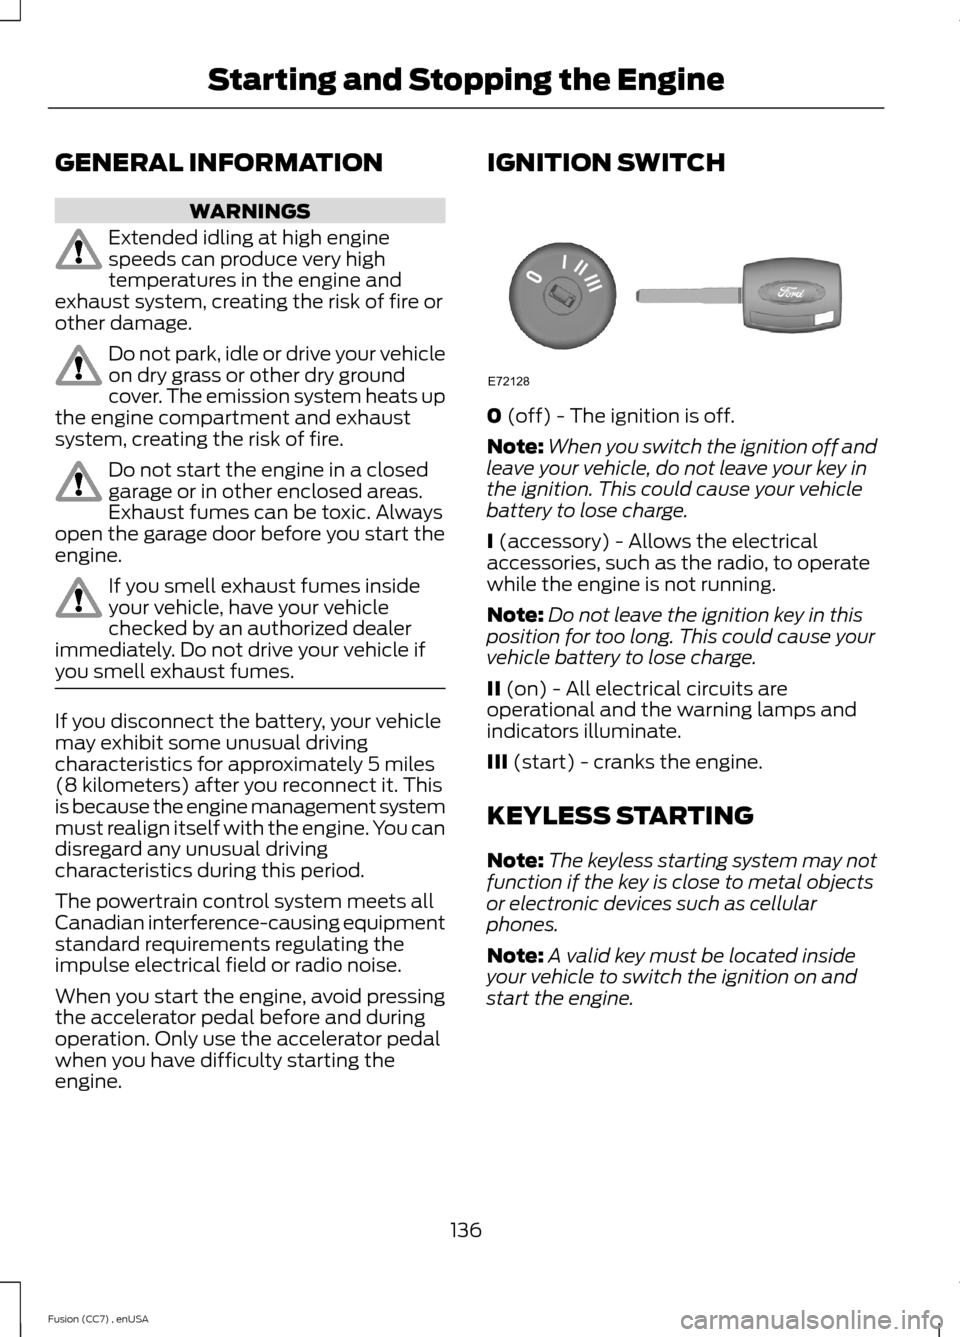
IGNITION SWITCH
0 (off) - The ignition is off.
Note:When you switch the ignition off andleave your vehicle, do not leave your key inthe ignition. This could cause your vehiclebattery to lose charge.
I (accessory) - Allows the electricalaccessories, such as the radio, to operatewhile the engine is not running.
Note:Do not leave the ignition key in thisposition for too long. This could cause yourvehicle battery to lose charge.
II (on) - All electrical circuits areoperational and the warning lamps andindicators illuminate.
III (start) - cranks the engine.
KEYLESS STARTING
Note:The keyless starting system may notfunction if the key is close to metal objectsor electronic devices such as cellularphones.
Note:A valid key must be located insideyour vehicle to switch the ignition on andstart the engine.
136Fusion (CC7) , enUSAStarting and Stopping the EngineE72128
Page 173 of 458

PARKING AID (IF EQUIPPED)
WARNINGS
To help avoid personal injury, pleaseread and understand the limitationsof the system as contained in thissection. Sensing is only an aid for some(generally large and fixed) objects whenmoving in reverse on a flat surface atparking speeds. Traffic control systems,inclement weather, air brakes, and externalmotors and fans may also affect thefunction of the sensing system; this mayinclude reduced performance or a falseactivation.
To help avoid personal injury, alwaysuse caution when in R (Reverse) andwhen using the sensing system.
This system is not designed toprevent contact with small or movingobjects. The system is designed toprovide a warning to assist the driver indetecting large stationary objects to avoiddamaging the vehicle. The system may notdetect smaller objects, particularly thoseclose to the ground.
Certain add-on devices such as largetrailer hitches, bike or surfboard racksand any device that may block thenormal detection zone of the system, maycreate false beeps.
Note:Keep the sensors, located on thebumper or fascia, free from snow, ice andlarge accumulations of dirt. If the sensorsare covered, the system’s accuracy can beaffected. Do not clean the sensors withsharp objects.
Note:If your vehicle sustains damage tothe bumper or fascia, leaving it misalignedor bent, the sensing zone may be alteredcausing inaccurate measurement ofobstacles or false alarms.
Note:If your vehicle is equipped withMyKey®, it is possible to prevent turning thesensing system off. See MyKey™ (page50).
The sensing system warns the driver ofobstacles within a certain range of thebumper area. The system turns onautomatically whenever the ignition isswitched on.
When receiving a detection warning, theradio volume is reduced to apredetermined level. After the warninggoes away, the radio volume returns to theprevious level.
The system can be switched off throughthe information display menu or from thepop-up message that appears once thetransmission is shifted into R. See GeneralInformation (page 87).
If a fault is present in the system, a warningmessage appears in the informationdisplay and does not allow the driver toswitch the faulted system on. SeeInformation Messages (page 95).
Rear Sensing System
The rear sensors are only active when thetransmission is in R. As the vehicle movescloser to the obstacle, the rate of theaudible warning increases. When theobstacle is fewer than 10 inches (25centimeters) away, the warning soundscontinuously. If a stationary or recedingobject is detected farther than 10 inches(25 centimeters) from the side of thevehicle, the tone sounds for only threeseconds. Once the system detects anobject approaching, the warning soundsagain.
170Fusion (CC7) , enUSAParking Aids
Page 174 of 458

Coverage area of up to 6 feet (2meters) from the rear bumper.There is decreased coveragearea at the outer corners of thebumper.
A
The system detects certain objects whilethe transmission is in R:
•and moving toward a stationary objectat a speed of 3 mph (5 km/h) or less
•but not moving, and a moving object isapproaching the rear of the vehicle ata speed of 3 mph (5 km/h) or less
•and moving at a speed of less than 3mph (5 km/h) and a moving object isapproaching the rear of the vehicle ata speed of less than 3 mph (5 km/h).
Front Sensing System
The front sensors are active when thegearshift is in any position other than P(Park) or N (Neutral) and the vehicle speedis below 6 mph (10 km/h).
Coverage area of up to 27 inches(70 centimeters) from the frontof the vehicle and about 6–14inches (15–35 centimeters) tothe side of the front end of thevehicle. Refer to the reversesensing section for details oncoverage area.
A
The system sounds an audible warningwhen obstacles are near either bumper inthe following manner:
•Objects detected by the front sensorsare indicated by a high-pitched tonefrom the front radio speakers.
•Objects detected by the rear sensorsare indicated by a lower pitched tonefrom the rear radio speakers.
•The sensing system reports theobstacle which is closest to the frontor rear of the vehicle. For example, ifan obstacle is 24 inches (60centimeters) from the front of thevehicle and, at the same time, anobstacle is only 16 inches (40centimeters) from the rear of thevehicle, the lower pitched tone sounds.
•An alternating warning sounds fromthe front and rear if there are objectsat both bumpers that are closer than10 inches (25 centimeters).
171Fusion (CC7) , enUSAParking AidsE130178A E130382A
Page 181 of 458

This allows you to get a closer view of anobject behind the vehicle. The zoomedimage keeps the bumper in the image toprovide a reference. The zoom is onlyactive while the transmission is in R(Reverse). When the transmission isshifted out of R (Reverse), the featureautomatically turns off and must be resetwhen it is used again.
Selectable settings for this feature are ONand OFF.
Rear Camera Delay
The camera image will be displayed uponshifting out of R (Reverse) until the vehiclespeed reaches 5 mph (8 km/h). This willoccur when the rear camera delay featureis on, or until the radio button is selected.
Selectable settings for this feature are ONand OFF. The default setting for the rearcamera delay is OFF.
178Fusion (CC7) , enUSAParking Aids
Page 237 of 458

Protected componentsFuse amp ratingFuse or relay number
Occupant classification sensor5A222
Delayed accessory (Power inverter logic,Moonroof logic)10A123
Central lock/unlock30A124
Driver door (window, mirror)30A125
Front passenger door (window, mirror)30A126
Moonroof30A127
Sony amplifier20A128
Rear driver side door (window)30A129
Rear passenger side door (window)30A130
Not used (spare)15A131
GPS, Voice control, Display, Adaptive cruisecontrol, Radio frequency receiver10A132
Radio, Active noise control20A133
Run/start bus (fuse #19, 20, 21, 22, 35, 36,37, circuit breaker)30A134
Restraints control module5A135
Auto-dimming rear view mirror15A136
All-wheel drive module, Heated steeringwheel module15A137
Not used (spare)30A38
1Micro fuse2Dual micro fuse
234Fusion (CC7) , enUSAFuses
Page 249 of 458

WARNINGS
When lifting a plastic-cased battery,excessive pressure on the end wallscould cause acid to flow through thevent caps, resulting in personal injury anddamage to the vehicle or battery. Lift thebattery with a battery carrier or with yourhands on opposite corners.
Keep batteries out of reach ofchildren. Batteries contain sulfuricacid. Avoid contact with skin, eyes orclothing. Shield your eyes when workingnear the battery to protect against possiblesplashing of acid solution. In case of acidcontact with skin or eyes, flushimmediately with water for a minimum of15 minutes and get prompt medicalattention. If acid is swallowed, call aphysician immediately.
Your vehicle is equipped with aMotorcraft® maintenance-free batterywhich normally does not require additionalwater during its life of service.
Note:If your battery has a cover/shield,make sure it is reinstalled after the batteryhas been cleaned or replaced.
Note:See an authorized dealer for lowvoltage battery access, testing, orreplacement.
When a low voltage battery replacementis necessary, see an authorized dealer toreplace the low voltage battery with a Fordrecommended replacement low voltagebattery that matches the electricalrequirements of the vehicle
To ensure proper operation of the batterymanagement system (BMS), do not allowa technician to connect any electricaldevice ground connection directly to thelow voltage battery negative post. Aconnection at the low voltage batterynegative post can cause inaccuratemeasurements of the battery conditionand potential incorrect system operation.
Note:If a person adds electrical orelectronic accessories or components to thevehicle, the accessories or components mayadversely affect the low voltage batteryperformance and durability and may alsoaffect the performance of other electricalsystems in the vehicle.
For longer, trouble-free operation, keep thetop of the battery clean and dry. Also,make certain the battery cables are alwaystightly fastened to the battery terminals.
If you see any corrosion on the battery orterminals, remove the cables from theterminals and clean with a wire brush. Youcan neutralize the acid with a solution ofbaking soda and water.
When a battery replacement is required,the battery should only be replaced witha Ford recommended replacement batterythat matches the electrical requirementsof the vehicle.
Because your vehicle’s engine iselectronically-controlled by a computer,some engine control settings aremaintained by power from the low voltagebattery. Some engine computer settings,like the idle trim and fuel trim strategy,optimize the driveability and performanceof the engine. Some other computersettings, like the clock and radio stationpresets, are also maintained in memory bypower from the low voltage battery. Whena technician disconnects and connects thelow voltage battery, these settings areerased. Complete the following procedurein order to restore the settings:
1.With the vehicle at a complete stop,set the parking brake.
2.Shift the transmission into P.
3.Turn off all accessories.
4.Step on the brake pedal and start thevehicle.
246Fusion (CC7) , enUSAMaintenance
Page 250 of 458

5.Run the engine until it reaches normaloperating temperature. While theengine is warming up, complete thefollowing: Reset the clock. See AudioSystem (page 294). Reset the powerwindows bounce-back feature. SeeWindows and Mirrors (page 75).Reset the radio station presets. SeeAudio System (page 294).
6.Allow the engine to idle for at least oneminute. If the engine turns off, step onthe accelerator to start the engine.
7.While the engine is running, step on thebrake pedal and shift the transmissionto N.
8.Allow the engine to run for at least oneminute by pressing on the acceleratorpedal.
9.Drive the vehicle at least 10 miles (16kilometers) to completely relearn theidle and fuel trim strategy.
Note:If you do not allow the engine torelearn the idle and fuel trim strategy, theidle quality of your vehicle may be adverselyaffected until the engine computereventually relearns the idle trim and fueltrim strategy.
Note:Always dispose of automotivebatteries in a responsible manner. Followyour local authorized standards for disposal.Call your local authorized recycling centerto find out more about recycling automotivebatteries.
Note:It is recommended that the negativebattery cable terminal be disconnected fromthe battery if you plan to store your vehiclefor an extended period of time.
CHECKING THE WIPER
BLADES
Run the tip of your fingers over the edge ofthe blade to check for roughness.
Clean the wiper blades with washer fluidor water applied with a soft sponge orcloth.
CHANGING THE WIPER
BLADES
The wiper arms can be manually movedwhen the ignition is off. This allows for easeof blade replacement and cleaning underthe blades.
1.Pull the wiper blade and arm awayfrom the glass.
2.Press the locking buttons together.
3.Rotate and remove the wiper blade.
4.Install in the reverse order.
247Fusion (CC7) , enUSAMaintenanceE142463 E129990112