2014 FORD FUSION (AMERICAS) lights
[x] Cancel search: lightsPage 37 of 458

The Personal Safety System provides animproved overall level of frontal crashprotection to front seat occupants and isdesigned to help further reduce the risk ofairbag-related injuries. The system is ableto analyze different occupant conditionsand crash severity before activating theappropriate safety devices to help betterprotect a range of occupants in a varietyof frontal crash situations.
Your vehicle's Personal Safety Systemconsists of:
•Driver and passenger dual-stage airbagsupplemental restraints.
•Front outboard safety belts withpretensioners, energy managementretractors (first row only), and safetybelt usage sensors.
•Driver’s seat position sensor.
•Front passenger sensing system.
•Passenger airbag off and on indicatorlamp.
•Front crash severity sensors.
•Restraints control module with impactand safing sensors.
•Restraint system warning light andbackup tone.
•The electrical wiring for the airbags,crash sensor(s), safety beltpretensioners, front safety belt usagesensors, driver seat position sensor,front passenger sensing system, andindicator lights.
How Does the Personal SafetySystem Work?
The Personal Safety System can adapt thedeployment strategy of your vehicle’ssafety devices according to crash severityand occupant conditions. A collection ofcrash and occupant sensors providesinformation to the restraints control
module. During a crash, the restraintscontrol module may activate the safetybelt pretensioners and may activate eitherone or both stages of the dual-stage airbagsupplemental restraints based on crashseverity and occupant conditions.
34Fusion (CC7) , enUSAPersonal Safety System™
Page 60 of 458

The illuminated entry system will turn offthe lights if:
•the ignition is on,
•you press the remote control lockbutton, or
•after 25 seconds of illumination.
The lights will not turn off if:
•you turn them on with the lamp control,or
•any door is open.
Illuminated Exit
The interior lamps and select exteriorlamps will illuminate when all doors areclosed, you switch the ignition off and youremove the key from the ignition(integrated keyhead transmitter only).
The lamps will turn off if all the doorsremain closed and:
•25 seconds elapse
•you insert the key in the ignition(integrated keyhead transmitter only)
•you press the START/STOP button(intelligent access key only).
Battery Saver
If you leave the courtesy lamps, domelamps or headlamps on, the battery saverwill shut them off 10 minutes after youswitch the ignition off.
Accessory Mode Battery Saver forIntelligent Access Keys (If Equipped)
If you leave your vehicle in the run ignitionstate, it will shut off once it detects acertain amount of battery drain or after 45minutes.
Luggage Compartment
With the Remote Control
Press twice within three secondsto unlatch the trunk.
From Outside Your Vehicle
Press the release button above the licenseplate to unlatch the trunk. Your vehiclemust be unlocked or have an intelligentaccess transmitter within 3 feet (1 meter)of the trunk.
KEYLESS ENTRY (IF EQUIPPED)
SECURICODE™ KEYLESS ENTRYKEYPAD
The keypad is located near the driverwindow. It is invisible until touched andthen it lights up so you can see and touchthe appropriate buttons.
Note:If you enter your entry code too faston the keypad, the unlock function may notwork. Re-enter your entry code more slowly.
57Fusion (CC7) , enUSALocksE138630 E144402
Page 74 of 458

HEADLAMP EXIT DELAY
After you switch the ignition off, you canswitch the headlamps on by pulling thedirection indicator lever toward you. Youwill hear a short tone. The headlamps willswitch off automatically after threeminutes with any door open or 30 secondsafter the last door has been closed. Youcan cancel this feature by pulling thedirection indicator toward you again orswitching the ignition on.
DAYTIME RUNNING LAMPS (IF
EQUIPPED)
WARNING
Always remember to switch yourheadlamps on in low light situationsor during inclement weather. Thesystem does not activate the tail lampsand may not provide adequate lightingduring these conditions. Failure to activateyour headlamps under these conditionsmay result in a collision.
The system switches the low beamheadlamps on at a reduced intensity indaylight conditions.
To switch the system on, switch theignition on, and switch the lighting controlto the off, autolamp or parking lampposition.
AUTOMATIC HIGH BEAM
CONTROL (IF EQUIPPED)
The system will automatically turn on yourhigh beams if it is dark enough and no othertraffic is present. When it detects theheadlights of an approaching vehicle, thetail lamps of the preceding vehicle or streetlighting, the system will turn off the highbeams before they distract other drivers.The low beams remain on.
Note:If it appears that automatic controlof the high beams is not functioningproperly, check the windshield in front ofthe camera for a blockage. A clear view ofthe road is required for proper systemoperation. Have any windshield damage inthe area of the camera’s field-of-viewrepaired.
Note:If the system detects a blockage suchas bird droppings, bug splatter, snow or ice,and you do not observe changes, the systemwill go into low beam mode until you clearthe blockage. A message may also appearin the instrument cluster display noting thefront camera is blocked.
Note:Typical road dust, dirt and waterspots will not affect the performance of theautomatic high beam system . However, incold or inclement weather conditions, youwill notice a decrease in the availability ofthe high beam system, especially at startup. If you want to change the beam stateindependently of the system, you mayswitch the high beams on or off using themultifunction switch. Automatic control willresume when conditions are correct.
Note:Modification of the vehicle ride heightsuch as using much larger tires, maydegrade feature performance.
A camera sensor, centrally mountedbehind the windshield of your vehicle,continuously monitors conditions to decidewhen to switch the high beams off and on.
71Fusion (CC7) , enUSALighting
Page 81 of 458

Note:Do not clean the housing or glass ofany mirror with harsh abrasives, fuel or otherpetroleum or ammonia-based cleaningproducts.
You can adjust the interior mirror to yourpreference. Some mirrors also have asecond pivot point. This lets you move themirror head up or down and from side toside.
Pull the tab below the mirror toward youto reduce glare at night.
Auto-Dimming Mirror (If Equipped)
Note:Do not block the sensors on the frontand back of the mirror. Mirror performancemay be affected. A rear center passenger orraised rear center head restraint may alsoblock light from reaching the sensor.
The mirror will dim automatically to reduceglare when bright lights are detected frombehind your vehicle. It will automaticallyreturn to normal reflection when you selectreverse gear to make sure you have a clearview when backing up.
SUN VISORS
Rotate the sun visor toward the sidewindow and extend it rearward for extrashade.
Illuminated Vanity Mirror
Lift the cover to switch the lamp on.
MOONROOF (IF EQUIPPED)
WARNINGS
Do not let children play with themoonroof or leave them unattendedin the vehicle. They may seriouslyhurt themselves.
When closing the moonroof, youshould verify that it is free ofobstructions and make sure thatchildren and pets are not in the proximityof the roof opening.
The sliding shade can be manually openedor closed when the moonroof is closed.Pull the shade toward the front of thevehicle to close it.
The moonroof controls are located on theoverhead console and have a one-touchopen and close feature. To stop it duringone-touch operation, touch the control asecond time.
78Fusion (CC7) , enUSAWindows and MirrorsE138666 E162197
Page 87 of 458

Door Ajar
Displays when the ignition is onand any door is not completelyclosed.
Electric Park Brake
It will illuminate when theelectric parking brake has amalfunction.
Engine Coolant Temperature
Illuminates when the enginecoolant temperature is high.Stop the vehicle as soon aspossible, switch off the engine and let cool.
Engine Oil
If it illuminates with the enginerunning or when you are driving,this indicates a malfunction.Stop your vehicle as soon as it is safe todo so and switch the engine off. Check theengine oil level. See Engine Oil Check(page 241).
Note:Do not resume your journey if itilluminates despite the level being correct.Have the system checked by your authorizeddealer immediately.
Fasten Safety Belt
It will illuminate and a chime willsound to remind you to fastenyour safety belt. See SafetyBelt Minder (page 31).
Front Airbag
If it fails to illuminate when youstart your vehicle, continues toflash or remains on, it indicatesa malfunction. Have the system checkedby your authorized dealer.
Front Fog Lamps (If Equipped)
It will illuminate when you switchthe front fog lamps on.
Heads Up Display (If Equipped)
A red beam of lights willilluminate on the windshield incertain instances when usingadaptive cruise control and/or the collisionwarning system. It will also illuminatemomentarily when you start your vehicleto make sure the display works.
High Beam
It will illuminate when you switchthe high beam headlamps on. Itwill flash when you use theheadlamp flasher.
Hood Ajar
Displays when the ignition is onand the hood is not completelyclosed.
Lane Keeping Aid (If Equipped)
Illuminates when the lanekeeping system is activated.
Low Fuel Level
It will illuminate when the fuellevel is low or the fuel tank isnearly empty. Refuel as soon aspossible.
Low Tire Pressure Warning
It will illuminate when your tirepressure is low. If the lampremains on with the enginerunning or when driving, checkyour tire pressure as soon as possible.
84Fusion (CC7) , enUSAInstrument Cluster E146190 E156133 E159324 E144813
Page 130 of 458

HEATED SEATS (IF EQUIPPED)
WARNING
People who are unable to feel painto their skin because of advancedage, chronic illness, diabetes, spinalcord injury, medication, alcohol use,exhaustion or other physical conditions,must exercise care when using the heatedseat. The heated seat may cause burnseven at low temperatures, especially ifused for long periods of time. Do not placeanything on the seat that insulates againstheat, such as a blanket or cushion. Thismay cause the heated seat to overheat.Do not puncture the seat with pins, needlesor other pointed objects. This may damagethe heating element which may cause theheated seat to overheat. An overheatedseat may cause serious personal injury.
Do not do the following:
•Place heavy objects on the seat.
•Operate the heated seat if water or anyother liquid is spilled on the seat. Allowthe seat to dry thoroughly.
•Operate the heated seats unless theengine is running. Doing so can causethe battery to lose charge.
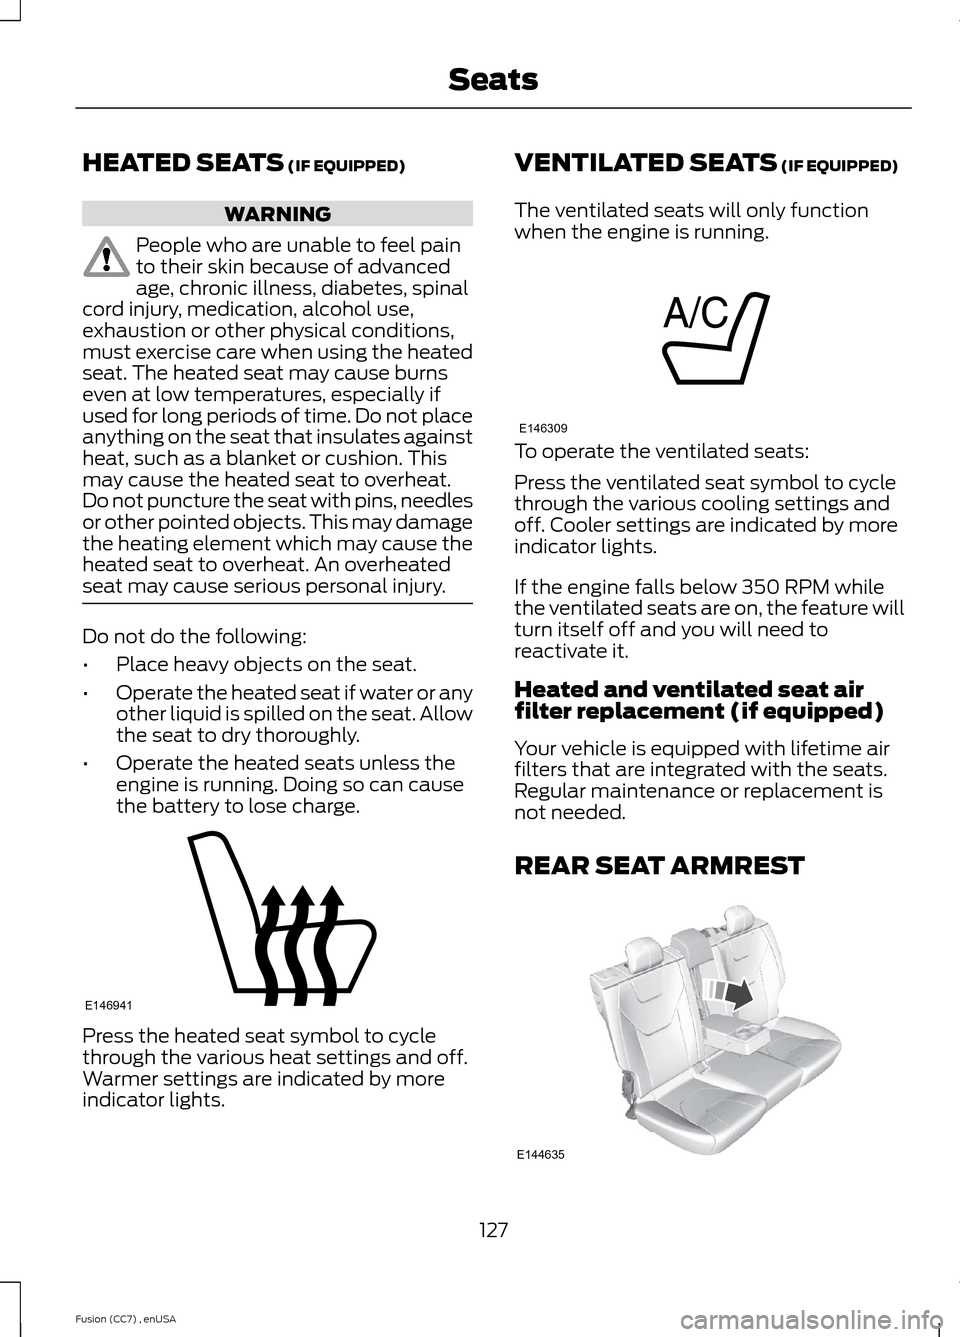
Press the heated seat symbol to cyclethrough the various heat settings and off.Warmer settings are indicated by moreindicator lights.
VENTILATED SEATS (IF EQUIPPED)
The ventilated seats will only functionwhen the engine is running.
To operate the ventilated seats:
Press the ventilated seat symbol to cyclethrough the various cooling settings andoff. Cooler settings are indicated by moreindicator lights.
If the engine falls below 350 RPM whilethe ventilated seats are on, the feature willturn itself off and you will need toreactivate it.
Heated and ventilated seat airfilter replacement (if equipped)
Your vehicle is equipped with lifetime airfilters that are integrated with the seats.Regular maintenance or replacement isnot needed.
REAR SEAT ARMREST
127Fusion (CC7) , enUSASeatsE146941 E146309 E144635
Page 134 of 458

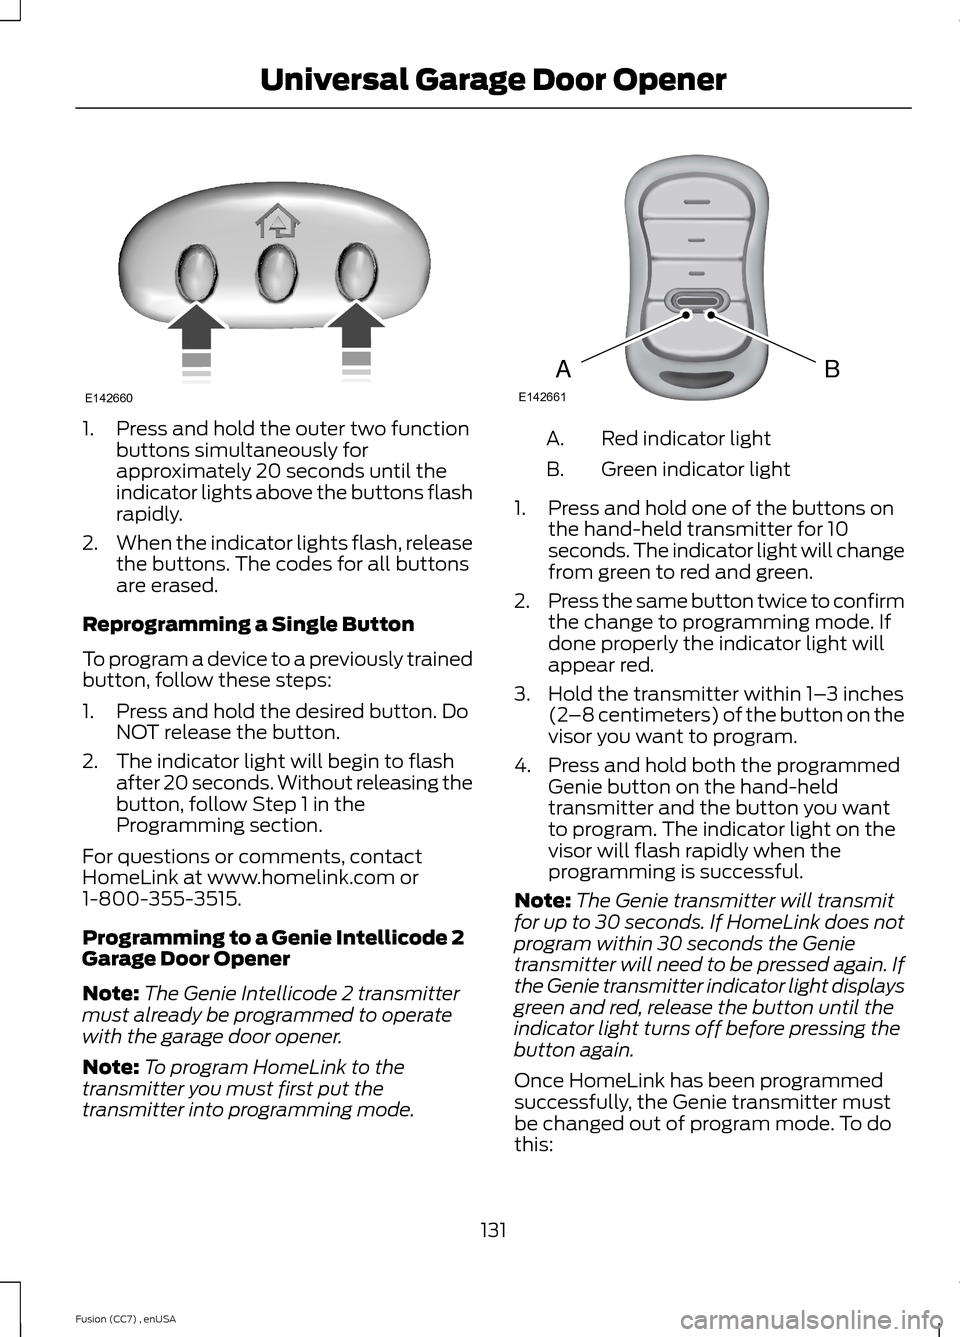
1.Press and hold the outer two functionbuttons simultaneously forapproximately 20 seconds until theindicator lights above the buttons flashrapidly.
2.When the indicator lights flash, releasethe buttons. The codes for all buttonsare erased.
Reprogramming a Single Button
To program a device to a previously trainedbutton, follow these steps:
1.Press and hold the desired button. DoNOT release the button.
2.The indicator light will begin to flashafter 20 seconds. Without releasing thebutton, follow Step 1 in theProgramming section.
For questions or comments, contactHomeLink at www.homelink.com or1-800-355-3515.
Programming to a Genie Intellicode 2Garage Door Opener
Note:The Genie Intellicode 2 transmittermust already be programmed to operatewith the garage door opener.
Note:To program HomeLink to thetransmitter you must first put thetransmitter into programming mode.
Red indicator lightA.
Green indicator lightB.
1.Press and hold one of the buttons onthe hand-held transmitter for 10seconds. The indicator light will changefrom green to red and green.
2.Press the same button twice to confirmthe change to programming mode. Ifdone properly the indicator light willappear red.
3.Hold the transmitter within 1–3 inches(2–8 centimeters) of the button on thevisor you want to program.
4.Press and hold both the programmedGenie button on the hand-heldtransmitter and the button you wantto program. The indicator light on thevisor will flash rapidly when theprogramming is successful.
Note:The Genie transmitter will transmitfor up to 30 seconds. If HomeLink does notprogram within 30 seconds the Genietransmitter will need to be pressed again. Ifthe Genie transmitter indicator light displaysgreen and red, release the button until theindicator light turns off before pressing thebutton again.
Once HomeLink has been programmedsuccessfully, the Genie transmitter mustbe changed out of program mode. To dothis:
131Fusion (CC7) , enUSAUniversal Garage Door OpenerE142660 BAE142661
Page 135 of 458

1.Press and hold the previouslyprogrammed Genie button on thehand-held transmitter for 10 seconds.The indicator light will change from redto red and green.
2.Press the same button twice to confirmthe change. If done correctly theindicator light will turn green.
Programming HomeLink to the GenieIntellicode Garage Door Opener Motor
Note:You may need a ladder to access thegarage door opener motor.
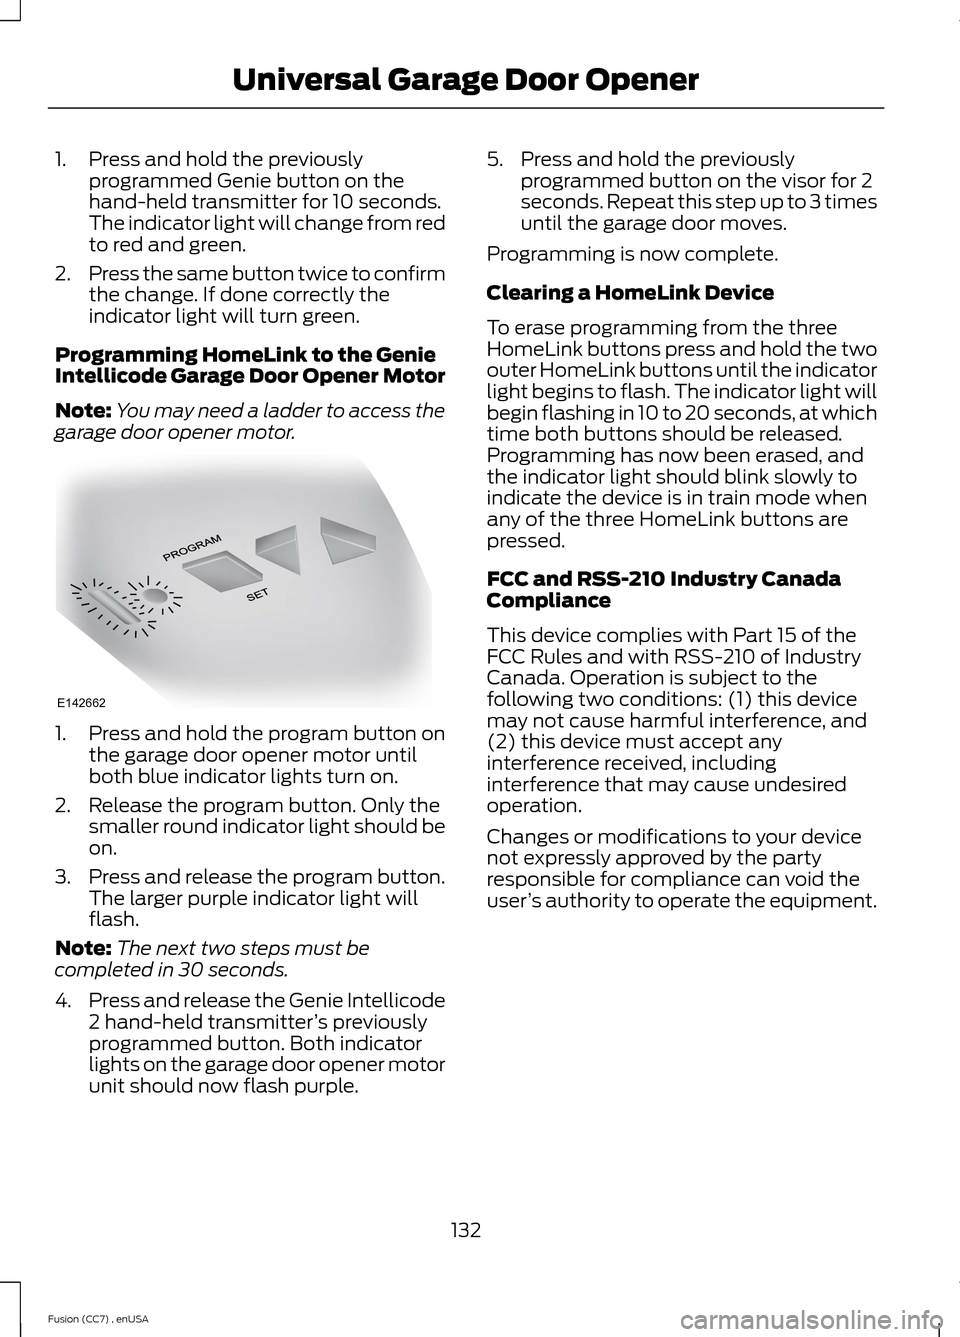
1.Press and hold the program button onthe garage door opener motor untilboth blue indicator lights turn on.
2.Release the program button. Only thesmaller round indicator light should beon.
3.Press and release the program button.The larger purple indicator light willflash.
Note:The next two steps must becompleted in 30 seconds.
4.Press and release the Genie Intellicode2 hand-held transmitter’s previouslyprogrammed button. Both indicatorlights on the garage door opener motorunit should now flash purple.
5.Press and hold the previouslyprogrammed button on the visor for 2seconds. Repeat this step up to 3 timesuntil the garage door moves.
Programming is now complete.
Clearing a HomeLink Device
To erase programming from the threeHomeLink buttons press and hold the twoouter HomeLink buttons until the indicatorlight begins to flash. The indicator light willbegin flashing in 10 to 20 seconds, at whichtime both buttons should be released.Programming has now been erased, andthe indicator light should blink slowly toindicate the device is in train mode whenany of the three HomeLink buttons arepressed.
FCC and RSS-210 Industry CanadaCompliance
This device complies with Part 15 of theFCC Rules and with RSS-210 of IndustryCanada. Operation is subject to thefollowing two conditions: (1) this devicemay not cause harmful interference, and(2) this device must accept anyinterference received, includinginterference that may cause undesiredoperation.
Changes or modifications to your devicenot expressly approved by the partyresponsible for compliance can void theuser’s authority to operate the equipment.
132Fusion (CC7) , enUSAUniversal Garage Door OpenerE142662