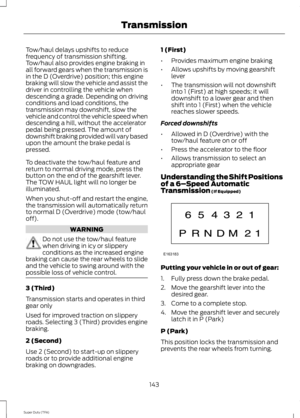
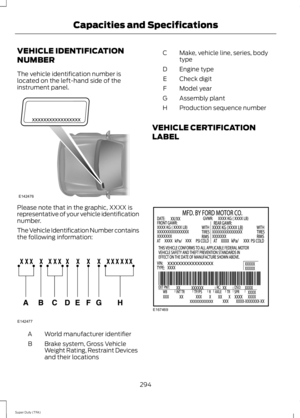
Page 105 of 460
ActionMessage
You select 2WD and need to apply the brakes inorder to exit 4X4 LOW.TO EXIT 4X4 LOW APPLY BRAKE
You select 2WD while your vehicle is at a stop in4X4 LOW and you need to shift into Neutral.TO EXIT 4X4 LOW SHIFT TO N
You select 2WD while your vehicle is operating in4X4 LOW and you need to reduce your speed.TO EXIT 4X4 LOW SLOW TO 3MPH
May display when shifting to or from 4X4 LOW.SHIFT DELAYED PULL FORWARD
102
Super Duty (TFA)
Information Displays
Page 106 of 460

MANUAL CLIMATE CONTROL
Defrost: Distributes air through the windshield defroster vents and demistervents. You can also use this setting to defog and clear the windshield of a thincovering of ice.
A
Rear defrost and heated mirrors: Turns the heated mirrors off and on as wellas the heated rear window, if your vehicle has that feature. See HeatedWindows and Mirrors (page 106).
B
Air distribution control: Press to set the air distribution to a position.Floorand defrost distributes air through the windshield defroster vents, demistervents and floor vents.Panel distributes air through the instrument panel vents.Panel and floor distributes air through the instrument panel vents, floor vents,and demister vents.Floor distributes air through the floor vents.
C
A/C: Press to turn air conditioning off and on. Air conditioning cools the vehicleusing outside air. To improve air conditioning when starting your vehicle, drivewith the windows slightly open for two to three minutes.
D
Recirculated air: Press to switch between outside air and recirculated air.When the air in the passenger compartment is recirculating, the LED on thebutton illuminates. Using recirculated air can reduce the time needed to coolthe interior and reduce unwanted odors from entering your vehicle.
E
MAX A/C: Distributes recirculated air through the instrument panel vents tocool the vehicle. This position is more economical and efficient than normalA/C.
F
Temperature control: Controls the temperature of the air circulated in yourvehicle. Turn to select the desired temperature.G
103
Super Duty (TFA)
Climate ControlE163163
ABDCE
F
G
I
H
Page 107 of 460

Fan speed control: Controls the volume of air circulated in your vehicle. Turnto select the desired fan speed.H
Power: Press to switch the system off and on. When the system is off, outsideair cannot enter the vehicle and the windshield may fog up.I
AUTOMATIC CLIMATE CONTROL
Power and Driver temperature control: Press to turn the climate controlsystem off and on. When the system is off, outside air cannot enter the vehicle.Turn to increase or decrease the air temperature for the driver side of the vehicle.This control also adjusts the passenger side temperature when dual zoneoperation is disengaged.
A
Rear defrost: Turns the heated windows and mirrors off and on. See HeatedWindows and Mirrors (page 106).B
Defrost: Distributes air through the windshield defroster vents and demistervents. You can also use this setting to defog and clear the windshield of a thincovering of ice.
C
Air distribution control: Press to set the air distribution to a position.Floorand defrost distributes air through the windshield defroster vents, demistervents and floor vents.Panel distributes air through the instrument panel vents.Panel and floor distributes air through the instrument panel vents, floor vents,and demister vents.Floor distributes air through the floor vents.
D
104
Super Duty (TFA)
Climate ControlE163164
AHCEF
JIK
DBG
Page 108 of 460

A/C: Press to turn air conditioning off and on. Air conditioning cools the vehicleusing outside air. To improve air conditioning when starting your vehicle, drivewith the windows slightly open for two to three minutes. Use air conditioningwith recirculated air to improve cooling performance and efficiency.Note: Airconditioning turns on automatically in MAX A/C, defrost and floor and defrostmodes.
E
MAX A/C: Distributes recirculated air through the instrument panel vents tocool the vehicle. This position is more economical and efficient than normal airconditioning. When in MAX A/C mode, pressing MAX A/C returns you to yourprevious settings.
F
Recirculated air: Press to switch between outside air and recirculated air.When the air currently in the passenger compartment is recirculating, the LEDon the button illuminates. Using recirculated air can reduce the time needed tocool the interior and reduce unwanted odors from entering your vehicle. Evenwhen you do not select this button, air may still recirculate in some instancesin order to reduce vehicle warm-up time in cold conditions or to cool down time
G
in hot conditions.Note: Recirculated air engages automatically when you selectMAX A/C, or turn on manually in any airflow mode except defrost.Note: Youmay notice changes in sound between recirculated mode and other airflowmodes.Note: For better cooling in hot conditions, recirculated air automaticallyengages when the air distribution control is in panel or panel and floor modesand the air conditioning is on. You can switch to fresh air by pressing therecirculated air button again.
PASS TEMP: Press to switch between single and dual zone. Turn to increaseor decrease the air temperature on the passenger side of the vehicle.H
Fan speed control +: Press to increase the volume of air circulated in yourvehicle.I
AUTO: Press to turn on fully automatic operation. Select the desiredtemperature using the temperature control. The system automaticallydetermines fan speed, air distribution, A/C operation, and outside or recirculatedair, to heat or cool the vehicle to maintain the selected temperature.
J
Fan speed control -: Press to decrease the volume of air circulated in yourvehicle.K
HINTS ON CONTROLLING THE
INTERIOR CLIMATE
Note:To reduce fogging of the windshieldduring humid weather, adjust the airdistribution control to the windshield airvents position. Increase the temperatureand fan speed to improve clearing, ifrequired.
Note:To reduce humidity build-up insideyour vehicle, do not drive with the systemswitched off or with recirculated air alwaysswitched on.
Note:Do not place objects under the frontseats as this may interfere with the airflowto the rear seats.
Note:Remove any snow, ice or leaves fromthe air intake area at the base of thewindshield.
105
Super Duty (TFA)
Climate Control
Page 109 of 460

Note:You may feel a small amount of airfrom the floor air vents regardless of the airdistribution setting.
During extreme high ambient temperatureswhen idling stationary for extended periodsin gear, it is recommended to run the A/Cin the MAX A/C mode, adjust the blowerfan speed to the lowest setting and putthe vehicle’s transmission into position Pto continue to receive cool air from yourA/C system.
For maximum cooling performance inAUTO (automatic climate system) orpanel mode, press MAX A/C.
For maximum cooling performance inpanel and floor mode:
1. Adjust the temperature control to thecoolest setting.
2. Select A/C and recirculated air toprovide colder airflow.
3. Set the fan to the highest speedinitially, and then adjust to maintaincomfort.
To aid in side window defogging anddemisting in cold or humid weather:
1. Select the floor and panel mode.
2. Press A/C.
3. Adjust the temperature control tomaintain comfort.
4. Set the fan speed to the highestsetting.
5.Direct the outer instrument panel ventstoward the side windows.
6. To increase airflow to the outerinstrument panel vents, close the ventslocated in the middle of the instrumentpanel.
HEATED WINDOWS AND
MIRRORS
Heated Rear Window (If Equipped)
Note:The engine must be running to usethis feature.
Note:If your vehicle is equipped with asliding rear window, the feature stilloperates when you open the window.
Press the button to clear the rear windowof thin ice and fog. Press the button againwithin 10 minutes to switch it off. Itswitches off automatically after 10minutes, or when you switch the ignitionoff.
Do not use razor blades or other sharpobjects to clean the inside of the rearwindow or to remove decals from theinside of the rear window. This maycause damage to the heated grid lines.Your warranty does not cover thisdamage.
Heated Exterior Mirror (If Equipped)
Note:Do not remove ice from the mirrorswith a scraper or attempt to readjust themirror glass that has frozen in place. Theseactions could cause damage to the glassand mirrors.
Note:Do not clean the housing or glass ofany mirror with harsh abrasives, fuel or otherpetroleum-based cleaning products.
The heated mirrors remove ice, mist andfog when you switch on the heated rearwindow.
REMOTE START (IF EQUIPPED)
The climate control system adjusts thecabin temperature during remote start.
106
Super Duty (TFA)
Climate Control
Page 110 of 460

You cannot adjust the system duringremote start operation. Turn the ignitionon to return the system to its previoussettings. You can now make adjustments.You will need to turn certainvehicle-dependent features back on, suchas:
•heated seats
•cooled seats
•heated steering wheel
•heated mirrors
•heated rear window.
You can adjust the settings using theinformation display controls. SeeInformation Displays (page 81).
Automatic Settings
You can set the climate control to operatein AUTO mode through the informationdisplay setting: Remote Start > ClimateControl > Heater-A/C > Auto. The climatecontrol system automatically sets theinterior temperature to 72°F (22°C).
In hot weather, the system is set to 72°F(22°C). Cooled seats are set to high (ifavailable, and selected to AUTO in theinformation display).
In moderate weather, the system eitherheats or cools (based on previoussettings). The rear defroster, heatedmirrors, heated seats and cooled seats donot automatically turn on.
In cold weather, the system is set to 72°F(22°C). The heated seats and heatedsteering wheel are set to high (if available,and selected to AUTO in the informationdisplay). The rear defroster and heatedmirrors automatically turn on.
Heated and Cooled Devices
The climate control system controls otherheated and cooled devices inside thevehicle. You can switch these devices on(if available, and selected to AUTO in theinformation displays) during remote start.Heated devices usually switch on duringcold weather, and cooled devices duringhot weather. If your vehicle is equippedwith a diesel engine and a supplementalheater, the supplemental heater also turnson.
107
Super Duty (TFA)
Climate Control
Page 111 of 460

SITTING IN THE CORRECT
POSITION
WARNINGS
Sitting improperly, out of position orwith the seat back reclined too farcan take weight off the seat cushionand affect the decision of the passengersensing system, resulting in serious injuryor death in the event of a crash. Always situpright against your seat back, with yourfeet on the floor.
Do not recline the seat back as thiscan cause the occupant to slideunder the safety belt, resulting inserious injury in the event of a crash.
Do not place objects higher than theseat back to reduce the risk ofserious injury in the event of a crashor during heavy braking.
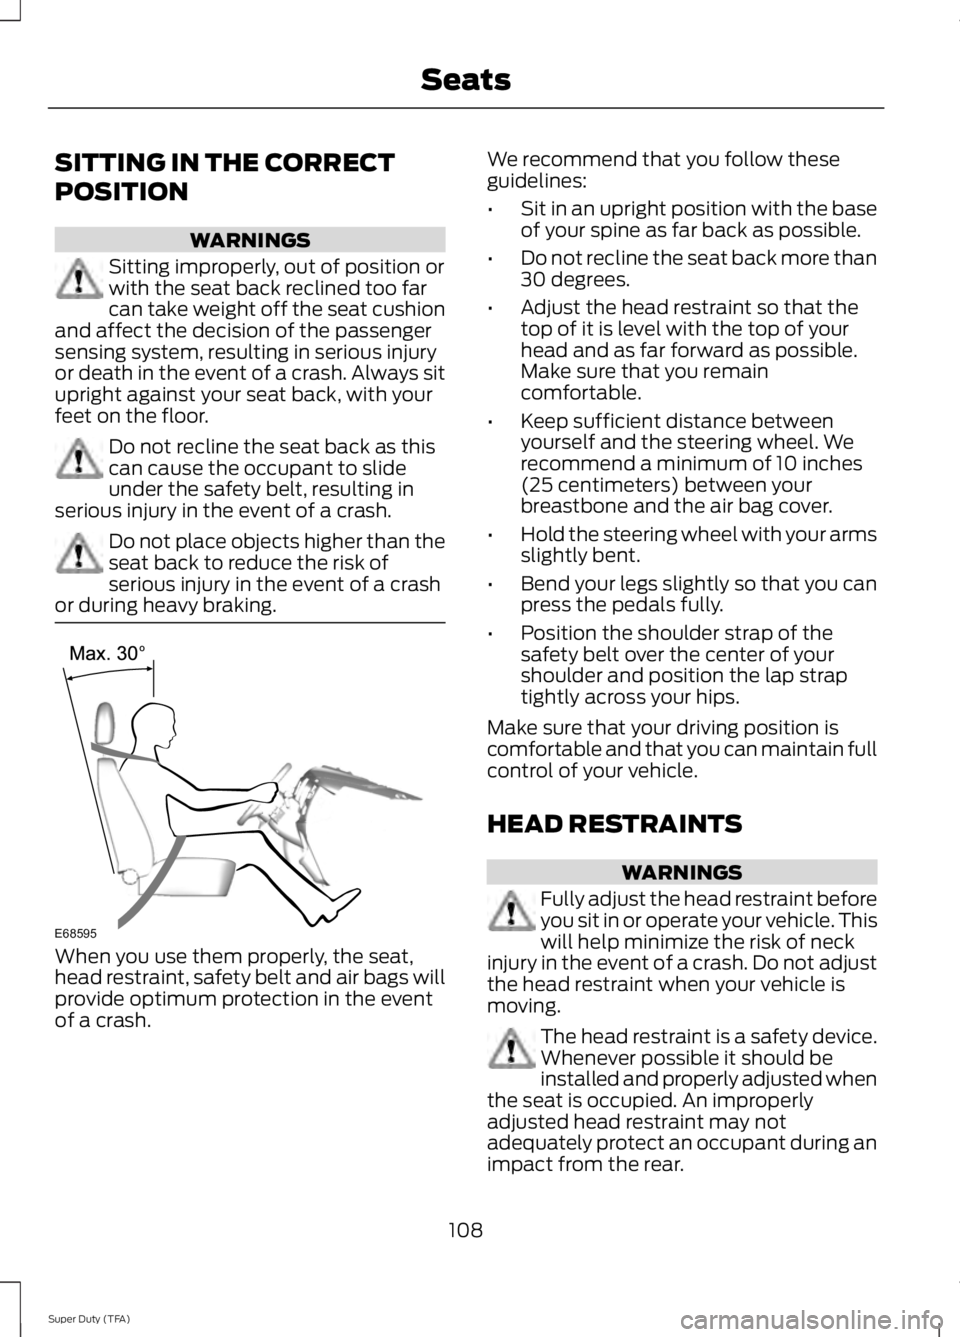
When you use them properly, the seat,head restraint, safety belt and air bags willprovide optimum protection in the eventof a crash.
We recommend that you follow theseguidelines:
•Sit in an upright position with the baseof your spine as far back as possible.
•Do not recline the seat back more than30 degrees.
•Adjust the head restraint so that thetop of it is level with the top of yourhead and as far forward as possible.Make sure that you remaincomfortable.
•Keep sufficient distance betweenyourself and the steering wheel. Werecommend a minimum of 10 inches(25 centimeters) between yourbreastbone and the air bag cover.
•Hold the steering wheel with your armsslightly bent.
•Bend your legs slightly so that you canpress the pedals fully.
•Position the shoulder strap of thesafety belt over the center of yourshoulder and position the lap straptightly across your hips.
Make sure that your driving position iscomfortable and that you can maintain fullcontrol of your vehicle.
HEAD RESTRAINTS
WARNINGS
Fully adjust the head restraint beforeyou sit in or operate your vehicle. Thiswill help minimize the risk of neckinjury in the event of a crash. Do not adjustthe head restraint when your vehicle ismoving.
The head restraint is a safety device.Whenever possible it should beinstalled and properly adjusted whenthe seat is occupied. An improperlyadjusted head restraint may notadequately protect an occupant during animpact from the rear.
108
Super Duty (TFA)
SeatsE68595
Page 112 of 460

WARNINGS
Install the head restraint properly tohelp minimize the risk of neck injuryin the event of a crash.
Note:Adjust the seat back to an uprightdriving position before adjusting the headrestraint. Adjust the head restraint so thatthe top of it is level with the top of your headand as far forward as possible. Make surethat you remain comfortable. If you areextremely tall, adjust the head restraint toits highest position.
Front Seat Head Restraint
The head restraints consist of:
An energy absorbing headrestraint.A
Two steel stems.B
Guide sleeve adjust and releasebutton.C
Guide sleeve unlock and removebutton.D
Adjusting the Head Restraint
Raising the Head Restraint
Pull the head restraint up.
Lowering the Head Restraint
1. Press and hold button C.
2. Push the head restraint down.
Removing the Head Restraint
1. Press and hold buttons C and D.
2. Pull the head restraint up.
Installing the Head Restraint
Align the steel stems into the guide sleevesand push the head restraint down until itlocks.
Front Row Center, Outboard (CrewCab), and Rear Seat Center (Crew Cab)Head Restraints
Note:The SuperCab has rear outboardhead restraints that are not removable andare bolted to the back wall.
Your vehicle may be equipped with headrestraints that are non-adjustable. Thenon-adjustable head restraints consist of:
An energy absorbing headrestraint.A
Two steel stems.B
Guide sleeve unlock and removebutton.C
109
Super Duty (TFA)
SeatsE138642 E162872
A
C
B