2014 FORD F250 maintenance
[x] Cancel search: maintenancePage 237 of 460

TRANSFER CASE FLUID
CHECK
1. Clean the filler plug.
2. Remove the filler plug and inspect the
fluid level.
3. Add only enough fluid through the filler
opening so that the fluid level is at the
bottom of the opening.
Use only fluid that meets Ford
specifications. Refer to the See
Capacities and Specifications (page
292). section. BRAKE FLUID CHECK
Fluid levels between the
MIN and MAX
lines are within the normal operating range;
there is no need to add fluid. If the fluid
levels are outside of the normal operating
range, the performance of the system
could be compromised; seek service from
your authorized dealer immediately.
POWER STEERING FLUID
CHECK
Check the power steering fluid. See
Scheduled Maintenance
(page 430). If
adding fluid is necessary, use only
MERCON LV ATF
Note: This procedure is for vehicles with
gasoline engines. Vehicles with diesel
engines are similar. See Under Hood
Overview in your diesel supplement.
Check the fluid level when it is at ambient
temperature.
1. Check the fluid level in the reservoir. It should be between the MIN and MAX
range. Do not add fluid if the level is
within this range.
2. If the fluid level is low, add fluid to bring
the fluid level up to between the MIN
and MAX range.
3. Switch the engine on.
4. While the engine idles, turn the steering
wheel left and right several times.
5. Switch the engine off.
234
Super Duty (TFA) MaintenanceE164246
Page 238 of 460

6. Recheck the fluid level in the reservoir.
Do not add fluid if the level is between
the MIN and MAX range.
7. If the fluid is low, add fluid in small amounts, continuously checking the
level until it is between the MIN and
MAX range. For proper fluid type, See
Capacities and Specifications (page
292). Be sure to put the cap back on the
reservoir.
WASHER FLUID CHECK WARNING
If you operate your vehicle in
temperatures below 40°F (5°C), use
washer fluid with antifreeze
protection. Failure to use washer fluid with
antifreeze protection in cold weather could
result in impaired windshield vision and
increase the risk of injury or accident. Add fluid to fill the reservoir if the level is
low. Only use a washer fluid that meets
Ford specifications. See Capacities and
Specifications (page 292).
State or local regulations on volatile
organic compounds may restrict the use
of methanol, a common windshield washer
antifreeze additive. Washer fluids
containing non-methanol antifreeze
agents should be used only if they provide
cold weather protection without damaging
the vehicle ’s paint finish, wiper blades or
washer system.
FUEL FILTER
Your vehicle is equipped with a lifetime
fuel filter that is integrated with the fuel
tank. Regular maintenance or replacement
is not needed. CHANGING THE 12V BATTERY WARNINGS
This vehicle may be equipped with
more than one battery, removal of
cable from only one battery does not
disconnect the vehicle electrical system.
Be sure to disconnect cables from all
batteries when disconnecting power.
Failure to do so may cause serious
personal injury or property damage. Batteries normally produce explosive
gases which can cause personal
injury. Therefore, do not allow
flames, sparks or lighted substances to
come near the battery. When working near
the battery, always shield your face and
protect your eyes. Always provide proper
ventilation. When lifting a plastic-cased battery,
excessive pressure on the end walls
could cause acid to flow through the
vent caps, resulting in personal injury and
damage to the vehicle or battery. Lift the
battery with a battery carrier or with your
hands on opposite corners. Keep batteries out of reach of
children. Batteries contain sulfuric
acid. Avoid contact with skin, eyes or
clothing. Shield your eyes when working
near the battery to protect against possible
splashing of acid solution. In case of acid
contact with skin or eyes, flush
immediately with water for a minimum of
15 minutes and get prompt medical
attention. If acid is swallowed, call a
physician immediately. Note:
If your battery has a cover/shield,
make sure it is reinstalled after the battery
has been cleaned or replaced.
Note: Battery posts, terminals and related
accessories contain lead and lead
compounds. Wash hands after handling.
235
Super Duty (TFA) Maintenance
Page 239 of 460

Note:
Electrical or electronic accessories
or components added to the vehicle by the
dealer or the owner may adversely affect
battery performance and durability.
Your vehicle is equipped with a Motorcraft
maintenance-free battery which normally
does not require additional water during
its life of service.
For longer, trouble-free operation, keep the
top of the battery clean and dry. Also,
make certain the battery cables are always
tightly fastened to the battery terminals.
If you see any corrosion on the battery or
terminals, remove the cables from the
terminals and clean with a wire brush. You
can neutralize the acid with a solution of
baking soda and water.
It is recommended that the negative
battery cable terminal be disconnected
from the battery if you plan to store your
vehicle for an extended period of time.
Because your vehicle ’s engine is
electronically controlled by a computer,
some control conditions are maintained
by power from the battery. When the
battery is disconnected or a new battery
is installed, the engine must relearn its idle
and fuel trim strategy for optimum
driveability and performance. Flexible fuel
vehicles (FFV) must also relearn the
ethanol content of the fuel for optimum
driveability and performance. To begin this
process
1. With the vehicle at a complete stop, set the parking brake.
2. Put the gearshift in P, turn off all
accessories.
3. Start the engine. Run the engine until it reaches normal operating
temperature.
4. Allow the engine to idle for at least one
minute.
5. Turn the A/C on and allow the engine to idle for at least one minute. 6. Release the parking brake. With your
foot on the brake pedal and with the
A/C on, put the vehicle in
D and allow
the engine to idle for at least one
minute.
• If you do not allow the engine to
relearn its idle trim, the idle quality
of your vehicle may be adversely
affected until the idle trim is
eventually relearned.
7. Drive the vehicle to complete the relearning process
•The vehicle may need to be driven
10 mi (16 km) or more to relearn the
idle and fuel trim strategy along
with the ethanol content for flexible
fuel vehicles.
• For flexible fuel vehicles, if you are
operating on E85, you may
experience poor starts or an
inability to start the engine and
driveability problems until the fuel
trim and ethanol content have been
relearned.
If the battery has been disconnected or a
new battery has been installed, the clock
and radio settings must be reset once the
battery is reconnected.
Always dispose of automotive
batteries in a responsible manner.
Follow your local authorized standards
for disposal. Call your local authorized
recycling center to find out more about
recycling automotive batteries.
Battery Management System (If
Equipped)
The battery management system (BMS)
monitors battery conditions and takes
actions to extend battery life. If excessive
battery drain is detected, the system may
temporarily disable certain electrical
features to protect the battery. Those
electrical accessories affected include the
rear defrost, heated/cooled seats, climate
236
Super Duty (TFA) Maintenance
Page 240 of 460

control fan, heated steering wheel, audio
and navigation system. A message may be
shown in the information displays to alert
the driver that battery protection actions
are active. These messages are only for
notification that an action is taking place,
and not intended to indicate an electrical
problem or that the battery requires
replacement.
Electrical accessory installation
To ensure proper operation of the BMS,
any electrical devices that are added to
the vehicle should not have their ground
connection made directly at the negative
battery post. A connection at the negative
battery post can cause inaccurate
measurements of the battery condition
and potential incorrect system operation.
Note:
Electrical or electronic accessories
added to the vehicle by the dealer or the
owner may adversely affect battery
performance and durability, and may also
affect the performance of other electrical
systems in the vehicle.
When a battery replacement is required,
the battery should only be replaced with
a Ford recommended replacement battery
which matches the electrical requirements
of the vehicle. After battery replacement,
or in some cases after charging the battery
with the external charger, the BMS requires
eight hours of vehicle sleep time (key off
with doors closed) to relearn the new
battery state of charge. Prior to relearning
the state of charge, the BMS may disable
electrical features (to protect the battery)
earlier than normal. CHECKING THE WIPER
BLADES Run the tip of your fingers over the edge of
the blade to check for roughness.
Clean the wiper blades with washer fluid
or water applied with a soft sponge or
cloth.
CHANGING THE WIPER
BLADES
You can manually move the wiper arms
when the ignition is off. This allows for ease
of blade replacement and cleaning under
the blades.
1. Pull the wiper blade and arm away
from the glass.
237
Super Duty (TFA) MaintenanceE142463 E165804
Page 241 of 460

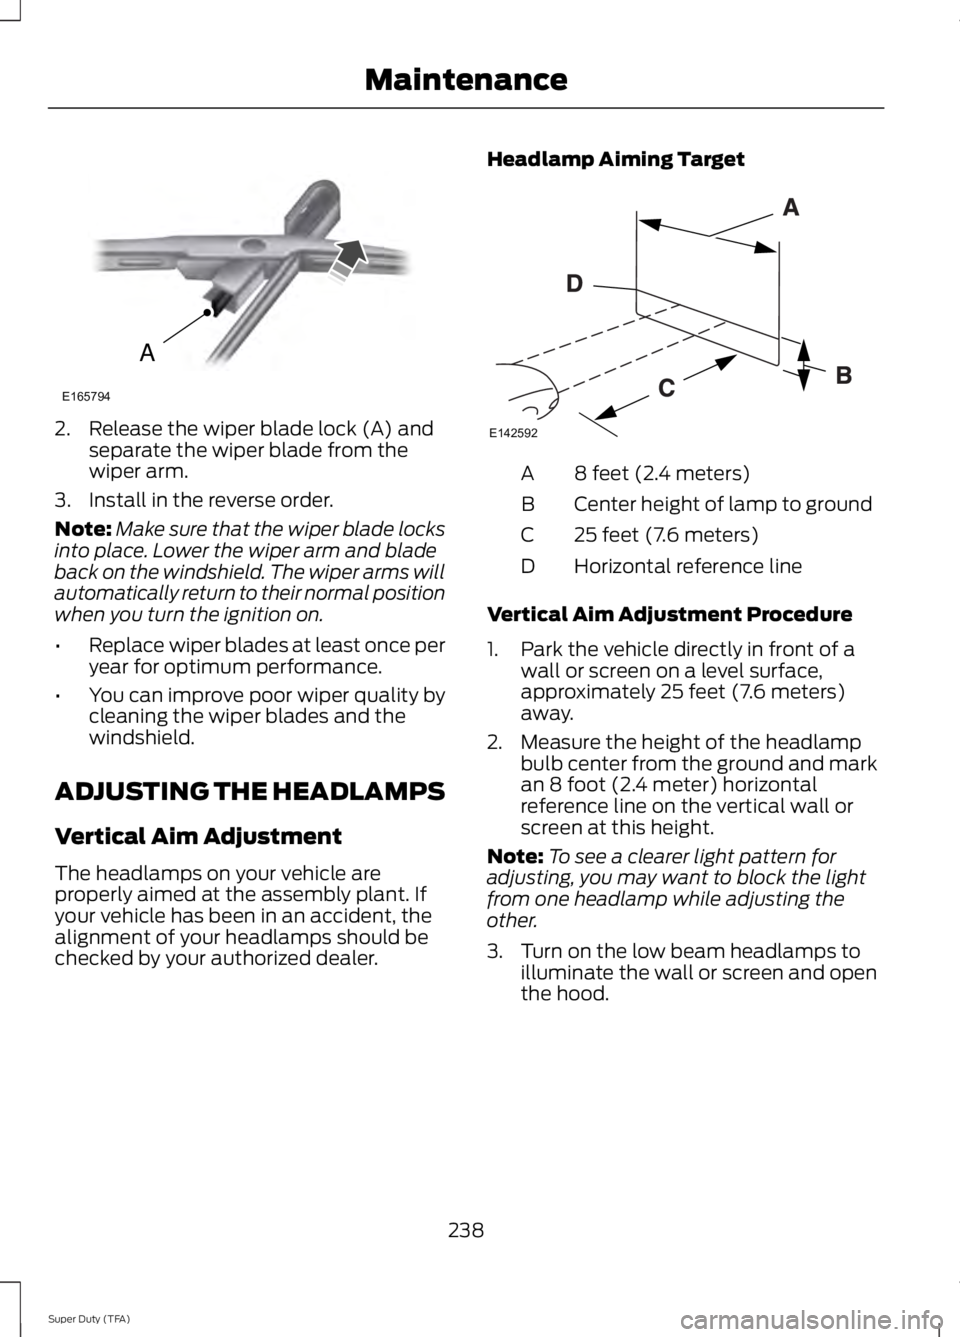
2. Release the wiper blade lock (A) and
separate the wiper blade from the
wiper arm.
3. Install in the reverse order.
Note: Make sure that the wiper blade locks
into place. Lower the wiper arm and blade
back on the windshield. The wiper arms will
automatically return to their normal position
when you turn the ignition on.
• Replace wiper blades at least once per
year for optimum performance.
• You can improve poor wiper quality by
cleaning the wiper blades and the
windshield.
ADJUSTING THE HEADLAMPS
Vertical Aim Adjustment
The headlamps on your vehicle are
properly aimed at the assembly plant. If
your vehicle has been in an accident, the
alignment of your headlamps should be
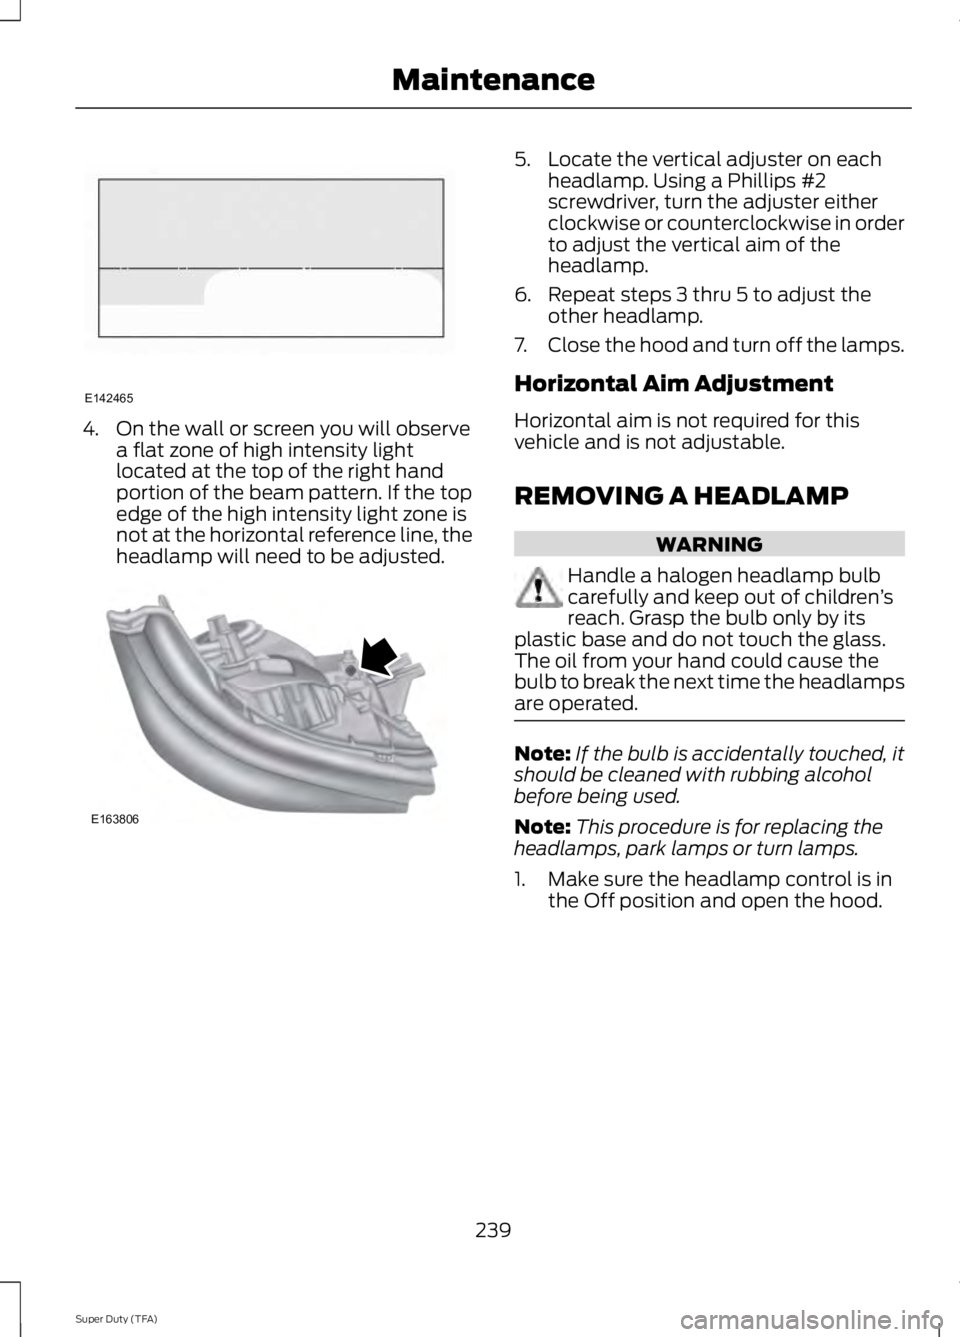
checked by your authorized dealer. Headlamp Aiming Target 8 feet (2.4 meters)
A
Center height of lamp to ground
B
25 feet (7.6 meters)
C
Horizontal reference line
D
Vertical Aim Adjustment Procedure
1. Park the vehicle directly in front of a wall or screen on a level surface,
approximately 25 feet (7.6 meters)
away.
2. Measure the height of the headlamp bulb center from the ground and mark
an 8 foot (2.4 meter) horizontal
reference line on the vertical wall or
screen at this height.
Note: To see a clearer light pattern for
adjusting, you may want to block the light
from one headlamp while adjusting the
other.
3. Turn on the low beam headlamps to illuminate the wall or screen and open
the hood.
238
Super Duty (TFA) MaintenanceA
E165794 E142592
Page 242 of 460

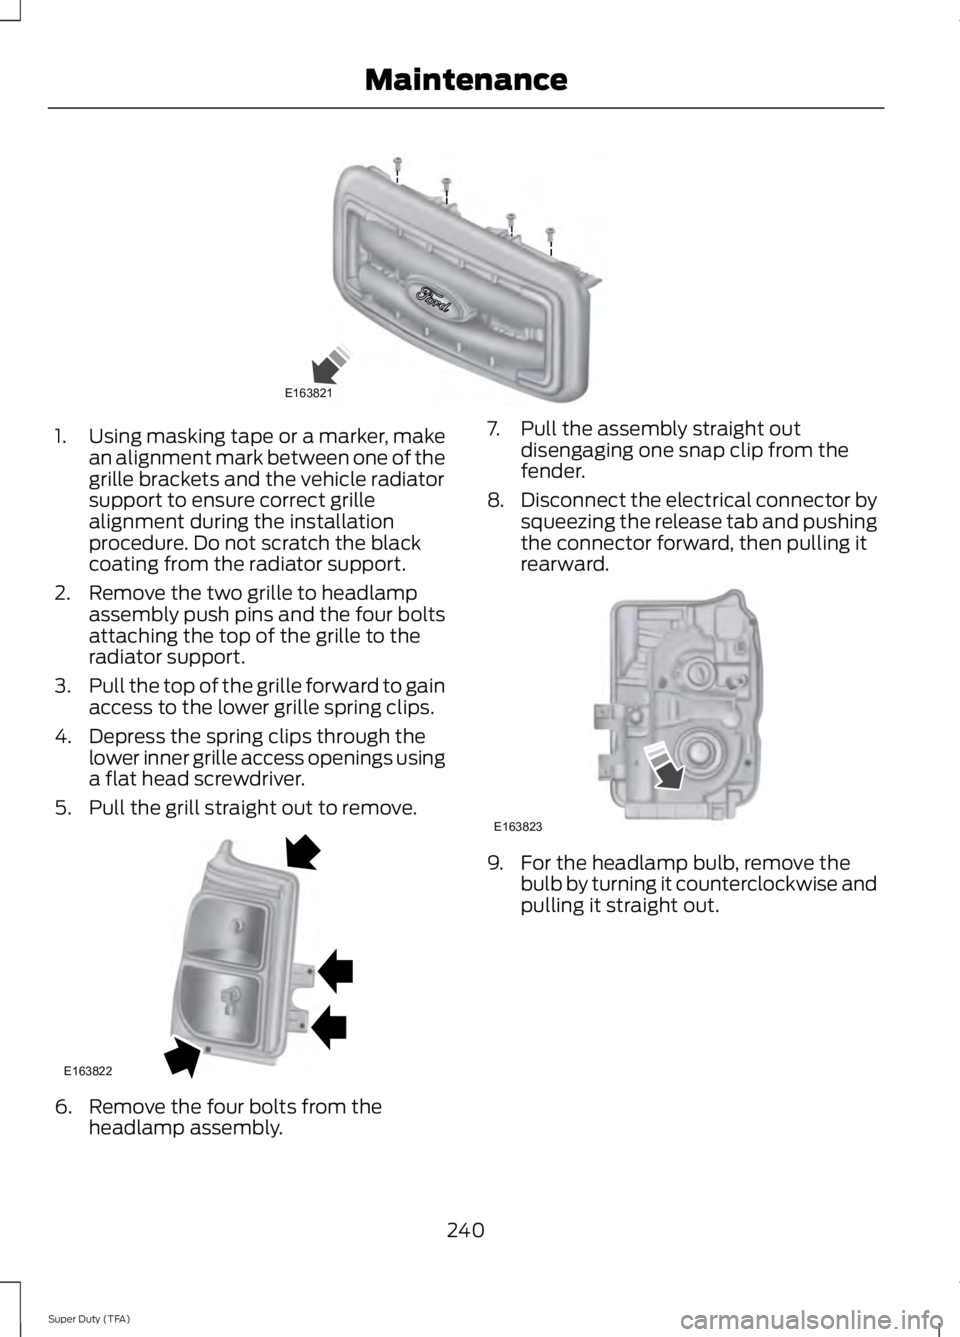
4. On the wall or screen you will observe
a flat zone of high intensity light
located at the top of the right hand
portion of the beam pattern. If the top
edge of the high intensity light zone is
not at the horizontal reference line, the
headlamp will need to be adjusted. 5. Locate the vertical adjuster on each
headlamp. Using a Phillips #2
screwdriver, turn the adjuster either
clockwise or counterclockwise in order
to adjust the vertical aim of the
headlamp.
6. Repeat steps 3 thru 5 to adjust the other headlamp.
7. Close the hood and turn off the lamps.
Horizontal Aim Adjustment
Horizontal aim is not required for this
vehicle and is not adjustable.
REMOVING A HEADLAMP WARNING
Handle a halogen headlamp bulb
carefully and keep out of children
’s
reach. Grasp the bulb only by its
plastic base and do not touch the glass.
The oil from your hand could cause the
bulb to break the next time the headlamps
are operated. Note:
If the bulb is accidentally touched, it
should be cleaned with rubbing alcohol
before being used.
Note: This procedure is for replacing the
headlamps, park lamps or turn lamps.
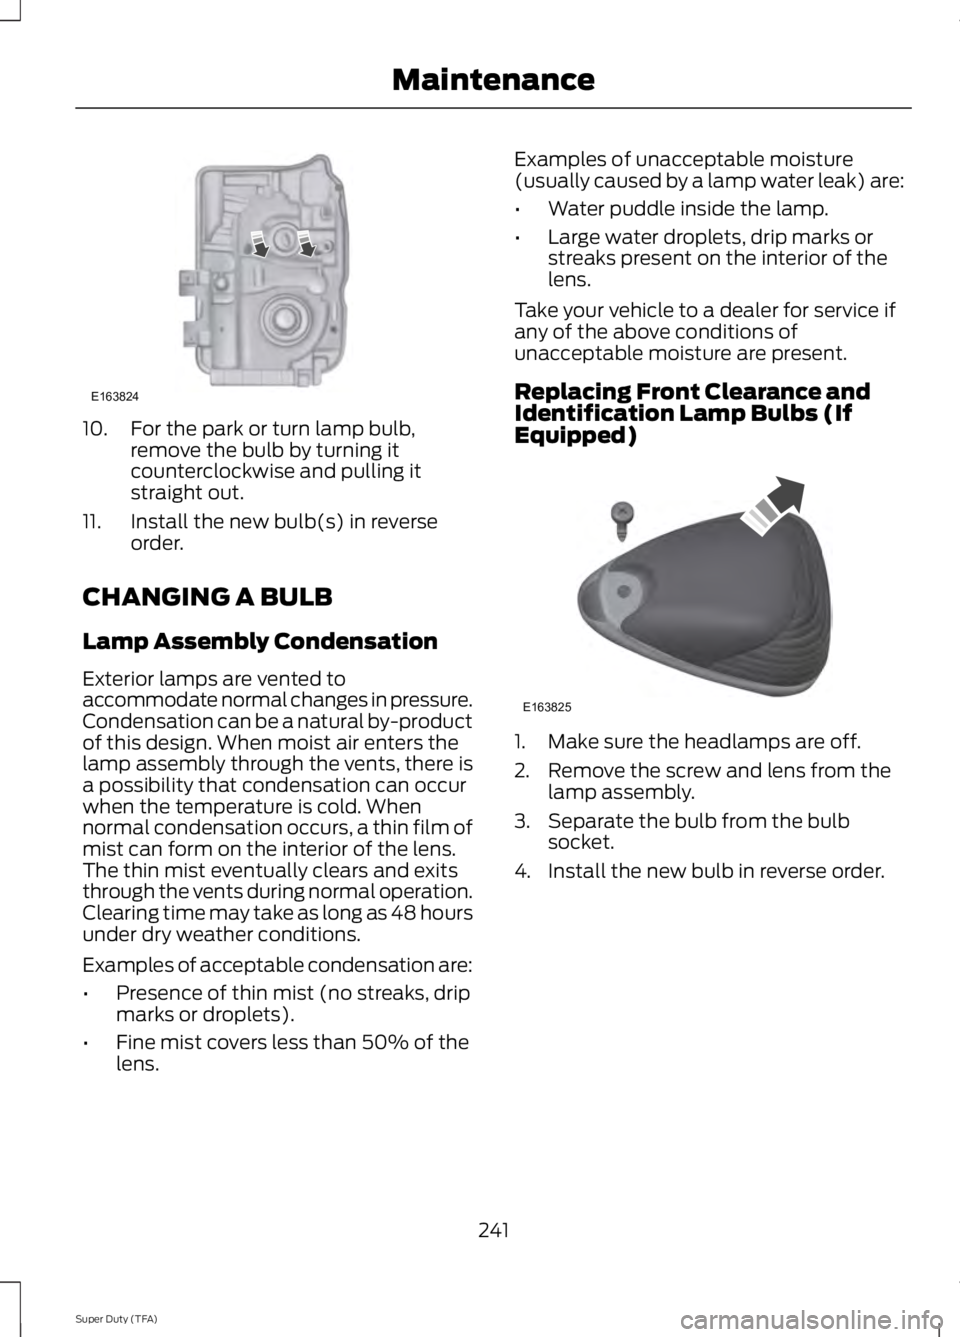
1. Make sure the headlamp control is in the Off position and open the hood.
239
Super Duty (TFA) MaintenanceE142465 E163806
Page 243 of 460

1.
Using masking tape or a marker, make
an alignment mark between one of the
grille brackets and the vehicle radiator
support to ensure correct grille
alignment during the installation
procedure. Do not scratch the black
coating from the radiator support.
2. Remove the two grille to headlamp assembly push pins and the four bolts
attaching the top of the grille to the
radiator support.
3. Pull the top of the grille forward to gain
access to the lower grille spring clips.
4. Depress the spring clips through the lower inner grille access openings using
a flat head screwdriver.
5. Pull the grill straight out to remove. 6. Remove the four bolts from the
headlamp assembly. 7. Pull the assembly straight out
disengaging one snap clip from the
fender.
8. Disconnect the electrical connector by
squeezing the release tab and pushing
the connector forward, then pulling it
rearward. 9. For the headlamp bulb, remove the
bulb by turning it counterclockwise and
pulling it straight out.
240
Super Duty (TFA) MaintenanceE163821 E163822 E163823
Page 244 of 460

10. For the park or turn lamp bulb,
remove the bulb by turning it
counterclockwise and pulling it
straight out.
11. Install the new bulb(s) in reverse order.
CHANGING A BULB
Lamp Assembly Condensation
Exterior lamps are vented to
accommodate normal changes in pressure.
Condensation can be a natural by-product
of this design. When moist air enters the
lamp assembly through the vents, there is
a possibility that condensation can occur
when the temperature is cold. When
normal condensation occurs, a thin film of
mist can form on the interior of the lens.
The thin mist eventually clears and exits
through the vents during normal operation.
Clearing time may take as long as 48 hours
under dry weather conditions.
Examples of acceptable condensation are:
• Presence of thin mist (no streaks, drip
marks or droplets).
• Fine mist covers less than 50% of the
lens. Examples of unacceptable moisture
(usually caused by a lamp water leak) are:
•
Water puddle inside the lamp.
• Large water droplets, drip marks or
streaks present on the interior of the
lens.
Take your vehicle to a dealer for service if
any of the above conditions of
unacceptable moisture are present.
Replacing Front Clearance and
Identification Lamp Bulbs (If
Equipped) 1. Make sure the headlamps are off.
2. Remove the screw and lens from the
lamp assembly.
3. Separate the bulb from the bulb socket.
4. Install the new bulb in reverse order.
241
Super Duty (TFA) MaintenanceE163824 E163825