Page 222 of 460
Protected components
Fuse amp rating
Fuse or relay number
Anti-lock brake system coil feed
25A*
86
Auxiliary power point #5
20A*
87
Auxiliary power point #6
20A*
88
Starter motor
40A*
89
Trailer tow battery charge
25A*
90
Not used
—
91
Auxiliary power point #4
20A*
92
Auxiliary power point #3
20A*
93
Auxiliary switch #1
25A*
94
Auxiliary switch #2
25A*
95
Anti-lock brake system pump
50A*
96
Inverter
40A*
97
Not used
—
98
Instrument panel power inverter
40A*
99
Trailer tow turn signals
25A*
100
Starter
Relay
101
Trailer tow battery charge
Relay
102
Not used
—
103
Not used
—
104
Not used
—
105
Not used
—
106
Not used
—
107
*Cartridge fuses
**Mini fuses
219
Super Duty (TFA) Fuses
Page 224 of 460

Protected components
Fuse amp rating
Fuse or relay number
Auxiliary switch relay #3
10A
9
Run/accessory relay, Customer access
feed
10A
10
Instrument cluster
10A
11
Interior lighting, Lighted running board
lamps
15A
12
Right turn signals and brake lamps, Right
trailer tow stop turn relay
15A
13
Left turn signals and brake lamps, Left
trailer tow stop turn relay
15A
14
High-mounted stop lamps, Backup lamps,
Trailer tow backup relay, Reverse signal
interior mirror
15A
15
Right low beam headlamp
10A
16
Left low beam headlamp
10A
17
Keypad illumination, Passive anti-theft
transceiver, Powertrain control module,
Brake shift interlock
10A
18
Subwoofer, Amplifier
20A
19
Power door locks
20A
20
Brake on/off switch
10A
21
Horn
20A
22
Not used (spare)
15A
23
Steering wheel control module, Diagnostic
connector, Power fold mirror relay, Remote
keyless entry, Electronic finish panel
15A
24
Not used (spare)
15A
25
Steering wheel control module
5A
26
Not used (spare)
20A
27
Ignition switch
15A
28
SYNC, GPS module, Radio faceplate
20A
29
221
Super Duty (TFA) Fuses
Page 226 of 460

GENERAL INFORMATION
Have your vehicle serviced regularly to help
maintain its roadworthiness and resale
value. There is a large network of Ford
authorized dealers that are there to help
you with their professional servicing
expertise. We believe that their specially
trained technicians are best qualified to
service your vehicle properly and expertly.
They are supported by a wide range of
highly specialized tools developed
specifically for servicing your vehicle.
To help you service your vehicle, we
provide scheduled maintenance
information which makes tracking routine
service easy. See Scheduled
Maintenance (page 430).
If your vehicle requires professional service,
your authorized dealer can provide the
necessary parts and service. Check your
warranty information to find out which
parts and services are covered.
Use only recommended fuels, lubricants,
fluids and service parts conforming to
specifications. Motorcraft® parts are
designed and built to provide the best
performance in your vehicle.
Precautions
• Do not work on a hot engine.
• Make sure that nothing gets caught in
moving parts.
• Do not work on a vehicle with the
engine running in an enclosed space,
unless you are sure you have enough
ventilation.
• Keep all open flames and other burning
material (such as cigarettes) away
from the battery and all fuel related
parts. Working with the Engine Off
1. Set the parking brake and shift to
P
(Park).
2. Turn off the engine and remove the key
(if equipped).
3. Block the wheels.
Working with the Engine On WARNING
To reduce the risk of vehicle damage
and/or personal burn injuries, do not
start your engine with the air cleaner
removed and do not remove it while the
engine is running. 1. Set the parking brake and shift to
P
(Park).
2. Block the wheels
OPENING AND CLOSING THE
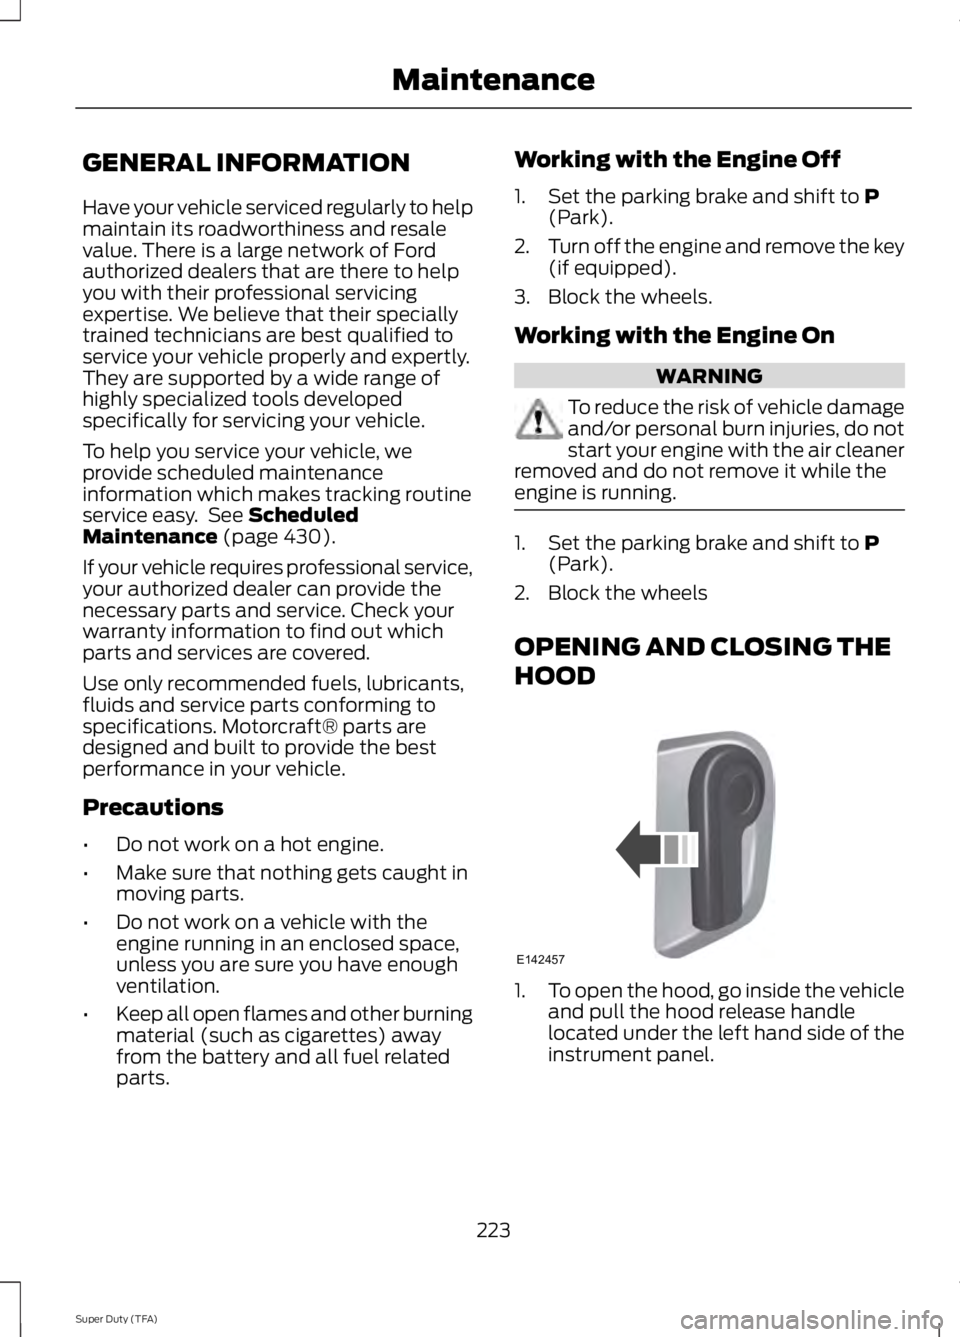
HOOD 1.
To open the hood, go inside the vehicle
and pull the hood release handle
located under the left hand side of the
instrument panel.
223
Super Duty (TFA) MaintenanceE142457
Page 247 of 460
Trade name
Number of Bulbs
Function
912
1
High-mount brake lamp
912
2
Cargo lamp
12V6W
2
Map lamp
578
3
Dome/reading lamps
2825
2
Interior visor lamp
2825
2
Mirror turn signal
2825
Mirror clearance lamp
194
5
Front clearance lamps and
front identification lamps 1
LED2
4
Rear fender clearance 1
1932
3
Rear identification 1
906
1
Underhood Lamp
LED (if equipped)2
To replace all instrument panel lights - see your authorized dealer 1Dual rear wheels, if equipped
2 See your authorized dealer to replace the lamp assembly
244
Super Duty (TFA) Maintenance
Page 253 of 460

Note:
Do not use razor blades or other
sharp objects to clean or remove decals
from the inside of the heated rear window.
The vehicle warranty does not cover
damage caused to the heated rear window
grid lines.
CLEANING THE INTERIOR WARNINGS
Do not use cleaning solvents, bleach
or dye on the vehicle
’s safety belts,
as these actions may weaken the
belt webbing. On vehicles equipped with
seat-mounted airbags, do not use
chemical solvents or strong
detergents. Such products could
contaminate the side airbag system and
affect performance of the side airbag in a
collision. For fabric, carpets, cloth seats, safety belts
and seats equipped with side airbags:
•
Remove dust and loose dirt with a
vacuum cleaner.
• Remove light stains and soil with
Motorcraft Professional Strength
Carpet & Upholstery Cleaner.
• If grease or tar is present on the
material, spot-clean the area first with
Motorcraft Spot and Stain Remover. In
Canada, use Motorcraft Multi-Purpose
Cleaner.
• If a ring forms on the fabric after spot
cleaning, clean the entire area
immediately (but do not oversaturate)
or the ring will set.
• Do not use household cleaning
products or glass cleaners, which can
stain and discolor the fabric and affect
the flame retardant abilities of the seat
materials. CLEANING THE INSTRUMENT
PANEL AND INSTRUMENT
CLUSTER LENS WARNING
Do not use chemical solvents or
strong detergents when cleaning the
steering wheel or instrument panel
to avoid contamination of the airbag
system. Clean the instrument panel and cluster
lens with a clean, damp, white cotton
cloth, then use a clean and dry white
cotton cloth to dry these areas.
•
Avoid cleaners or polishes that increase
the gloss of the upper portion of the
instrument panel. The dull finish in this
area helps protect you from
undesirable windshield reflection.
• Be certain to wash or wipe your hands
clean if you have been in contact with
certain products such as insect
repellent and suntan lotion in order to
avoid possible damage to the interior
painted surfaces.
• Do not use household or glass cleaners
as these may damage the finish of the
instrument panel, interior trim and
cluster lens.
• Do not allow air fresheners and hand
sanitizers to spill onto interior surfaces.
If a spill occurs, wipe off immediately.
Damage may not be covered by your
warranty.
If a staining liquid like coffee or juice has
been spilled on the instrument panel or on
interior trim surfaces, clean as follows:
1. Wipe up spilled liquid using a clean, white, cotton cloth.
250
Super Duty (TFA) Vehicle Care
Page 297 of 460
VEHICLE IDENTIFICATION
NUMBER
The vehicle identification number is
located on the left-hand side of the
instrument panel.
Please note that in the graphic, XXXX is
representative of your vehicle identification
number.
The Vehicle Identification Number contains
the following information:
World manufacturer identifier
A
Brake system, Gross Vehicle
Weight Rating, Restraint Devices
and their locations
B Make, vehicle line, series, body
type
C
Engine type
D
Check digit
E
Model year
F
Assembly plant
G
Production sequence number
H
VEHICLE CERTIFICATION
LABEL 294
Super Duty (TFA) Capacities and SpecificationsE142476 E142477 E167469
Page 315 of 460
6. Press AUX until LINE or LINE IN
appears in the display. You should hear
music from your device even if it is low.
7. Adjust the volume on your portable music player until it reaches the volume
level of the FM station or CD. Do this
by switching back and forth between
the AUX and FM or CD controls.
USB PORT
(IF EQUIPPED) The USB port allows you to plug in media
playing devices, memory sticks and charge
devices (if supported). See SYNC™
(page
313).
MEDIA HUB
(IF EQUIPPED)
The media hub is located in a
compartment on top of the instrument
panel. Push down on the top of the
compartment to access the media hub. A/V inputs
A
SD card slot
B
USB ports
C
See
MyFord Touch ™ (page 349).
312
Super Duty (TFA) Audio SystemE163161 E163162
C
BA
Page 360 of 460

Under this menu, you can set
your clock, access and adjust the
display, sound and vehicle
settings as well as access settings for
specific modes or the help feature.
Clock
Note: You cannot manually set the date.
Your vehicle ’s GPS does this for you.
Note: If the battery has been disconnected,
your vehicle needs to acquire a GPS signal
to update the clock. Once your vehicle
acquires the signal, it may take a few
minutes for the update to display the correct
time. 1. Press the Settings icon > Clock.
2. Press
+ and - to adjust the time.
From this screen, you can also make other
adjustments such as 12-hour or 24-hour
mode, activate GPS time synchronization
and have the system automatically update
new time zones.
You can also turn the outside air
temperature display off and on. It appears
at the top center of the touchscreen, next
to the time and date.
The system automatically saves any
updates you make to the settings.
Display
You can adjust the touchscreen display
through the touchscreen or by pressing the
voice button on your steering wheel
controls and when prompted, say, "Display
settings". Press the Settings icon >
Display
, to access and make
adjustments using the
touchscreen. •
Brightness
allows you to make the
screen display brighter or dimmer.
• Auto DIM
, when set to On, lets you use
the Auto Dim Manual Offset feature.
When set to
Off, screen brightness
does not change.
• Mode
allows you to set the screen to
a certain brightness or have the system
automatically change based on the
outside light level, or turn the display
off.
• If you select
AUTO or NIGHT, you
have the options of turning the
display's Auto Dim feature on or off
and changing the Auto Dim Manual
Offset feature.
• Auto Dim Manual Offset
allows you
to adjust screen dimming as the
outside lighting conditions change from
day to night. This feature also allows
you to adjust screen brightness using
the instrument panel dimming control.
• Edit Wallpaper
•You can have your touchscreen
display the default photo or upload
your own.
Uploading Photos for Your Home
Screen Wallpaper
Note: You cannot load photos directly from
your camera. You must access the photos
either from your USB mass storage device
or from an SD card.
Note: Photographs with extremely large
dimensions (such as 2048 x 1536) may not
be compatible and appear as a blank
(black) image on the display.
Your system allows you to upload and view
up to 32 photos. To access, press the Settings
icon >
Display > Edit
Wallpaper, and then follow the
system prompts to upload your
photographs.
357
Super Duty (TFA) MyFord Touch
™
(If Equipped)E142607 E142607 E142607 E142607