2014 FORD F SERIES MOTORHOME AND COMMERCIAL CHASSIS reset
[x] Cancel search: resetPage 7 of 143
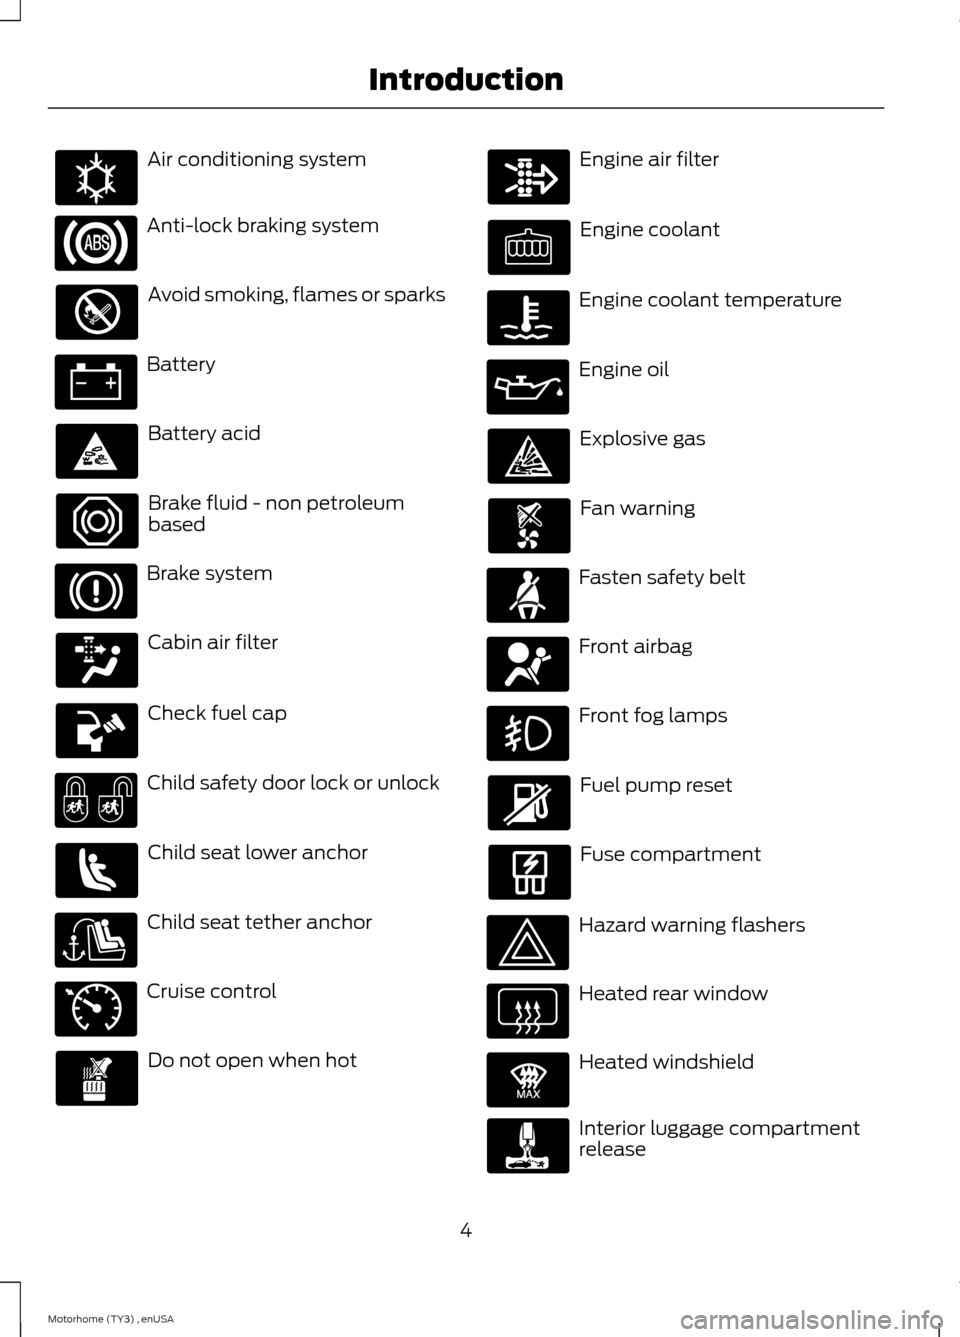
Air conditioning system
Anti-lock braking system
Avoid smoking, flames or sparks
Battery
Battery acid
Brake fluid - non petroleumbased
Brake system
Cabin air filter
Check fuel cap
Child safety door lock or unlock
Child seat lower anchor
Child seat tether anchor
Cruise control
Do not open when hot
Engine air filter
Engine coolant
Engine coolant temperature
Engine oil
Explosive gas
Fan warning
Fasten safety belt
Front airbag
Front fog lamps
Fuel pump reset
Fuse compartment
Hazard warning flashers
Heated rear window
Heated windshield
Interior luggage compartmentrelease
4Motorhome (TY3) , enUSAIntroductionE162384 E71340 E91392
Page 13 of 143
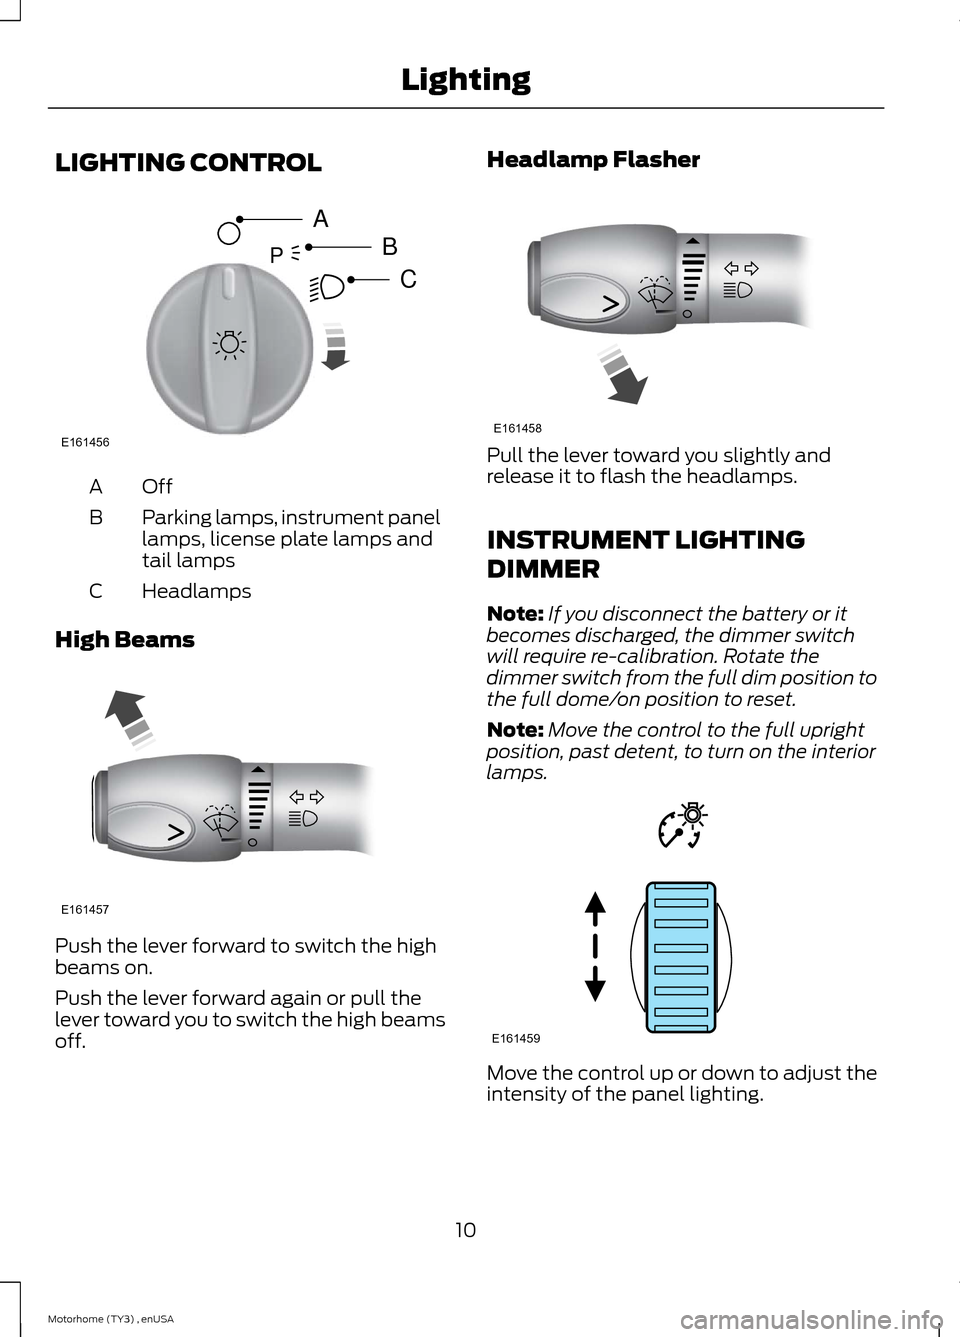
LIGHTING CONTROL
OffA
Parking lamps, instrument panellamps, license plate lamps andtail lamps
B
HeadlampsC
High Beams
Push the lever forward to switch the highbeams on.
Push the lever forward again or pull thelever toward you to switch the high beamsoff.
Headlamp Flasher
Pull the lever toward you slightly andrelease it to flash the headlamps.
INSTRUMENT LIGHTING
DIMMER
Note:If you disconnect the battery or itbecomes discharged, the dimmer switchwill require re-calibration. Rotate thedimmer switch from the full dim position tothe full dome/on position to reset.
Note:Move the control to the full uprightposition, past detent, to turn on the interiorlamps.
Move the control up or down to adjust theintensity of the panel lighting.
10Motorhome (TY3) , enUSALightingE161456ABCP E161457 E161458 E161459
Page 19 of 143
GENERAL INFORMATION
WARNING
Driving while distracted can result inloss of vehicle control, crash andinjury. We strongly recommend thatyou use extreme caution when using anydevice that may take your focus off theroad. Your primary responsibility is the safeoperation of your vehicle. We recommendagainst the use of any hand-held devicewhile driving and encourage the use ofvoice-operated systems when possible.Make sure you are aware of all applicablelocal laws that may affect the use ofelectronic devices while driving.
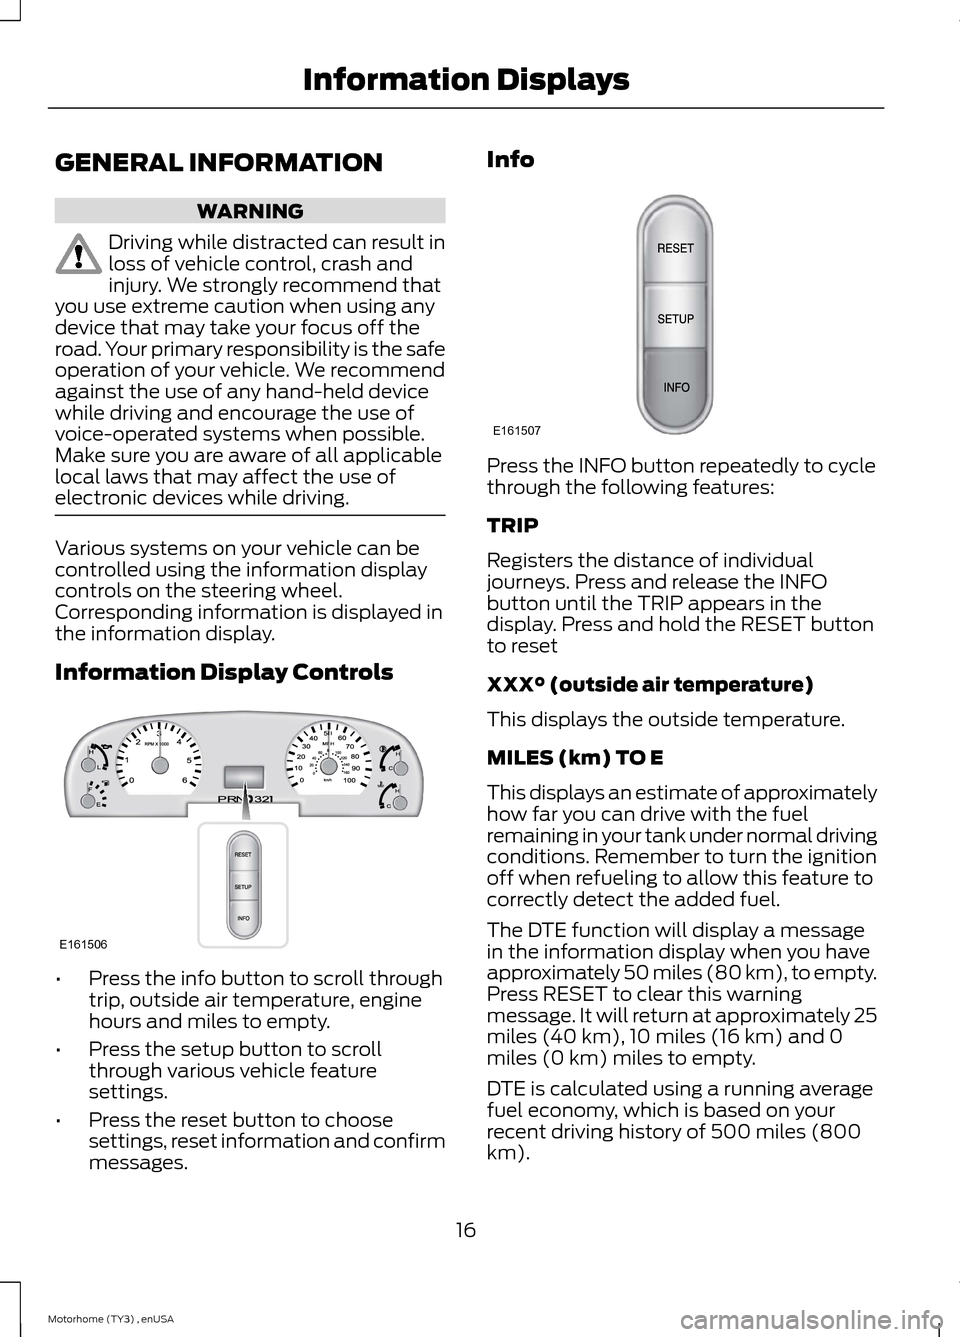
Various systems on your vehicle can becontrolled using the information displaycontrols on the steering wheel.Corresponding information is displayed inthe information display.
Information Display Controls
•Press the info button to scroll throughtrip, outside air temperature, enginehours and miles to empty.
•Press the setup button to scrollthrough various vehicle featuresettings.
•Press the reset button to choosesettings, reset information and confirmmessages.
Info
Press the INFO button repeatedly to cyclethrough the following features:
TRIP
Registers the distance of individualjourneys. Press and release the INFObutton until the TRIP appears in thedisplay. Press and hold the RESET buttonto reset
XXX° (outside air temperature)
This displays the outside temperature.
MILES (km) TO E
This displays an estimate of approximatelyhow far you can drive with the fuelremaining in your tank under normal drivingconditions. Remember to turn the ignitionoff when refueling to allow this feature tocorrectly detect the added fuel.
The DTE function will display a messagein the information display when you haveapproximately 50 miles (80 km), to empty.Press RESET to clear this warningmessage. It will return at approximately 25miles (40 km), 10 miles (16 km) and 0miles (0 km) miles to empty.
DTE is calculated using a running averagefuel economy, which is based on yourrecent driving history of 500 miles (800km).
16Motorhome (TY3) , enUSAInformation DisplaysE161506 E161507
Page 20 of 143
ENG HRS
Registers the accumulated time the enginehas been running.
System check and vehicle featurecustomization
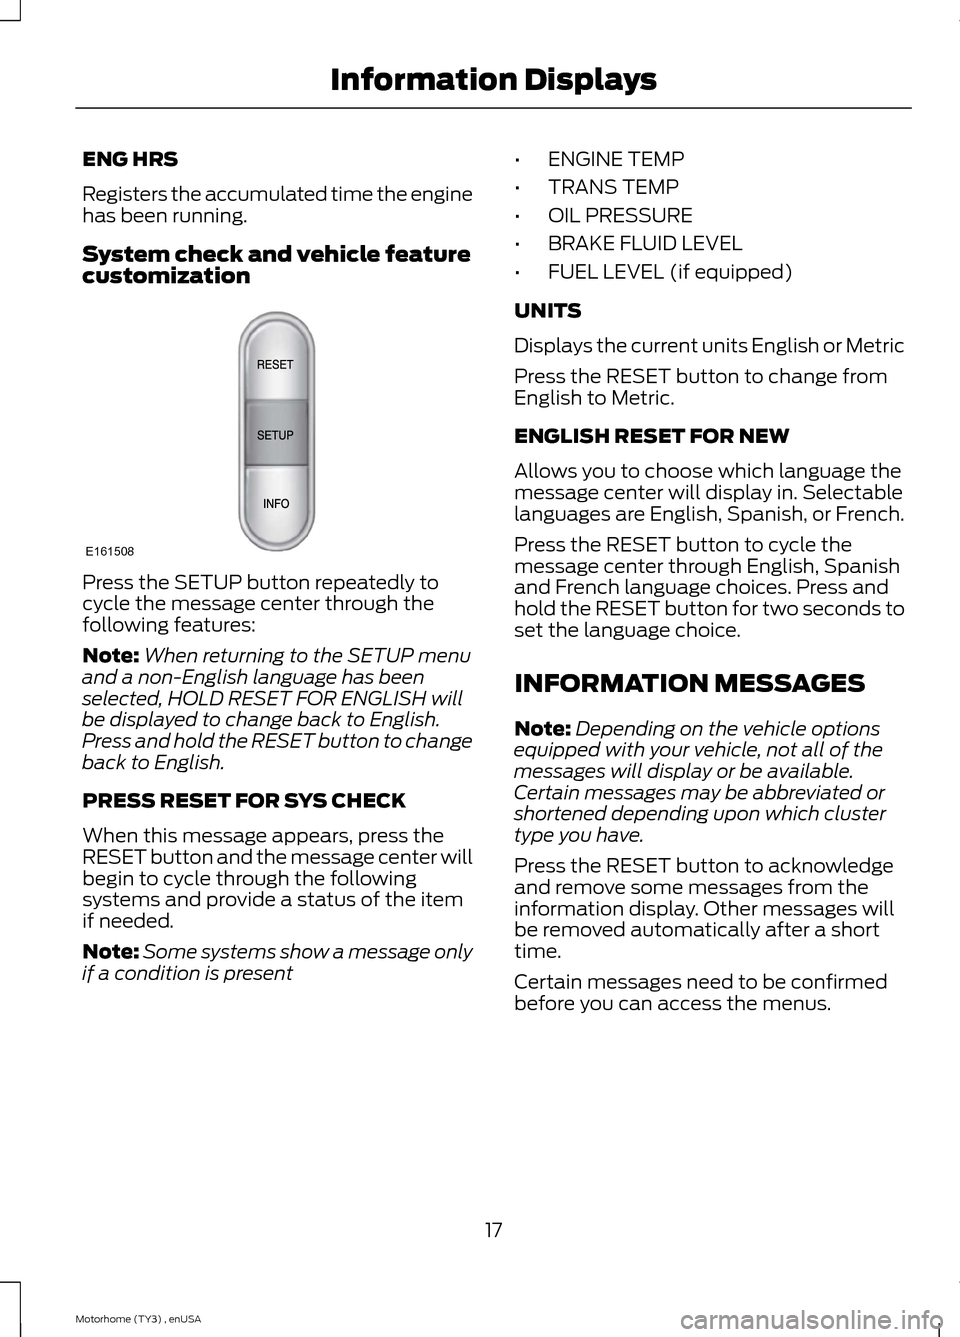
Press the SETUP button repeatedly tocycle the message center through thefollowing features:
Note:When returning to the SETUP menuand a non-English language has beenselected, HOLD RESET FOR ENGLISH willbe displayed to change back to English.Press and hold the RESET button to changeback to English.
PRESS RESET FOR SYS CHECK
When this message appears, press theRESET button and the message center willbegin to cycle through the followingsystems and provide a status of the itemif needed.
Note:Some systems show a message onlyif a condition is present
•ENGINE TEMP
•TRANS TEMP
•OIL PRESSURE
•BRAKE FLUID LEVEL
•FUEL LEVEL (if equipped)
UNITS
Displays the current units English or Metric
Press the RESET button to change fromEnglish to Metric.
ENGLISH RESET FOR NEW
Allows you to choose which language themessage center will display in. Selectablelanguages are English, Spanish, or French.
Press the RESET button to cycle themessage center through English, Spanishand French language choices. Press andhold the RESET button for two seconds toset the language choice.
INFORMATION MESSAGES
Note:Depending on the vehicle optionsequipped with your vehicle, not all of themessages will display or be available.Certain messages may be abbreviated orshortened depending upon which clustertype you have.
Press the RESET button to acknowledgeand remove some messages from theinformation display. Other messages willbe removed automatically after a shorttime.
Certain messages need to be confirmedbefore you can access the menus.
17Motorhome (TY3) , enUSAInformation DisplaysE161508
Page 28 of 143
5.To install the cap, align the tabs on thecap with the notches on the filler pipe.
6.Turn the filler cap clockwise 1/4 of aturn clockwise until it clicks at leastonce.
If the Check Fuel Cap light or a Check FuelCap message appears in the instrumentcluster and stays on after you start theengine, you may not have installed the fuelfiller properly.
If the fuel cap light remains on, at the nextopportunity, safely pull off of the road,remove the fuel filler cap, align the capproperly and reinstall it. The check fuel caplight or Check fuel cap message may notreset immediately. It may take severaldriving cycles for the indicators to turn off.A driving cycle consists of an enginestart-up (after four or more hours with theengine off) followed by normal city andhighway driving.
FUEL CONSUMPTION
Empty reserve is the amount of fuelremaining in the tank after the fuel gaugeindicates empty. The amount of usablefuel in the empty reserve varies and shouldnot be relied upon to increase driving range.
•The usable capacity of the fuel tank isthe amount of fuel that can be addedinto the tank after the gauge indicatesempty
•The advertised capacity is the total fueltank size. See Capacities andSpecifications (page 111). It is thecombined usable capacity plus theempty reserve.
•Due to the empty reserve, you may notbe able to refuel the full amount of theadvertised capacity of the fuel tankeven when the fuel gauge reads empty.
Filling the Tank
For consistent results when filling the fueltank:
•Turn the ignition off before fueling; aninaccurate reading results if the engineis left running.
•Use the same fill rate(low-medium-high) each time the tankis filled.
•Allow no more than two automaticclick-offs when filling.
Results are most accurate when the fillingmethod is consistent.
Calculating Fuel Economy
Do not measure fuel economy during thefirst 1000 miles (1600 kilometers) ofdriving (this is your engine’s break-inperiod); a more accurate measurement isobtained after 2000 miles - 3000 miles(3200 kilometers - 4800 kilometers). Also,fuel expense, frequency of fill ups or fuelgauge readings are not accurate ways tomeasure fuel economy.
1.Fill the fuel tank completely and recordthe initial odometer reading.
2.Each time you fill the tank, record theamount of fuel added.
3.After at least 3 to 5 tank fill ups, fill thefuel tank and record the currentodometer reading.
4.Subtract your initial odometer readingfrom the current odometer reading.
5.Calculate fuel economy by dividingmiles traveled by gallons used (ForMetric: Multiply liters used by 100, thendivide by kilometers traveled).
25Motorhome (TY3) , enUSAFuel and Refueling
Page 32 of 143
AUTOMATIC TRANSMISSION
WARNINGS
Always set the parking brake fullyand make sure the gearshift islatched in P (Park). Turn the ignitionto the off position and remove the keywhenever you leave your vehicle.
Do not apply the brake pedal andaccelerator pedal simultaneously.Applying both pedals simultaneouslyfor more than three seconds will limitengine rpm, which may result in difficultymaintaining speed in traffic and could leadto serious injury.
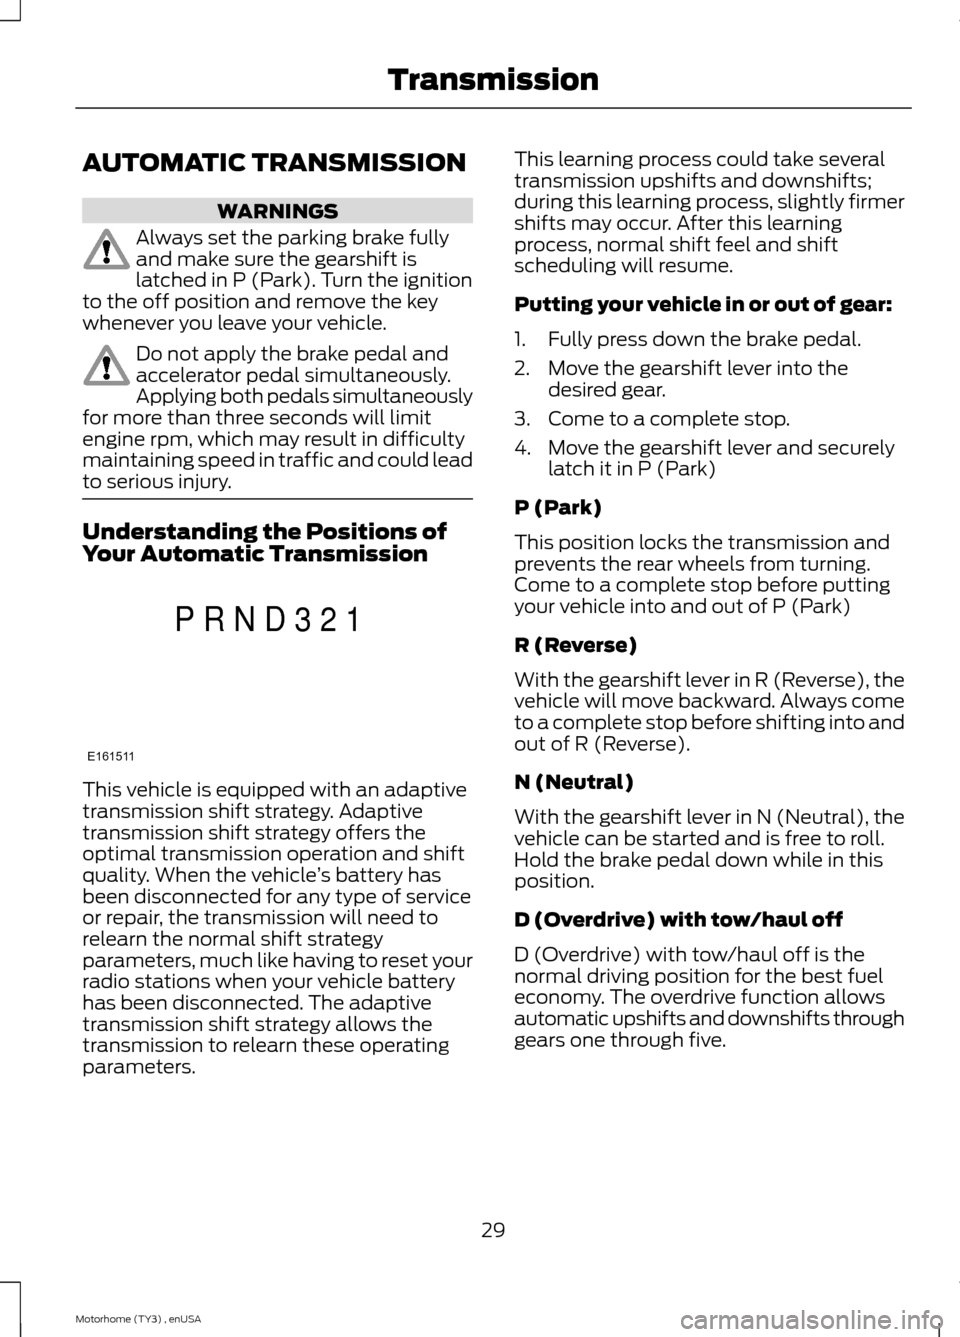
Understanding the Positions ofYour Automatic Transmission
This vehicle is equipped with an adaptivetransmission shift strategy. Adaptivetransmission shift strategy offers theoptimal transmission operation and shiftquality. When the vehicle’s battery hasbeen disconnected for any type of serviceor repair, the transmission will need torelearn the normal shift strategyparameters, much like having to reset yourradio stations when your vehicle batteryhas been disconnected. The adaptivetransmission shift strategy allows thetransmission to relearn these operatingparameters.
This learning process could take severaltransmission upshifts and downshifts;during this learning process, slightly firmershifts may occur. After this learningprocess, normal shift feel and shiftscheduling will resume.
Putting your vehicle in or out of gear:
1.Fully press down the brake pedal.
2.Move the gearshift lever into thedesired gear.
3.Come to a complete stop.
4.Move the gearshift lever and securelylatch it in P (Park)
P (Park)
This position locks the transmission andprevents the rear wheels from turning.Come to a complete stop before puttingyour vehicle into and out of P (Park)
R (Reverse)
With the gearshift lever in R (Reverse), thevehicle will move backward. Always cometo a complete stop before shifting into andout of R (Reverse).
N (Neutral)
With the gearshift lever in N (Neutral), thevehicle can be started and is free to roll.Hold the brake pedal down while in thisposition.
D (Overdrive) with tow/haul off
D (Overdrive) with tow/haul off is thenormal driving position for the best fueleconomy. The overdrive function allowsautomatic upshifts and downshifts throughgears one through five.
29Motorhome (TY3) , enUSATransmissionE161511PRND321
Page 63 of 143
FUSE SPECIFICATION CHART
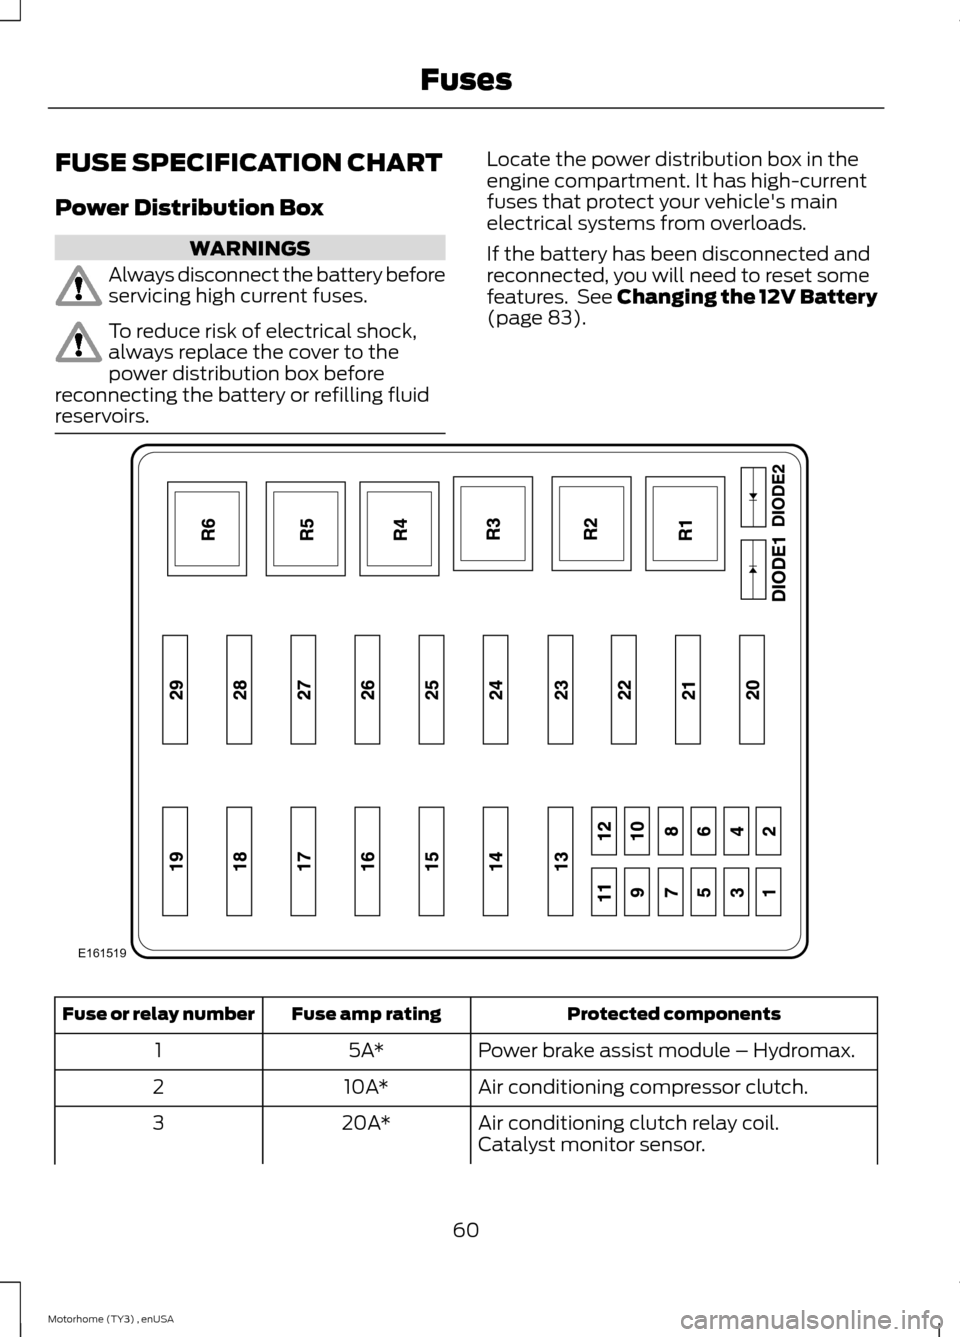
Power Distribution Box
WARNINGS
Always disconnect the battery beforeservicing high current fuses.
To reduce risk of electrical shock,always replace the cover to thepower distribution box beforereconnecting the battery or refilling fluidreservoirs.
Locate the power distribution box in theengine compartment. It has high-currentfuses that protect your vehicle's mainelectrical systems from overloads.
If the battery has been disconnected andreconnected, you will need to reset somefeatures. See Changing the 12V Battery(page 83).
Protected componentsFuse amp ratingFuse or relay number
Power brake assist module – Hydromax.5A*1
Air conditioning compressor clutch.10A*2
Air conditioning clutch relay coil.20A*3Catalyst monitor sensor.
60Motorhome (TY3) , enUSAFusesE161519
Page 78 of 143
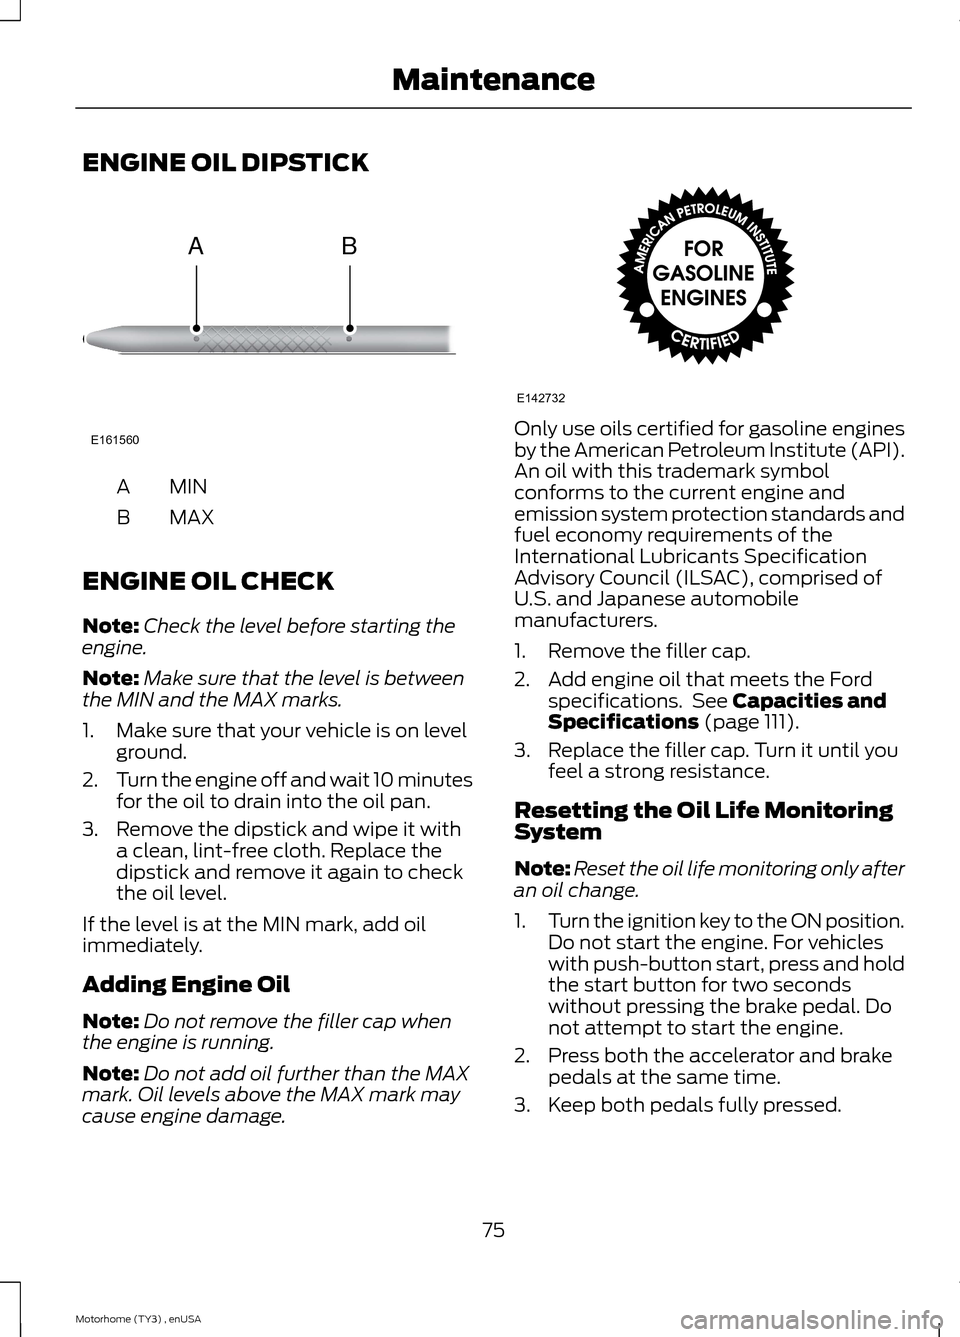
ENGINE OIL DIPSTICK
MINA
MAXB
ENGINE OIL CHECK
Note:Check the level before starting theengine.
Note:Make sure that the level is betweenthe MIN and the MAX marks.
1.Make sure that your vehicle is on levelground.
2.Turn the engine off and wait 10 minutesfor the oil to drain into the oil pan.
3.Remove the dipstick and wipe it witha clean, lint-free cloth. Replace thedipstick and remove it again to checkthe oil level.
If the level is at the MIN mark, add oilimmediately.
Adding Engine Oil
Note:Do not remove the filler cap whenthe engine is running.
Note:Do not add oil further than the MAXmark. Oil levels above the MAX mark maycause engine damage.
Only use oils certified for gasoline enginesby the American Petroleum Institute (API).An oil with this trademark symbolconforms to the current engine andemission system protection standards andfuel economy requirements of theInternational Lubricants SpecificationAdvisory Council (ILSAC), comprised ofU.S. and Japanese automobilemanufacturers.
1.Remove the filler cap.
2.Add engine oil that meets the Fordspecifications. See Capacities andSpecifications (page 111).
3.Replace the filler cap. Turn it until youfeel a strong resistance.
Resetting the Oil Life MonitoringSystem
Note:Reset the oil life monitoring only afteran oil change.
1.Turn the ignition key to the ON position.Do not start the engine. For vehicleswith push-button start, press and holdthe start button for two secondswithout pressing the brake pedal. Donot attempt to start the engine.
2.Press both the accelerator and brakepedals at the same time.
3.Keep both pedals fully pressed.
75Motorhome (TY3) , enUSAMaintenanceE161560AB E142732