2014 FORD EXPEDITION turn signal
[x] Cancel search: turn signalPage 49 of 519

RESTRAINT SAFETY SYSTEM
The Restraint Safety System provides an improved overall level of frontal
crash protection to front seat occupants and is designed to help further
reduce the risk of airbag-related injuries. The system is able to analyze
different occupant conditions and crash severity before activating the
appropriate safety devices to help better protect a range of occupants in
a variety of frontal crash situations.
Your vehicle’s Restraint Safety System consists of:
•driver and passenger dual-stage airbag supplemental restraints.
•front outboard safety belts with pretensioners, energy management
retractors (first row only), and safety belt usage sensors.
•driver’s seat position sensor.
•front crash severity sensors.
•restraints control module with impact and safing sensors.
•restraint system warning light and backup tone.
•the electrical wiring for the airbags, crash sensor(s), safety belt
pretensioners, front safety belt usage sensors, driver seat position
sensor, and indicator lights.
How does the Restraint Safety System work?
The Restraint Safety System can adapt the deployment strategy of your
vehicle’s safety devices according to crash severity and occupant
conditions. A collection of crash and occupant sensors provides
information to the restraints control module. During a crash, the
restraints control module may activate the safety belt pretensioners
and/or either one or both stages of the dual-stage airbag supplemental
restraints based on crash severity and occupant conditions.
SOS POST-CRASH ALERT SYSTEM™
The system flashes the turn signal lamps and sounds the horn
(intermittently) in the event of a serious impact that deploys an airbag
equipped on your vehicle, such as front, side, side curtain or Safety
Canopy.
The horn and lamps will turn off when:
•you press the hazard control button
•you press the panic button (if equipped) on the remote entry
transmitter, or
•your vehicle runs out of power.
48Supplementary Restraints System
2014 Expedition(exd)
Owners Guide gf, 1st Printing, June 2013
USA(fus)
Page 59 of 519

Memory Feature (If Equipped)
The feature allows the remote control to recall the driver seat, power
mirrors and power adjustable foot pedals memory positions.
Press the unlock button on the remote control to recall the memory
positions. If the easy entry and exit feature is enabled, the seat will move
to the easy entry position. The seat will move to the driver memory
position when the key is put in the ignition.
Programming Memory to the Remote Control
1. Switch on the ignition.
2. Move the memory features to the desired positions using the
associated controls.
3. Press and hold button1on the
side of the driver seat for five
seconds. You will hear two tones.
4. Within three seconds press the
lock button on the remote control.
Repeat this procedure for memory
button2and a second remote
control if desired.
Deactivating Memory from the Remote Control
1. Switch on the ignition.
2. Press and hold the desired memory button for five seconds. You will
hear two tones.
3. Within three seconds press the unlock button on the remote control.
Repeat this procedure for each additional remote control if desired.
Car Finder
Press the button twice within three seconds. The horn will sound
and the turn signals will flash. We recommend you use this method
to locate your vehicle, rather than using the panic alarm.
Sounding a Panic Alarm
Press the button to activate the alarm. Press the button again
or switch the ignition on to deactivate.
Note:The panic alarm will only operate when the ignition is off.
21
58Keys and Remote Control
2014 Expedition(exd)
Owners Guide gf, 1st Printing, June 2013
USA(fus)
Page 68 of 519
LOCKING AND UNLOCKING
You can use the power door lock control or the remote control to lock
and unlock your vehicle.
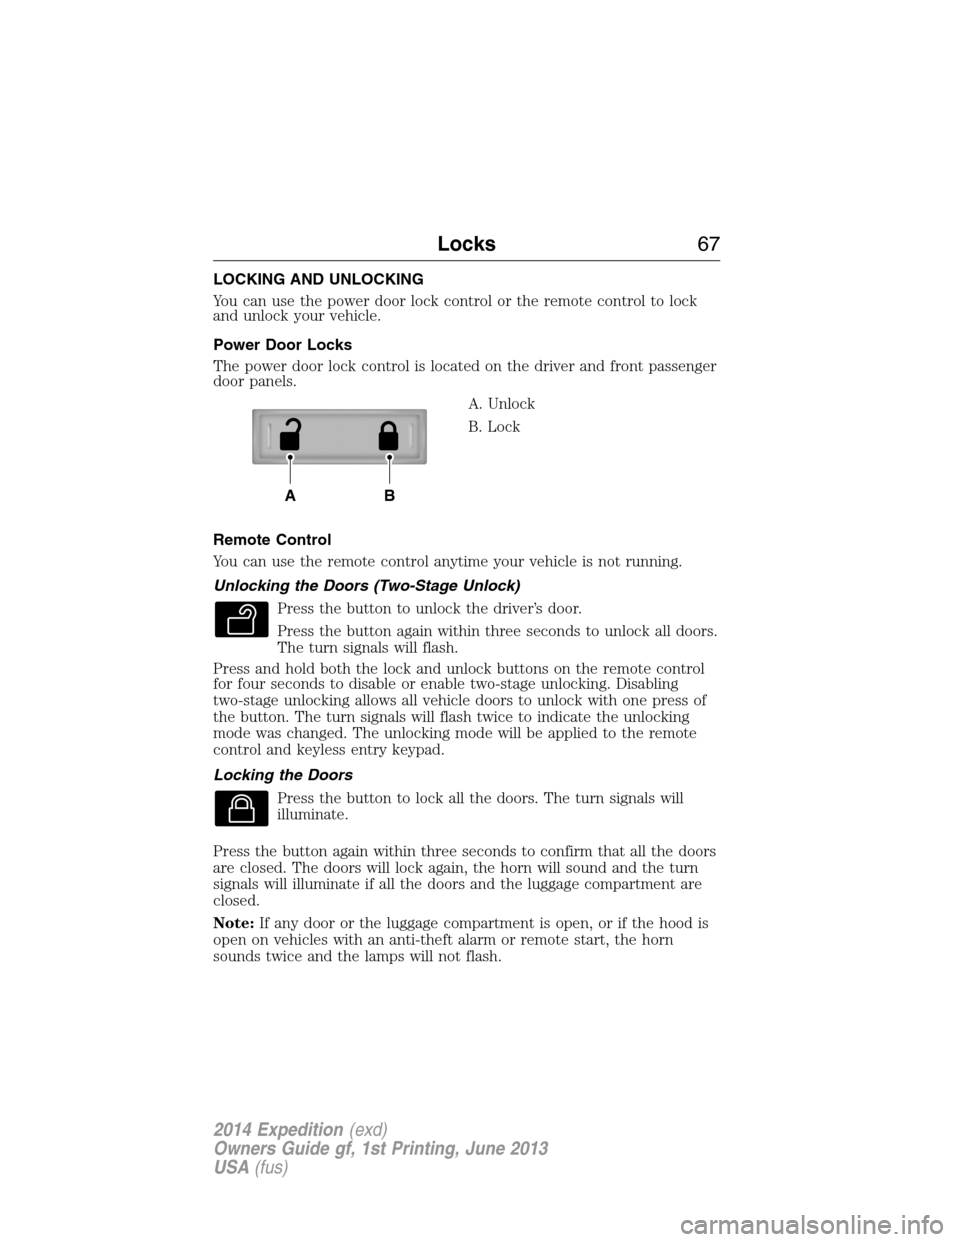
Power Door Locks
The power door lock control is located on the driver and front passenger
door panels.
A. Unlock
B. Lock
Remote Control
You can use the remote control anytime your vehicle is not running.
Unlocking the Doors (Two-Stage Unlock)
Press the button to unlock the driver’s door.
Press the button again within three seconds to unlock all doors.
The turn signals will flash.
Press and hold both the lock and unlock buttons on the remote control
for four seconds to disable or enable two-stage unlocking. Disabling
two-stage unlocking allows all vehicle doors to unlock with one press of
the button. The turn signals will flash twice to indicate the unlocking
mode was changed. The unlocking mode will be applied to the remote
control and keyless entry keypad.
Locking the Doors
Press the button to lock all the doors. The turn signals will
illuminate.
Press the button again within three seconds to confirm that all the doors
are closed. The doors will lock again, the horn will sound and the turn
signals will illuminate if all the doors and the luggage compartment are
closed.
Note:If any door or the luggage compartment is open, or if the hood is
open on vehicles with an anti-theft alarm or remote start, the horn
sounds twice and the lamps will not flash.
AB
Locks67
2014 Expedition(exd)
Owners Guide gf, 1st Printing, June 2013
USA(fus)
Page 76 of 519
Resetting the Power Liftgate
If any of these conditions occur, the power liftgate may not operate and
must be reset:
•A low voltage or dead battery
•Disconnected battery
•The liftgate is manually closed and left ajar (unlatched)
To reset the power liftgate:
1. Disconnect the battery for 20 seconds then, reconnect the battery.
2. Manually close and fully latch the liftgate.
3. Power open the liftgate by using the remote entry transmitter or
instrument panel button.
Note:If the power liftgate system is turned off in the message center,
the system cannot be activated with the outside release handle or rear
cargo area control button. The system will need to be turned on to
resume operation with the outside release handle or rear cargo area
control button. The power liftgate is still operational through the use of
the remote entry transmitter and instrument panel button when the
power liftgate is turned off in the message center.
Liftgate Ajar Signal
If the liftgate or liftgate glass are not fully latched, you will receive a
message on the instrument panel. If you see this message, check both
the liftgate glass and liftgate door to ensure they are fully latched.
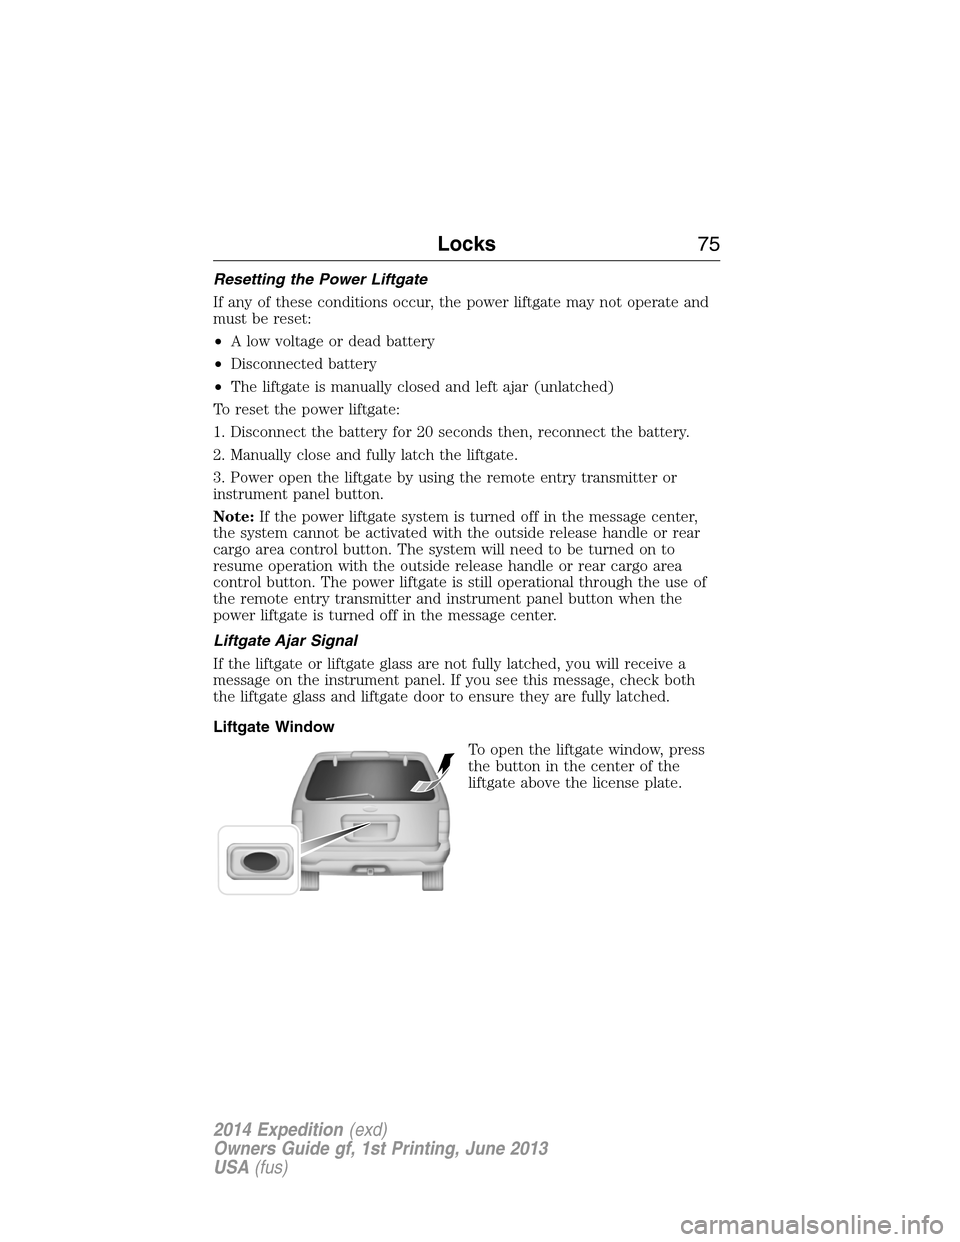
Liftgate Window
To open the liftgate window, press
the button in the center of the
liftgate above the license plate.
Locks75
2014 Expedition(exd)
Owners Guide gf, 1st Printing, June 2013
USA(fus)
Page 81 of 519
6. Turn the ignition off and remove the second previously programmed
coded key from the ignition.
7. After three seconds but within 20 seconds of turning the ignition off
and removing the previously programmed coded key, insert the new
unprogrammed key into the ignition.
8. Turn the ignition from off to on. Keep the ignition on for at least six
seconds.
9. Remove the newly programmed coded key from the ignition.
The key will start the vehicle’s engine and will operate the remote entry
system (if the new key is an integrated keyhead transmitter) if it has
been successfully programmed. The theft indicator light will illuminate
for three seconds and then go out to indicate successful programming.
If the key was not successfully programmed, the theft indicator light may
flash on and off. Wait 20 seconds and repeat Steps 1 through 8. Take
your vehicle to your authorized dealer to have the new key programmed
if you are still unsuccessful.
Wait 20 seconds and then repeat this procedure from Step 1 to program
an additional key.
ANTI-THEFT ALARM
The system will warn you of unauthorized entry to your vehicle.
The turn signal lamps will flash and the horn will sound when:
•any door or the hood is opened without using the key or the remote
control
•the ignition is turned on with an invalid key.
Take all keys and remote controls to your authorized dealer if there is
any potential alarm problem with your vehicle.
Arming the Alarm
The system is ready to arm whenever the ignition is off. Lock the vehicle
to arm the alarm.
The turn signal lamps will flash once after locking the vehicle to indicate
the alarm is in the pre-armed mode and will become fully armed in
20 seconds.
80Security
2014 Expedition(exd)
Owners Guide gf, 1st Printing, June 2013
USA(fus)
Page 90 of 519

DAYTIME RUNNING LAMPS (IF EQUIPPED)
WARNING:Always remember to switch your headlamps on in
low light situations or during inclement weather. The system does
not activate the tail lamps and may not provide adequate lighting
during these conditions. Failure to activate your headlamps under these
conditions may result in a collision.
The system turns the headlamps on with a reduced intensity output
(halogen headlamps) or turns the front turn lamps on (HID headlamps)
in daylight conditions.
To switch the system on, ignition must be in the on position, then switch
the lighting control to the off, autolamp, or parking lamp position.
FRONT FOG LAMPS (IF EQUIPPED)
The control also operates the fog
lamps. The fog lamps can be turned
on when the control is in the
parking lamps on, headlamps on, or
autolamps positions and the high
beams are not turned on.
Pull the control towards you to turn
the fog lamps on. The fog lamp
indicator light will illuminate.
DIRECTION INDICATORS
•Push down to activate the left
turn signal.
•Push up to activate the right turn
signal.
120
Lighting89
2014 Expedition(exd)
Owners Guide gf, 1st Printing, June 2013
USA(fus)
Page 95 of 519
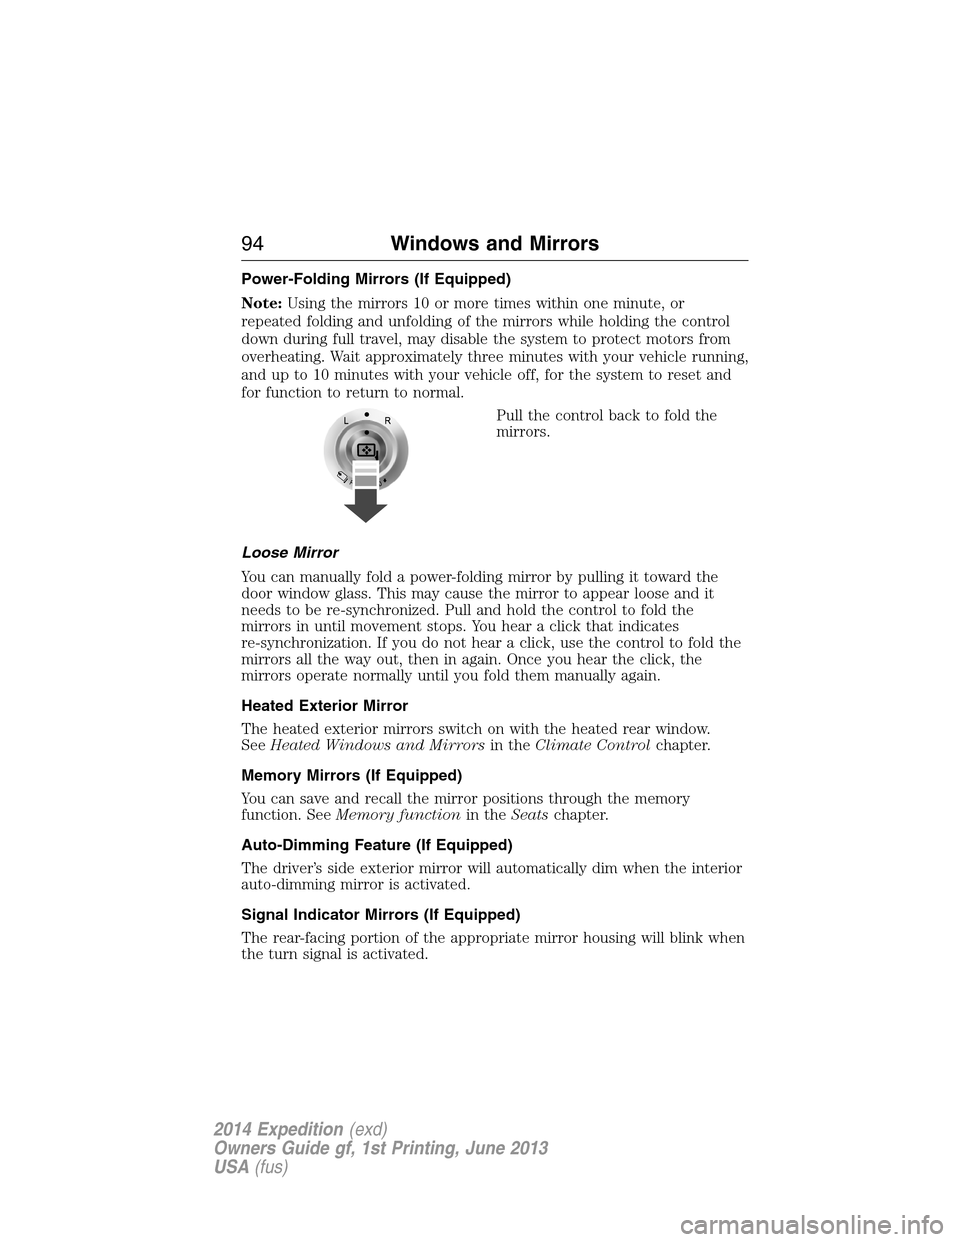
Power-Folding Mirrors (If Equipped)
Note:Using the mirrors 10 or more times within one minute, or
repeated folding and unfolding of the mirrors while holding the control
down during full travel, may disable the system to protect motors from
overheating. Wait approximately three minutes with your vehicle running,
and up to 10 minutes with your vehicle off, for the system to reset and
for function to return to normal.
Pull the control back to fold the
mirrors.
Loose Mirror
You can manually fold a power-folding mirror by pulling it toward the
door window glass. This may cause the mirror to appear loose and it
needs to be re-synchronized. Pull and hold the control to fold the
mirrors in until movement stops. You hear a click that indicates
re-synchronization. If you do not hear a click, use the control to fold the
mirrors all the way out, then in again. Once you hear the click, the
mirrors operate normally until you fold them manually again.
Heated Exterior Mirror
The heated exterior mirrors switch on with the heated rear window.
SeeHeated Windows and Mirrorsin theClimate Controlchapter.
Memory Mirrors (If Equipped)
You can save and recall the mirror positions through the memory
function. SeeMemory functionin theSeatschapter.
Auto-Dimming Feature (If Equipped)
The driver’s side exterior mirror will automatically dim when the interior
auto-dimming mirror is activated.
Signal Indicator Mirrors (If Equipped)
The rear-facing portion of the appropriate mirror housing will blink when
the turn signal is activated.
94Windows and Mirrors
2014 Expedition(exd)
Owners Guide gf, 1st Printing, June 2013
USA(fus)
Page 103 of 519
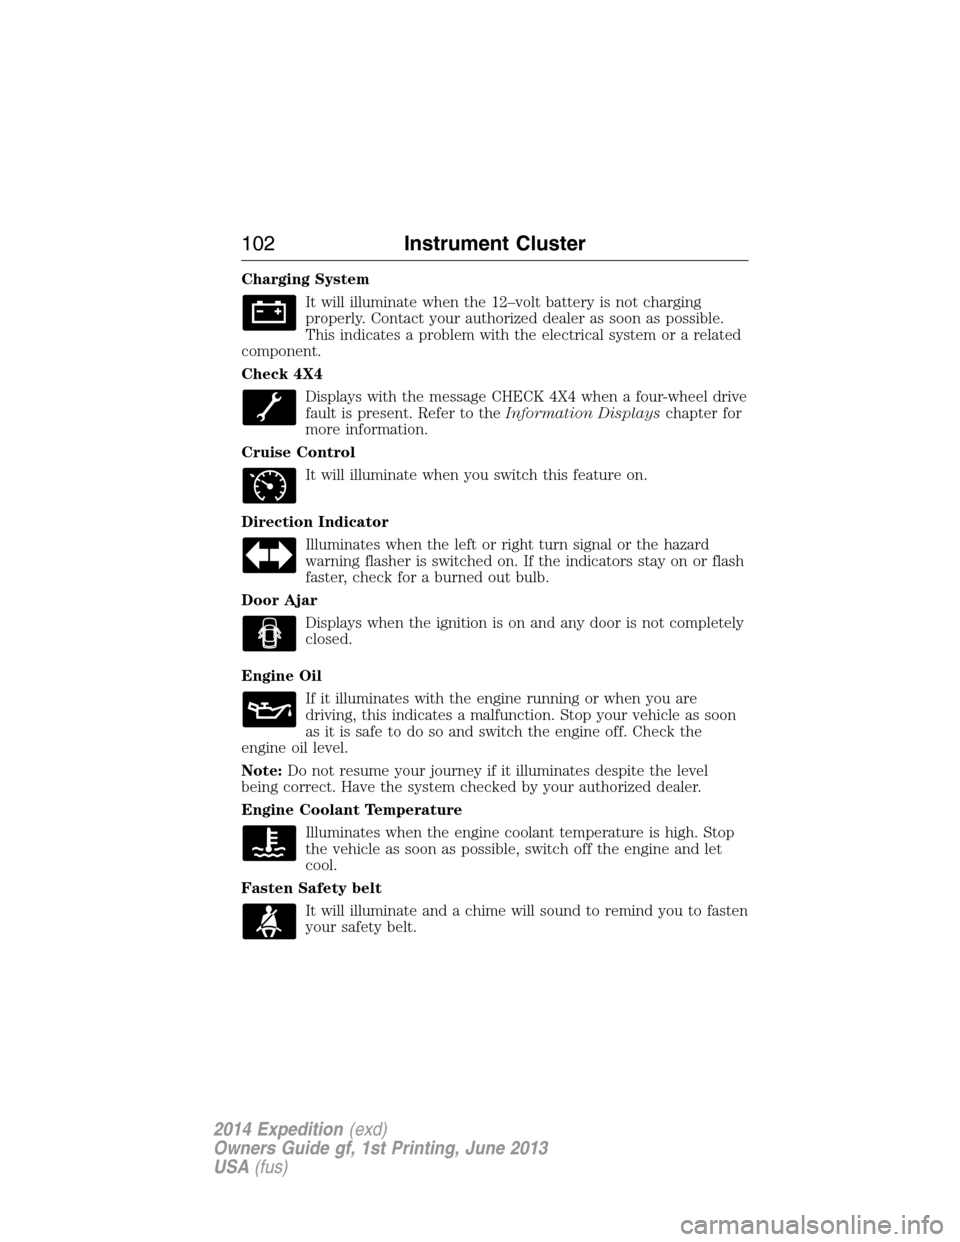
Charging System
It will illuminate when the 12–volt battery is not charging
properly. Contact your authorized dealer as soon as possible.
This indicates a problem with the electrical system or a related
component.
Check 4X4
Displays with the message CHECK 4X4 when a four-wheel drive
fault is present. Refer to theInformation Displayschapter for
more information.
Cruise Control
It will illuminate when you switch this feature on.
Direction Indicator
Illuminates when the left or right turn signal or the hazard
warning flasher is switched on. If the indicators stay on or flash
faster, check for a burned out bulb.
Door Ajar
Displays when the ignition is on and any door is not completely
closed.
Engine Oil
If it illuminates with the engine running or when you are
driving, this indicates a malfunction. Stop your vehicle as soon
as it is safe to do so and switch the engine off. Check the
engine oil level.
Note:Do not resume your journey if it illuminates despite the level
being correct. Have the system checked by your authorized dealer.
Engine Coolant Temperature
Illuminates when the engine coolant temperature is high. Stop
the vehicle as soon as possible, switch off the engine and let
cool.
Fasten Safety belt
It will illuminate and a chime will sound to remind you to fasten
your safety belt.
102Instrument Cluster
2014 Expedition(exd)
Owners Guide gf, 1st Printing, June 2013
USA(fus)