2014 FORD EXPEDITION battery
[x] Cancel search: batteryPage 160 of 519
Note:We recommend that upon the sale or lease termination of your
vehicle, you erase the programmed function buttons for security reasons.
SeeErasing the function button codeslater in this section.
Note:You can program a maximum of three devices. To change or
replace any of the three devices after it has been initially programmed,
you must first erase the current settings. SeeErasing the function
button codeslater in this section.
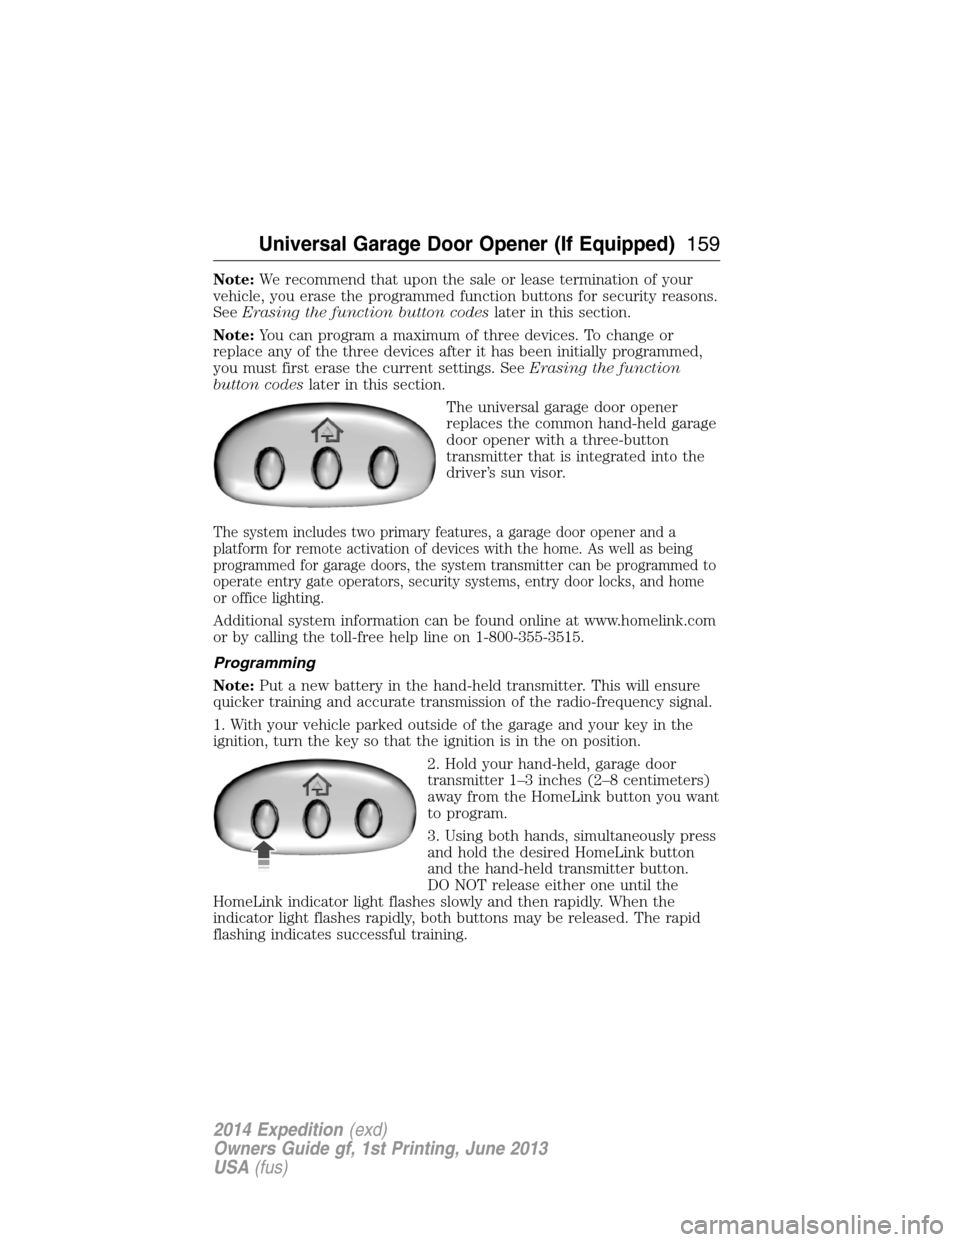
The universal garage door opener
replaces the common hand-held garage
door opener with a three-button
transmitter that is integrated into the
driver’s sun visor.
The system includes two primary features, a garage door opener and a
platform for remote activation of devices with the home. As well as being
programmed for garage doors, the system transmitter can be programmed to
operate entry gate operators, security systems, entry door locks, and home
or office lighting.
Additional system information can be found online at www.homelink.com
or by calling the toll-free help line on 1-800-355-3515.
Programming
Note:Put a new battery in the hand-held transmitter. This will ensure
quicker training and accurate transmission of the radio-frequency signal.
1. With your vehicle parked outside of the garage and your key in the
ignition, turn the key so that the ignition is in the on position.
2. Hold your hand-held, garage door
transmitter 1–3 inches (2–8 centimeters)
away from the HomeLink button you want
to program.
3. Using both hands, simultaneously press
and hold the desired HomeLink button
and the hand-held transmitter button.
DO NOT release either one until the
HomeLink indicator light flashes slowly and then rapidly. When the
indicator light flashes rapidly, both buttons may be released. The rapid
flashing indicates successful training.
Universal Garage Door Opener (If Equipped)159
2014 Expedition(exd)
Owners Guide gf, 1st Printing, June 2013
USA(fus)
Page 165 of 519
AUXILIARY POWER POINTS
WARNING:Do not plug optional electrical accessories into the
cigarette lighter socket (if equipped). Improper use of the lighter
can cause damage not covered by your warranty, and can result in fire
or serious injury.
Note:If used when the engine is not running, the battery will discharge.
There may be insufficient power to restart your engine.
Note:Do not insert objects other than an accessory plug into the power
point. This will damage the outlet and blow the fuse.
Note:Do not hang any type of accessory or accessory bracket from the
plug.
Note:Do not use the power point over the vehicle capacity of 12 volt
DC 180 watts or a fuse may blow.
Note:Do not use the power point for operating a cigarette lighter
element.
Note:Improper use of the power outlet can cause damage not covered
by your warranty.
Note:Always keep the power point caps closed when not in use.
Run the engine for full capacity use of the power point. To prevent the
battery from being discharged:
•Do not use the power point longer than necessary when the engine is
not running.
•Do not leave devices plugged in overnight or when the vehicle is
parked for extended periods.
Locations
Power points may be found:
•on the instrument panel
•by the passenger’s ankle near the floor on the front console
•on the rear of the center console
•on the right rear quarter panel.
164Auxiliary Power Points
2014 Expedition(exd)
Owners Guide gf, 1st Printing, June 2013
USA(fus)
Page 170 of 519
GENERAL INFORMATION
WARNING:Extended idling at high engine speeds can produce
very high temperatures in the engine and exhaust system,
creating the risk of fire or other damage.
WARNING:Do not park, idle, or drive your vehicle on dry grass
or other dry ground cover. The emission system heats up the
engine compartment and exhaust system, which can start a fire.
WARNING:Do not start your vehicle in a closed garage or in
other enclosed areas. Exhaust fumes can be toxic. Always open
the garage door before you start the engine.
WARNING:If you smell exhaust fumes inside your vehicle,
have your vehicle checked by an authorized dealer immediately.
Do not drive if you smell exhaust fumes.
If you disconnect the battery, your vehicle may exhibit some unusual
driving characteristics for approximately 5 miles (8 kilometers) after
you connect it. This is because the engine management system must
realign itself with the engine. You may disregard any unusual driving
characteristics during this period.
The powertrain control system meets all Canadian interference-causing
equipment standard requirements regulating the impulse electrical field
or radio noise.
Do not press the accelerator pedal while starting the engine. If you have
difficulty starting the engine, seeFailure to startlater in this section.
Starting and Stopping the Engine169
2014 Expedition(exd)
Owners Guide gf, 1st Printing, June 2013
USA(fus)
Page 171 of 519

IGNITION SWITCH
Note:Do not store the key in the ignition after the vehicle is turned off
and you have left the vehicle. This could cause a drain on the battery.
A.Off:The ignition is off.
B.Accessory:Allows the electrical accessories, such as the radio, to
operate while the engine is not running.
C.On:All the electrical circuits are operational. Warning lights are
illuminated. This is the key position when driving.
D.Start:Cranks the engine. Release the key as soon as the engine starts.
STARTING A GASOLINE ENGINE
When you start the engine, the idle speed increases, this helps to warm
up the engine. If the engine idle speed does not slow down automatically,
have your vehicle checked by an authorized dealer.
Before starting the engine:
•Make sure all occupants have fastened their safety belts.
•Make sure the headlamps and electrical accessories are off.
•Make sure the parking brake is on.
•Move the transmission selector lever to positionP.
•Turn the ignition key to the on position.
Some warning lights briefly illuminate.
Note:Do not touch the accelerator pedal.
1. Fully press the brake pedal.
2. Turn the key to the start position to start the engine. Release the key
when the engine starts.
Note:The engine may continue cranking for up to 15 seconds or until it
starts.
Note:If you cannot start the engine on the first try, wait for a short
period and try again.
If you have difficulty starting the engine when the temperature is below
-13°F (-25°C), press the accelerator pedal slightly and try again.
C
D
B
A
170Starting and Stopping the Engine
2014 Expedition(exd)
Owners Guide gf, 1st Printing, June 2013
USA(fus)
Page 184 of 519
Readiness for Inspection/Maintenance (I/M) Testing
Some state, provincial and local governments may have
Inspection/Maintenance (I/M) programs to inspect the emission control
equipment on your vehicle. Failure to pass this inspection could prevent
you from getting a vehicle registration.
If the service engine soon indicator is on or the bulb does not
work, the vehicle may need to be serviced. SeeOn-board
Diagnostics (OBD-II)in this chapter.
Your vehicle may not pass the I/M test if the service engine soon
indicator is on or not working properly (bulb is burned out), or if the
OBD-II system has determined that some of the emission control systems
have not been properly checked. In this case, the vehicle is considered
not ready for I/M testing.
If the vehicle’s engine or transmission has just been serviced, or the
battery has recently run down or been replaced, the OBD-II system may
indicate that the vehicle is not ready for I/M testing. To determine if the
vehicle is ready for I/M testing, turn the ignition key to the on position
for 15 seconds without cranking the engine. If the service engine soon
indicator blinks eight times, it means that the vehicle is not ready for I/M
testing; if the service engine soon indicator stays on solid, it means that
the vehicle is ready for I/M testing.
The OBD-II system is designed to check the emission control system
during normal driving. A complete check may take several days. If the
vehicle is not ready for I/M testing, the following driving cycle consisting
of mixed city and highway driving may be performed:
15 minutes of steady driving on an expressway or highway followed by
20 minutes of stop-and-go driving with at least four 30-second idle
periods.
Allow the vehicle to sit for at least eight hours without starting the
engine. Then, start the engine and complete the above driving cycle. The
engine must warm up to its normal operating temperature. Once the
engine is started, do not turn off the engine until the above driving cycle
is complete. If the vehicle is still not ready for I/M testing, the above
driving cycle will have to be repeated.
Fuel and Refueling183
2014 Expedition(exd)
Owners Guide gf, 1st Printing, June 2013
USA(fus)
Page 185 of 519
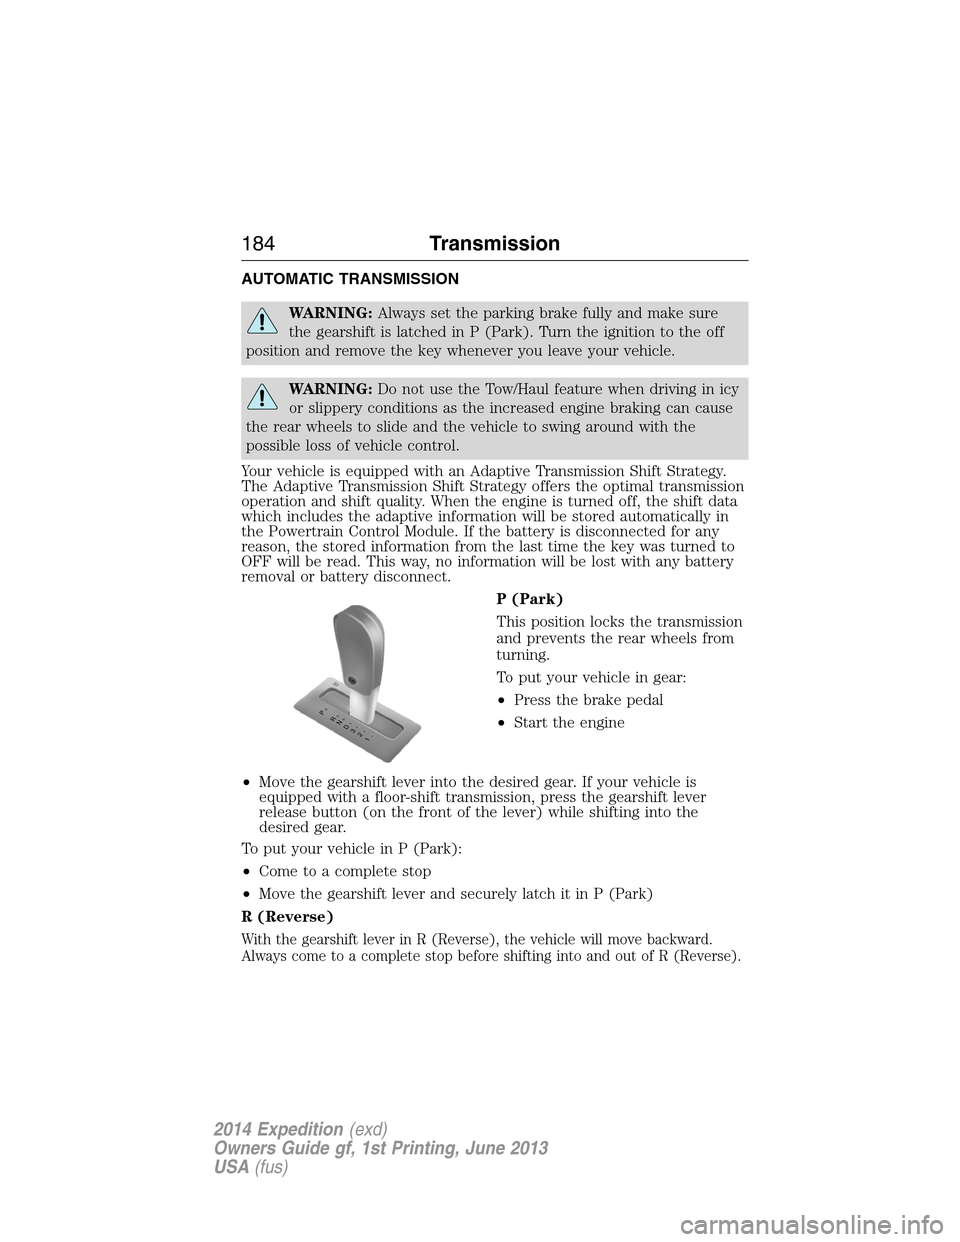
AUTOMATIC TRANSMISSION
WARNING:Always set the parking brake fully and make sure
the gearshift is latched in P (Park). Turn the ignition to the off
position and remove the key whenever you leave your vehicle.
WARNING:Do not use the Tow/Haul feature when driving in icy
or slippery conditions as the increased engine braking can cause
the rear wheels to slide and the vehicle to swing around with the
possible loss of vehicle control.
Your vehicle is equipped with an Adaptive Transmission Shift Strategy.
The Adaptive Transmission Shift Strategy offers the optimal transmission
operation and shift quality. When the engine is turned off, the shift data
which includes the adaptive information will be stored automatically in
the Powertrain Control Module. If the battery is disconnected for any
reason, the stored information from the last time the key was turned to
OFF will be read. This way, no information will be lost with any battery
removal or battery disconnect.
P (Park)
This position locks the transmission
and prevents the rear wheels from
turning.
To put your vehicle in gear:
•Press the brake pedal
•Start the engine
•Move the gearshift lever into the desired gear. If your vehicle is
equipped with a floor-shift transmission, press the gearshift lever
release button (on the front of the lever) while shifting into the
desired gear.
To put your vehicle in P (Park):
•Come to a complete stop
•Move the gearshift lever and securely latch it in P (Park)
R (Reverse)
With the gearshift lever in R (Reverse), the vehicle will move backward.
Always come to a complete stop before shifting into and out of R (Reverse).
T/H
PR
N
D
3
2
1
184Transmission
2014 Expedition(exd)
Owners Guide gf, 1st Printing, June 2013
USA(fus)
Page 187 of 519
conditions, the transmission may downshift, slow the vehicle and control
the vehicle speed when descending a hill, without the accelerator pedal
being pressed. The amount of downshift braking provided will vary based
upon the amount the brake pedal is depressed.
To deactivate the Tow/Haul feature and return to normal driving mode,
press the button on the end of the gearshift lever. The TOW HAUL light
will no longer be illuminated.
When you shut-off and restart the engine, the transmission will
automatically return to normal D (Overdrive) mode (Tow/Haul OFF).
3 (Third) (column-shift only)
Transmission operates in third gear only.
Used for improved traction on slippery roads.
2 (Second)
Transmission operates in 2nd gear only.
Use 2 (Second) to start-up on slippery roads.
1 (First)
•Transmission operates in 1st gear only.
•Provides maximum engine braking.
•Allows upshifts by moving gearshift lever.
•Will not downshift into 1 (First) at high speeds; allows for 1 (First)
when vehicle reaches slower speeds.
Forced downshifts
•Allowed in D (Drive) only.
•Press the accelerator to the floor.
•Allows transmission to select an appropriate gear.
Automatic Transmission Adaptive Learning
This feature is designed to increase durability and provide consistent
shift feel over the life of the vehicle. A new vehicle or transmission may
have firm shifts, soft shifts or both. This operation is considered normal
and will not affect function or durability of the transmission. Over time,
the adaptive learning process will fully update transmission operation.
Additionally, whenever the battery is disconnected or a new battery
installed, the strategy must be relearned.
186Transmission
2014 Expedition(exd)
Owners Guide gf, 1st Printing, June 2013
USA(fus)
Page 231 of 519
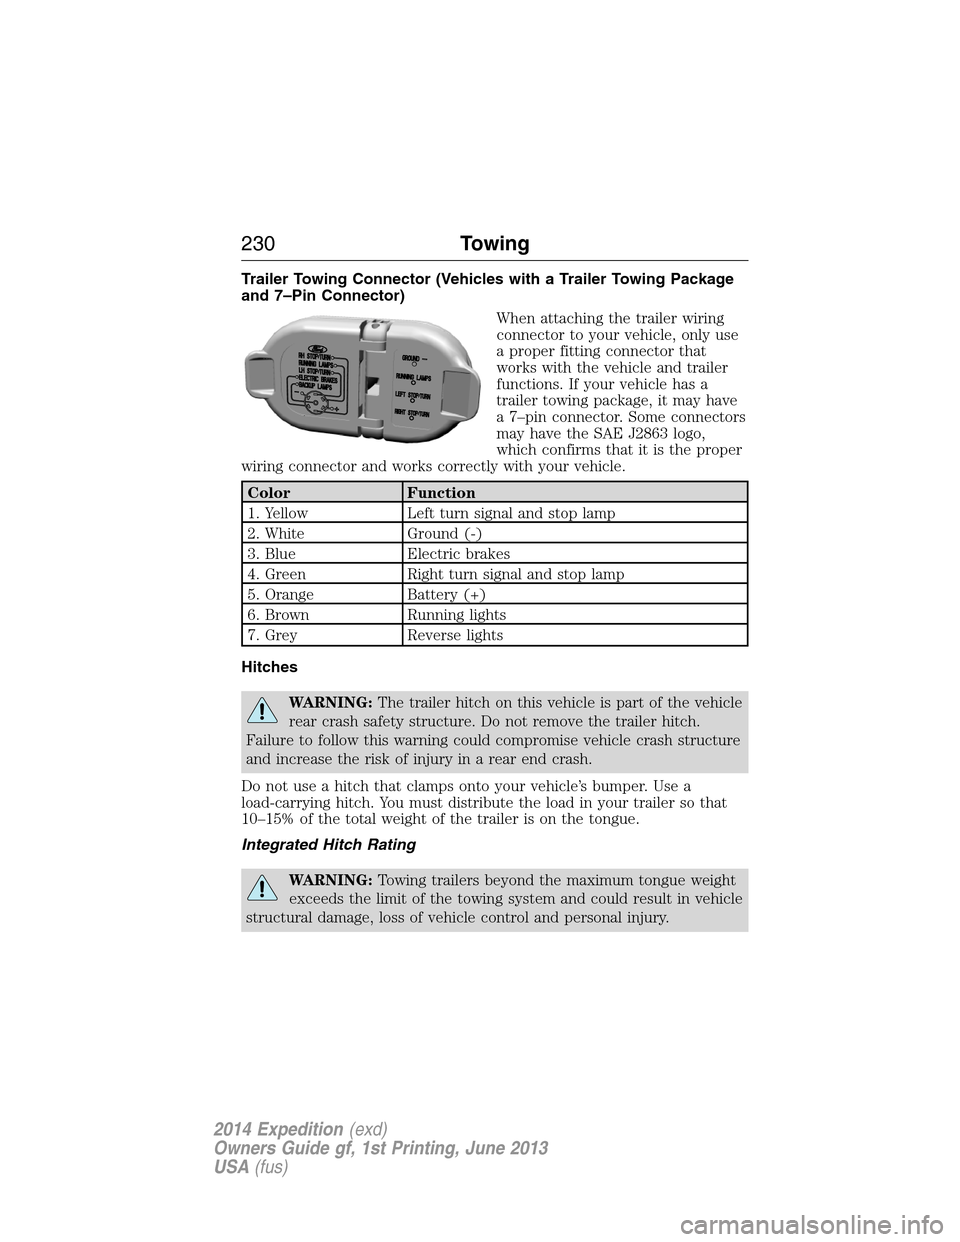
Trailer Towing Connector (Vehicles with a Trailer Towing Package
and 7–Pin Connector)
When attaching the trailer wiring
connector to your vehicle, only use
a proper fitting connector that
works with the vehicle and trailer
functions. If your vehicle has a
trailer towing package, it may have
a 7–pin connector. Some connectors
may have the SAE J2863 logo,
which confirms that it is the proper
wiring connector and works correctly with your vehicle.
Color Function
1. Yellow Left turn signal and stop lamp
2. White Ground (-)
3. Blue Electric brakes
4. Green Right turn signal and stop lamp
5. Orange Battery (+)
6. Brown Running lights
7. Grey Reverse lights
Hitches
WARNING:The trailer hitch on this vehicle is part of the vehicle
rear crash safety structure. Do not remove the trailer hitch.
Failure to follow this warning could compromise vehicle crash structure
and increase the risk of injury in a rear end crash.
Do not use a hitch that clamps onto your vehicle’s bumper. Use a
load-carrying hitch. You must distribute the load in your trailer so that
10–15% of the total weight of the trailer is on the tongue.
Integrated Hitch Rating
WARNING:Towing trailers beyond the maximum tongue weight
exceeds the limit of the towing system and could result in vehicle
structural damage, loss of vehicle control and personal injury.
230Towing
2014 Expedition(exd)
Owners Guide gf, 1st Printing, June 2013
USA(fus)