2014 FORD EXPEDITION battery
[x] Cancel search: batteryPage 100 of 519
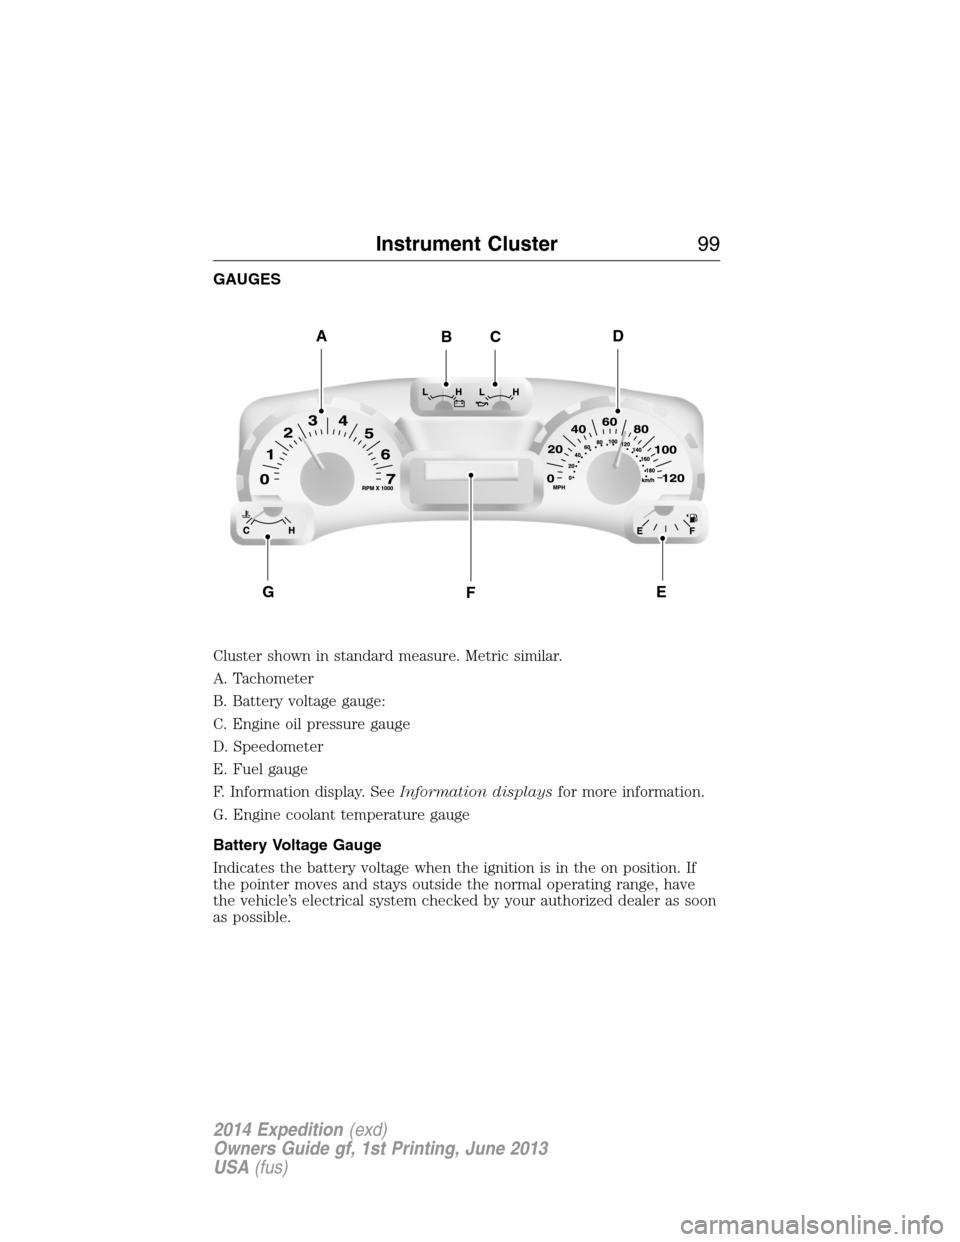
GAUGES
Cluster shown in standard measure. Metric similar.
A. Tachometer
B. Battery voltage gauge:
C. Engine oil pressure gauge
D. Speedometer
E. Fuel gauge
F. Information display. SeeInformation displaysfor more information.
G. Engine coolant temperature gauge
Battery Voltage Gauge
Indicates the battery voltage when the ignition is in the on position. If
the pointer moves and stays outside the normal operating range, have
the vehicle’s electrical system checked by your authorized dealer as soon
as possible.
ADBC
FGE
Instrument Cluster99
2014 Expedition(exd)
Owners Guide gf, 1st Printing, June 2013
USA(fus)
Page 102 of 519
WARNING LAMPS AND INDICATORS
The following warning lamps and indicators will alert you to a vehicle
condition that may become serious. Some lamps will illuminate when you
start your vehicle to make sure they work. If any lamps remain on after
starting your vehicle, refer to the respective system warning lamp for
further information.
Note:Some warning indicators appear in the information display and
function the same as a warning lamp but do not display when you start
your vehicle.
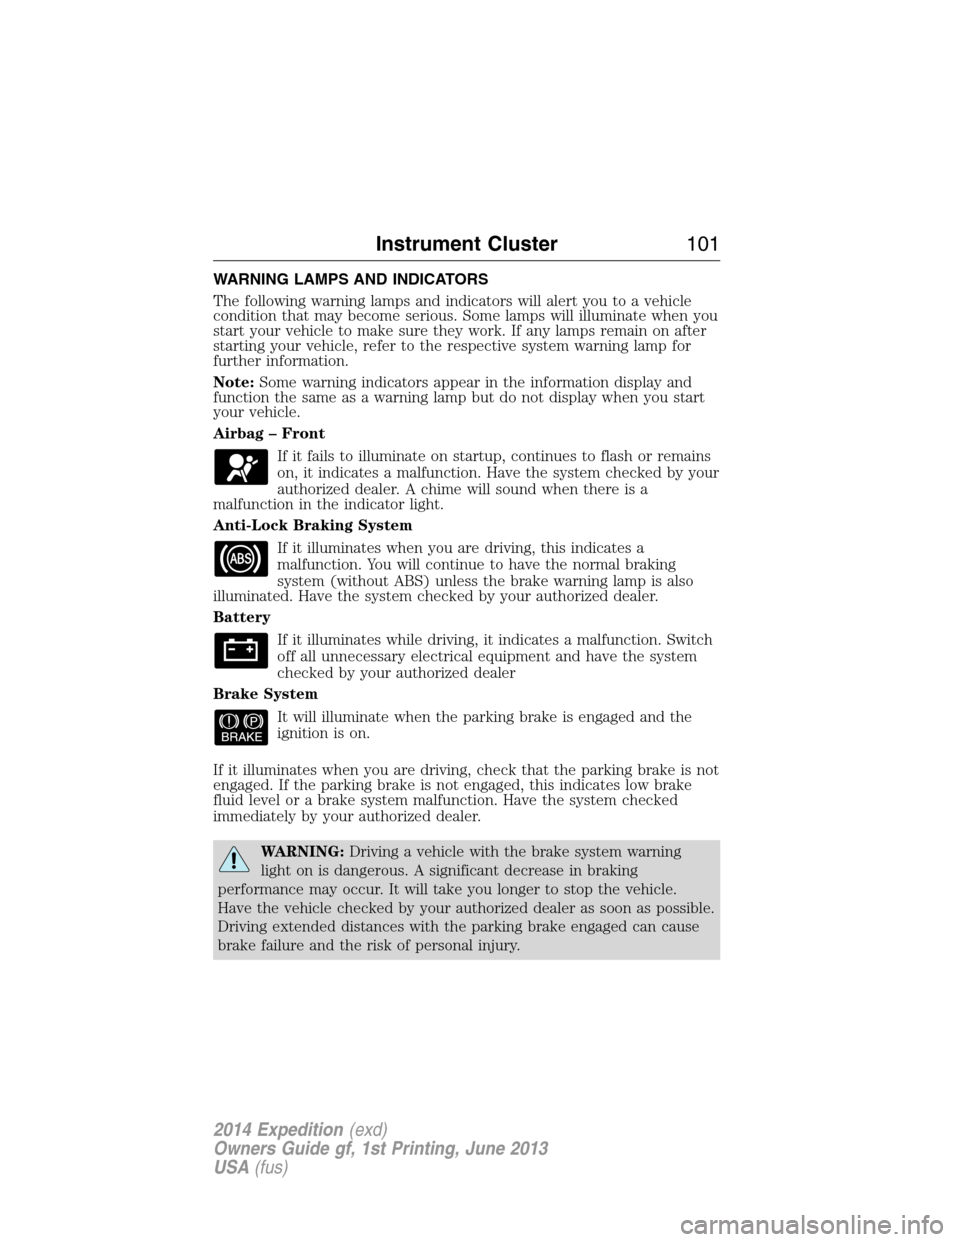
Airbag – Front
If it fails to illuminate on startup, continues to flash or remains
on, it indicates a malfunction. Have the system checked by your
authorized dealer. A chime will sound when there is a
malfunction in the indicator light.
Anti-Lock Braking System
If it illuminates when you are driving, this indicates a
malfunction. You will continue to have the normal braking
system (without ABS) unless the brake warning lamp is also
illuminated. Have the system checked by your authorized dealer.
Battery
If it illuminates while driving, it indicates a malfunction. Switch
off all unnecessary electrical equipment and have the system
checked by your authorized dealer
Brake System
It will illuminate when the parking brake is engaged and the
ignition is on.
If it illuminates when you are driving, check that the parking brake is not
engaged. If the parking brake is not engaged, this indicates low brake
fluid level or a brake system malfunction. Have the system checked
immediately by your authorized dealer.
WARNING:Driving a vehicle with the brake system warning
light on is dangerous. A significant decrease in braking
performance may occur. It will take you longer to stop the vehicle.
Have the vehicle checked by your authorized dealer as soon as possible.
Driving extended distances with the parking brake engaged can cause
brake failure and the risk of personal injury.
Instrument Cluster101
2014 Expedition(exd)
Owners Guide gf, 1st Printing, June 2013
USA(fus)
Page 103 of 519
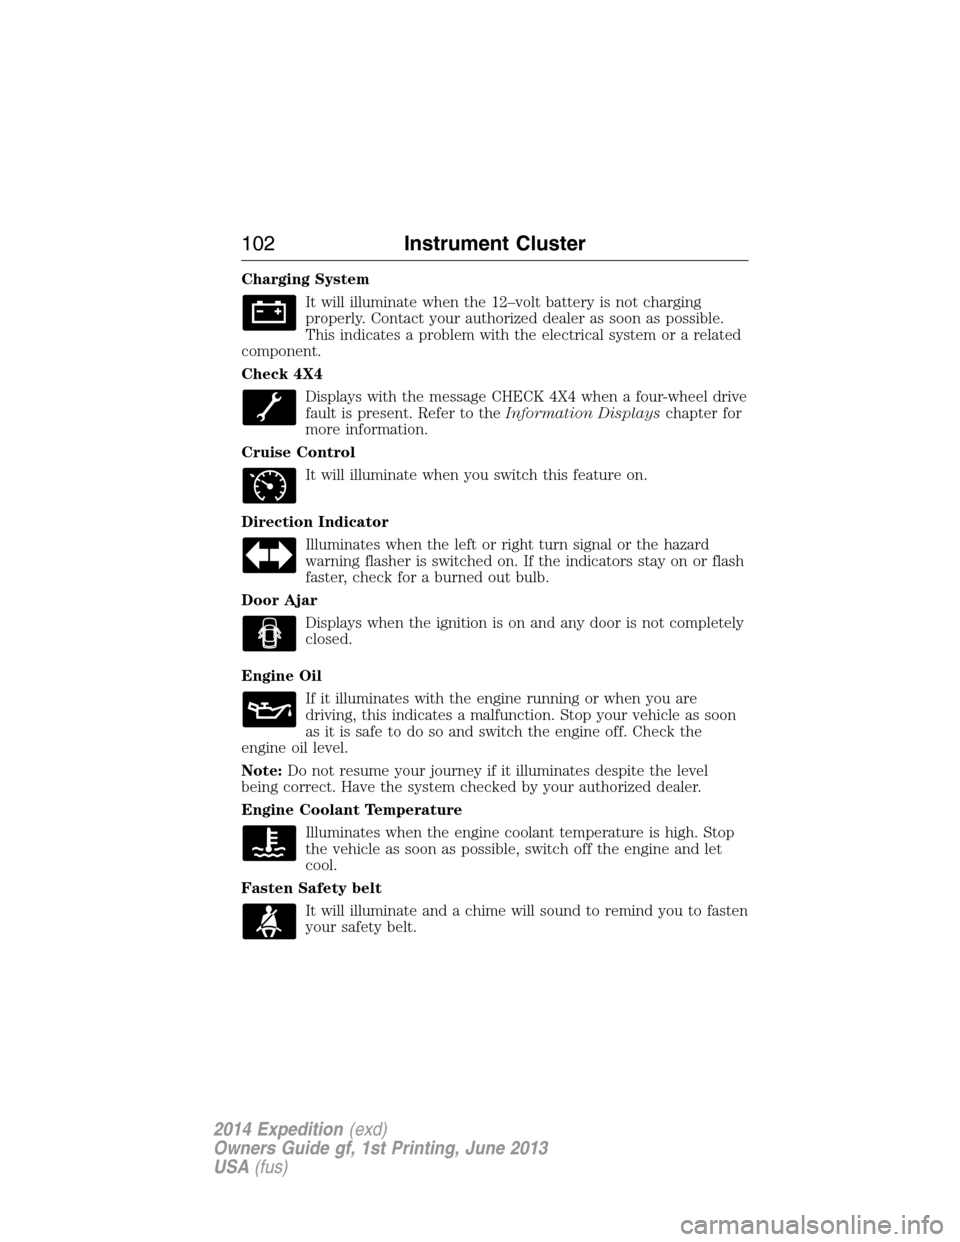
Charging System
It will illuminate when the 12–volt battery is not charging
properly. Contact your authorized dealer as soon as possible.
This indicates a problem with the electrical system or a related
component.
Check 4X4
Displays with the message CHECK 4X4 when a four-wheel drive
fault is present. Refer to theInformation Displayschapter for
more information.
Cruise Control
It will illuminate when you switch this feature on.
Direction Indicator
Illuminates when the left or right turn signal or the hazard
warning flasher is switched on. If the indicators stay on or flash
faster, check for a burned out bulb.
Door Ajar
Displays when the ignition is on and any door is not completely
closed.
Engine Oil
If it illuminates with the engine running or when you are
driving, this indicates a malfunction. Stop your vehicle as soon
as it is safe to do so and switch the engine off. Check the
engine oil level.
Note:Do not resume your journey if it illuminates despite the level
being correct. Have the system checked by your authorized dealer.
Engine Coolant Temperature
Illuminates when the engine coolant temperature is high. Stop
the vehicle as soon as possible, switch off the engine and let
cool.
Fasten Safety belt
It will illuminate and a chime will sound to remind you to fasten
your safety belt.
102Instrument Cluster
2014 Expedition(exd)
Owners Guide gf, 1st Printing, June 2013
USA(fus)
Page 108 of 519
•MILES (km) TO E: This displays an estimate of approximately how far
you can drive with the fuel remaining in your tank under normal
driving conditions. Remember to turn the ignition off when refueling
to allow this feature to correctly detect the added fuel. Distance to
empty is calculated using a running average fuel economy, which is
based on your recent driving history of 500 miles (800 km). This value
is not the same as the average fuel economy display. The running
average fuel economy is re-initialized to a factory default value if the
battery is disconnected.
•AVG MPG (L/100km): Average fuel economy displays your average fuel
economy in miles/gallon or liters/100 km.
•XX°F / XX°C: The outside air temperature is shown together with the
compass heading in the bottom row of the message center display.
Refer toUnitsin this section for information on selecting °F or °C.
•
COMPASS DISPLAY (if equipped): Displays the vehicle’s heading direction.
The compass reading may be affected when you drive near large
buildings, bridges, power lines and powerful broadcast antenna. Magnetic
or metallic objects placed in, on or near the vehicle may also affect
compass accuracy. If the compass appears to be inaccurate, a manual
calibration may be necessary. Refer toCompass zone adjustment
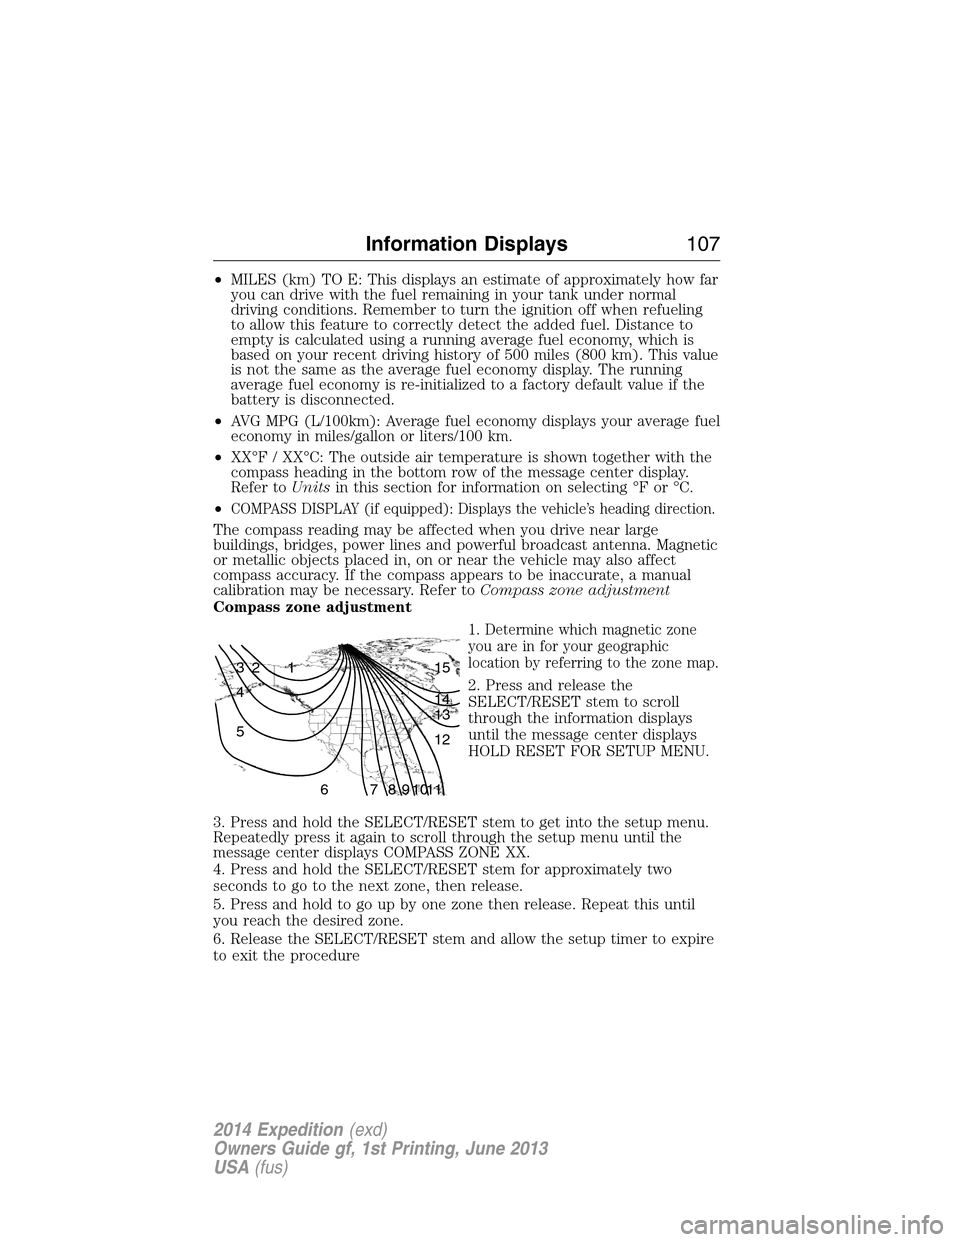
Compass zone adjustment
1. Determine which magnetic zone
you are in for your geographic
location by referring to the zone map.
2. Press and release the
SELECT/RESET stem to scroll
through the information displays
until the message center displays
HOLD RESET FOR SETUP MENU.
3. Press and hold the SELECT/RESET stem to get into the setup menu.
Repeatedly press it again to scroll through the setup menu until the
message center displays COMPASS ZONE XX.
4. Press and hold the SELECT/RESET stem for approximately two
seconds to go to the next zone, then release.
5. Press and hold to go up by one zone then release. Repeat this until
you reach the desired zone.
6. Release the SELECT/RESET stem and allow the setup timer to expire
to exit the procedure
1 2 3
4
5
6 7 8 9 101112 13 14 15
Information Displays107
2014 Expedition(exd)
Owners Guide gf, 1st Printing, June 2013
USA(fus)
Page 112 of 519
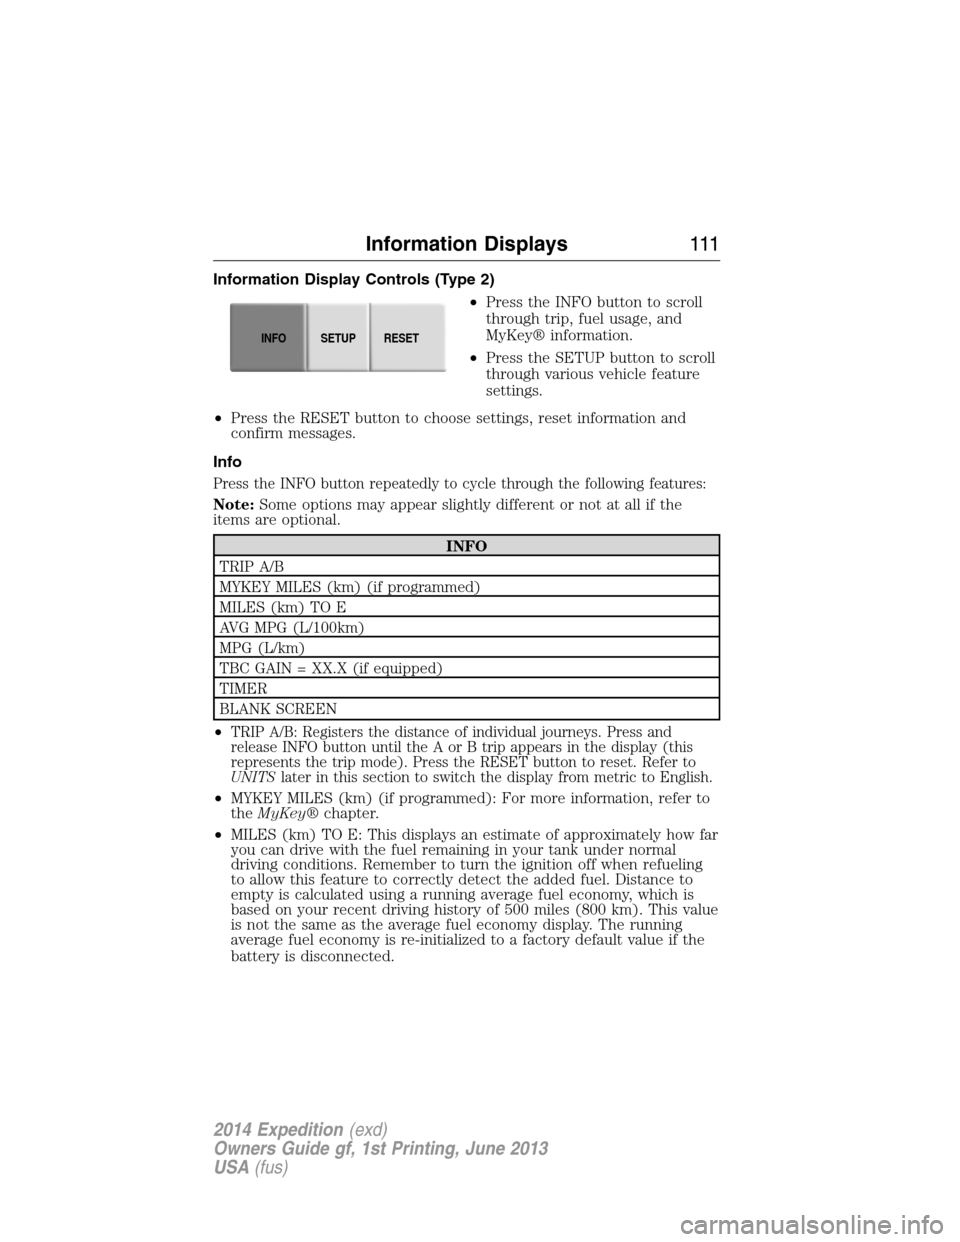
Information Display Controls (Type 2)
•Press the INFO button to scroll
through trip, fuel usage, and
MyKey® information.
•Press the SETUP button to scroll
through various vehicle feature
settings.
•Press the RESET button to choose settings, reset information and
confirm messages.
Info
Press the INFO button repeatedly to cycle through the following features:
Note:Some options may appear slightly different or not at all if the
items are optional.
INFO
TRIP A/B
MYKEY MILES (km) (if programmed)
MILES (km) TO E
AVG MPG (L/100km)
MPG (L/km)
TBC GAIN = XX.X (if equipped)
TIMER
BLANK SCREEN
•
TRIP A/B: Registers the distance of individual journeys. Press and
release INFO button until the A or B trip appears in the display (this
represents the trip mode). Press the RESET button to reset. Refer to
UNITSlater in this section to switch the display from metric to English.
•MYKEY MILES (km) (if programmed): For more information, refer to
theMyKey®chapter.
•MILES (km) TO E: This displays an estimate of approximately how far
you can drive with the fuel remaining in your tank under normal
driving conditions. Remember to turn the ignition off when refueling
to allow this feature to correctly detect the added fuel. Distance to
empty is calculated using a running average fuel economy, which is
based on your recent driving history of 500 miles (800 km). This value
is not the same as the average fuel economy display. The running
average fuel economy is re-initialized to a factory default value if the
battery is disconnected.
INFOSETUP
RESET
Information Displays111
2014 Expedition(exd)
Owners Guide gf, 1st Printing, June 2013
USA(fus)
Page 118 of 519
Battery and
Charging System
MessagesAction / Description
CHECK CHARGING
SYSTEMDisplayed when the charging system needs
servicing. If the warning stays on or continues
to come on, contact your authorized dealer as
soon as possible.
Brake System
MessagesAction / Description
BRAKE FLUID
LEVEL LOWIndicates the brake fluid level is low and the
brake system should be inspected immediately.
Refer toBrake fluidin theMaintenance
chapter.
CHECK BRAKE
SYSTEMDisplayed when the brake system needs
servicing. If the warning stays on or continues
to come on, contact your authorized dealer as
soon as possible.
PARK BRAKE
ENGAGEDDisplayed when the parking brake is set and
the vehicle is in motion.
Door Messages Action / Description
DOOR AJARDisplayed when a door is not completely
closed.
LIFTGATE / GLASS
AJARDisplayed when the liftgate or liftgate glass is
not completely closed.
Fuel Messages Action / Description
CHECK FUEL FILL
INLETDisplayed when the fuel fill inlet may not be
properly closed.
XXX MILES TO E
FUEL LEVEL LOWDisplayed as an early reminder of a low fuel
condition.
Information Displays11 7
2014 Expedition(exd)
Owners Guide gf, 1st Printing, June 2013
USA(fus)
Page 153 of 519
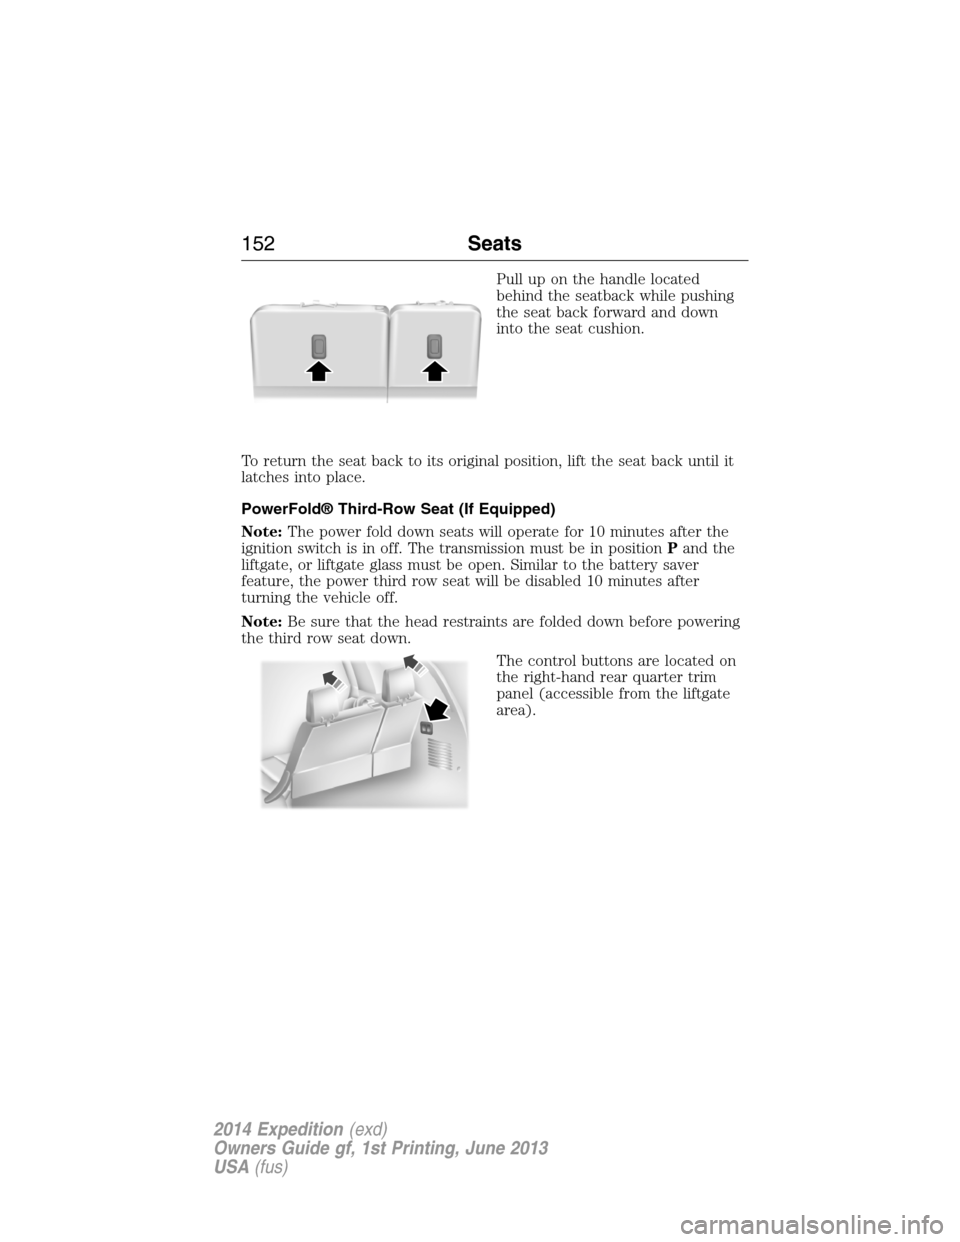
Pull up on the handle located
behind the seatback while pushing
the seat back forward and down
into the seat cushion.
To return the seat back to its original position, lift the seat back until it
latches into place.
PowerFold® Third-Row Seat (If Equipped)
Note:The power fold down seats will operate for 10 minutes after the
ignition switch is in off. The transmission must be in positionPand the
liftgate, or liftgate glass must be open. Similar to the battery saver
feature, the power third row seat will be disabled 10 minutes after
turning the vehicle off.
Note:Be sure that the head restraints are folded down before powering
the third row seat down.
The control buttons are located on
the right-hand rear quarter trim
panel (accessible from the liftgate
area).
152Seats
2014 Expedition(exd)
Owners Guide gf, 1st Printing, June 2013
USA(fus)
Page 158 of 519
Fixed Code Programming
Note:It may be helpful to have another person assist you in
programming the transmitter.
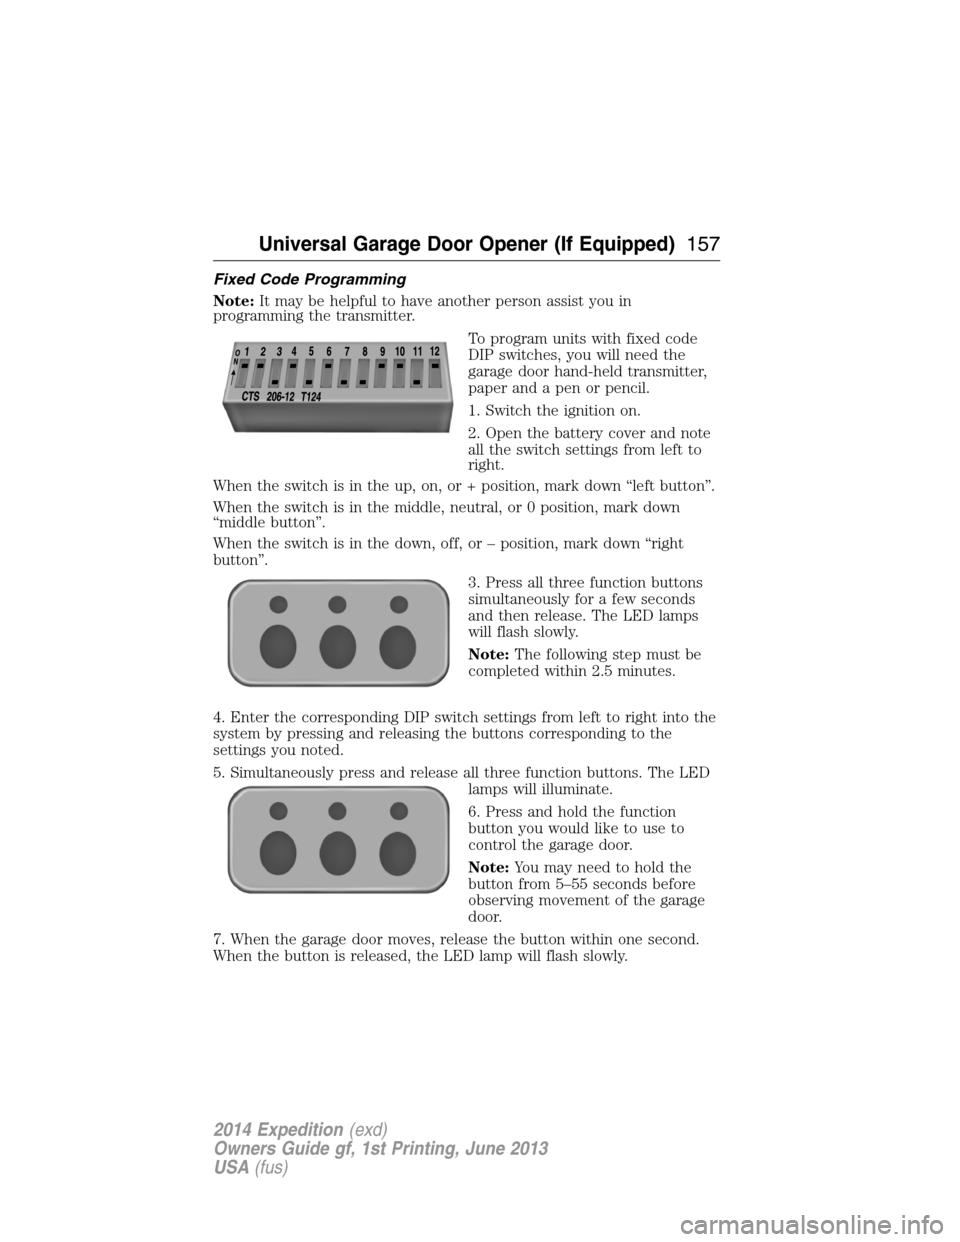
To program units with fixed code
DIP switches, you will need the
garage door hand-held transmitter,
paper and a pen or pencil.
1. Switch the ignition on.
2. Open the battery cover and note
all the switch settings from left to
right.
When the switch is in the up, on, or + position, mark down “left button”.
When the switch is in the middle, neutral, or 0 position, mark down
“middle button”.
When the switch is in the down, off, or – position, mark down “right
button”.
3. Press all three function buttons
simultaneously for a few seconds
and then release. The LED lamps
will flash slowly.
Note:The following step must be
completed within 2.5 minutes.
4. Enter the corresponding DIP switch settings from left to right into the
system by pressing and releasing the buttons corresponding to the
settings you noted.
5. Simultaneously press and release all three function buttons. The LED
lamps will illuminate.
6. Press and hold the function
button you would like to use to
control the garage door.
Note:You may need to hold the
button from 5–55 seconds before
observing movement of the garage
door.
7. When the garage door moves, release the button within one second.
When the button is released, the LED lamp will flash slowly.
Universal Garage Door Opener (If Equipped)157
2014 Expedition(exd)
Owners Guide gf, 1st Printing, June 2013
USA(fus)