Page 292 of 476
Replacement Bulbs
Interior Bulbs
LampsBulb Number
Front Courtesy Light C5W
Front Courtesy Lights (Sun Visors) C5W
Rear Dome Light (Models Without Retractable Roof) C5W
Rear Interior Lights (Models With Retractable Roof) C5W
Interior Lights W5W
Dome Light (Glove Compartment) W5W
Exterior Bulbs
LampsBulb Number
Low Beam/High Beam Headlamps HIR2
Front Position/Daytime Running Lights (DRL) P21/5
Front Direction Indicator Lamps PY21W
Front Fog Lamps H8
Side Indicators (Side View Mirror) WY5W
Tail/Brake Lights/Turn Indicators P21W
Center High Mounted Stop Lamp (CHMSL) LED (Serviced At An Authorized Dealer)
Reverse P21W
License Plate Lamp W5W
290 IN CASE OF EMERGENCY
Page 298 of 476
Side Indicators on External Rear View Mirrors – If
Equipped
CAUTION!
The procedure is described as a guideline. For the
replacement of the lamp it is recommended that you
contact your authorized dealer.
To replace the bulb proceed as follows:
1. Remove the mirror cap on the outside rear view mirror.
2. Remove the transparent lens assembly as shown.
3. Remove the bulb socket and bulb from the transpar-ent lens assembly by rotating the socket counter-
clockwise.
4. Remove the bulb from the bulb socket by pulling the bulb straight out.
Mirror Cap
1 — Mirror Cover
2 — Side Indicator Lens
3 — Side Indicator Bulb Location
296 IN CASE OF EMERGENCY
Page 299 of 476
5. Insert the new bulb, making sure that it is locked intoplace
6. Reinstall the socket in to the transparent lens assem- bly.
7. Reinstall the cover on the outside rear view mirror, making sure it is locked into place.
Rear Tail Lamps
Contain the following:
• Position lights
• Stop lights
• Direction indicator
• REVERSE lights To replace the bulbs proceed as follows:
1. Open the liftgate.
2. Using a suitable tool remove the tail lamp housing
screws as shown.
Tail Lamp Removal
8
IN CASE OF EMERGENCY 297
Page 304 of 476
Dome Light Vanity Mirror
To replace the bulbs proceed as follows:
1. Lift the cover of the mirror and pull out the visormirror light cover.
2. Replace the bulb, releasing it from the side contacts, and then insert the new bulb, making sure that it is
properly locked between the contacts.
3. Reinstall the visor mirror light cover making sure that it is properly locked.
4. Finally lower the visor mirror cover to the mirror. Dome Light Glove Compartment
To replace the bulb proceed as follows:
1. Open the glove compartment.
2. Place your fingers inside the light assembly, pull the
bulb to replace it.
3. Insert the new bulb, making sure it is properly locked.
Visor Mirror Cover
Bulb Removal/Installation
302 IN CASE OF EMERGENCY
Page 313 of 476
CavityMaxi Fuse Cartage Fuse Mini Fuse Description
F24 ––15 Amp Blue Electronic Unit Sup-
ply AutomaticTransmission
F30 ––30 Amp Green Heated Windshield
– If Equipped
F83 –40 Amp Green –Air Conditioning
Fan
F84 ––20 Amp Yellow Power Outlet (Igni-
tion Powered)
F87 ––5 Amp Tan Gear Selector Auto-
matic Transmission
F88 ––7.5 Amp Brown Heated Outside
Mirrors
F89 –30 Amp Pink –Heated Rear Win-
dow
F90 ––5 Amp Tan IBS Sensor (Battery
State of Charge)
8
IN CASE OF EMERGENCY 311
Page 315 of 476

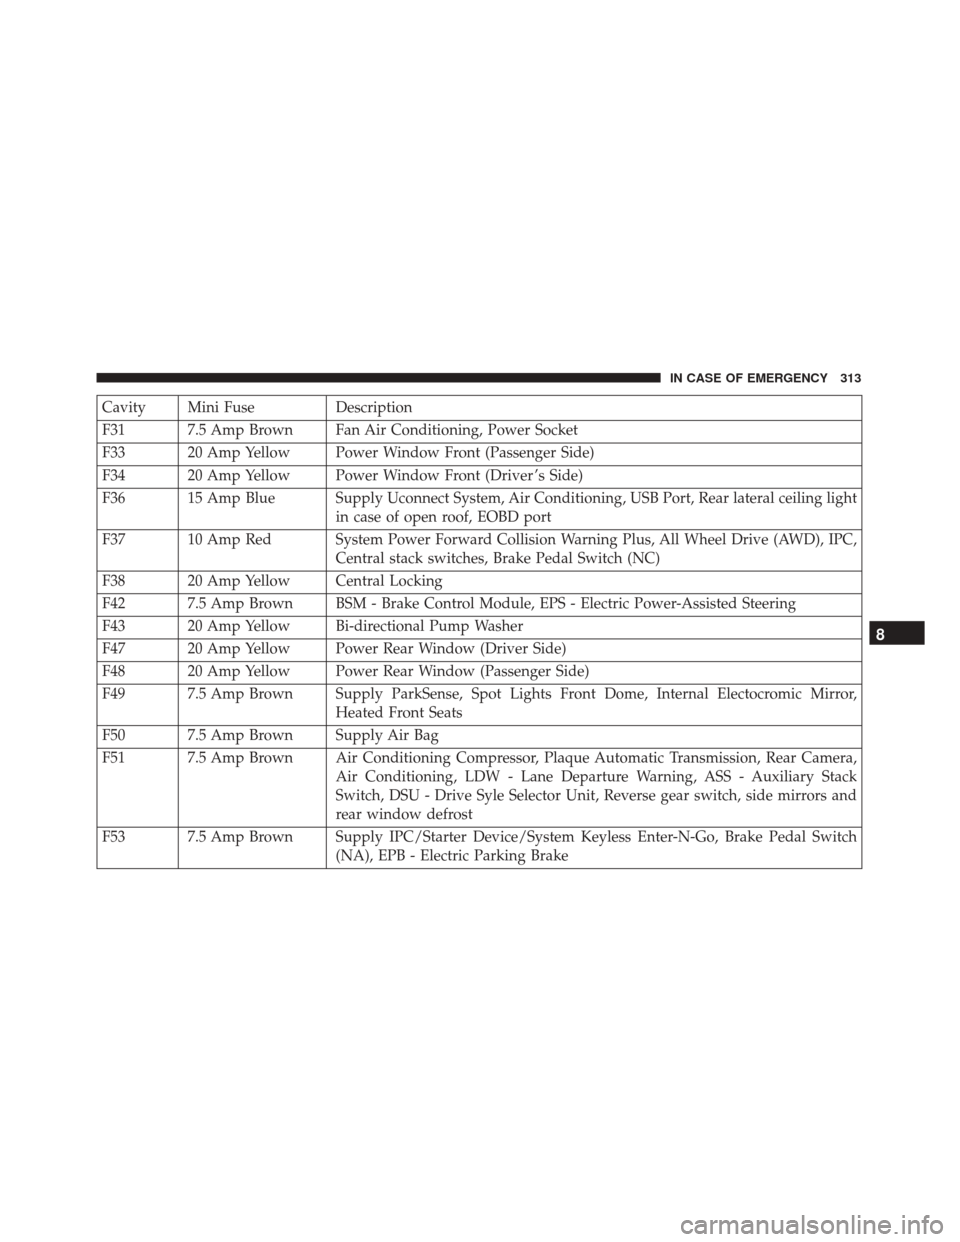
Cavity Mini FuseDescription
F31 7.5 Amp Brown Fan Air Conditioning, Power Socket
F33 20 Amp Yellow Power Window Front (Passenger Side)
F34 20 Amp Yellow Power Window Front (Driver ’s Side)
F36 15 Amp Blue Supply Uconnect System, Air Conditioning, USB Port, Rear lateral ceiling light in case of open roof, EOBD port
F37 10 Amp Red System Power Forward Collision Warning Plus, All Wheel Drive (AWD), IPC, Central stack switches, Brake Pedal Switch (NC)
F38 20 Amp Yellow Central Locking
F42 7.5 Amp Brown BSM - Brake Control Module, EPS - Electric Power-Assisted Steering
F43 20 Amp Yellow Bi-directional Pump Washer
F47 20 Amp Yellow Power Rear Window (Driver Side)
F48 20 Amp Yellow Power Rear Window (Passenger Side)
F49 7.5 Amp Brown Supply ParkSense, Spot Lights Front Dome, Internal Electocromic Mirror, Heated Front Seats
F50 7.5 Amp Brown Supply Air Bag
F51 7.5 Amp Brown Air Conditioning Compressor, Plaque Automatic Transmission, Rear Camera, Air Conditioning, LDW - Lane Departure Warning, ASS - Auxiliary Stack
Switch, DSU - Drive Syle Selector Unit, Reverse gear switch, side mirrors and
rear window defrost
F53 7.5 Amp Brown Supply IPC/Starter Device/System Keyless Enter-N-Go, Brake Pedal Switch (NA), EPB - Electric Parking Brake
8
IN CASE OF EMERGENCY 313
Page 379 of 476

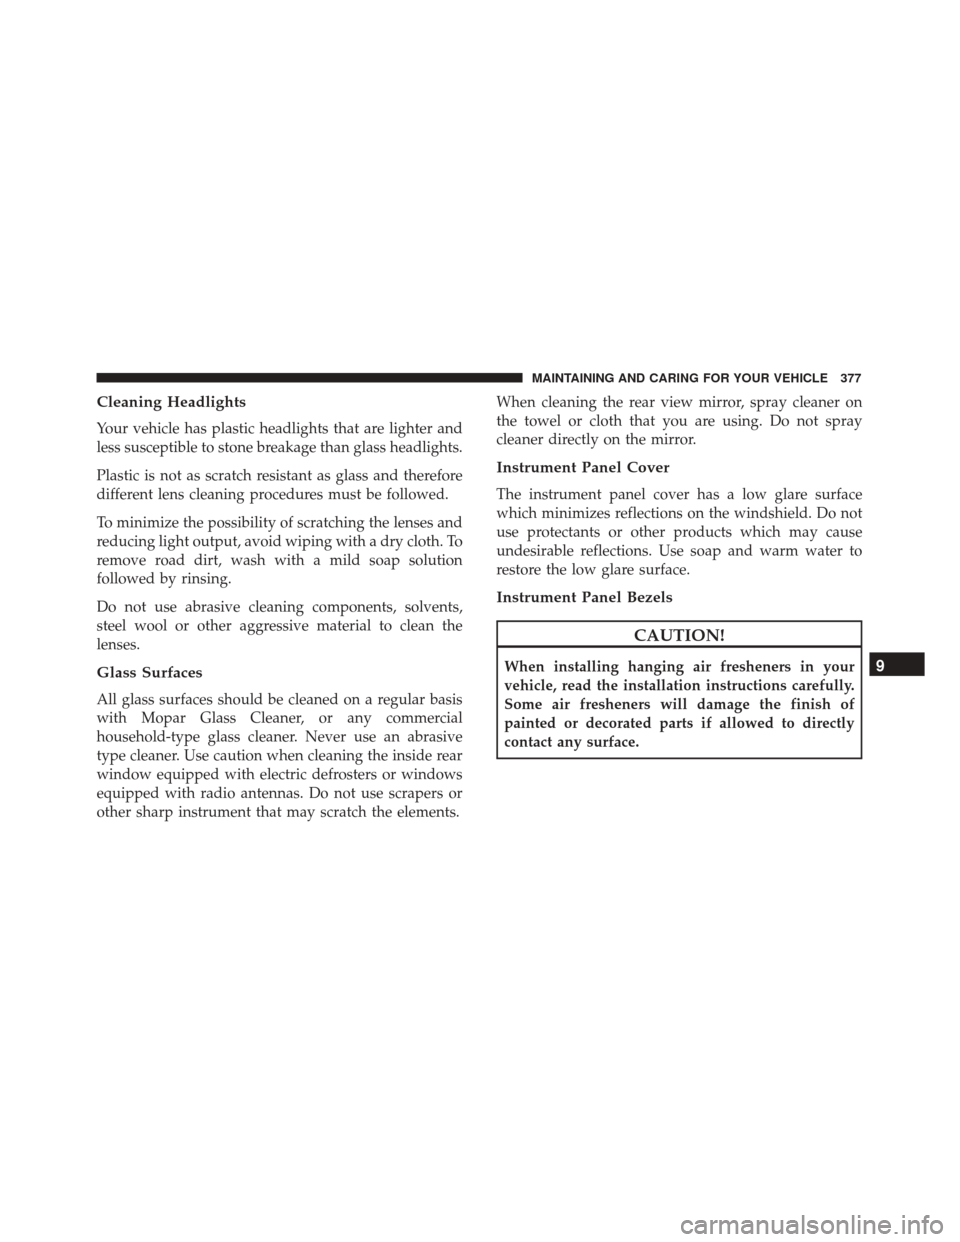
Cleaning Headlights
Your vehicle has plastic headlights that are lighter and
less susceptible to stone breakage than glass headlights.
Plastic is not as scratch resistant as glass and therefore
different lens cleaning procedures must be followed.
To minimize the possibility of scratching the lenses and
reducing light output, avoid wiping with a dry cloth. To
remove road dirt, wash with a mild soap solution
followed by rinsing.
Do not use abrasive cleaning components, solvents,
steel wool or other aggressive material to clean the
lenses.
Glass Surfaces
All glass surfaces should be cleaned on a regular basis
with Mopar Glass Cleaner, or any commercial
household-type glass cleaner. Never use an abrasive
type cleaner. Use caution when cleaning the inside rear
window equipped with electric defrosters or windows
equipped with radio antennas. Do not use scrapers or
other sharp instrument that may scratch the elements.When cleaning the rear view mirror, spray cleaner on
the towel or cloth that you are using. Do not spray
cleaner directly on the mirror.
Instrument Panel Cover
The instrument panel cover has a low glare surface
which minimizes reflections on the windshield. Do not
use protectants or other products which may cause
undesirable reflections. Use soap and warm water to
restore the low glare surface.
Instrument Panel Bezels
CAUTION!
When installing hanging air fresheners in your
vehicle, read the installation instructions carefully.
Some air fresheners will damage the finish of
painted or decorated parts if allowed to directly
contact any surface.9
MAINTAINING AND CARING FOR YOUR VEHICLE 377
Page 424 of 476

Setting NameSelectable Options
Blind Spot Alert — If Equipped Off
LightsLights & Chime
NOTE:
•When this feature is selected, the Blind Spot Alert feature can be set to Off, Lights or Lights and Chime. The
Blind Spot Alert feature can be activated in Lights mode. When this mode is selected, the Blind Spot Monitor
(BSM) system is activated and will only show a visual alert in the outside mirrors. When Lights & Chime
mode is activated, the Blind Spot Monitor (BSM) will show a visual alert in the outside mirrors as well as an
audible alert when the turn signal is on. When Off is selected, the Blind Spot Monitor (BSM) system is deac-
tivated.
•If your vehicle has experienced any damage in the area where the sensor is located, even if the fascia is not
damaged, the sensor may have become misaligned. Take your vehicle to an authorized dealer to verify sen-
sor alignment. A sensor that is misaligned will result in the BSM not operating to specification.
Setting Name Selectable Options
Rain Sensing Wipers — If Equipped
NOTE: When this feature is selected, the system will automatically activate the windshield wipers if it senses
moisture on the windshield.
422 MULTIMEDIA