Page 44 of 476
NOTE:The Emergency Key can be inserted into the
door lock cylinder in either direction.
WARNING!
• Never leave children alone in a vehicle, or with
access to an unlocked vehicle. Allowing children
to be in a vehicle unattended is dangerous for a
number of reasons. A child or others could be
severely injured or killed. Children should be
warned not to touch the parking brake, brake
pedal, or the gear selector. Do not leave the key
fob in or near the vehicle, or in a location acces-
sible to children, and do not leave the ignition of
a vehicle equipped with Keyless Enter- N-Go in
the ON/RUN mode. A child could start the ve-
hicle, operate power windows, other controls, or
move the vehicle.
• Do not leave children or animals inside parked
vehicles in hot weather. Interior heat build-up
may cause them to be severely injured or killed.
Emergency Key Release
1 — Emergency Key Release Button
2 — Emergency Key 42 GETTING TO KNOW YOUR VEHICLE
Page 45 of 476
To Unlock/Enter The Liftgate
The liftgate Passive Entry unlock feature is built into the
electronic liftgate release. With a valid Passive Entry
key fob within 3 ft (1.0 m) of the liftgate, push the
Electronic Liftgate release to open with one fluid mo-
tion.NOTE:
If “Unlock All Doors 1st Press” is programmed
in the instrument cluster display, if equipped, all doors
will unlock when you push the Electronic Release. If
�Unlock Driver Door 1st Press� is programmed in
Uconnect, the liftgate will unlock when you push the
electronic lock/unlock button on the liftgate. For fur-
ther information, refer to “Uconnect Settings” in “Mul-
timedia.”
To Lock The Liftgate
With a valid Passive Entry key fob within 3 ft (1.0 m) of
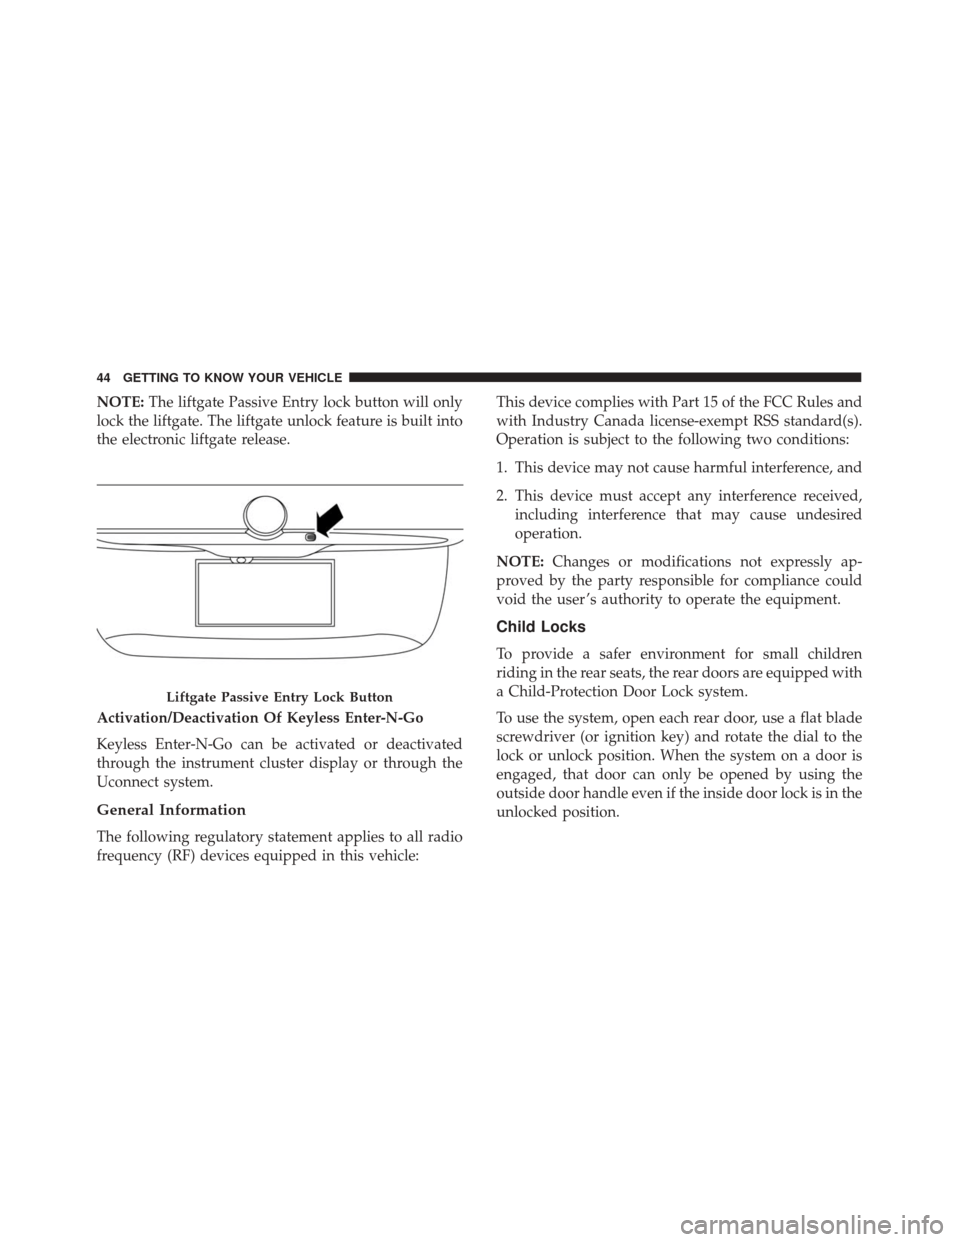
the liftgate, push the Passive Entry lock button located
to the right of electronic liftgate release.
Electronic Liftgate Release Button
4
GETTING TO KNOW YOUR VEHICLE 43
Page 46 of 476

NOTE:The liftgate Passive Entry lock button will only
lock the liftgate. The liftgate unlock feature is built into
the electronic liftgate release.
Activation/Deactivation Of Keyless Enter-N-Go
Keyless Enter-N-Go can be activated or deactivated
through the instrument cluster display or through the
Uconnect system.
General Information
The following regulatory statement applies to all radio
frequency (RF) devices equipped in this vehicle: This device complies with Part 15 of the FCC Rules and
with Industry Canada license-exempt RSS standard(s).
Operation is subject to the following two conditions:
1. This device may not cause harmful interference, and
2. This device must accept any interference received,
including interference that may cause undesired
operation.
NOTE: Changes or modifications not expressly ap-
proved by the party responsible for compliance could
void the user ’s authority to operate the equipment.
Child Locks
To provide a safer environment for small children
riding in the rear seats, the rear doors are equipped with
a Child-Protection Door Lock system.
To use the system, open each rear door, use a flat blade
screwdriver (or ignition key) and rotate the dial to the
lock or unlock position. When the system on a door is
engaged, that door can only be opened by using the
outside door handle even if the inside door lock is in the
unlocked position.
Liftgate Passive Entry Lock Button
44 GETTING TO KNOW YOUR VEHICLE
Page 47 of 476
NOTE:
•When the child lock system is engaged, the door can
only be opened by using the outside door handle
even though the inside door lock is in the unlocked
position.
• After disengaging the Child-Protection Door Lock
system, always test the door from the inside to make
certain it is in the desired position. •
After engaging the Child-Protection Door Lock sys-
tem, always test the door from the inside to make
certain it is in the desired position.
• For emergency exit with the system engaged, rotate
the lock button to the unlocked position, roll down
the window, and open the door with the outside door
handle.
WARNING!
Avoid trapping anyone in a vehicle in a collision.
Remember that the rear doors can only be opened
from the outside when the Child-Protection locks
are engaged.
Child-Protection Door Lock Location
4
GETTING TO KNOW YOUR VEHICLE 45
Page 73 of 476

NOTE:
•Before exiting the vehicle, make sure that the interior
lights are turned off. This will prevent the battery
from discharging once the doors are closed.
• If a light is left on it will automatically be turned off
after approximately 15 minutes after the ignition is in
STOP mode.
Dome Light Timing
The Dome Light will automatically illuminate when the
doors are unlocked, the doors are opened or after the
doors are closed.
Timing Entering The Vehicle
The dome lights illuminate in the following ways:
• When the doors are unlocked, the dome light will
illuminate for approximately 27 seconds.
• When one of the doors is opened, the dome light will
illuminate for approximately three minutes.
• When the doors are closed, the dome light will
automatically shut off after approximately 27 sec-
onds. NOTE:
The timing stops once the ignition is placed in
the RUN or START mode.
The dome light will turn off under any of the following
conditions:
• The dome light is disabled when the ignition is
placed in the RUN or START mode.
• The dome lights will turn off automatically when the
doors are locked.
• The dome lights will automatically turn off after
approximately fifteen minutes of inactivity to pre-
serve the battery.
Timing Exiting The Vehicle
The dome light will illuminate under the following
conditions when the ignition is turned to the STOP
mode:
• The dome light will illuminate for 27 seconds after
the key is removed from the vehicle.
• The opening of one of the doors (approximately three
minutes).
• After closing a door (approximately 27 seconds).
4
GETTING TO KNOW YOUR VEHICLE 71
Page 74 of 476
The dome light timing is disabled when the doors are
locked.
Illuminated Vanity Mirrors — If Equipped
An illuminated vanity mirror is located on each sun
visor. To use the mirror, rotate the sun visor down and
swing the mirror cover upward. The lights will turn on
automatically. Closing the mirror cover will turn the
light off.
Lower Glove Compartment Light
An interior light is located is the lower glove compart-
ment.
This light automatically turn on/off when the glove
compartment is opened and closed, regardless of the
position of the ignition.
NOTE:In order to preserve the life of the battery, the
light will turn off after 15 minutes.
Vanity Mirror Light
Lower Glove Compartment Light
72 GETTING TO KNOW YOUR VEHICLE
Page 100 of 476

WINDOWS
Driver’s Door Controls
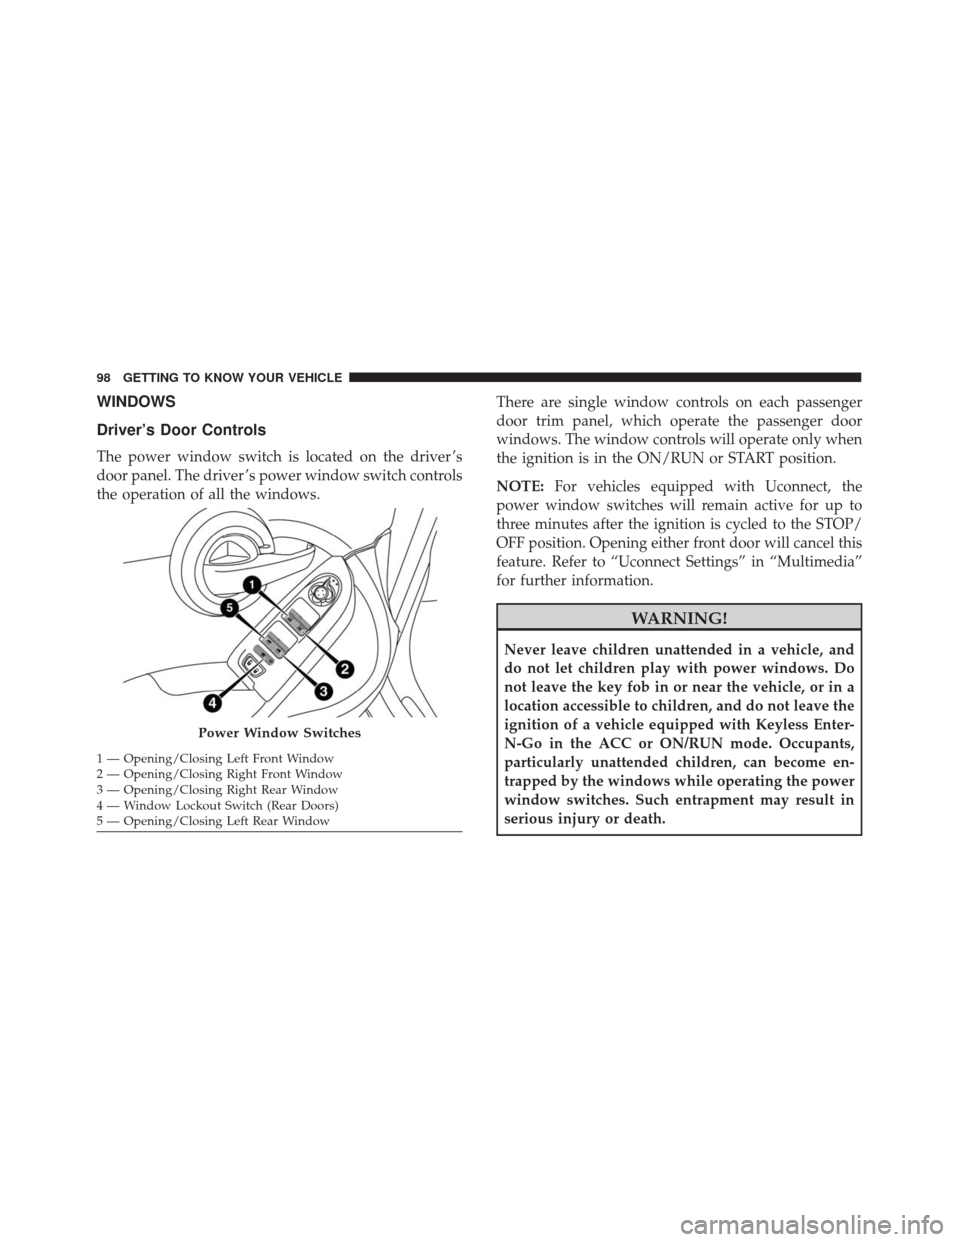
The power window switch is located on the driver ’s
door panel. The driver ’s power window switch controls
the operation of all the windows.There are single window controls on each passenger
door trim panel, which operate the passenger door
windows. The window controls will operate only when
the ignition is in the ON/RUN or START position.
NOTE:
For vehicles equipped with Uconnect, the
power window switches will remain active for up to
three minutes after the ignition is cycled to the STOP/
OFF position. Opening either front door will cancel this
feature. Refer to “Uconnect Settings” in “Multimedia”
for further information.
WARNING!
Never leave children unattended in a vehicle, and
do not let children play with power windows. Do
not leave the key fob in or near the vehicle, or in a
location accessible to children, and do not leave the
ignition of a vehicle equipped with Keyless Enter-
N-Go in the ACC or ON/RUN mode. Occupants,
particularly unattended children, can become en-
trapped by the windows while operating the power
window switches. Such entrapment may result in
serious injury or death.
Power Window Switches
1 — Opening/Closing Left Front Window
2 — Opening/Closing Right Front Window
3 — Opening/Closing Right Rear Window
4 — Window Lockout Switch (Rear Doors)
5 — Opening/Closing Left Rear Window 98 GETTING TO KNOW YOUR VEHICLE
Page 108 of 476
LIFTGATE
The liftgate release function is disabled when the ve-
hicle is in motion.
Opening
Opening From Outside
To unlock the liftgate from the outside, squeeze the
electronic liftgate release and pull the liftgate open with
one fluid motion.
When opening the door, the turn signal lights will flash
twice and the interior dome light will illuminate. Theinterior dome light will turn off automatically by clos-
ing the liftgate. Refer to “Interior Lights” in “Getting To
Know Your Vehicle.”
If the liftgate is left open, the interior dome light will
shut off after a few minutes to conserve battery life.
Internal Emergency Release
Proceed as follows:
1. Lower the headrests and fold the seatbacks.
2. Using the supplied screwdriver (located under cargo
floor in tool kit), remove the yellow tab.
Electronic Liftgate Release
1 — Yellow Tab
106 GETTING TO KNOW YOUR VEHICLE