2014 FIAT 500L LIVING buttons
[x] Cancel search: buttonsPage 7 of 420

GETTING TO KNOW YOUR CAR
DASHBOARDThe presence and position of the controls, instruments and indicators may vary according to the different
versions.1. Adjustable and directable air diffusers 2. Radio controls on the steering wheel (for versions/markets, where provided)
3. Exterior light control stalk 4. Instrument panel 5. Windscreen wiper/rear window wiper/trip computer control stalk
6. Adjustable and directable centre air vents 7. Fixed upper air vent 8. Passenger front airbag 9. Upper glove
compartment (for versions/markets, where provided the compartment may be conditioned) 10. Storage compartment
11. Lower glove compartment 12. Control buttons 13. Heating/ventilation system or manual climate control (for
versions/markets, where provided) or automatic dual zone climate control (for versions/markets, where provided)
14. USB port/AUX socket (for versions/markets, where provided) 15.
UConnect
vided) or radio system setup 16. Ignition switch 17. Driver front airbag 18. Cruise Control/Speed Limiter lever (for
versions/markets, where provided)
fig. 1
F0Y0042
3GETTING TO
KNOW YOUR CARSAFETY
STARTING AND
DRIVING
WARNING LIGHTS
AND MESSAGES
IN AN EMERGENCY
SERVICING AND
MAINTENANCE
TECHNICAL
SPECIFICATIONS
INDEX
™ (for versions/markets, where pro-
Page 14 of 420

GEAR SHIFT INDICATOR
The GSI (Gear Shift Indicator) system advises the
driver to change gear through a specific indication on
the instrument panel fig. 9.
Through the GSI, the driver is notified that changing
gear will allow a reduction in fuel consumption.
When the SHIFT UP icon (
SHIFT) is shown on the
display, the GSI is advising the driver to engage a
higher gear, while the SHIFT DOWN (
SHIFT) icon
advises the driver to engage a lower gear.
The indication on the instrument panel remains on
until the driver changes gear or the driving
conditions return to a situation where changing gear
is not required to reduce consumption.CONTROL BUTTONS
NOTE Buttons
and
fig. 10 are described in
the following pages. The buttons are
and
on
some versions.
To scroll up through the screen and the related
options or to increase the displayed value.Press briefly to access the menu and/or go to next
screen or confirm the desired menu selection.
Hold down to go back to the standard screen.To scroll down through the displayed menu and the
related options or to decrease the value displayed.
Buttons
and
activate different functions
according to the following situations:
❒within the menu, they allow you to scroll up and
down;
❒during setting operations, they increase or
decrease the displayed value.
fig. 9
F0Y1104
10GETTING TO
KNOW YOUR CAR
SAFETY
STARTING AND
DRIVING
WARNING LIGHTS
AND MESSAGES
IN AN EMERGENCY
SERVICING AND
MAINTENANCE
TECHNICAL
SPECIFICATIONS
INDEX
Page 15 of 420

SETUP MENU
The menu comprises a series of options which can
be selected using buttons
and
to access the
different selection and setting operations (Setup)
indicated below. Some options have a submenu.
The menu can be activated by briefly pressing the
button.
The menu comprises the following options:
❒MENU
❒LIGHTING
❒HEADLIGHT ALIGNMENT (for versions/markets,
where provided)
❒SPEED BEEP
❒HEADLIGHT SENSOR (for versions/markets
where provided)
❒CORNERING LIGHTS (for versions/markets,
where available)❒RAIN SENSOR (for versions/markets, where
provided)
❒TRIP B ACTIVATION/DATA
❒SET TIME
❒SET DATE
❒AUTOCLOSE
❒MEASUREMENT UNIT
❒LANGUAGE
❒WARNINGS VOLUME
❒BELT BUZZER
❒SERVICE
❒AIRBAG/PASSENGER BAG (for versions/markets,
where provided)
❒DAYTIME RUNNING LIGHTS (for versions/
markets, where provided)
❒CITY BRAKE C./COLLISION MITIGATION
(for versions/markets, where provided)
❒EXIT MENUfig. 10
F0Y0035
11GETTING TO
KNOW YOUR CARSAFETY
STARTING AND
DRIVING
WARNING LIGHTS
AND MESSAGES
IN AN EMERGENCY
SERVICING AND
MAINTENANCE
TECHNICAL
SPECIFICATIONS
INDEX
Page 16 of 420
Selecting an option from the main menu without a
submenu:
❒briefly press the
button to select the main menu
option to be set;
❒press buttonsor
(with single presses) to
select the new setting;
❒briefly press the
button to store the new setting
and to go back to the same main menu option
selected previously.
Selecting an option from the main menu with a
submenu:
❒briefly press thebutton to display the first
submenu option;
❒press buttonsor
(with single presses) to
scroll through all the submenu options;
❒briefly press the
button to select the displayed
submenu option and to open the relevant setup
menu;
❒press buttonsor
(with single presses) to
select the new setting for this submenu option;
❒briefly press button
to store the new setting and
at the same time go back to the previously
selected menu option.
MENU ITEMSMenu
This option allows you to access the Setup Menu.
Press the
or
button to select the various
Menu items.
Hold down the
button to return to the standard
screen.
Lighting
(Interior light adjustment)
(with side lights on only)
With the side lights on, this function is used to set
the brightness of the instrument panel, uconnect™
system controls (for versions/markets where
provided) and automatic climate control system
controls (for versions/markets where provided) to 8
levels.
Proceed as follows to adjust the brightness:
❒press buttonbriefly. The level set previously
flashes on the display;
12GETTING TO
KNOW YOUR CAR
SAFETY
STARTING AND
DRIVING
WARNING LIGHTS
AND MESSAGES
IN AN EMERGENCY
SERVICING AND
MAINTENANCE
TECHNICAL
SPECIFICATIONS
INDEX
❒press button
or
to set the required
brightness level;
❒press the
button briefly to return to the menu
screen or hold the button down to return to the
standard screen without saving. NoteWith uconnect™ system (for versions/
markets where provided), some Menu items are
shown and managed on the display of the latter and
not on the instrument panel display (refer to the
uconnect™ supplement).
Page 23 of 420
Airbag/Passenger bag
(Activation/deactivation of passenger side
front airbag and side bag for pelvis, chest and
shoulder protection - for versions/markets,
where provided)
This function allows the passenger airbag to be
activated / deactivated.
Proceed as follows:
❒press the
button and, after the message "Bag
pass: Off" (to deactivate) or "Bag pass: On" (to
activate) is displayed by pressing buttons
and
, press the
button again;
❒a confirmation request message will appear on the
display;
❒by pressing theor
buttons select "Yes" (to
confirm activation/deactivation) or "No" (to
cancel);
❒press the
button briefly; a message confirming
the selection is displayed and you return to the
menu screen; Hold down the button to return to
the standard screen without storing.
Daytime running lights (D.R.L.)
(for versions/markets, where provided)
This function can be used to activate/deactivate the
daytime running lights.
Proceed as follows to activate or deactivate this
function:
❒press button
briefly. The display shows a
submenu;❒press button
briefly. "On" or "Off" flash on the
display, according to what has been previously set;
❒press
or
to make your choice;
❒press the
button briefly to return to the
submenu screen or hold the button down
to return to the main menu screen without saving;
❒hold down the
button again to return to the
standard screen or to the main menu according
to the menu items where you are in.
City Brake Control - "Collision Mitigation"
(for versions/markets, where provided)
This function allows to activate ("On") or de-activate
("Off") the City Brake Control - "Collision
Mitigation" system.
To adjust proceed as follows:
❒press buttonbriefly. "On" or "Off" flash on the
display, according to what has been previously set;
❒a confirmation request message will appear on the
display;
❒by pressing the
or
buttons select "Yes" (to
confirm activation/deactivation) or "No" (to
cancel);
❒press the
button briefly; a message confirming
the selection is displayed and you return to the
menu screen; Hold down the button to return to
the standard screen without storing.
When the system is deactivated the dedicated
warning light in the instrument panel switches on
(see chapter "Warning lights and messages").
19GETTING TO
KNOW YOUR CARSAFETY
STARTING AND
DRIVING
WARNING LIGHTS
AND MESSAGES
IN AN EMERGENCY
SERVICING AND
MAINTENANCE
TECHNICAL
SPECIFICATIONS
INDEX
Page 41 of 420
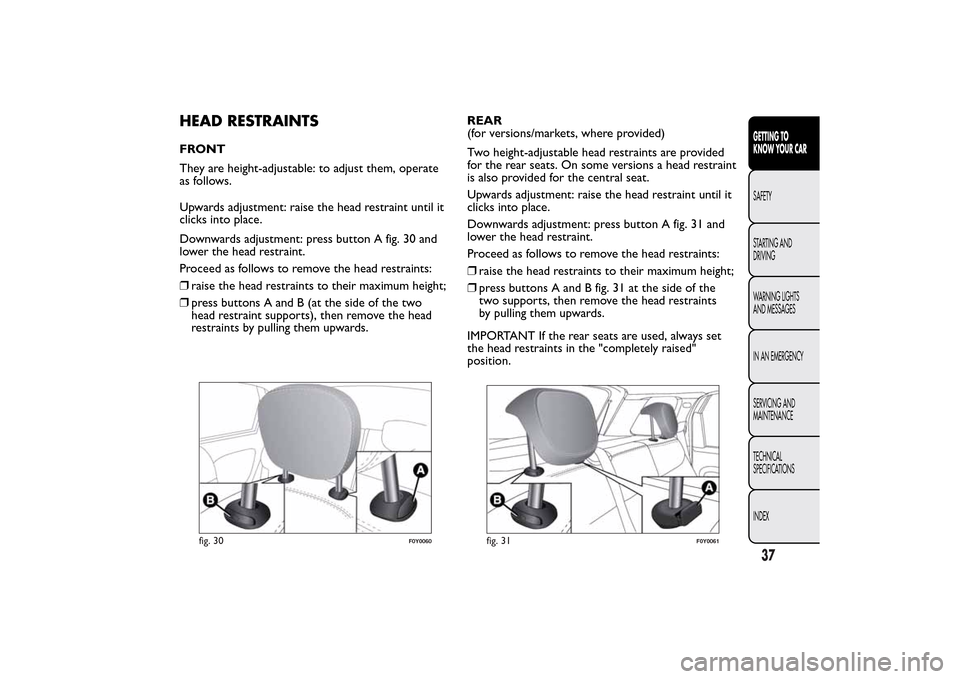
HEAD RESTRAINTSFRONT
They are height-adjustable: to adjust them, operate
as follows.
Upwards adjustment: raise the head restraint until it
clicks into place.
Downwards adjustment: press button A fig. 30 and
lower the head restraint.
Proceed as follows to remove the head restraints:
❒raise the head restraints to their maximum height;
❒press buttons A and B (at the side of the two
head restraint supports), then remove the head
restraints by pulling them upwards.REAR
(for versions/markets, where provided)
Two height-adjustable head restraints are provided
for the rear seats. On some versions a head restraint
is also provided for the central seat.
Upwards adjustment: raise the head restraint until it
clicks into place.
Downwards adjustment: press button A fig. 31 and
lower the head restraint.
Proceed as follows to remove the head restraints:
❒raise the head restraints to their maximum height;
❒press buttons A and B fig. 31 at the side of the
two supports, then remove the head restraints
by pulling them upwards.
IMPORTANT If the rear seats are used, always set
the head restraints in the "completely raised"
position.
fig. 30
F0Y0060
fig. 31
F0Y0061
37GETTING TO
KNOW YOUR CARSAFETY
STARTING AND
DRIVING
WARNING LIGHTS
AND MESSAGES
IN AN EMERGENCY
SERVICING AND
MAINTENANCE
TECHNICAL
SPECIFICATIONS
INDEX
Page 57 of 420
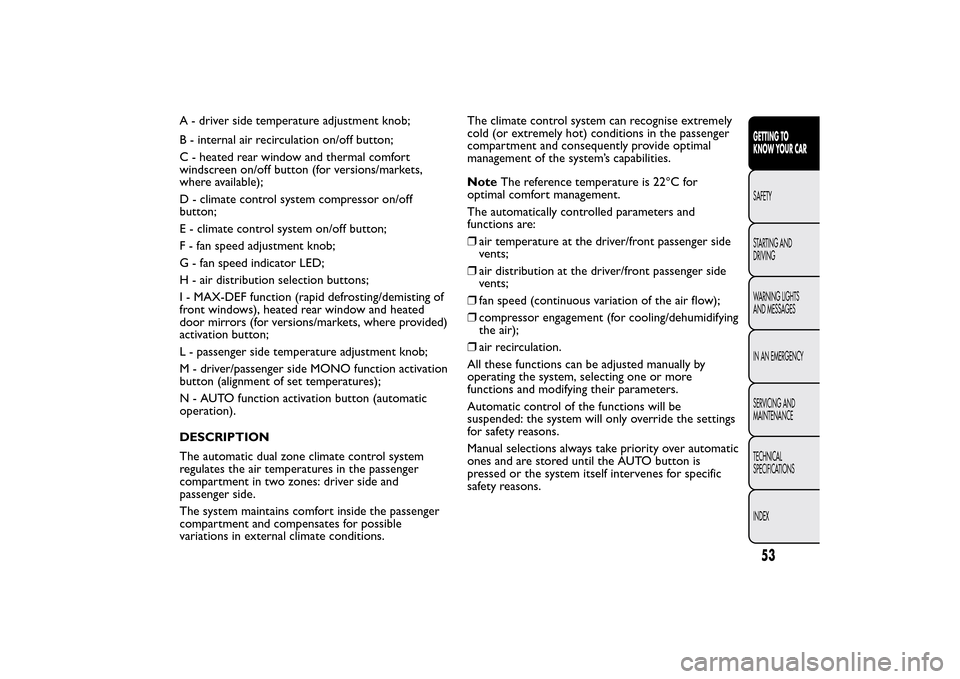
A - driver side temperature adjustment knob;
B - internal air recirculation on/off button;
C - heated rear window and thermal comfort
windscreen on/off button (for versions/markets,
where available);
D - climate control system compressor on/off
button;
E - climate control system on/off button;
F - fan speed adjustment knob;
G - fan speed indicator LED;
H - air distribution selection buttons;
I - MAX-DEF function (rapid defrosting/demisting of
front windows), heated rear window and heated
door mirrors (for versions/markets, where provided)
activation button;
L - passenger side temperature adjustment knob;
M - driver/passenger side MONO function activation
button (alignment of set temperatures);
N - AUTO function activation button (automatic
operation).
DESCRIPTION
The automatic dual zone climate control system
regulates the air temperatures in the passenger
compartment in two zones: driver side and
passenger side.
The system maintains comfort inside the passenger
compartment and compensates for possible
variations in external climate conditions.The climate control system can recognise extremely
cold (or extremely hot) conditions in the passenger
compartment and consequently provide optimal
management of the system’s capabilities.
NoteThe reference temperature is 22°C for
optimal comfort management.
The automatically controlled parameters and
functions are:
❒air temperature at the driver/front passenger side
vents;
❒air distribution at the driver/front passenger side
vents;
❒fan speed (continuous variation of the air flow);
❒compressor engagement (for cooling/dehumidifying
the air);
❒air recirculation.
All these functions can be adjusted manually by
operating the system, selecting one or more
functions and modifying their parameters.
Automatic control of the functions will be
suspended: the system will only override the settings
for safety reasons.
Manual selections always take priority over automatic
ones and are stored until the AUTO button is
pressed or the system itself intervenes for specific
safety reasons.
53GETTING TO
KNOW YOUR CARSAFETY
STARTING AND
DRIVING
WARNING LIGHTS
AND MESSAGES
IN AN EMERGENCY
SERVICING AND
MAINTENANCE
TECHNICAL
SPECIFICATIONS
INDEX
Page 58 of 420
The amount of air introduced into the passenger
compartment is not affected by car speed; it is
regulated by the fan, which is controlled
electronically.
The air temperature is always automatically
controlled according to the temperature set on the
display (except for when the system is off or in
certain conditions when the compressor is
not running).
The system allows the following to be set or adjusted
manually:
❒driver/passenger side air temperature;
❒fan speed (continuous variation);
❒air distribution to 7 positions;
❒compressor enablement;
❒rapid defrosting/demisting function;
❒air recirculation;
❒heated rear window;
❒system deactivation.
The climate control system detects the
passenger compartment temperature
using a mean radiant temperature sensor
located in the interior rear view mirror and
protected by a specific cover. Obstructing the
field of view of this sensor with any object could
cause the climate control system to operate
with less than optimal efficiency.SWITCHING ON THE CLIMATE
CONTROL SYSTEM
The climate control system can be switched on in
different ways: it is advisable to press the AUTO
button and turn the knobs to set the desired
temperatures.
In this way the system operates completely
automatically to adjust the temperature, quantity and
distribution of the air introduced into the passenger
compartment. It also manages the air recirculation
function and the activation of the air conditioning
compressor.
During automatic operation, you can change the set
temperatures, air distribution and fan speed at any
time by using the relevant buttons or knobs: the
system will automatically change the settings to
adjust to the new requirements.
During completely automatic operation (AUTO),
varying the air flow and/or distribution (which are
not displayed) causes the AUTO function LED
to disappear and the system to operate in MANUAL
mode (displaying both the flow and distribution
requested).
When the compressor is deactivated, the AUTO
operation remains active only if the system can
guarantee in-car comfort. Otherwise, the system
switches to MANUAL mode (the set temperatures
will flash on the display). The fan speed is the same in
all the zones of the passenger compartment.
54GETTING TO
KNOW YOUR CAR
SAFETY
STARTING AND
DRIVING
WARNING LIGHTS
AND MESSAGES
IN AN EMERGENCY
SERVICING AND
MAINTENANCE
TECHNICAL
SPECIFICATIONS
INDEX