2014 FIAT 500L LIVING buttons
[x] Cancel search: buttonsPage 59 of 420
ADJUSTING THE AIR TEMPERATURE
Turn the A or L knob clockwise or anticlockwise to
adjust the air temperature in the front left (knob
A) or right (knob L) zone of the passenger
compartment.
The set temperatures are shown on the displays.
Press the MONO button to align the air
temperature between the two zones.
Turn the L knob to return to the separate
management of air temperatures in the two zones.
Turning the knobs completely in one direction or the
other activates the "HI" (maximum heating) or
"LO" (maximum cooling) functions respectively.
To deactivate these functions, turn the temperature
knob to the desired temperature.
AIR DISTRIBUTION SELECTION
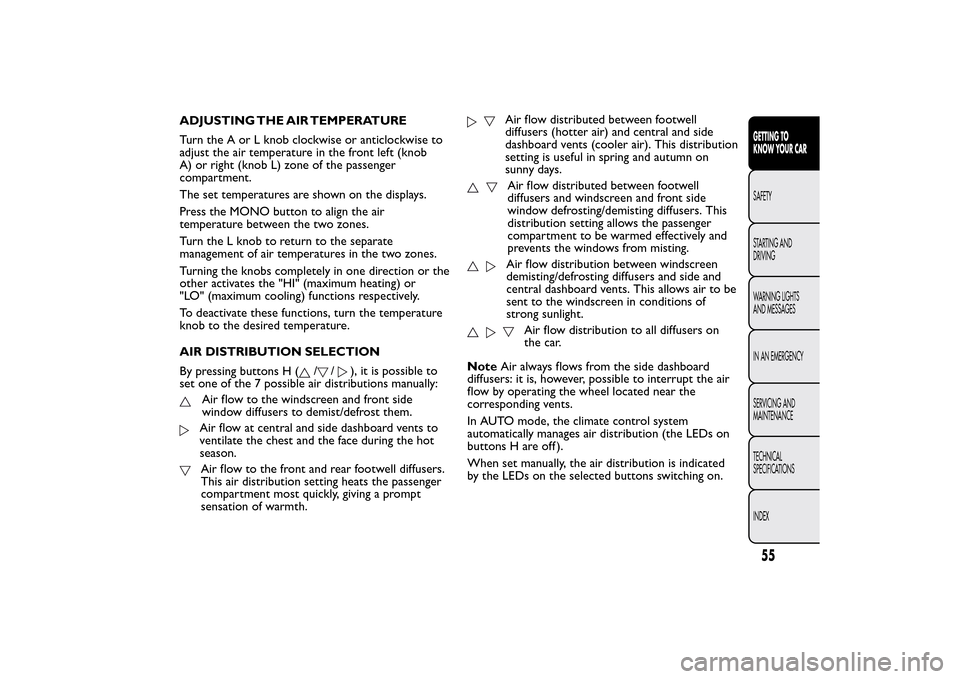
By pressing buttons H (
/
/
), it is possible to
set one of the 7 possible air distributions manually:
Air flow to the windscreen and front side
window diffusers to demist/defrost them.Air flow at central and side dashboard vents to
ventilate the chest and the face during the hot
season.Air flow to the front and rear footwell diffusers.
This air distribution setting heats the passenger
compartment most quickly, giving a prompt
sensation of warmth.
Air flow distributed between footwell
diffusers (hotter air) and central and side
dashboard vents (cooler air). This distribution
setting is useful in spring and autumn on
sunny days.Air flow distributed between footwell
diffusers and windscreen and front side
window defrosting/demisting diffusers. This
distribution setting allows the passenger
compartment to be warmed effectively and
prevents the windows from misting.Air flow distribution between windscreen
demisting/defrosting diffusers and side and
central dashboard vents. This allows air to be
sent to the windscreen in conditions of
strong sunlight.
Air flow distribution to all diffusers on
the car.
NoteAir always flows from the side dashboard
diffusers: it is, however, possible to interrupt the air
flow by operating the wheel located near the
corresponding vents.
In AUTO mode, the climate control system
automatically manages air distribution (the LEDs on
buttons H are off ).
When set manually, the air distribution is indicated
by the LEDs on the selected buttons switching on.
55GETTING TO
KNOW YOUR CARSAFETY
STARTING AND
DRIVING
WARNING LIGHTS
AND MESSAGES
IN AN EMERGENCY
SERVICING AND
MAINTENANCE
TECHNICAL
SPECIFICATIONS
INDEX
Page 63 of 420
When the function is activated, the LED on the
AUTO button switches off. With the function
activated the only possible manual adjustments are
adjusting the fan speed and turning the heated rear
window off.
When the B, C, or AUTO buttons are pressed, the
climate control system will deactivate the MAX-DEF
function.
Selecting the footwell/windscreen or only windscreen
distribution activates the climate control system
compressor (LED on A/C button on) and the air
recirculation is set to "outside air" intake (LED on
button off ).
This logic guarantees optimum visibility at the
windows. It is, however, always possible to manage
air recirculation and the climate control system
compressor manually.
HEATED REAR WINDOW
DEMISTING/DEFROSTING
Press the
button to activate heated rear window
demisting/defrosting.
The effective activation of the function is indicated by
the
warning light on the instrument panel
switching on.
This function switches off automatically after about
20 minutes or when the engine is turned off. It is not
switched on automatically the next time the engine
is started.For versions/markets where provided, press the
button to activate demisting/defrosting of door
mirrors and heated nozzles (for versions/markets,
where provided).
IMPORTANT Do not affix stickers to the inside of
the heated rear window over the heating filaments,
to avoid damage that might cause them to stop
working properly.
Heated windscreen
(for versions/markets, where provided)
Press button C
to activate this function.
When the function is active, a warning light
on
the instrument panel is on.
For versions/markets where provided, press the C
button to activate also demisting/defrosting of
windscreen (with engine running only) and heated
door mirrors (for versions/markets, where provided).
This function is timed and switches off automatically
after 4 minutes for the windscreen and 20 minutes
for the rear window and door mirrors. Press button
C again to disable the function in advance.
59GETTING TO
KNOW YOUR CARSAFETY
STARTING AND
DRIVING
WARNING LIGHTS
AND MESSAGES
IN AN EMERGENCY
SERVICING AND
MAINTENANCE
TECHNICAL
SPECIFICATIONS
INDEX
Page 92 of 420
BLIND MOVEMENT
Press again button B fig. 72: the blind will move
towards the rear part of the car, until it is fully open.
With blind fully open press button B: the blind will
move towards the front part of the car, until it is fully
closed.
During the automatic opening and closing stages,
press button B again to interrupt the blind
movement.
ANTI-PINCH SAFETY DEVICE
The sun roof and the electric blind are equipped with
an anti-pinch safety system capable of detecting the
presence of an obstacle whilst the roof is closing:
if this happens, the system intervenes and the
movement of the glass is immediately reversed.EMERGENCY OPERATION
If the control buttons fail to operate, the sun blind
and the sun roof can be moved manually proceeding
as described below:
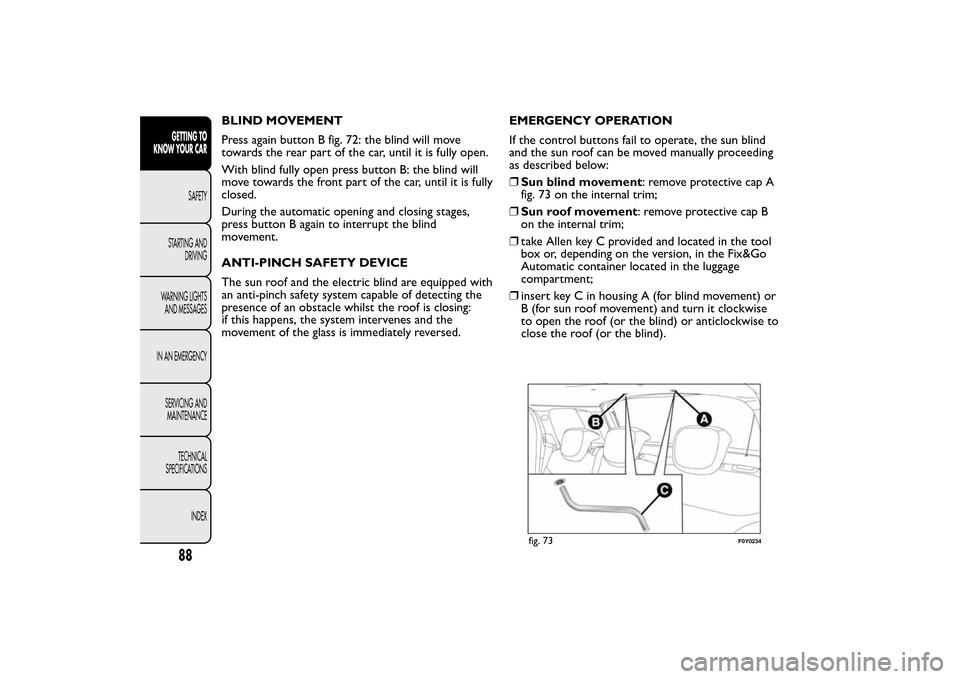
❒Sun blind movement: remove protective cap A
fig. 73 on the internal trim;
❒Sun roof movement: remove protective cap B
on the internal trim;
❒take Allen key C provided and located in the tool
box or, depending on the version, in the Fix&Go
Automatic container located in the luggage
compartment;
❒insert key C in housing A (for blind movement) or
B (for sun roof movement) and turn it clockwise
to open the roof (or the blind) or anticlockwise to
close the roof (or the blind).
fig. 73
F0Y0234
88GETTING TO
KNOW YOUR CAR
SAFETY
STARTING AND
DRIVING
WARNING LIGHTS
AND MESSAGES
IN AN EMERGENCY
SERVICING AND
MAINTENANCE
TECHNICAL
SPECIFICATIONS
INDEX
Page 97 of 420
ELECTRIC WINDOWSThese operate when the ignition key is turned to
MAR-ON and for about three minutes after the
ignition key is turned to STOP or removed unless
one of the front doors is opened.
The buttons are located on the door panel trim (for
versions/markets, where provided). All windows
can be controlled from the driver side door panel.
WARNING
Improper use of the electric windows
can be dangerous. Before and during
operation, always check that passengers are not
exposed to the risk of being injured either
directly by the moving windows or through
objects getting caught or struck by them.When
leaving the car, always remove the ignition
key to avoid the risk of injury of people still on
board due to accidental operation of the
electric windows.CONTROLS
Driver's side front door
(versions with 2 electric windows)
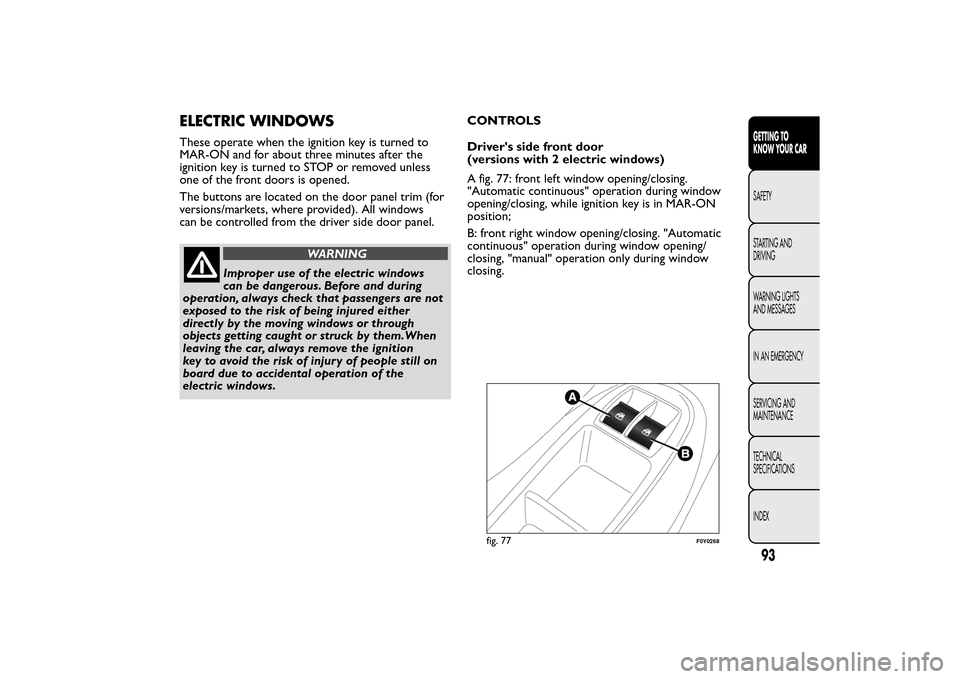
A fig. 77: front left window opening/closing.
"Automatic continuous" operation during window
opening/closing, while ignition key is in MAR-ON
position;
B: front right window opening/closing. "Automatic
continuous" operation during window opening/
closing, "manual" operation only during window
closing.
fig. 77
F0Y0268
93GETTING TO
KNOW YOUR CARSAFETY
STARTING AND
DRIVING
WARNING LIGHTS
AND MESSAGES
IN AN EMERGENCY
SERVICING AND
MAINTENANCE
TECHNICAL
SPECIFICATIONS
INDEX
Page 98 of 420
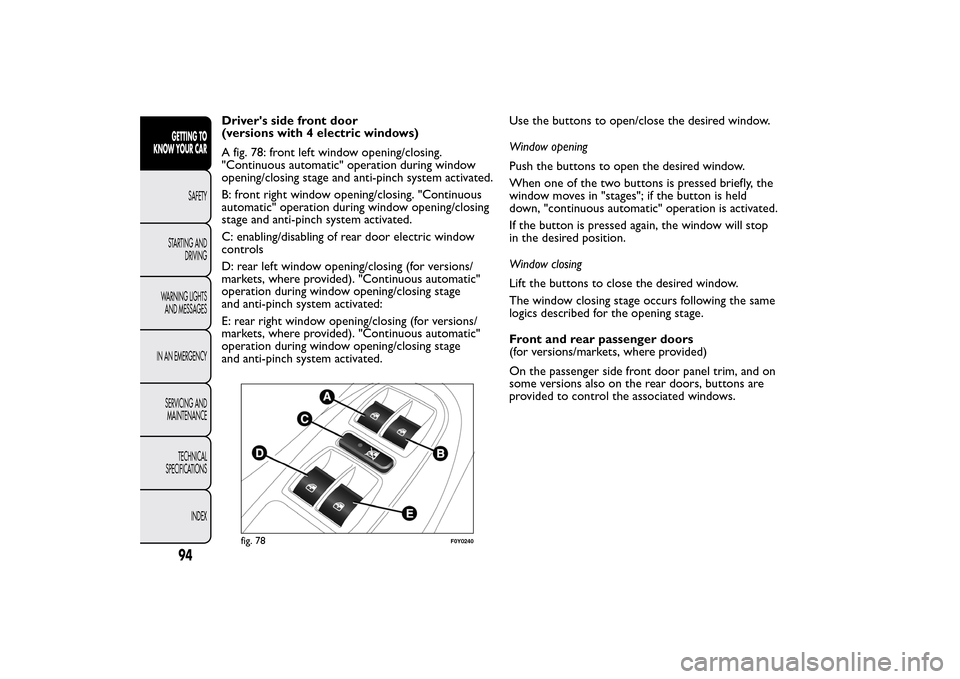
Driver's side front door
(versions with 4 electric windows)
A fig. 78: front left window opening/closing.
"Continuous automatic" operation during window
opening/closing stage and anti-pinch system activated.
B: front right window opening/closing. "Continuous
automatic" operation during window opening/closing
stage and anti-pinch system activated.
C: enabling/disabling of rear door electric window
controls
D: rear left window opening/closing (for versions/
markets, where provided). "Continuous automatic"
operation during window opening/closing stage
and anti-pinch system activated:
E: rear right window opening/closing (for versions/
markets, where provided). "Continuous automatic"
operation during window opening/closing stage
and anti-pinch system activated.Use the buttons to open/close the desired window.
Window opening
Push the buttons to open the desired window.
When one of the two buttons is pressed briefly, the
window moves in "stages"; if the button is held
down, "continuous automatic" operation is activated.
If the button is pressed again, the window will stop
in the desired position.
Window closing
Lift the buttons to close the desired window.
The window closing stage occurs following the same
logics described for the opening stage.
Front and rear passenger doors
(for versions/markets, where provided)
On the passenger side front door panel trim, and on
some versions also on the rear doors, buttons are
provided to control the associated windows.
fig. 78
F0Y0240
94GETTING TO
KNOW YOUR CAR
SAFETY
STARTING AND
DRIVING
WARNING LIGHTS
AND MESSAGES
IN AN EMERGENCY
SERVICING AND
MAINTENANCE
TECHNICAL
SPECIFICATIONS
INDEX
Page 113 of 420
HEADLIGHTSLIGHT BEAM DIRECTION
The correct alignment of the headlights is important
for the comfort and safety of not only the driver
but all other road users. This is also covered by
a specific rule of the highway code.
The headlights must be correctly aligned to
guarantee the best visibility conditions for all drivers
while travelling with headlights on.
Contact a Fiat Dealership to have the headlights
checked and adjusted, if necessary.
Check beam alignment every time the load or its
distribution changes.
HEADLAMP ALIGNMENT CORRECTOR
This device works with the ignition key in the MAR
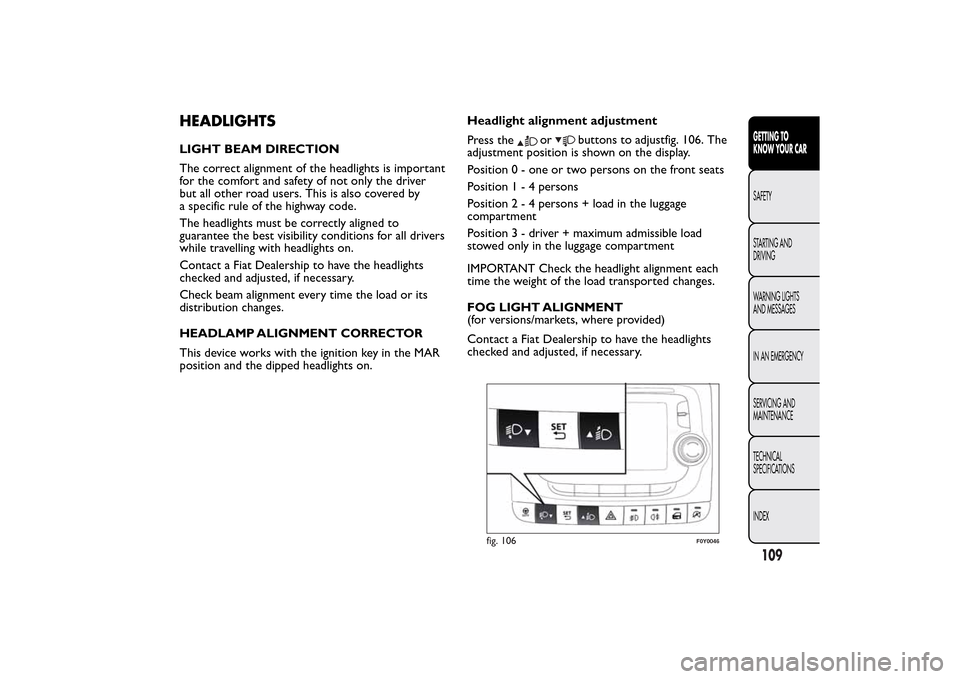
position and the dipped headlights on.Headlight alignment adjustment
Press the
or
buttons to adjustfig. 106. The
adjustment position is shown on the display.
Position 0 - one or two persons on the front seats
Position1-4persons
Position2-4persons + load in the luggage
compartment
Position 3 - driver + maximum admissible load
stowed only in the luggage compartment
IMPORTANT Check the headlight alignment each
time the weight of the load transported changes.
FOG LIGHT ALIGNMENT
(for versions/markets, where provided)
Contact a Fiat Dealership to have the headlights
checked and adjusted, if necessary.
fig. 106
F0Y0046
109GETTING TO
KNOW YOUR CARSAFETY
STARTING AND
DRIVING
WARNING LIGHTS
AND MESSAGES
IN AN EMERGENCY
SERVICING AND
MAINTENANCE
TECHNICAL
SPECIFICATIONS
INDEX
Page 299 of 420
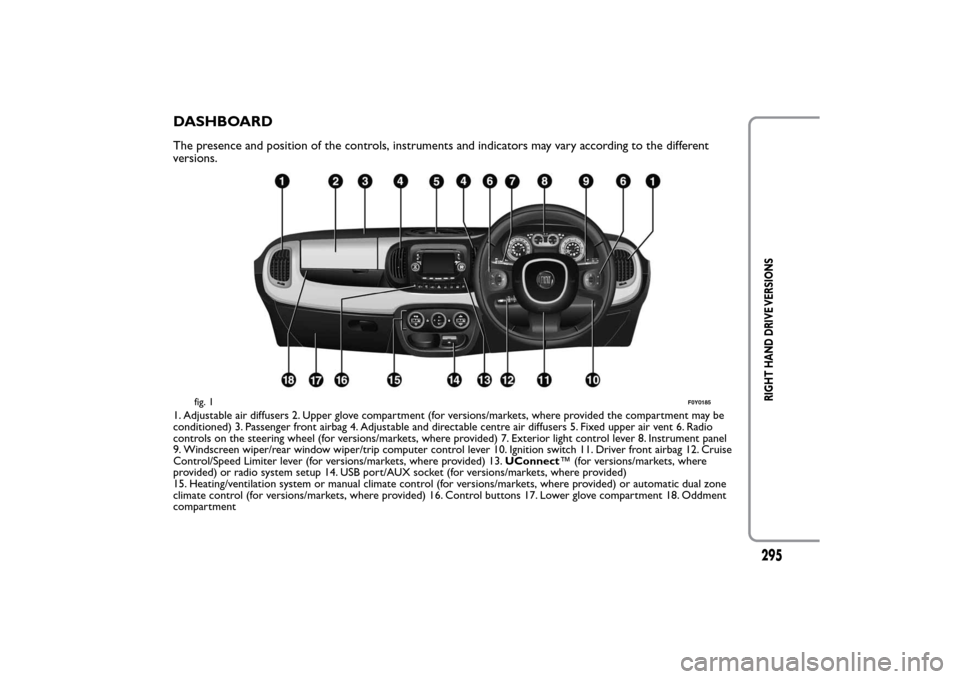
DASHBOARDThe presence and position of the controls, instruments and indicators may vary according to the different
versions.1. Adjustable air diffusers 2. Upper glove compartment (for versions/markets, where provided the compartment may be
conditioned) 3. Passenger front airbag 4. Adjustable and directable centre air diffusers 5. Fixed upper air vent 6. Radio
controls on the steering wheel (for versions/markets, where provided) 7. Exterior light control lever 8. Instrument panel
9. Windscreen wiper/rear window wiper/trip computer control lever 10. Ignition switch 11. Driver front airbag 12. Cruise
Control/Speed Limiter lever (for versions/markets, where provided) 13.UConnect™ (for versions/markets, where
provided) or radio system setup 14. USB port/AUX socket (for versions/markets, where provided)
15. Heating/ventilation system or manual climate control (for versions/markets, where provided) or automatic dual zone
climate control (for versions/markets, where provided) 16. Control buttons 17. Lower glove compartment 18. Oddment
compartment
fig. 1
F0Y0185
295
RIGHT HAND DRIVE VERSIONS
Page 363 of 420
SWITCHING THE SYSTEM ON/OFFRADIO (TUNER) MODE
The system switches on/off when the button/knob
(ON/OFF) is pressed (1-fig. 1).
The electronic volume adjustment control rotates
continuously (360°) in both directions without stop
positions.
Turn the button/knob clockwise to increase the radio
volume or counterclockwise to decrease it.
The system has the following tuners: AM, FM and
DAB (for versions/markets, where provided).RADIO MODE SELECTION
Press the RADIO button (12-fig. 1) on the front
panel to activate the radio mode.
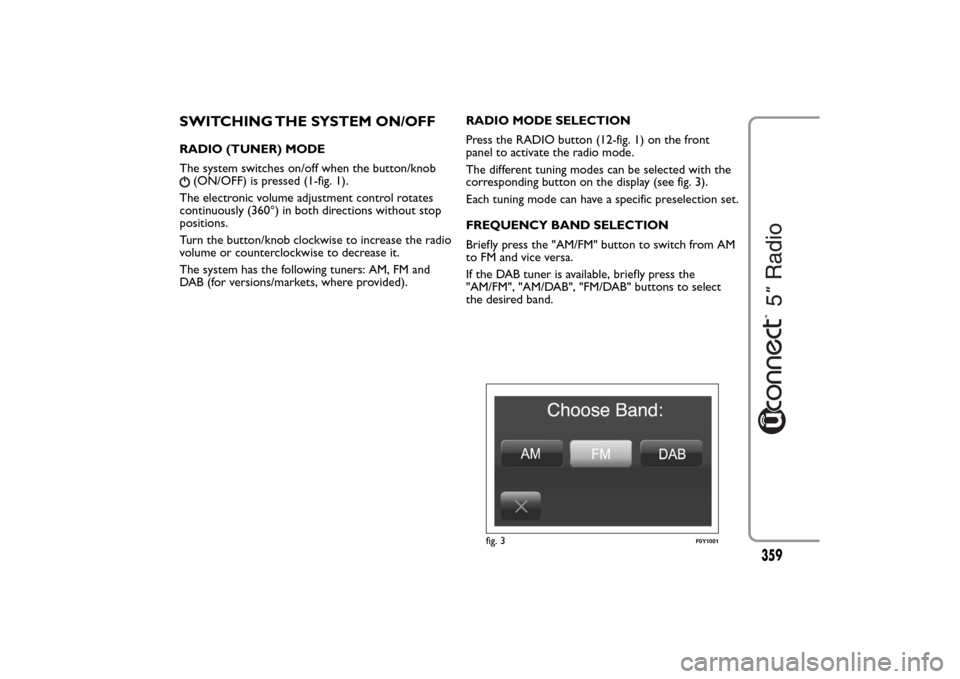
The different tuning modes can be selected with the
corresponding button on the display (see fig. 3).
Each tuning mode can have a specific preselection set.
FREQUENCY BAND SELECTION
Briefly press the "AM/FM" button to switch from AM
to FM and vice versa.
If the DAB tuner is available, briefly press the
"AM/FM", "AM/DAB", "FM/DAB" buttons to select
the desired band.
fig. 3
F0Y1001
359