2014 FIAT 500L LIVING audio
[x] Cancel search: audioPage 351 of 420
TABLE OF CONTENTS
INTRODUCTION ...................................................................349
TIPS, CONTROLS AND GENERAL INFORMATION ...350
TIPS ...........................................................................................350
MULTIMEDIA DEVICES: SUPPORTED AUDIO FILES
AND FORMATS.....................................................................352
NOTES ON TRADEMARKS...............................................352
EXTERNAL AUDIO SOURCES .........................................352
ANTI-THEFT PROTECTION .............................................353
SOFTWARE UPDATES ........................................................354
TECHNICAL SPECIFICATIONS........................................354
QUICK GUIDE .........................................................................355
CONTROLS ON FRONT PANEL ....................................355
FRONT PANEL CONTROL SUMMARY TABLE............356
STEERING WHEEL CONTROLS ........................................357
DESCRIPTION .......................................................................357
STEERING WHEEL CONTROL SUMMARY TABLE ....358
SWITCHING THE SYSTEM ON/OFF ................................359
RADIO (TUNER) MODE ....................................................359
RADIO MODE SELECTION ..............................................359
FREQUENCY BAND SELECTION...................................359
DISPLAYED INFORMATION .............................................360
RADIO STATION SELECTION .........................................360
PREVIOUS/NEXT RADIO STATION SEARCH ............361
PREVIOUS/NEXT RADIO STATION FAST SEARCH ..361
AM/FM RADIO STATION TUNING ................................361
DAB RADIO ...........................................................................362
SETTING THE PRESELECTIONS .....................................363
AUDIO .....................................................................................363
MEDIA MODE ..........................................................................366
TRACK CHANGE (previous/next) ...................................366TRACK FAST FORWARD/REWIND ...............................366
TRACK SELECTION (Browse) ..........................................366
AUDIO SOURCE SELECTION..........................................367
TRACK INFORMATION DISPLAY ...................................367
RANDOM TRACK REPRODUCTION ...........................367
TRACK REPETITION...........................................................367
CD PLAYER ...............................................................................368
LOADING/EJECTING A CD ..............................................368
Bluetooth
® SOURCE.........................................................369
PAIRING ABluetooth
® AUDIO DEVICE .................369
USB/iPod SUPPORT.................................................................370
AUX SUPPORT.........................................................................370
PHONE MODE ........................................................................371
PHONE MODE ACTIVATION ..........................................371
MAIN FUNCTIONS .............................................................371
DISPLAYED INFORMATION .............................................371
PAIRING A MOBILE PHONE.............................................372
STORING NAMES/NUMBERS IN THE MOBILE
PHONE PHONEBOOK ......................................................372
CONNECTION/DISCONNECTION OF A MOBILE
PHONE OR A
Bluetooth
® AUDIO DEVICE ...........373
DELETION OF A MOBILE PHONE OR A
Bluetooth
® AUDIO DEVICE ........................................373
SETTING A MOBILE PHONE OR A
Bluetooth
®
AUDIO DEVICE AS FAVOURITE .....................................374
DELETION OF PHONE DATA
(PHONEBOOK AND RECENT CALLS) ........................374
TRANSMISSION OF PHONE DATA
(PHONEBOOK AND RECENT CALLS) ........................374
347
Page 355 of 420
CD
Dirt, scratches or any distortions on CDs may cause
skipping during playback and poor sound quality.
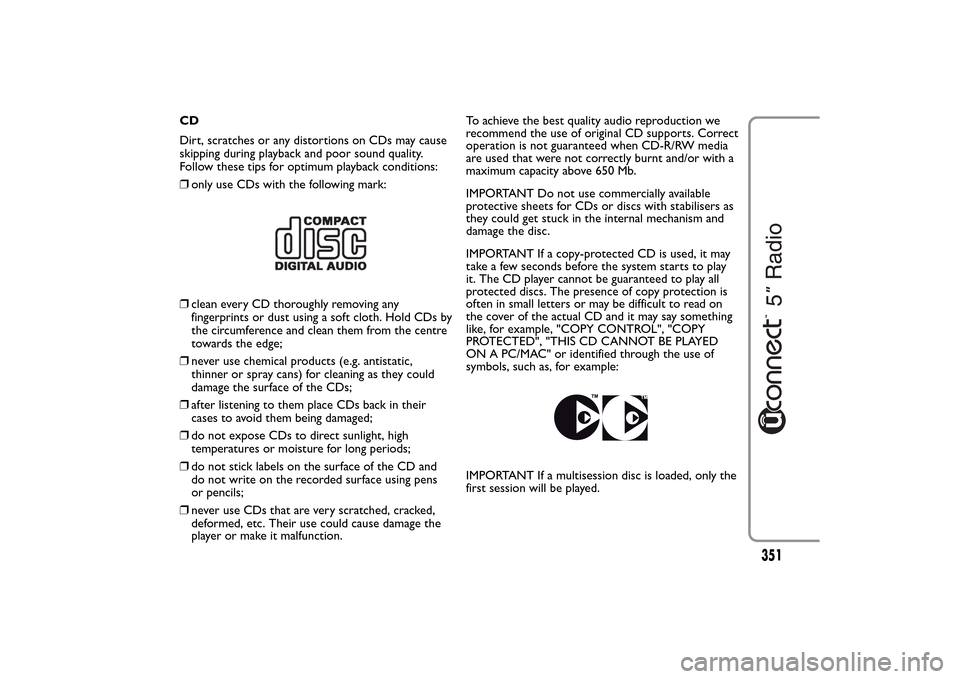
Follow these tips for optimum playback conditions:
❒only use CDs with the following mark:❒clean every CD thoroughly removing any
fingerprints or dust using a soft cloth. Hold CDs by
the circumference and clean them from the centre
towards the edge;
❒never use chemical products (e.g. antistatic,
thinner or spray cans) for cleaning as they could
damage the surface of the CDs;
❒after listening to them place CDs back in their
cases to avoid them being damaged;
❒do not expose CDs to direct sunlight, high
temperatures or moisture for long periods;
❒do not stick labels on the surface of the CD and
do not write on the recorded surface using pens
or pencils;
❒never use CDs that are very scratched, cracked,
deformed, etc. Their use could cause damage the
player or make it malfunction.To achieve the best quality audio reproduction we
recommend the use of original CD supports. Correct
operation is not guaranteed when CD-R/RW media
are used that were not correctly burnt and/or with a
maximum capacity above 650 Mb.
IMPORTANT Do not use commercially available
protective sheets for CDs or discs with stabilisers as
they could get stuck in the internal mechanism and
damage the disc.
IMPORTANT If a copy-protected CD is used, it may
take a few seconds before the system starts to play
it. The CD player cannot be guaranteed to play all
protected discs. The presence of copy protection is
often in small letters or may be difficult to read on
the cover of the actual CD and it may say something
like, for example, "COPY CONTROL", "COPY
PROTECTED", "THIS CD CANNOT BE PLAYED
ON A PC/MAC" or identified through the use of
symbols, such as, for example:
IMPORTANT If a multisession disc is loaded, only the
first session will be played.
351
Page 356 of 420
MULTIMEDIA DEVICES: SUPPORTED
AUDIO FILES AND FORMATS
For CD, USB and iPod sources the system can play
files with the following extensions and formats:
❒.MP3 (32 – 320Kbps);
❒. WAV ;
❒.WMA (5 – 320Kbps) mono and stereo;
❒.AAC (8 – 96KHz) mono and stereo;
❒.M4A (8 – 96KHz) mono and stereo;
❒.M4B (8 – 96KHz) mono and stereo;
❒.MP4 (8 – 96KHz) mono and stereo.
For all sources (CD, AUX, iPod andBluetooth®),
the system can also play the following Playlist
formats:
❒.M3U
❒.WPL
NOTE It makes no difference whether the suffixes
are written in capital or small letters.NOTES ON TRADEMARKS
iPod, iTunes and iPhone are registered trademarks of
Apple Inc.
All other trademarks are the property of their
respective owners.
Apple is not responsible for the operation of this
device and of its conformity with the safety rules and
standards.The DAB/DAB+/DMB Digital Radio function has
been certified according to the specifications of
"ARD" white sticker, for Class A - Audio services.
ARD is a trademark of the Associazione per la
Radiofonia Digitale in Italia.
352
Page 357 of 420
EXTERNAL AUDIO SOURCES
Other electronic devices (e.g. iPod, PDA, etc...) can
be used on the car.
Some of them can however cause electromagnetic
interference. Disconnect these devices if the system
performance worsens.
NOTE The system supports only FAT32-formatted
USB devices. The system does not support devices
with a capacity higher than 64 Gb.
ANTI-THEFT PROTECTION
uconnect™ is equipped with an anti-theft
protection system based on the exchange of
information with the electronic control unit (Body
Computer) on the car.
This guarantees maximum safety and prevents the
secret code from being entered after the power
supply has been disconnected.
If the check has a positive outcome, the system will
start to function, whereas if the comparison codes
are not the same or if the electronic control unit
(Body Computer) is replaced, the system will ask the
user to enter the secret code according to the
procedure described in the paragraph below.Entering the secret code
When the system is switched on, if the code is
requested, the display will show "Please enter Anti-
Theft Code" followed by the video page showing a
keypad to enter the secret code.
The secret code is made up of four digits, from 1 to
9: to insert the first number of the code press the
corresponding key on the display. Enter the other
code digits in the same way.
After entering the fourth figure,uconnect™ begins
operating.
If an incorrect code is entered, the system displays
"Incorrect Code. Please Try Again" to notify the user
of the need to enter the correct code.
After the 3 available attempts to enter the code, the
system displays "Incorrect Code. Radio locked. Please
wait 30 minutes": the waiting time is displayed. Once
the text has disappeared you can start the code
entering procedure again.
353
Page 362 of 420
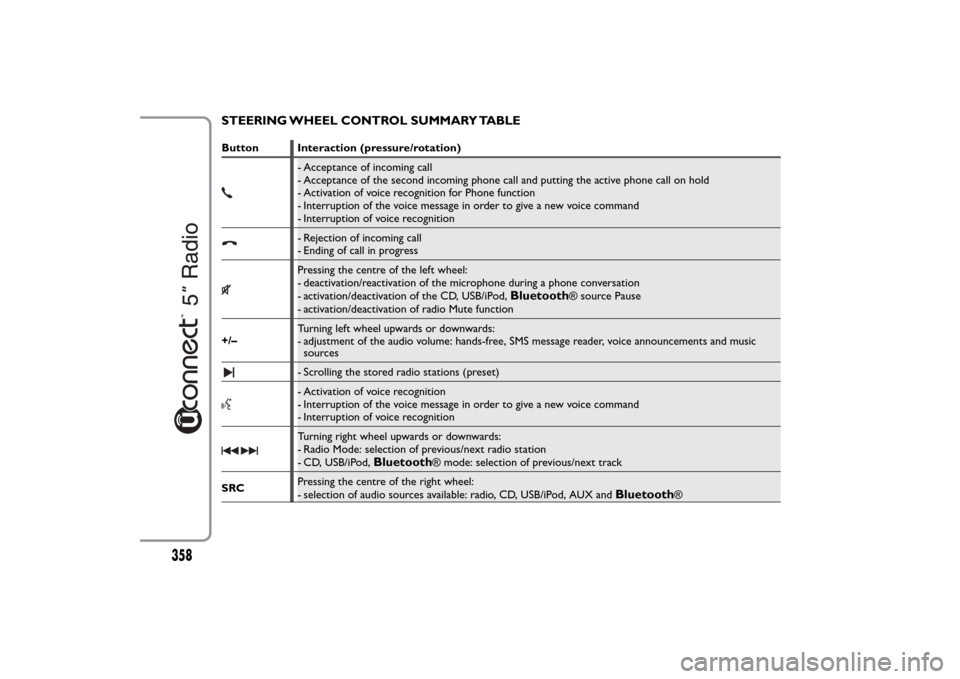
STEERING WHEEL CONTROL SUMMARY TABLEButton Interaction (pressure/rotation)
- Acceptance of incoming call
- Acceptance of the second incoming phone call and putting the active phone call on hold
- Activation of voice recognition for Phone function
- Interruption of the voice message in order to give a new voice command
- Interruption of voice recognition- Rejection of incoming call
- Ending of call in progressPressing the centre of the left wheel:
- deactivation/reactivation of the microphone during a phone conversation
- activation/deactivation of the CD, USB/iPod,
Bluetooth
® source Pause
- activation/deactivation of radio Mute function
+/–Turning left wheel upwards or downwards:
- adjustment of the audio volume: hands-free, SMS message reader, voice announcements and music
sources
- Scrolling the stored radio stations (preset)- Activation of voice recognition
- Interruption of the voice message in order to give a new voice command
- Interruption of voice recognitionTurning right wheel upwards or downwards:
- Radio Mode: selection of previous/next radio station
- CD, USB/iPod,
Bluetooth
® mode: selection of previous/next track
SRCPressing the centre of the right wheel:
- selection of audio sources available: radio, CD, USB/iPod, AUX and
Bluetooth
®
358
Page 364 of 420
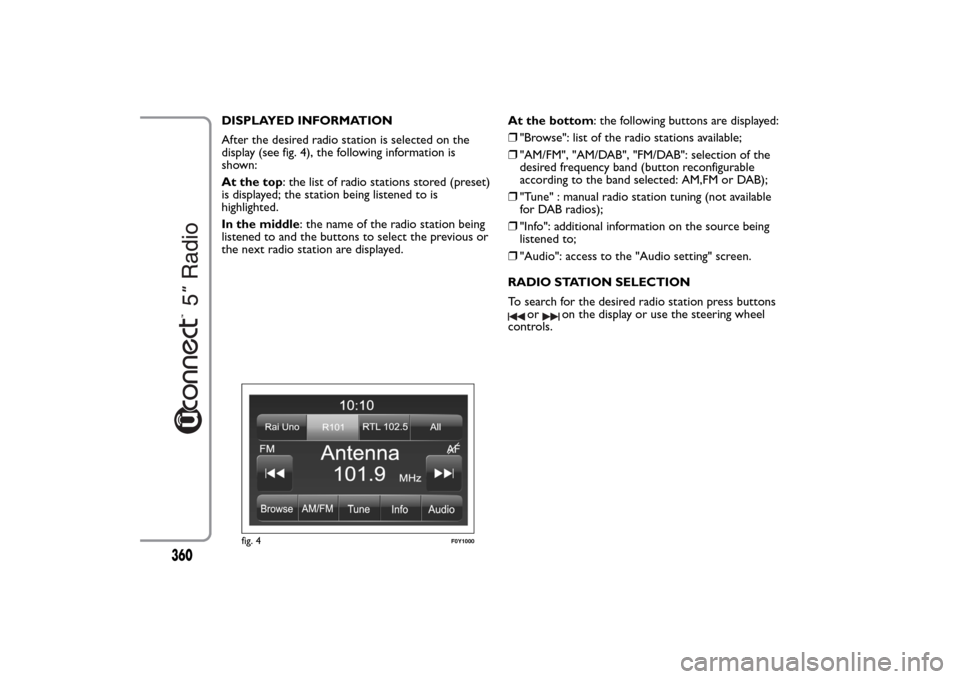
DISPLAYED INFORMATION
After the desired radio station is selected on the
display (see fig. 4), the following information is
shown:
At the top: the list of radio stations stored (preset)
is displayed; the station being listened to is
highlighted.
In the middle: the name of the radio station being
listened to and the buttons to select the previous or
the next radio station are displayed.At the bottom: the following buttons are displayed:
❒"Browse": list of the radio stations available;
❒"AM/FM", "AM/DAB", "FM/DAB": selection of the
desired frequency band (button reconfigurable
according to the band selected: AM,FM or DAB);
❒"Tune" : manual radio station tuning (not available
for DAB radios);
❒"Info": additional information on the source being
listened to;
❒"Audio": access to the "Audio setting" screen.
RADIO STATION SELECTION
To search for the desired radio station press buttons
or
on the display or use the steering wheel
controls.
fig. 4
F0Y1000
360
Page 367 of 420
SETTING THE PRESELECTIONS
Preselections are available in all system modes and
are activated by touching one of the preselection
buttons located at the top of the display.
To store the radio station being listened to, press and
hold down the button corresponding to the desired
preset until a confirmation acoustic signal is heard.
The system can store up to 12 radio station in each
mode: 4 radio stations are displayed at the top.
Press the "All" button on the display to show all the
radio stations stored in the frequency band selected.AUDIO
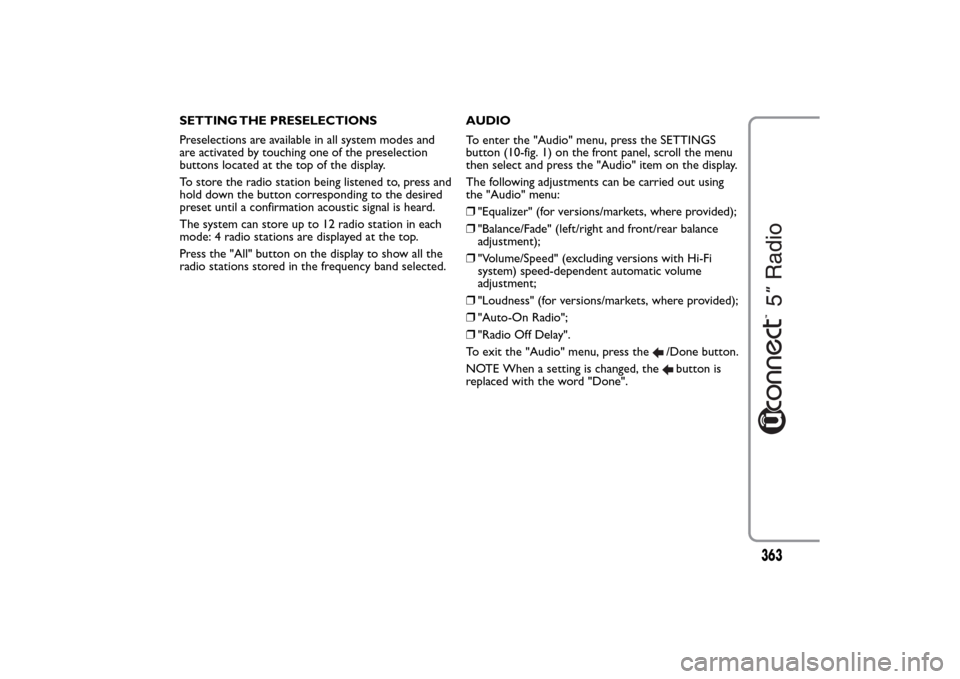
To enter the "Audio" menu, press the SETTINGS
button (10-fig. 1) on the front panel, scroll the menu
then select and press the "Audio" item on the display.
The following adjustments can be carried out using
the "Audio" menu:
❒"Equalizer" (for versions/markets, where provided);
❒"Balance/Fade" (left/right and front/rear balance
adjustment);
❒"Volume/Speed" (excluding versions with Hi-Fi
system) speed-dependent automatic volume
adjustment;
❒"Loudness" (for versions/markets, where provided);
❒"Auto-On Radio";
❒"Radio Off Delay".
To exit the "Audio" menu, press the
/Done button.
NOTE When a setting is changed, thebutton is
replaced with the word "Done".
363
Page 368 of 420
Equalizer
(for versions/markets, where provided)
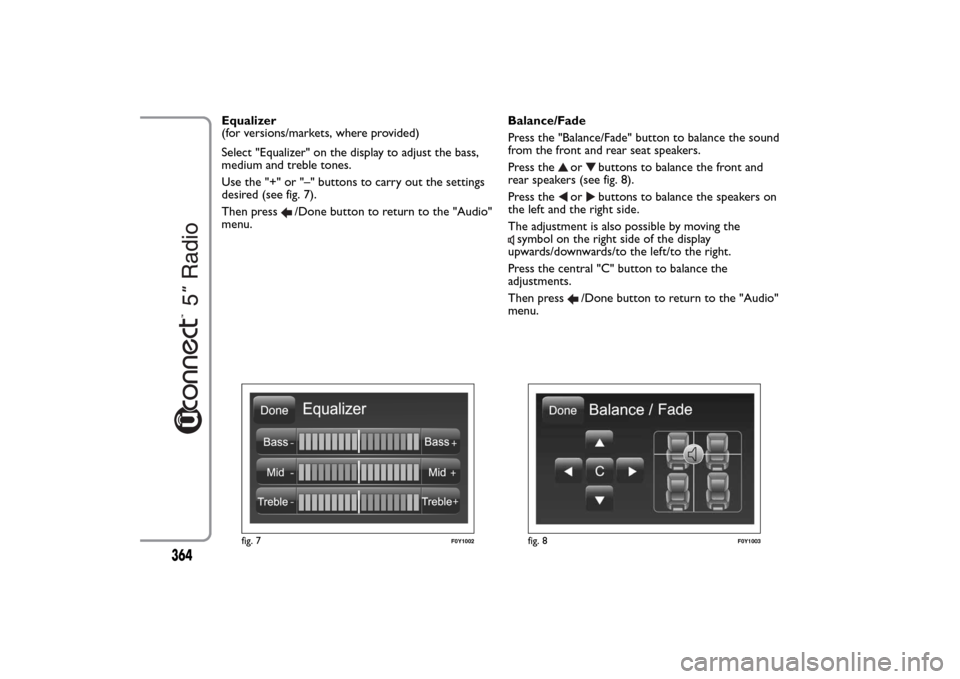
Select "Equalizer" on the display to adjust the bass,
medium and treble tones.
Use the "+" or "–" buttons to carry out the settings
desired (see fig. 7).
Then press
/Done button to return to the "Audio"
menu.Balance/Fade
Press the "Balance/Fade" button to balance the sound
from the front and rear seat speakers.
Press the
or
buttons to balance the front and
rear speakers (see fig. 8).
Press the
or
buttons to balance the speakers on
the left and the right side.
The adjustment is also possible by moving the
symbol on the right side of the display
upwards/downwards/to the left/to the right.
Press the central "C" button to balance the
adjustments.
Then press
/Done button to return to the "Audio"
menu.
fig. 7
F0Y1002
fig. 8
F0Y1003
364