2014 FIAT 500L LIVING language
[x] Cancel search: languagePage 15 of 420

SETUP MENU
The menu comprises a series of options which can
be selected using buttons
and
to access the
different selection and setting operations (Setup)
indicated below. Some options have a submenu.
The menu can be activated by briefly pressing the
button.
The menu comprises the following options:
❒MENU
❒LIGHTING
❒HEADLIGHT ALIGNMENT (for versions/markets,
where provided)
❒SPEED BEEP
❒HEADLIGHT SENSOR (for versions/markets
where provided)
❒CORNERING LIGHTS (for versions/markets,
where available)❒RAIN SENSOR (for versions/markets, where
provided)
❒TRIP B ACTIVATION/DATA
❒SET TIME
❒SET DATE
❒AUTOCLOSE
❒MEASUREMENT UNIT
❒LANGUAGE
❒WARNINGS VOLUME
❒BELT BUZZER
❒SERVICE
❒AIRBAG/PASSENGER BAG (for versions/markets,
where provided)
❒DAYTIME RUNNING LIGHTS (for versions/
markets, where provided)
❒CITY BRAKE C./COLLISION MITIGATION
(for versions/markets, where provided)
❒EXIT MENUfig. 10
F0Y0035
11GETTING TO
KNOW YOUR CARSAFETY
STARTING AND
DRIVING
WARNING LIGHTS
AND MESSAGES
IN AN EMERGENCY
SERVICING AND
MAINTENANCE
TECHNICAL
SPECIFICATIONS
INDEX
Page 21 of 420

Unit of measurement
(Setting the unit of measurement)
With this function it is possible to set the units
through three submenus: "Distances",
"Consumption" and "Temperature".
To set the desired measurement unit, proceed as
follows:
❒press button
briefly. The display will show the
three submenus;
❒press buttonor
to scroll through the
three submenus;
❒once you have selected the submenu to be
changed, press the button
briefly;
❒if the "Distances" submenu is selected and button
is pressed briefly, the display shows "km" or
"mi" depending on the previous setting;
❒press
or
to make your choice;
❒if the "Consumption" submenu is selected and
button
is pressed briefly, the display shows
"km/l", "l/100km" or "mpg" depending on
the previous setting. If the measurement unit set
for "Distances" is "km", the display allows the
measurement unit ("km/l" or "l/100km") for
Consumption to be set. If the measurement unit
set for "Distances" is "mi", the display will show
Consumption in "mpg";
❒pressor
to make your choice;❒if the "Temperature" submenu is selected and
button
is pressed briefly, the display shows "°C"
or "°F" depending on the previous setting;
❒pressor
to make your choice;
Once the required settings are made, briefly press
button
to go back to the submenu screen or hold
the button down to return to the main menu screen
without storing.
Hold down the
button again to return to the
standard screen or to the main menu according to
the menu items where you are in.
Language (Language selection)
Display messages can be set to be shown in different
languages: Italian, German, English, Spanish, French,
Portuguese, Polish, Dutch, Turkish (the list varies
according to the market).
To set the desired language, proceed as follows:
❒press buttonbriefly. The “language” set
previously flashes on the display;
❒press
or
to make your choice;
❒press the
button briefly to return to the menu
screen or hold the button down to return to the
standard screen without storing.
17GETTING TO
KNOW YOUR CARSAFETY
STARTING AND
DRIVING
WARNING LIGHTS
AND MESSAGES
IN AN EMERGENCY
SERVICING AND
MAINTENANCE
TECHNICAL
SPECIFICATIONS
INDEX
Page 201 of 420

Never use a fast batter y-charger to star t
the engine as this could damage the
electronic systems of your car, particularly
the ignition and fuel supply control units.
WARNING
This procedure must be performed by
expert personnel because incorrect
actions could cause electrical discharge of
considerable intensity. Furthermore, battery
fluid is poisonous and corrosive: avoid contact
with skin and eyes. Keep naked flames and
lighted cigarettes away from the battery and do
not cause sparks.
BUMP STARTING
Never jump start the engine by pushing, towing or
coasting downhill.
IMPORTANT Remember that the brake servo and
electrical power steering system are not active until
the engine is started. A much greater effort will
therefore be required to use the brake pedal or turn
the steering wheel.
REPLACING A WHEELGENERAL INSTRUCTIONS
The car is equipped with the "Fix&Go Automatic
Kit": see the paragraph “Fix&Go Automatic Kit” for
how to use this device.
As an alternative to the “Fix&Go Automatic Kit” the
car may be equipped with a space-saver wheel: see
the instructions on the following pages for changing
the wheel.
WARNING
The space-saver wheel (for versions/
markets where provided) is specific to
your car, do not use it on other models, or use
the space-saver wheel of other models on your
car.The space-saver wheel must only be used
in case of emergency. It must only be used
for the distance necessary to reach a service
point and the car speed must not exceed 80
km/h.The space-saver wheel has an orange
sticker that summarises the main cautions for
use and limitations. Never remove or cover
the label.The following information is provided
in four languages on the label: "Important!
For temporary use only! 80 km/h max! Replace
with a standard tyre as soon as possible. Never
cover this indication." Never apply a hub cap on
a space-saver wheel.
197GETTING TO KNOW
YOUR CAR
SAFETY
STARTING AND
DRIVING
WARNING LIGHTS
AND MESSAGESIN AN
EMERGENCYSERVICING AND
MAINTENANCE
TECHNICAL
SPECIFICATIONS
INDEX
Page 321 of 420

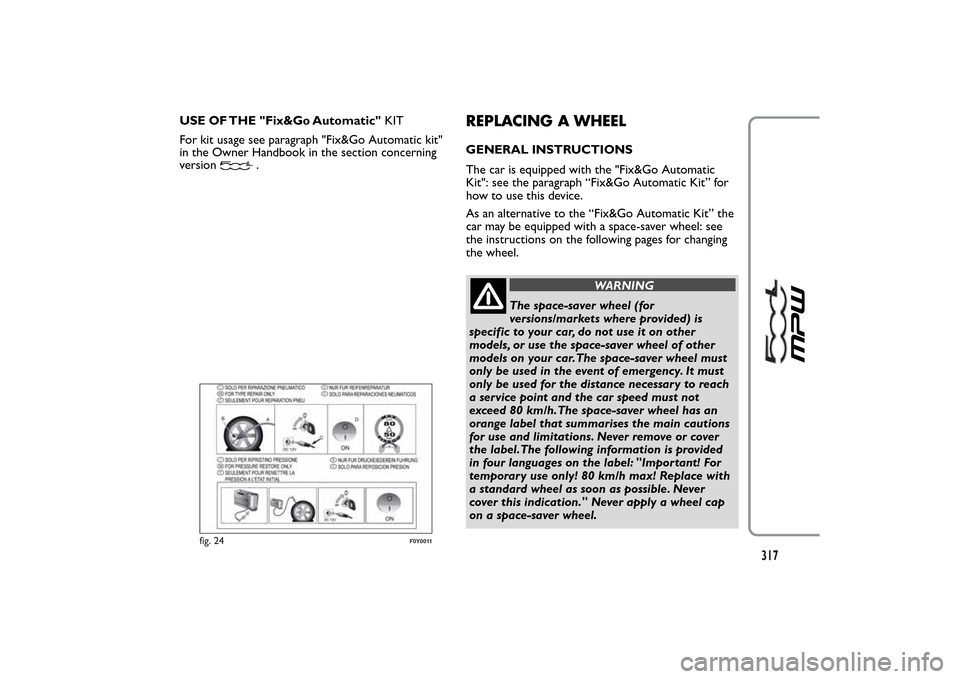
USE OF THE "Fix&Go Automatic"KIT
For kit usage see paragraph "Fix&Go Automatic kit"
in the Owner Handbook in the section concerning
version
.
REPLACING A WHEELGENERAL INSTRUCTIONS
The car is equipped with the "Fix&Go Automatic
Kit": see the paragraph “Fix&Go Automatic Kit” for
how to use this device.
As an alternative to the “Fix&Go Automatic Kit” the
car may be equipped with a space-saver wheel: see
the instructions on the following pages for changing
the wheel.
WARNING
The space-saver wheel (for
versions/markets where provided) is
specific to your car, do not use it on other
models, or use the space-saver wheel of other
models on your car.The space-saver wheel must
only be used in the event of emergency. It must
only be used for the distance necessary to reach
a service point and the car speed must not
exceed 80 km/h.The space-saver wheel has an
orange label that summarises the main cautions
for use and limitations. Never remove or cover
the label.The following information is provided
in four languages on the label: "Important! For
temporary use only! 80 km/h max! Replace with
a standard wheel as soon as possible. Never
cover this indication." Never apply a wheel cap
on a space-saver wheel.
fig. 24
F0Y0011
317
Page 386 of 420

Display
The "Display" menu contains the following options:
❒"Brightness"(this setting is not available when the
display mode is set to "Automatic"): select
"Brightness" and press the "+" or "–" buttons to
adjust the display brightness with the headlights on
or off (the setting not corresponding to the active
headlight condition is greyed out).
❒"Display Mode": press the "Display Mode" button to
set the display brightness according to "Day",
"Night" or "Auto" condition. In "Auto" mode the
display brightness is aligned to that of the
instrument panel.
❒"Language": press the "Language" button to select
one of the languages available.
❒"Units": press the "Units" button to select the
correct unit for "Temperature" ("°C" or "°F"),
"Distance" ("km" or "mi") and "Fuel Consumption".
If the distance is in "km", "km/l" or "l/100km" can
be selected. If the distance is in "mi" (miles), "miles
per gallon" ("mpg") are set automatically.❒"Voice Resp. Length": press the relevant button to
set the detail level of the voice messages supplied
by the system and the suggestions displayed.
❒"Touchscreen Beep": press the relevant button to
activate/deactivate the acoustic signal when the
buttons on the displayed are pressed.
❒"Display Trip B": press the relevant button to
activate/deactivate the displaying of the Trip B on
the instrument panel display.
382