Page 17 of 88

7. If the child restraint has a top tether strap and the seating position has a top
tether anchorage, connect the tether strap to the anchorage and tighten the
tether strap. See below for directions to attach a tether anchor.
8. Test that the child restraint is installed tightly by pulling back and forth on the
child seat at the belt path. It should not move more than 1 inch (25.4 mm) in any
direction.
Installing The Top Tether Strap (With Either Lower Anchors Or Vehicle
Seat Belt):
• When installing a forward-facing child restraint, always secure the top tether
strap, up to the tether anchor weight limit, whether the child restraint is installed
with the lower anchors or the vehicle seat belt.
1. Route the tether strap to provide the most direct path for the strap between the
anchor and the child seat.
2. If your vehicle is equipped with adjustable rear head restraints, raise the head
restraint, and where possible, route the tether strap under the head restraint and
between the two posts. If not possible, lower the head restraint and pass the
tether strap around the outboard side of the head restraint.
3. Attach the tether strap hook of the child restraint to the top tether anchorage
and remove slack in the tether strap according to the child restraint manufactur-
er’s instructions.
WARNING!
• In a collision, an unrestrained child, even a tiny baby, can become a projec-
tile inside the vehicle. The force required to hold even an infant on your lap
could become so great that you could not hold the child, no matter how
strong you are. The child and others could be severely injured or killed. Any
child riding in your vehicle should be in a proper restraint for the child's size.
• Rearward-facing child seats must never be used in the front seat of a vehicle
with a front passenger air bag. An air bag deployment could cause severe
injury or death to infants in this position.
• Only use a rearward-facing child restraint in a vehicle with a rear seat.
• Improper installation of a child restraint to the LATCH anchorages can lead
to failure of an infant or child restraint. The child could be severely injured or
killed. Follow the manufacturer’s directions exactly when installing an infant
or child restraint.
• An incorrectly anchored tether strap could lead to increased head motion
and possible injury to the child. Use only the anchor positions directly behind
the child seat to secure a child restraint top tether strap.
• If your vehicle is equipped with a split rear seat, make sure the tether strap
does not slip into the opening between the seatbacks as you remove slack
in the strap.
GETTING STARTED
15
Page 18 of 88
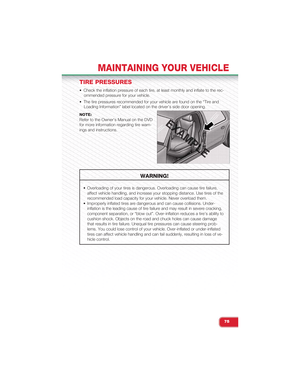
FRONT SEATS
Manual Seat Adjustment
Forward/Rearward
• Lift up on the adjusting bar, located at the front of the seat near the floor, and
release at the desired position. Then, using body pressure, move forward and
backward on the seat to be sure that the seat adjusters have latched.
Recliner
• To recline the seatback, lift up the recline lever, located on the inboard side of the
seat, lean back until the desired position has been reached, and release the lever.
GETTING STARTED
16
Page 19 of 88

Seat Height
• Both front seat heights can be raised or lowered by using a lever, located on the
outboard side of the seat. Pump the lever upward to raise the seat height, or
pump the lever downward to lower the seat height.
EZ Entry Seats
• Pull up on the pull strap, located on
the side of the seatback, to dump the
seatback forward and slide the seat
forward. This allows for easier access
to the rear seat.
• Both front seats have a memory fea-
ture. After using the EZ Entry function,
the seat back and adjuster will re-lock
into the original position the seat was
previously adjusted to.
WARNING!
• Adjusting a seat while the vehicle is moving is dangerous. The sudden move-
ment of the seat could cause you to lose control. The seat belt might not be
properly adjusted, and you could be severely injured or killed. Only adjust a
seat while the vehicle is parked.
• Actuating the recliner handle will allow the seatback to swing forward. Do not
stand or lean in front of the seatback while actuating the handle. The seat-
back may swing forward and strike you, causing injury. To avoid possible
injury, place your hand on the seatback while actuating the recliner handle.
• Do not ride with the seatback reclined so that the seat belt is no longer rest-
ing against your chest. In a collision, you could slide under the seat belt and
be severely injured or killed. Use the recliner only when the vehicle is parked.
GETTING STARTED
17
Page 20 of 88
REAR SEATS
Folding Rear Seatback
• To fold each rear seatback, push
down on the button located on the
upper outboard side of the seat and
fold the seatback flat.
NOTE:Be sure that the front seats are fully uprightand positioned forward. This will allow therear seatback to fold down easily.
TILT STEERING COLUMN
• The tilt lever is located on the steering
column, below the turn signal lever.
• Push down on the lever to unlock the
steering column.
• With one hand firmly on the steering
wheel, move the steering column up
or down as desired.
• Pull upward on the lever to lock the
column firmly in place.
WARNING!
Do not adjust the steering column while driving. Adjusting the steering column
while driving or driving with the steering column unlocked could cause the driver
to lose control of the vehicle. Be sure the steering column is locked before driving
your vehicle. Failure to follow this warning may result in severe injury or death.
GETTING STARTED
18
Page 21 of 88
 in your vehicle.
• Drive moderately during the first 300 miles (500 k")
ENGINE BREAK-IN RECOMMENDATIONS
• A long break-in period is not required for the engine and drivetrain (transmission
and axle) in your vehicle.
• Drive moderately during the first 300 miles (500 km). After the initial 60 miles
(100 km), speeds up to 50 or 55 mph (80 or 90 km/h) are desirable.
• While cruising, brief full-throttle acceleration within the limits of local traffic laws
contributes to a good break-in. Wide-open throttle acceleration in low gear can
be detrimental and should be avoided.
• The engine oil installed in the engine at the factory is a high-quality energy con-
serving type lubricant. Oil changes should be consistent with anticipated climate
conditions under which vehicle operations will occur. For the recommended vis-
cosity and quality grades, refer to “Maintaining Your Vehicle.”
NOTE:
A new engine may consume some oil during its first few thousand miles (kilometers)
of operation. This should be considered a normal part of the break-in and not inter-
preted as an indication of an engine problem or malfunction.
CAUTION!
Never use Non-Detergent Oil or Straight Mineral Oil in the engine or damage may
result.
OPERATING YOUR VEHICLE
19
Page 22 of 88
TURN SIGNAL/LIGHTS/HIGH BEAM LEVER
Turn Signal/Lane Change Assist
• Tap the lever up or down once and the turn signal (right or left) will flash three
times to indicate a lane change and automatically turn off.
Headlights/Parking Lights
• The ignition switch must be in the ON/RUN position for the headlights to operate.
• Rotate the end of the lever to the first detent for parking lights and headlight
operation.
High Beams
• Push the lever forward to activate the high beams.
•A high beam symbol will illuminate in the cluster to indicate the high beams are on.
NOTE:For safe driving, turn off the high beams when oncoming traffic is present to preventheadlight glare and as a courtesy to other motorists.
Flash To Pass
• Pull the lever toward you to activate the high beams. The high beams will remain
on until the lever is released.
OPERATING YOUR VEHICLE
20
Page 23 of 88
Headlight Delay (Follow Me Home)
• Within two minutes of the ignition switch being turned to the OFF/LOCK position
or the ignition key being removed from the ignition, pull the turn signal lever to-
ward the steering wheel.
• Each movement of the lever toward the steering wheel will increase the illumina-
tion period by 30 seconds, up to a maximum of 210 seconds.
• To deactivate, pull the multifunction lever toward the steering wheel and hold it for
more than two seconds.
NOTE:Activation of Follow Me Home is only enabled once per key cycle and the steps outlinedabove must be repeated each time you want to activate it.
Fog Lights
• Push the FOG LIGHT button, located
on the climate controls once to turn
on the fog lights.
• Push the button a second time to turn
the fog lights off.
• A fog lamp indicator will illuminate in
the instrument cluster to indicate the
fog lamps are on.
OPERATING YOUR VEHICLE
21
Page 24 of 88
WIPER/WASHER LEVER
Front Wipers
Intermittent, Low And High Operation
• Move the lever downward to the first detent for intermittent wiper operation, the
second detent for low wiper operation and to the third detent for high wiper
operation.
Mist
• Move the lever upward and release when a single wipe is desired.
NOTE:The mist feature does not activate the washer pump; no washer fluid will be sprayed onthe windshield. The wash function must be activated to spray the windshield with washerfluid.
Washer Operation
• Pull the lever toward you and hold for as long as spray is desired.
Rear Wiper
Rear Wiper Operation
• Rotate the end of the lever to activate the rear wiper.
Rear Washer Operation
• Push the lever forward and hold for as long as spray is desired.
NOTE:The rear wiper will automatically operate if the front wipers are on and the vehicle isplaced in reverse.
OPERATING YOUR VEHICLE
22


 will flash three
times to indicate a lane change and automatical")

• Within two minutes of the ignition switch being turned to the OFF/LOCK position
or the ignition key being removed from the ignition, pull the turn signal lever to-")
