Page 106 of 590

WARNING!(Continued)
•Always make sure that objects cannot fall into the
driver footwell while the vehicle is moving. Ob-
jects can become trapped under the brake pedal
and accelerator pedal causing a loss of vehicle
control.
• If required, mounting posts must be properly in-
stalled, if not equipped from the factory.
Failure to properly follow floor mat installation or
mounting can cause interference with the brake
pedal and accelerator pedal operation causing loss of
control of the vehicle.
Periodic Safety Checks You Should Make Outside
The Vehicle
Tires
Examine tires for excessive tread wear and uneven wear
patterns. Check for stones, nails, glass, or other objects lodged in the tread or sidewall. Inspect the tread for cuts
and cracks. Inspect sidewalls for cuts, cracks and bulges.
Check the wheel nuts for tightness. Check the tires
(including spare) for proper cold inflation pressure.
Lights
Have someone observe the operation of brake lights and
exterior lights while you work the controls. Check turn
signal and high beam indicator lights on the instrument
panel.
Door Latches
Check for positive closing, latching, and locking.
Fluid Leaks
Check area under vehicle after overnight parking for fuel,
engine coolant, oil, or other fluid leaks. Also, if gasoline
fumes are detected or if fuel, power steering fluid (if
equipped), or brake fluid leaks are suspected, the cause
should be located and corrected immediately.
104 THINGS TO KNOW BEFORE STARTING YOUR VEHICLE
Page 306 of 590

your odometer needs to be repaired or serviced, the
repair technician should leave the odometer reading
the same as it was before the repair or service. If s/he
cannot do so, then the odometer must be set at zero,
and a sticker must be placed in the door jamb stating
what the mileage was before the repair or service. It
is a good idea for you to make a record of the
odometer reading before the repair/service, so that
you can be sure that it is properly reset, or that the
door jamb sticker is accurate if the odometer must be
reset at zero.
• Electronic Vehicle Information Center (EVIC) Dis-
play
The Electronic Vehicle Information Center (EVIC)
features a driver-interactive display that is located in
the instrument cluster. For further information, refer
to “Electronic Vehicle Information Center (EVIC)”. The Shift Lever Indicator is self-contained within the
EVIC displauy. It displays the gear position of the
automatic transmission.
NOTE: •You must apply the brakes before shifting from
PARK.
• The highest available transmission gear is displayed
in the lower right corner of the Electronic Vehicle
Information Center (EVIC) whenever the Electronic
Range Select (ERS) feature is active. Use the +/-
selector on the shift lever to activate ERS. Refer to
“Automatic Transmission” in “Starting And Operat-
ing” for further information.
7. Tire Pressure Monitoring Telltale Light — If Equipped
Each tire, including the spare (if provided),
should be checked monthly when cold and
inflated to the inflation pressure recommended
304 UNDERSTANDING YOUR INSTRUMENT PANEL
Page 307 of 590

by the vehicle manufacturer on the vehicle placard or tire
inflation pressure label. (If your vehicle has tires of a
different size than the size indicated on the vehicle
placard or tire inflation pressure label, you should deter-
mine the proper tire inflation pressure for those tires.)
As an added safety feature, your vehicle has been
equipped with a Tire Pressure Monitoring System
(TPMS) that illuminates a low tire pressure telltale when
one or more of your tires is significantly under-inflated.
Accordingly, when the low tire pressure telltale illumi-
nates, you should stop and check your tires as soon as
possible, and inflate them to the proper pressure. Driving
on a significantly under-inflated tire causes the tire to
overheat and can lead to tire failure. Under-inflation also
reduces fuel efficiency and tire tread life, and may affect
the vehicle’s handling and stopping ability.
Please note that the TPMS is not a substitute for proper
tire maintenance, and it is the driver ’s responsibility tomaintain correct tire pressure, even if under-inflation has
not reached the level to trigger illumination of the TPMS
low tire pressure telltale.
Your vehicle has also been equipped with a TPMS
malfunction indicator to indicate when the system is not
operating properly. The TPMS malfunction indicator is
combined with the low tire pressure telltale. When the
system detects a malfunction, the telltale will flash for
approximately one minute and then remain continuously
illuminated. This sequence will continue upon subse-
quent vehicle start-ups as long as the malfunction exists.
When the malfunction indicator is illuminated, the sys-
tem may not be able to detect or signal low tire pressure
as intended. TPMS malfunctions may occur for a variety
of reasons, including the installation of replacement or
alternate tires or wheels on the vehicle that prevent the
TPMS from functioning properly. Always check the
TPMS malfunction telltale after replacing one or more
tires or wheels on your vehicle, to ensure that the
4
UNDERSTANDING YOUR INSTRUMENT PANEL 305
Page 371 of 590

▫Tire Pressure ....................... .423
▫ Tire Inflation Pressures .................424
▫ Tire Pressures For High Speed Operation . . . .426
▫ Radial Ply Tires ..................... .426
▫ Tire Types .......................... .427
▫ Run Flat Tires — If Equipped .............428
▫ Spare Tires — If Equipped ...............429
▫ Tire Spinning ....................... .431
▫ Tread Wear Indicators ..................431
▫ Life Of Tire ........................ .432
▫ Replacement Tires .....................433
� TIRE CHAINS (TRACTION DEVICES) .......434
� TIRE ROTATION RECOMMENDATIONS .....436▫
Tire Rotation ........................ .436
� TIRE PRESSURE MONITOR SYSTEM (TPMS) . .437
▫ Premium System ..................... .440
▫ General Information ...................444
� FUEL REQUIREMENTS ..................445
▫ 6.4L Engine ......................... .445
▫ Reformulated Gasoline .................445
▫ Gasoline/Oxygenate Blends ..............446
▫ E-85 Usage In Non-Flex Fuel Vehicles .......446
▫ MMT In Gasoline .....................447
▫ Materials Added To Fuel ................447
▫ Fuel System Cautions ...................448
▫ Carbon Monoxide Warnings .............449
5
STARTING AND OPERATING 369
Page 417 of 590

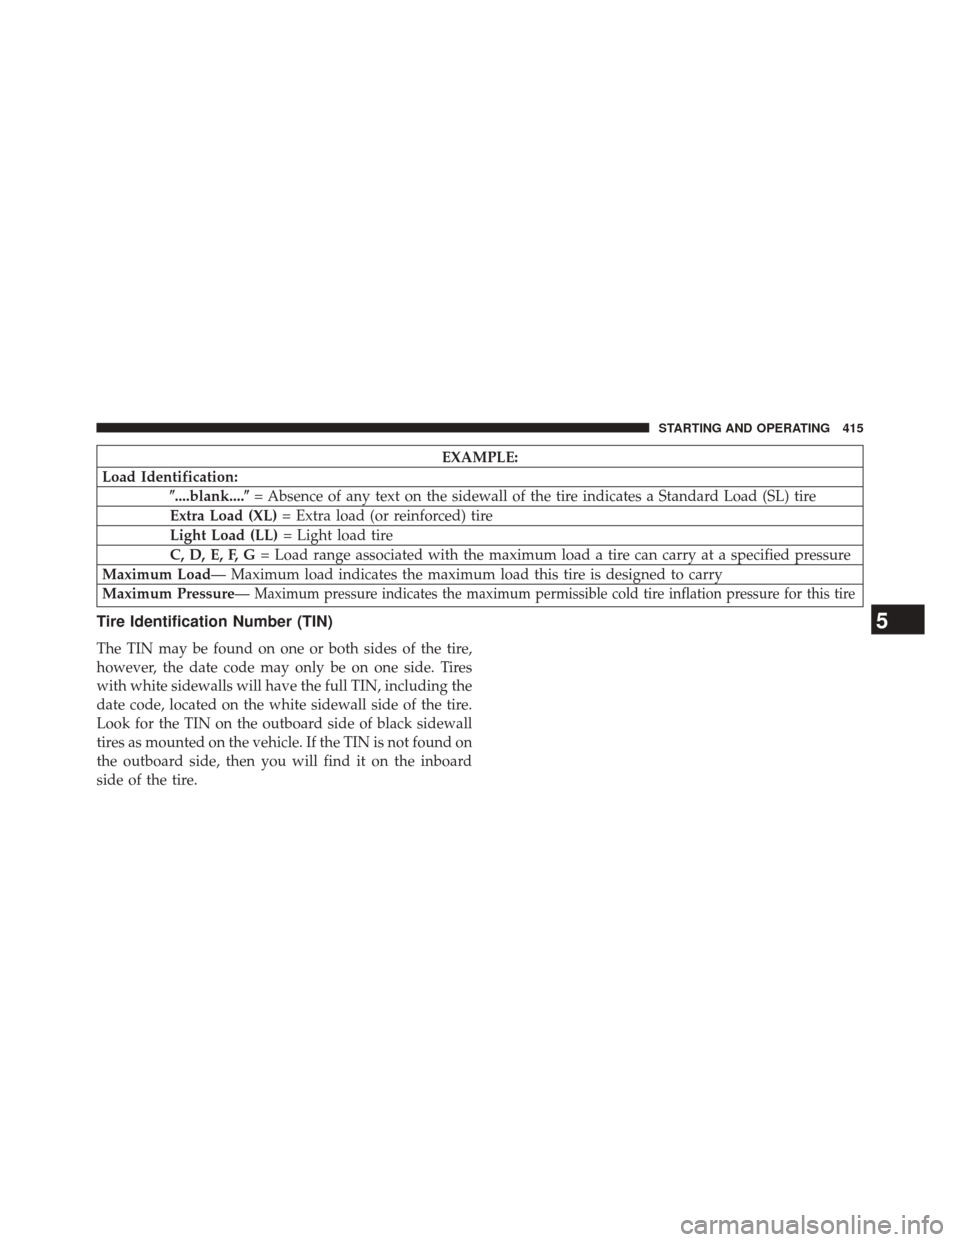
EXAMPLE:
Load Identification: �....blank....� = Absence of any text on the sidewall of the tire indicates a Standard Load (SL) tire
Extra Load (XL) = Extra load (or reinforced) tire
Light Load (LL) = Light load tire
C, D, E, F, G = Load range associated with the maximum load a tire can carry at a specified pressure
Maximum Load— Maximum load indicates the maximum load this tire is designed to carry
Maximum Pressure—
Maximum pressure indicates the maximum permissible cold tire inflation pressure for this tire
Tire Identification Number (TIN)
The TIN may be found on one or both sides of the tire,
however, the date code may only be on one side. Tires
with white sidewalls will have the full TIN, including the
date code, located on the white sidewall side of the tire.
Look for the TIN on the outboard side of black sidewall
tires as mounted on the vehicle. If the TIN is not found on
the outboard side, then you will find it on the inboard
side of the tire.
5
STARTING AND OPERATING 415
Page 419 of 590

Tire Terminology And Definitions
TermDefinition
B-Pillar The vehicle B-Pillar is the structural member of the body located
behind the front door.
Cold Tire Inflation Pressure Cold tire inflation pressure is defined as the tire pressure after
the vehicle has not been driven for at least 3 hours, or driven less
than 1 mile (1.6 km) after sitting for a three hour period. Inflation
pressure is measured in units of PSI (pounds per square inch) or
kPa (kilopascals).
Maximum Inflation Pressure The maximum inflation pressure is the maximum permissible
cold tire inflation pressure for this tire. The maximum inflation
pressure is molded into the sidewall.
Recommended Cold Tire Inflation PressureVehicle manufacturer’s recommended cold tire inflation pressure
as shown on the tire placard.
Tire Placard A paper label permanently attached to the vehicle describing the
vehicle’s loading capacity, the original equipment tire sizes and
the recommended cold tire inflation pressures.
5
STARTING AND OPERATING 417
Page 420 of 590
Tire Loading And Tire Pressure
Tire And Loading Information Placard Location
NOTE:The proper cold tire inflation pressure is listed on
the driver ’s side B-Pillar or the rear edge of the driver’s
side door.
B-Pillar Location For Tire And Loading Information
Placard
418 STARTING AND OPERATING
Page 421 of 590
Tire And Loading Information PlacardThis placard tells you important information about the:
1. Number of people that can be carried in the vehicle.
2. Total weight your vehicle can carry.
3. Tire size designed for your vehicle.
4. Cold tire inflation pressures for the front, rear, andspare tires.
Tire And Loading Information Placard
5
STARTING AND OPERATING 419