Page 66 of 234
65
Entering a Destination
Navigation
•Place Name : Sets a destination by entering a place name. 2Place Name P. 73
• Place Category : Sets a destination by se lecting a place/landmark.
2Place Category P. 76
• Place Phone No. : Sets a destination by entering the phone number of a place/
landmark.
2 Place Phone Number P. 80
• ZAGAT : Sets a destination (restaurant) by using ZAGAT® SURVEY Rating
information.
2 ZAGAT P. 80
• Coordinate : Sets a destination by entering latitude and longitude.
2Coordinate P. 83
• Intersection : Sets a destination (intersection) by entering two streets.
2Intersection P. 84
• Map Input : Sets a destination by scrolling through the map.
2Map Input P. 85
• Go Home 1 or 2 : Sets your home address as a destination.
2Going Home P. 12
Page 81 of 234
80
Entering a DestinationPlace Phone Number
Navigation
Place Phone Number
HDEST/ROUTE button Dest. MENU 2 Place Phone No.
Select a destination by phone number. On ly phone numbers in the database are
recognized.
1.Enter the area code and phone
number. Move r to select OK.
2. Set the route to your destination.
2 Calculating the Route P. 87
ZAGAT
HDEST/ROUTE button Dest. MENU 2 ZAGAT
Find a restaurant by ZAGAT® SURVEY Rating information.
1.Rotate i to select an item. Press
u .
1Place Phone Number
All 10 digits must be entered.
Phone numbers of private residences entered in
your address book are not stored in the database
and thus cannot be used to search for a
destination.
A list is displayed if there are multiple locations in
the database with th e same phone number.
Rotate i to select a place from the list. Press
u.
Page 88 of 234
87
Navigation
Calculating the Route
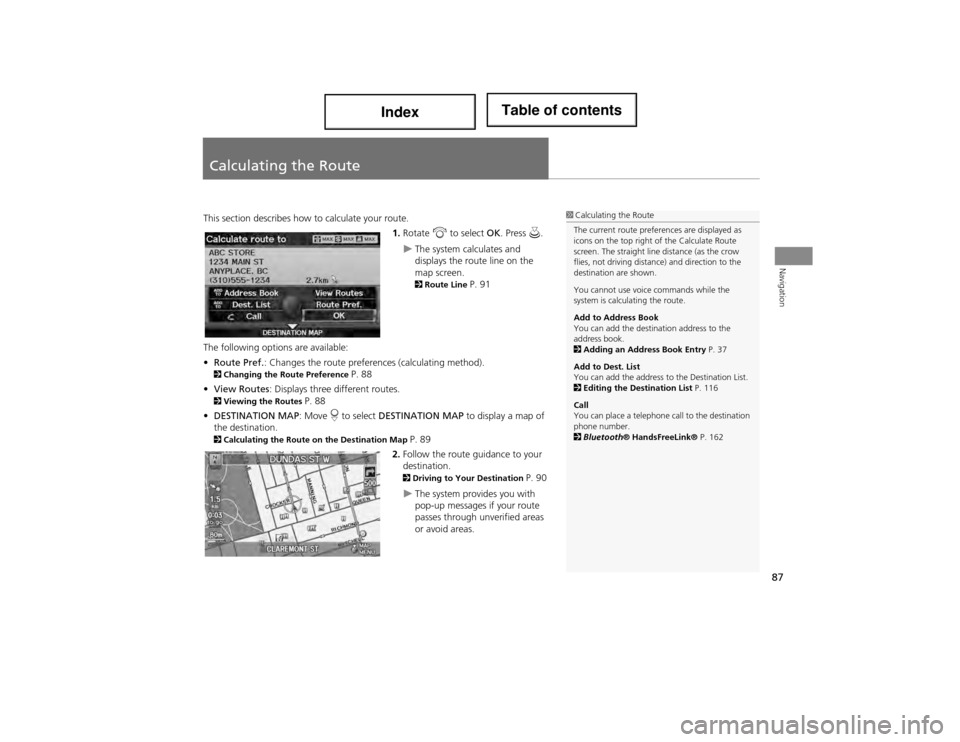
This section describes how to calculate your route.1.Rotate i to select OK. Press u.
The system calculates and
displays the route line on the
map screen.
2Route Line P. 91
The following options are available:
• Route Pref. : Changes the route prefer ences (calculating method).
2Changing the R oute Preference P. 88
• View Routes : Displays three different routes.
2Viewing the Routes P. 88
• DESTINATION MAP : Move r to select DESTINATION MAP to display a map of
the destination.
2 Calculating the Route on the Destination Map P. 89
2. Follow the route guidance to your
destination.
2 Driving to Your Destination P. 90
The system provides you with
pop-up messages if your route
passes through unverified areas
or avoid areas.
1Calculating the Route
The current route preferences are displayed as
icons on the top right of the Calculate Route
screen. The straight line distance (as the crow
flies, not driving distance) and direction to the
destination are shown.
You cannot use voice commands while the
system is calculating the route.
Add to Address Book
You can add the destination address to the
address book.
2 Adding an Address Book Entry P. 37
Add to Dest. List
You can add the address to the Destination List.
2 Editing the Destination List P. 116
Call
You can place a telephone call to the destination
phone number.
2 Bluetooth ® HandsFreeLink® P. 162
Page 107 of 234
106
Map MenuMap Information
Navigation
HENTER button (on map) Map Information Current Location
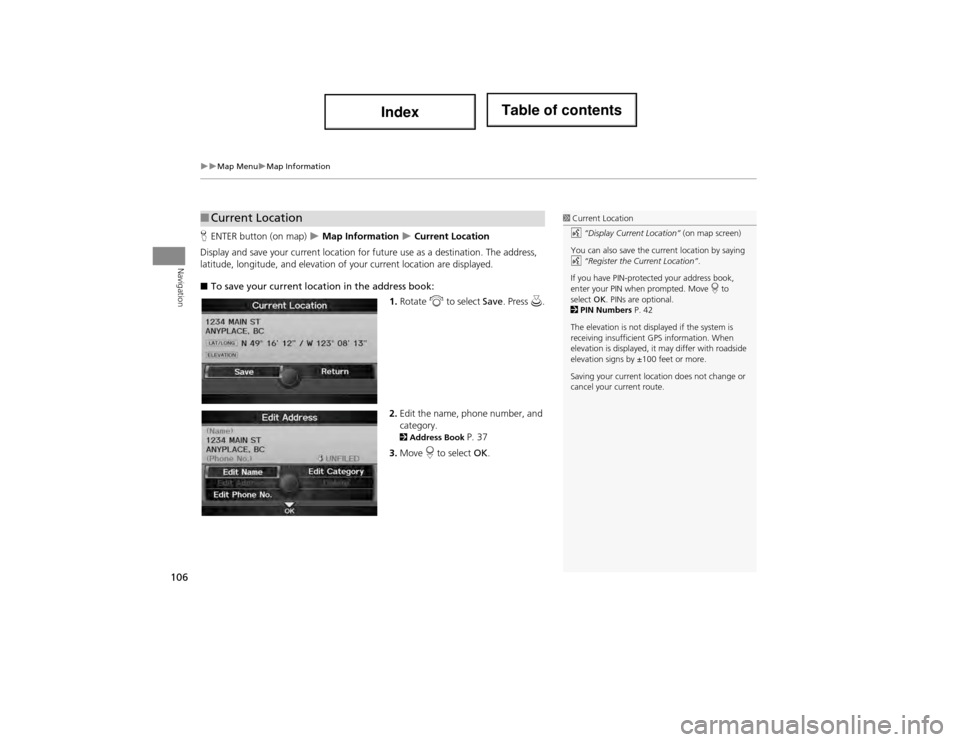
Display and save your current location for future use as a destination. The address,
latitude, longitude, and elevation of your current location are displayed.
■ To save your current location in the address book:
1.Rotate i to select Save. Press u .
2. Edit the name, phone number, and
category.
2 Address Book P. 37
3. Move r to select OK.
■Current Location1 Current Location
d “Display Current Location” (on map screen)
You can also save the current location by saying
d “Register the Current Location” .
If you have PIN-protected your address book,
enter your PIN when prompted. Move r to
select OK. PINs are optional.
2 PIN Numbers P. 42
The elevation is not displayed if the system is
receiving insufficient GPS information. When
elevation is displayed, it may differ with roadside
elevation signs by ±100 feet or more.
Saving your current locati on does not change or
cancel your current route.
Page 122 of 234
121
Navigation
Resuming Your Trip
Stop your vehicle en route (e.g., to rest, stop for gas, etc.), and then continue on
your route.
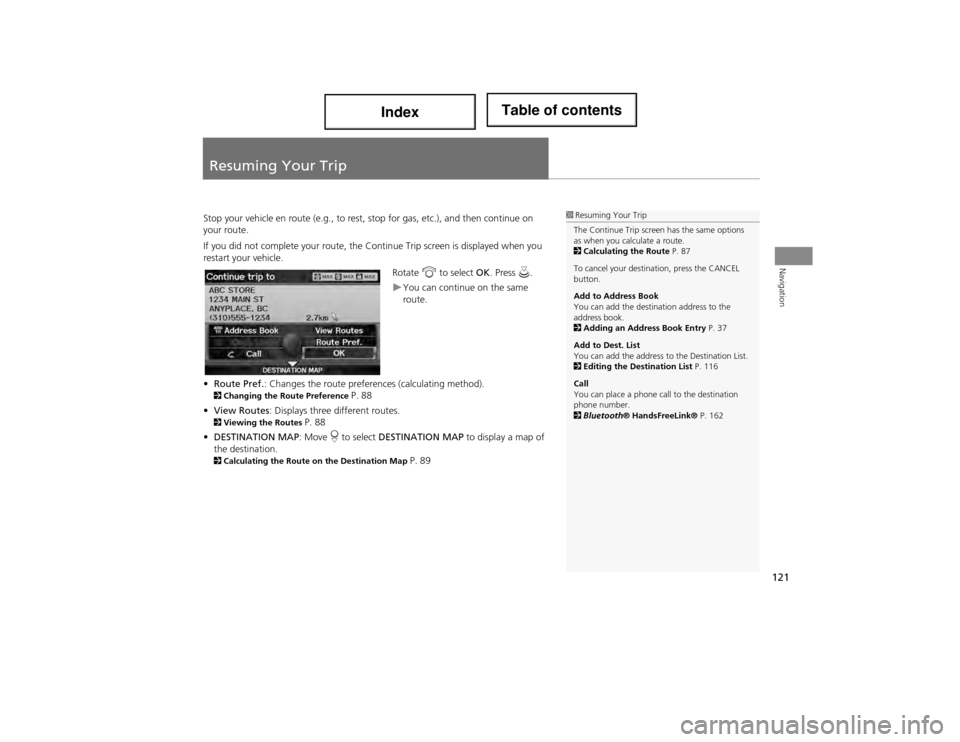
If you did not complete your route, the C ontinue Trip screen is displayed when you
restart your vehicle.
Rotate i to select OK. Press u.
You can continue on the same
route.
• Route Pref. : Changes the route prefer ences (calculating method).
2Changing the R oute Preference P. 88
• View Routes : Displays three different routes.
2Viewing the Routes P. 88
• DESTINATION MAP : Move r to select DESTINATION MAP to display a map of
the destination.
2 Calculating the Route on the Destination Map P. 89
1Resuming Your Trip
The Continue Trip screen has the same options
as when you calculate a route.
2 Calculating the Route P. 87
To cancel your destination, press the CANCEL
button.
Add to Address Book
You can add the destination address to the
address book.
2 Adding an Address Book Entry P. 37
Add to Dest. List
You can add the address to the Destination List.
2 Editing the Destination List P. 116
Call
You can place a phone call to the destination
phone number.
2 Bluetooth ® HandsFreeLink® P. 162
Page 148 of 234
147
Audio
Playing an iPod®
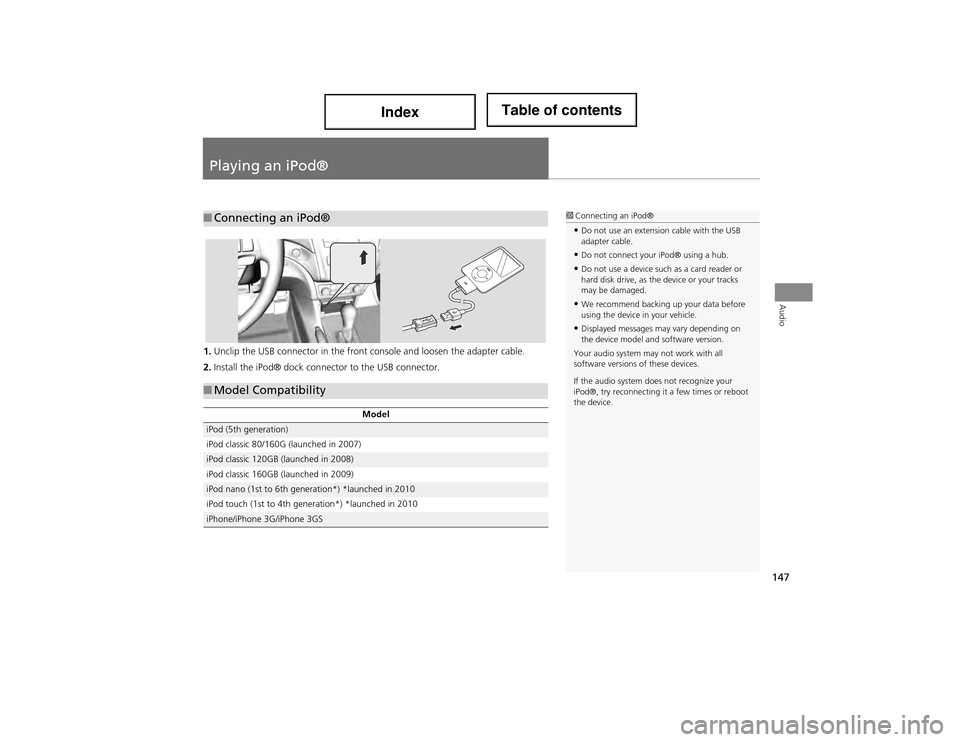
1.Unclip the USB connector in the front console and loosen the adapter cable.
2. Install the iPod® dock connector to the USB connector.
■Connecting an iPod®1 Connecting an iPod®
•Do not use an extension cable with the USB
adapter cable.
•Do not connect your iPod® using a hub.
•Do not use a device such as a card reader or
hard disk drive, as the device or your tracks
may be damaged.
•We recommend backing up your data before
using the device in your vehicle.
•Displayed messages may vary depending on
the device model and software version.
Your audio system may not work with all
software versions of these devices.
If the audio system does not recognize your
iPod®, try reconnecting it a few times or reboot
the device.
■ Model Compatibility
Model
iPod (5th generation)
iPod classic 80/160G (launched in 2007)
iPod classic 120GB (launched in 2008)
iPod classic 160GB (launched in 2009)
iPod nano (1st to 6th generation*) *launched in 2010
iPod touch (1st to 4th generation*) *launched in 2010
iPhone/iPhone 3G/iPhone 3GS
Page 152 of 234
151
Audio
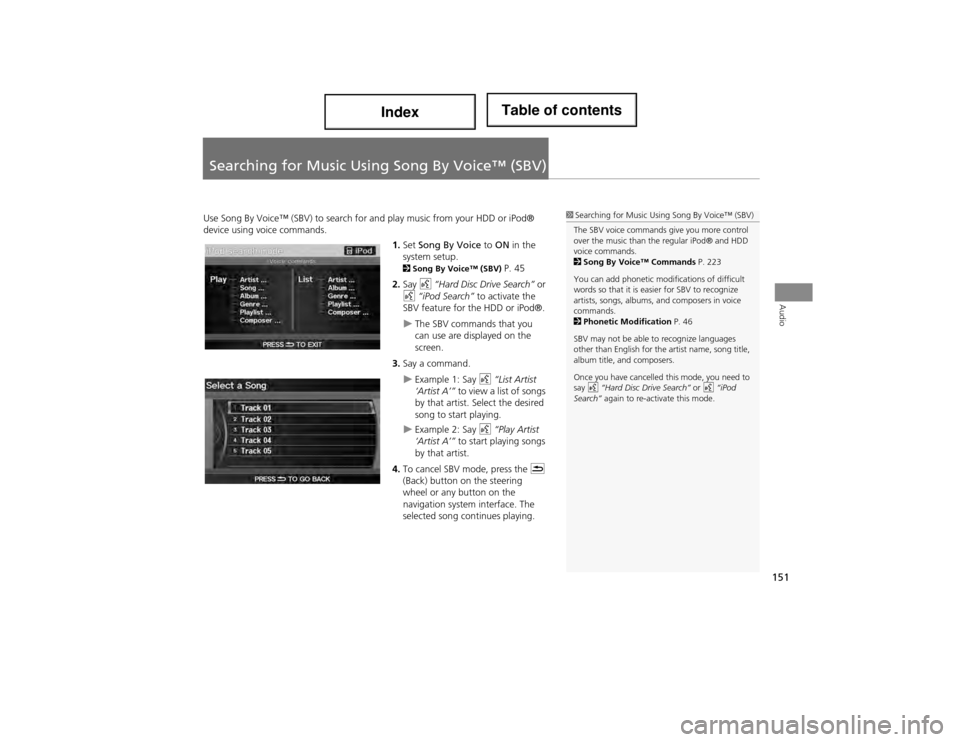
Searching for Music Using Song By Voice™ (SBV)
Use Song By Voice™ (SBV) to search fo r and play music from your HDD or iPod®
device using voice commands.
1.Set Song By Voice to ON in the
system setup.
2 Song By Voice™ (SBV) P. 45
2. Say d “Hard Disc Drive Search” or
d “iPod Search” to activate the
SBV feature for the HDD or iPod®.
The SBV commands that you
can use are displayed on the
screen.
3. Say a command.
Example 1: Say d “List Artist
‘Artist A’” to view a list of songs
by that artist. Select the desired
song to start playing.
Example 2: Say d “Play Artist
‘Artist A’” to start playing songs
by that artist.
4. To cancel SBV mode, press the K
(Back) button on the steering
wheel or any button on the
navigation system interface. The
selected song continues playing.
1 Searching for Music Using Song By Voice™ (SBV)
The SBV voice commands give you more control
over the music than the regular iPod® and HDD
voice commands.
2 Song By Voice™ Commands P. 223
You can add phonetic modifications of difficult
words so that it is easier for SBV to recognize
artists, songs, albums, and composers in voice
commands.
2 Phonetic Modification P. 46
SBV may not be able to recognize languages
other than English for the artist name, song title,
album title, and composers.
Once you have cancelled this mode, you need to
say d “Hard Disc Drive Search” or d “iPod
Search” again to re-activate this mode.
Page 157 of 234
156
Audio
Playing Bluetooth ® Audio
Your audio system allows you to li sten to music tracks stored on your Bluetooth-
compatible phone.
This function is available when th e phone is linked to the vehicle’s Bluetooth®
HandsFreeLink® (HFL) system.
2 Bluetooth ® HandsFreeLink® P. 161
Selecting Bluetooth ® Audio Mode
1.Make sure that your phone is on, paired, and linked to HFL. 2Pairing a Phone P. 164
2. Press the HDD/AUX button to select Bluetooth® Audio mode.
A Bluetooth ® message and icon are displayed on the display and screen.
3. If necessary, follow the cell phone operating instructions for playing audio tracks.
Check the following if the phone is not recognized:
• Another HFL-compatible phone, which is not compatible for Bluetooth ® Audio, is
already connected.
1 Playing Bluetooth ® Audio
d “Display audio screen”
You can control the Bluetooth® Audio using
voice commands.
2 Bluetooth ® Audio Commands P. 223
Not all Bluetooth -enabled phones with
streaming audio capabilit ies are compatible. To
check if your phone is compatible:
•Canada: Visit www.handsfreelink.ca .
•Call HandsFreeLink customer support at
(888) 528-7876.
In some provinces, it may be illegal to perform
some data device functions while driving.
Only one phone can be used with HFL at a time.
When there are more than two paired phones in
the vehicle, the first paired phone the system
finds will be automatically linked.
Pressing the TITLE button switches the centre
display between the Bluetooth® Audio message
and the device name.