Page 43 of 415
41
"Driving assistance" menu
the systems with settings that can be adjusted are detailed in the table below.Button Corresponding function Comments
Speed settings Memorisation of speeds for use with the speed limiter or cruise control.
Under-inflation initialisation Reinitialisation of the under-inflation system.
Blind spot sensors Activation of the function.
1
Monitoring
Page 44 of 415

42
ButtonCorresponding function Comments
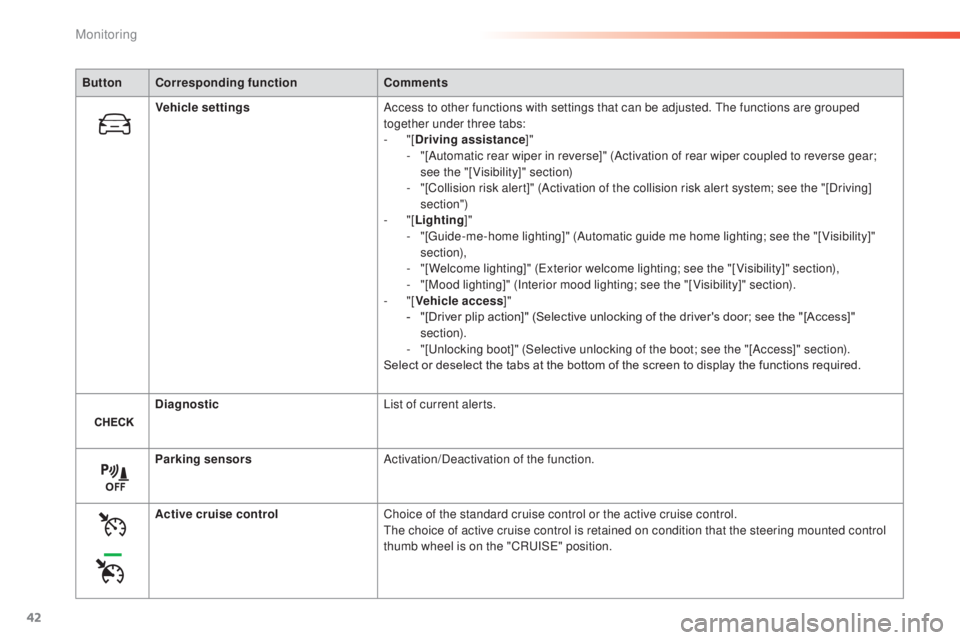
Vehicle settings Access to other functions with settings that can be adjusted.
t
h
e functions are grouped
together under three tabs:
-
"[Driving assistance ]"
-
"
[Automatic rear wiper in reverse]" (Activation of rear wiper coupled to reverse gear;
see the "[Visibility]" section)
-
"
[Collision risk alert]" (Activation of the collision risk alert system; see the "[Driving]
section")
-
"[Lighting ]"
-
"
[
gu
ide-me-home lighting]" (Automatic guide me home lighting; see the "[ Visibility]"
section),
-
"
[Welcome lighting]" (
ex
terior welcome lighting; see the "[ Visibility]" section),
-
"
[Mood lighting]" (Interior mood lighting; see the "[ Visibility]" section).
-
"[Vehicle access ]"
-
"
[Driver plip action]" (Selective unlocking of the driver's door; see the "[Access]"
section).
-
"
[
un
locking boot]" (Selective unlocking of the boot; see the "[Access]" section).
Select or deselect the tabs at the bottom of the screen to display the functions required.
Diagnostic List of current alerts.
Parking sensors Activation/Deactivation of the function.
Active cruise control Choice of the standard cruise control or the active cruise control.
th
e choice of active cruise control is retained on condition that the steering mounted control
thumb wheel is on the "CR
uI
S
e" p
osition.
Monitoring
Page 45 of 415
43
State of adjustable systems
Operating fault
In the event of a fault with one of these
systems, the indicator lamp in the activation/
deactivation button flashes for a few moments.
An alert symbol is displayed to the right of the
button symbol, then, in the case of systems that
are activated by default, the orange indicator
comes on permanently.
ev
ery time the button is pressed, the indicator
flashes for a few moments.ex ample:
Some systems have a dedicated button, to
which is associated an indicator lamp.
Illumination of this lamp indicates whether the
system is activated or deactivated compared to
the default (factory) setting.
gr
een indicator: you have switched on the
corresponding system.
Orange indicator: you have switched off the
corresponding system. ●
F
unction not activated.
●
O
perating fault alert.then
1
Monitoring
Page 46 of 415
44
the functions available through this menu are detailed in the table below.
"Configuration" menu
ButtonCorresponding function Comments
Audio settings Adjustment of volume, balance...
Color schemes Choice of color scheme.
Interactive help Access to the interactive user guide.
Turn off screen
Brightness
Monitoring
Page 47 of 415
45
ButtonCorresponding function Comments
System Settings Choice of units:
-
t
emperature (°Celsius or °Fahrenheit)
-
d
istance and fuel consumption (l/100 km, mpg or km/l).
Time/Date Setting the date and time.
Languages Choice of language used: French,
e
n
glish, Italian, Spanish, g
e
rman, Dutch, Portuguese,
Polish,
t
u
rkish, Russian.
Screen settings Adjustment of the display settings (scrolling of text, animations...).
Calculator
Calendar
1
Monitoring
Page 50 of 415
48
F Press the "MENU" button to gain access
to the main menu , then press the "5" or
" 6 " buttons to go to the Display settings
menu.
F
P
ress the "OK" button to select the menu
required. F
O
nce you have selected a setting, press
the " 7" or " 8" buttons to change its value.
You have access to the following settings:
-
year,
-
month,
-
d ay,
-
h o u r,
-
minutes,
-
1
2 or 24 hour mode.
Screen A
F Press the " 5" or " 6" buttons to switch
respectively to the previous or next setting.
F
P
ress the "OK" button to register the
change and return to the normal display or
press the "
<]" button to cancel.
Monitoring
Page 76 of 415

74
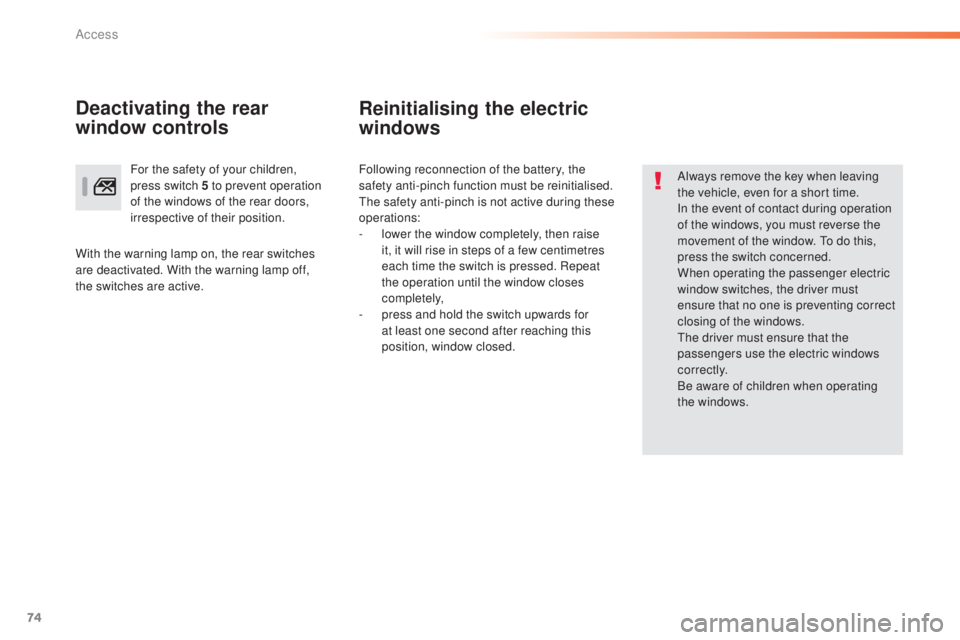
Reinitialising the electric
windows
Always remove the key when leaving
the vehicle, even for a short time.
In the event of contact during operation
of the windows, you must reverse the
movement of the window. t
o d
o this,
press the switch concerned.
When operating the passenger electric
window switches, the driver must
ensure that no one is preventing correct
closing of the windows.
th
e driver must ensure that the
passengers use the electric windows
c o r r e c t l y.
Be aware of children when operating
the windows.
Following reconnection of the battery, the
safety anti-pinch function must be reinitialised.
th
e safety anti-pinch is not active during these
operations:
-
l
ower the window completely, then raise
it, it will rise in steps of a few centimetres
each time the switch is pressed. Repeat
the operation until the window closes
completely,
-
p
ress and hold the switch upwards for
at least one second after reaching this
position, window closed.
For the safety of your children,
press switch 5 to prevent operation
of the windows of the rear doors,
irrespective of their position.
Deactivating the rear
window controls
With the warning lamp on, the rear switches
are deactivated. With the warning lamp off,
the switches are active.
Access
Page 87 of 415

85
Rear seats (hatchback)
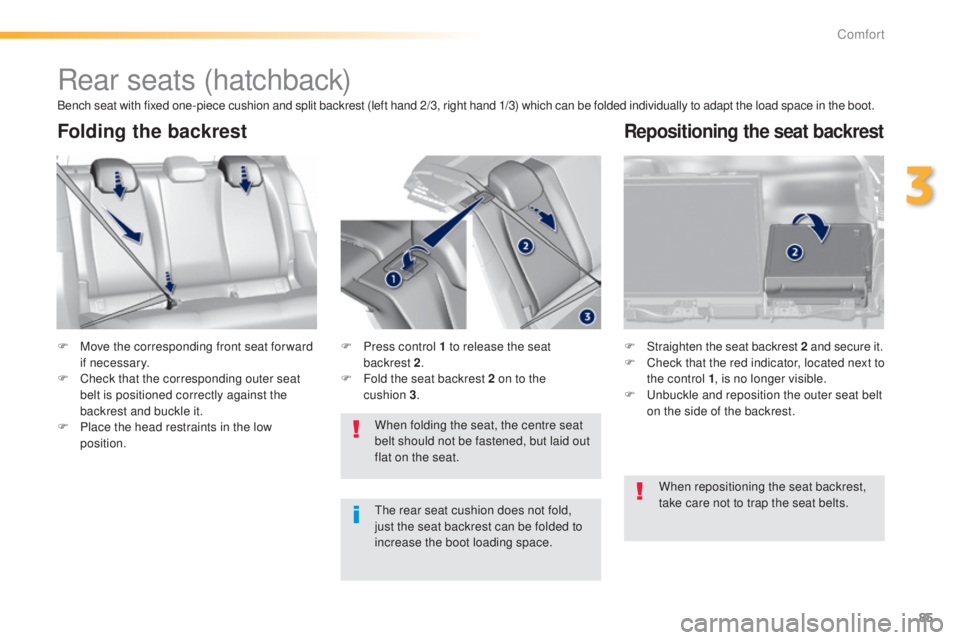
F Move the corresponding front seat for ward if necessary.
F
C
heck that the corresponding outer seat
belt is positioned correctly against the
backrest and buckle it.
F
P
lace the head restraints in the low
position. F
S traighten the seat backrest 2
and secure it.
F C heck that the red indicator, located next to
the control 1 , is no longer visible.
F
u
n
buckle and reposition the outer seat belt
on the side of the backrest.
When folding the seat, the centre seat
belt should not be fastened, but laid out
flat on the seat.
F
P ress control 1 to release the seat
backrest 2.
F
F
old the seat backrest 2 on to the
cushion
3.
Folding the backrestRepositioning the seat backrest
Bench seat with fixed one-piece cushion and split backrest (left hand 2/3, right hand 1/3) which can be folded individually to adapt the load space in the boot.
th
e rear seat cushion does not fold,
just the seat backrest can be folded to
increase the boot loading space. When repositioning the seat backrest,
take care not to trap the seat belts.
3
Comfort