2013 VOLVO V60 instrument panel
[x] Cancel search: instrument panelPage 100 of 422

03 Your driving environment
Wipers and washing
03
98* Option/accessory, for more information, see Introduction.
Windscreen wipers1
Windscreen wipers and windscreen washers.
Rain sensor, on/off
Thumbwheel sensitivity/frequency
Windscreen wipers offMove the stalk switch to position 0 to
switch off the windscreen wipers.
Single sweepRaise the stalk switch and release to
make one sweep.
Intermittent wipingSet the number of sweeps per time
unit with the thumbwheel when inter-
mittent wiping is selected.
Continuous wipingThe wipers sweep at normal speed.
The wipers sweep at high speed.
IMPORTANT
Before activating the wipers during winter -
ensure that the wiper blades are not frozen
in and that any snow or ice on the wind-
screen (and rear window) is scraped away.
IMPORTANT
Use plenty of washer fluid when the wipers
are cleaning the windscreen. The wind-
screen must be wet when the windscreen
wipers are operating.
Service position wiper bladeFor cleaning the windscreen/wiper blades and
replacement of wiper blades see see
page 341 and 361.
Rain sensor*The rain sensor automatically starts the wind-
screen wipers based on how much water it
detects on the windscreen. The sensitivity ofthe rain sensor can be adjusted using the
thumbwheel.
When the rain sensor is activated a light in the
button the rain sensor symbol
is shown
in the right-hand display in the combined
instrument panel.
Activating and setting the sensitivityWhen activating the rain sensor, the car must
be running or the remote control key in position
I or II while the windscreen wiper stalk switch
must be in position 0 or in the position for a
single sweep.
Activate the rain sensor by pressing the button
. The windscreen wipers make one
sweep.
Press the stalk switch up for the wipers to make
an extra sweep.
Turn the thumbwheel upward for higher sensi-
tivity and downward for lower sensitivity. (An
extra sweep is made when the thumbwheel is
turned upward.)
DeactivateDeactivate the rain sensor by pressing the but-
ton
or move the stalk switch down to
another wiper program.
1Replacing the wiper blades see page 341, service position, wiper blade see page 341 and filling washer fluid see page 343.
ProCarManuals.com
Page 101 of 422

03 Your driving environment
Wipers and washing
03
* Option/accessory, for more information, see Introduction.99
The rain sensor is automatically deactivated
when the remote control key is removed from
the ignition switch or five minutes after the
engine has been switched off.
IMPORTANT
The windscreen wipers could start and be
damaged in an automatic car wash. Deac-
tivate the rain sensor while the car is running
or the remote control key is in position I or
II. The symbol in the combined instrument
panel and the lamp in the button go out.
Washing the headlamps and windows
Washing function.
Washing the windscreenMove the stalk switch toward the steering
wheel to start the windscreen and headlamp
washers.
The windscreen wipers will make several more
sweeps and the headlamps are washed once
the stalk switch has been released.
Heated washer nozzles*The washer nozzles are heated automatically
in cold weather to prevent the washer fluid
freezing solid.
High-pressure headlamp washing*High-pressure headlamp washing consumes a
large quantity of washer fluid. To save fluid, the
headlamps are washed automatically at every
fifth windscreen wash cycle.
Reduced washingIf only approx. 1 litre of washer fluid remains in
the reservoir and the message that you should
fill the washer fluid is shown in the combined
instrument panel's display, then the supply of
washer fluid to the headlamps is switched off.
This is in order to prioritise cleaning the wind-
screen and the visibility through it.
Wiping and washing the rear window
Rear window wiper – intermittent wiping
Rear window wiper – continuous speed
Press the stalk switch forward (see the arrow
in the illustration above) to initiate rear window
washing and wiping.
NOTE
The rear window wiper is equipped with
overheating protection which means that
the motor is switched off if it overheats. The
rear window wiper works again after a cool-
ing period (30 seconds or longer, depending
on the heat in the motor and the outside
temperature).
ProCarManuals.com
Page 114 of 422

03 Your driving environment
Alcolock*
03
112* Option/accessory, for more information, see Introduction.
Activating the Bypass function
•Depress and hold the left-hand stalk
switch OK button and the button for haz-
ard warning flashers simultaneously for
approx. 5 seconds - the display first shows
Bypass activated Wait 1 minute and
then Alcoguard Bypass enabled - after
which the engine can be started.
This function can be activated several times.
The error message shown during driving can
only be cleared at a workshop
2.
Activating the Emergency function
•Depress and hold the left-hand stalk
switch OK button and the button for haz-
ard warning flashers simultaneously for
approx. 5 seconds - the display shows
Alcoguard Bypass enabled and the
engine can be started.
This function can be used once, after which a
reset must be made at a workshop
2.
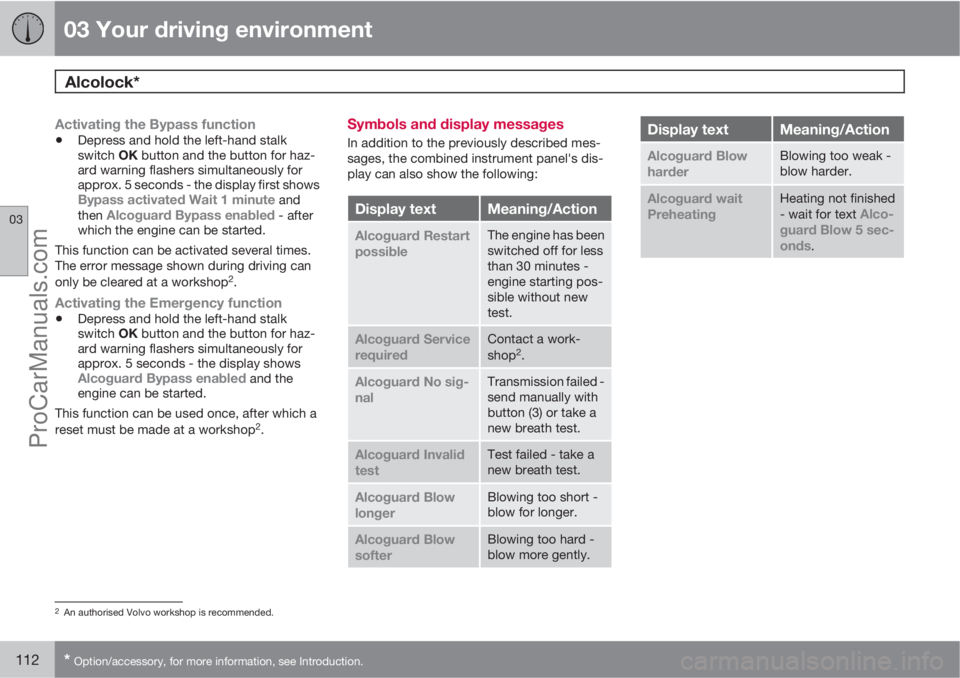
Symbols and display messages
In addition to the previously described mes-
sages, the combined instrument panel's dis-
play can also show the following:
Display textMeaning/Action
Alcoguard Restart
possibleThe engine has been
switched off for less
than 30 minutes -
engine starting pos-
sible without new
test.
Alcoguard Service
requiredContact a work-
shop2.
Alcoguard No sig-
nalTransmission failed -
send manually with
button (3) or take a
new breath test.
Alcoguard Invalid
testTest failed - take a
new breath test.
Alcoguard Blow
longerBlowing too short -
blow for longer.
Alcoguard Blow
softerBlowing too hard -
blow more gently.
Display textMeaning/Action
Alcoguard Blow
harderBlowing too weak -
blow harder.
Alcoguard wait
PreheatingHeating not finished
- wait for text Alco-
guard Blow 5 sec-
onds
.
2An authorised Volvo workshop is recommended.
ProCarManuals.com
Page 123 of 422

03 Your driving environment
Gearboxes
03
121
IMPORTANT
The operating temperature of the gearbox is
checked in order to prevent damage to any
of the drive system's components. In the
event of a risk of overheating a warning
symbol illuminates on the instrument panel
combined with a text message - In which
case, follow the recommendation given.
Manual gearbox
Gearshift pattern 5-speed gearbox.
Gearshift pattern 6-speed gearbox.
The 6-speed box is available in two versions -
reverse gear position differs between them.
Look at the actual gearshift pattern imprinted
on the gear lever.
•Depress the clutch pedal fully during each
gear change.
•Take your foot off the clutch pedal between
gear changes.
WARNING
Always apply the parking brake when park-
ing on a slope - leaving the car in gear is not
sufficient to hold the car in all situation.
Gear indicator1
An essential detail in connection with environ-
mental driving is to drive in the right gear and
change gear in time.
The driver is assisted by an indicator - GSI
(Gear Shift Indicator) - which notifies the driver
when it is most advantageous to engage the
next higher or lower gear in order to obtain the
lowest possible fuel consumption. However,
taking into consideration characteristics such
as performance and vibration-free running, it
may be advantageous to change gear at a
higher engine speed.
Indication is made with an up or down arrow in
the combined instrument panel's right-hand
display.
1Only manual gearbox for the D2 model.
ProCarManuals.com
Page 125 of 422

03 Your driving environment
Gearboxes
03
123
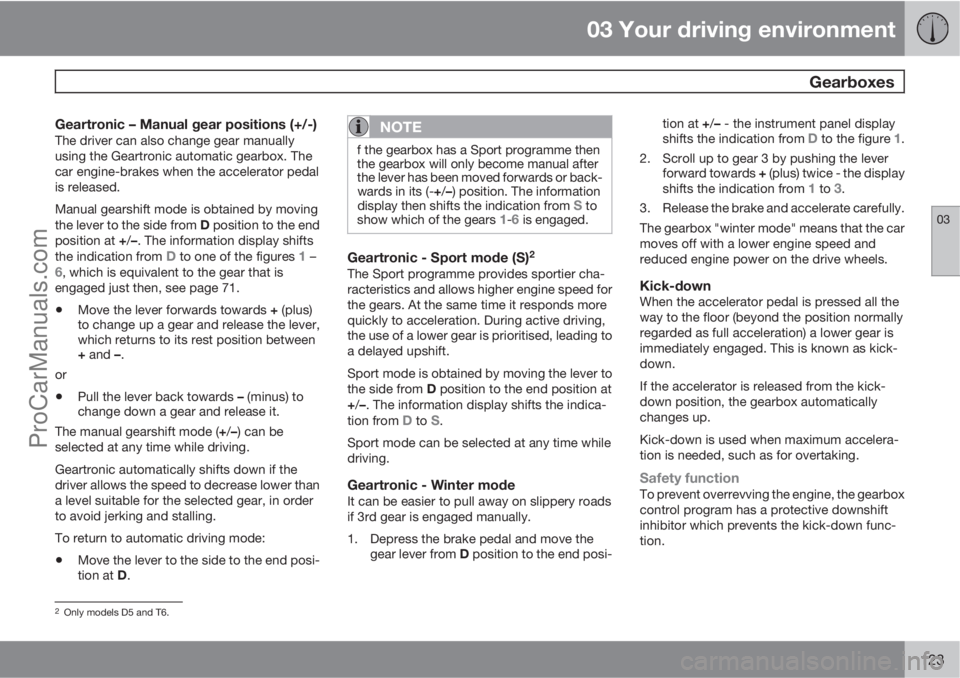
Geartronic – Manual gear positions (+/-)The driver can also change gear manually
using the Geartronic automatic gearbox. The
car engine-brakes when the accelerator pedal
is released.
Manual gearshift mode is obtained by moving
the lever to the side from D position to the end
position at +/–. The information display shifts
the indication from
D to one of the figures 1 –6, which is equivalent to the gear that is
engaged just then, see page 71.
•Move the lever forwards towards + (plus)
to change up a gear and release the lever,
which returns to its rest position between
+ and –.
or
•Pull the lever back towards – (minus) to
change down a gear and release it.
The manual gearshift mode (+/–) can be
selected at any time while driving.
Geartronic automatically shifts down if the
driver allows the speed to decrease lower than
a level suitable for the selected gear, in order
to avoid jerking and stalling.
To return to automatic driving mode:
•Move the lever to the side to the end posi-
tion at D.
NOTE
f the gearbox has a Sport programme then
the gearbox will only become manual after
the lever has been moved forwards or back-
wards in its (-+/–) position. The information
display then shifts the indication from
S to
show which of the gears 1-6 is engaged.
Geartronic - Sport mode (S)2
The Sport programme provides sportier cha-
racteristics and allows higher engine speed for
the gears. At the same time it responds more
quickly to acceleration. During active driving,
the use of a lower gear is prioritised, leading to
a delayed upshift.
Sport mode is obtained by moving the lever to
the side from D position to the end position at
+/–. The information display shifts the indica-
tion from
D to S.
Sport mode can be selected at any time while
driving.
Geartronic - Winter modeIt can be easier to pull away on slippery roads
if 3rd gear is engaged manually.
1. Depress the brake pedal and move the
gear lever from D position to the end posi-tion at +/– - the instrument panel display
shifts the indication from
D to the figure 1.
2. Scroll up to gear 3 by pushing the lever
forward towards + (plus) twice - the display
shifts the indication from
1 to 3.
3. Release the brake and accelerate carefully.
The gearbox "winter mode" means that the car
moves off with a lower engine speed and
reduced engine power on the drive wheels.
Kick-downWhen the accelerator pedal is pressed all the
way to the floor (beyond the position normally
regarded as full acceleration) a lower gear is
immediately engaged. This is known as kick-
down.
If the accelerator is released from the kick-
down position, the gearbox automatically
changes up.
Kick-down is used when maximum accelera-
tion is needed, such as for overtaking.
Safety functionTo prevent overrevving the engine, the gearbox
control program has a protective downshift
inhibitor which prevents the kick-down func-
tion.
2Only models D5 and T6.
ProCarManuals.com
Page 138 of 422

03 Your driving environment
Foot brake
03
136
fied in the Service and Warranty Booklet, see
page 328.
IMPORTANT
The wear on the brake system's compo-
nents must be checked regularly.
Contact a workshop for information about
the procedure or engage a workshop to
carry out the inspection - an authorised
Volvo workshop is recommended.
Symbols in the combined instrument
panel
SymbolSpecification
Constant glow – Check the
brake fluid level. If the level is
low, fill with brake fluid and
check for the cause of the brake
fluid loss.
Constant glow for 2 seconds
when the engine is started –
There was a fault in the brake
system's ABS function when
the engine was last running.
WARNING
If and illuminate at the same
time, there may be a fault in the brake sys-
tem.
If the level in the brake fluid reservoir is nor-
mal at this stage, drive carefully to the near-
est workshop and have the brake system
checked - an authorised Volvo workshop is
recommended.
If the brake fluid is under the MIN level in the
brake fluid reservoir, do not drive further
before topping up the brake fluid.
The reason for the loss of brake fluid must
be investigated.
ProCarManuals.com
Page 139 of 422

03 Your driving environment
Parking brake
03
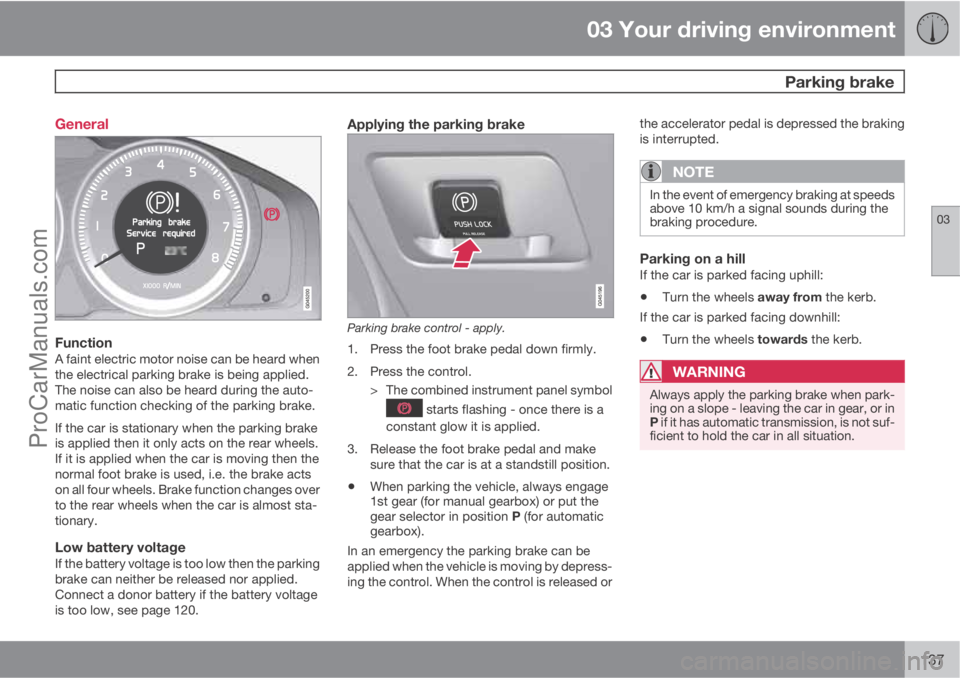
137 General
FunctionA faint electric motor noise can be heard when
the electrical parking brake is being applied.
The noise can also be heard during the auto-
matic function checking of the parking brake.
If the car is stationary when the parking brake
is applied then it only acts on the rear wheels.
If it is applied when the car is moving then the
normal foot brake is used, i.e. the brake acts
on all four wheels. Brake function changes over
to the rear wheels when the car is almost sta-
tionary.
Low battery voltageIf the battery voltage is too low then the parking
brake can neither be released nor applied.
Connect a donor battery if the battery voltage
is too low, see page 120.
Applying the parking brake
Parking brake control - apply.
1. Press the foot brake pedal down firmly.
2. Press the control.
> The combined instrument panel symbol
starts flashing - once there is a
constant glow it is applied.
3. Release the foot brake pedal and make
sure that the car is at a standstill position.
•When parking the vehicle, always engage
1st gear (for manual gearbox) or put the
gear selector in position P (for automatic
gearbox).
In an emergency the parking brake can be
applied when the vehicle is moving by depress-
ing the control. When the control is released orthe accelerator pedal is depressed the braking
is interrupted.
NOTE
In the event of emergency braking at speeds
above 10 km/h a signal sounds during the
braking procedure.
Parking on a hillIf the car is parked facing uphill:
•Turn the wheels away from the kerb.
If the car is parked facing downhill:
•Turn the wheels towards the kerb.
WARNING
Always apply the parking brake when park-
ing on a slope - leaving the car in gear, or in
P if it has automatic transmission, is not suf-
ficient to hold the car in all situation.
ProCarManuals.com
Page 140 of 422

03 Your driving environment
Parking brake
03
138
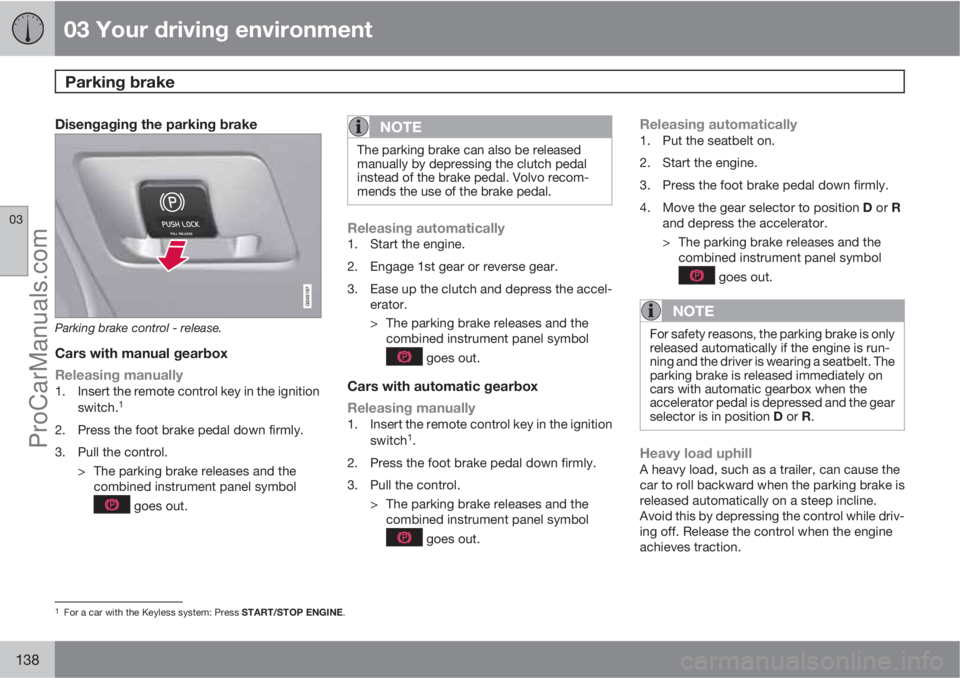
Disengaging the parking brake
Parking brake control - release.
Cars with manual gearbox
Releasing manually
1. Insert the remote control key in the ignition
switch.1
2. Press the foot brake pedal down firmly.
3. Pull the control.
> The parking brake releases and the
combined instrument panel symbol
goes out.
NOTE
The parking brake can also be released
manually by depressing the clutch pedal
instead of the brake pedal. Volvo recom-
mends the use of the brake pedal.
Releasing automatically1. Start the engine.
2. Engage 1st gear or reverse gear.
3. Ease up the clutch and depress the accel-
erator.
> The parking brake releases and the
combined instrument panel symbol
goes out.
Cars with automatic gearbox
Releasing manually
1. Insert the remote control key in the ignition
switch1.
2. Press the foot brake pedal down firmly.
3. Pull the control.
> The parking brake releases and the
combined instrument panel symbol
goes out.
Releasing automatically1. Put the seatbelt on.
2. Start the engine.
3. Press the foot brake pedal down firmly.
4.
Move the gear selector to position D or R
and depress the accelerator.
> The parking brake releases and the
combined instrument panel symbol
goes out.
NOTE
For safety reasons, the parking brake is only
released automatically if the engine is run-
ning and the driver is wearing a seatbelt. The
parking brake is released immediately on
cars with automatic gearbox when the
accelerator pedal is depressed and the gear
selector is in position D or R.
Heavy load uphillA heavy load, such as a trailer, can cause the
car to roll backward when the parking brake is
released automatically on a steep incline.
Avoid this by depressing the control while driv-
ing off. Release the control when the engine
achieves traction.
1For a car with the Keyless system: Press START/STOP ENGINE.
ProCarManuals.com