Page 51 of 328
3
51
1
2
3
4
5
6
7
8
9
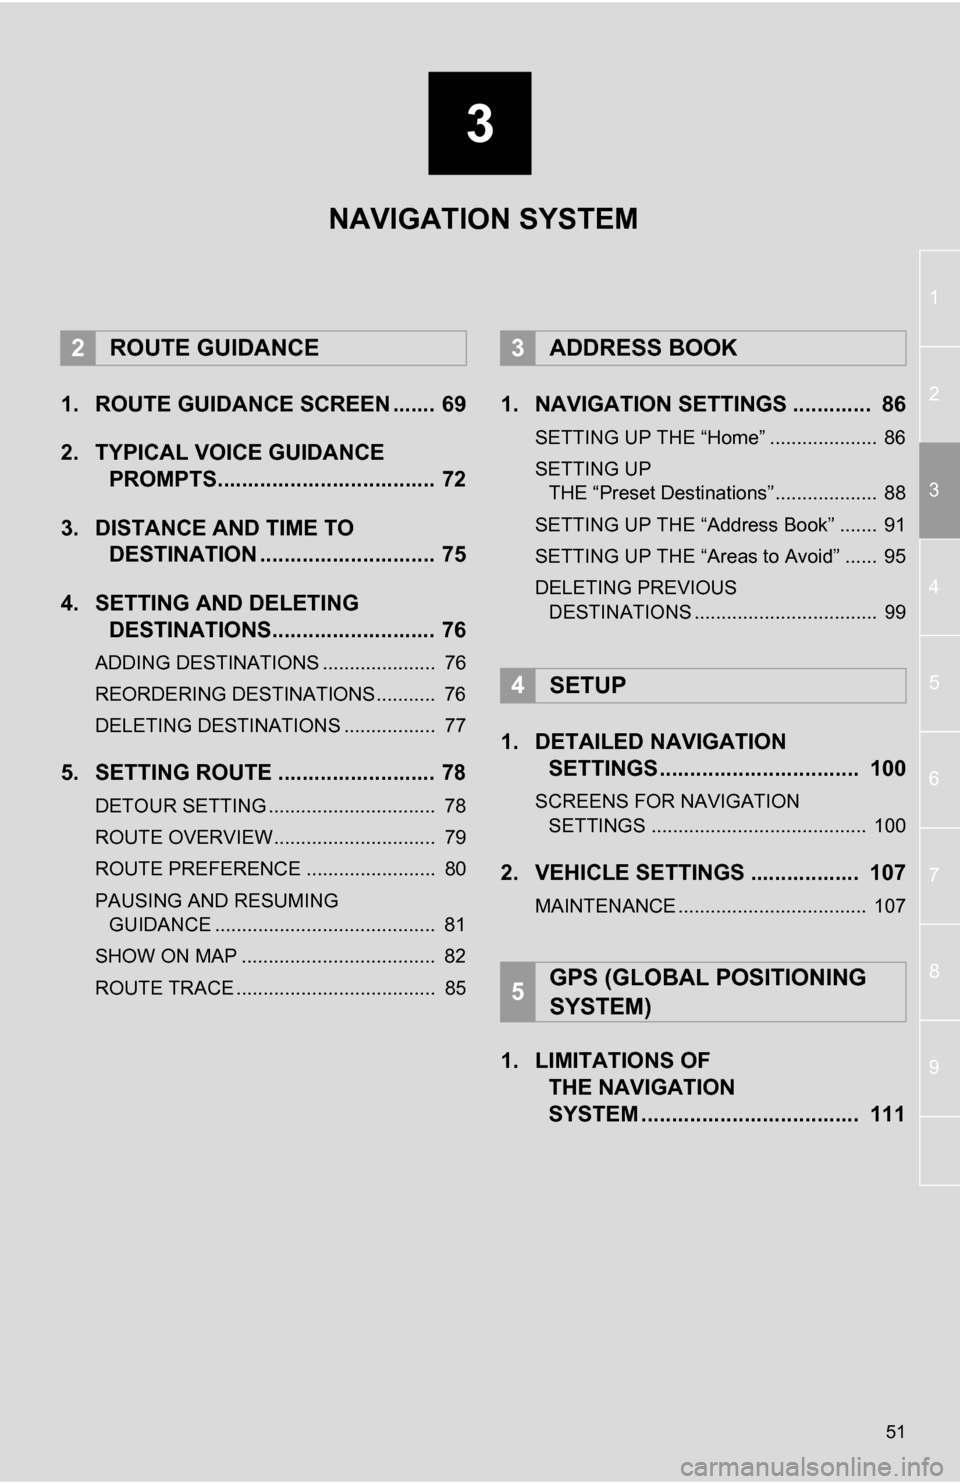
1. ROUTE GUIDANCE SCREEN ....... 69
2. TYPICAL VOICE GUIDANCE PROMPTS.................................... 72
3. DISTANCE AND TIME TO DESTINATION ............................. 75
4. SETTING AND DELETING DESTINATIONS........................... 76
ADDING DESTINATIONS ..................... 76
REORDERING DESTINATIONS ........... 76
DELETING DESTINATIONS ................. 77
5. SETTING ROUTE .......................... 78
DETOUR SETTING ............................... 78
ROUTE OVERVIEW.............................. 79
ROUTE PREFERENCE ........................ 80
PAUSING AND RESUMING
GUIDANCE ......................................... 81
SHOW ON MAP .................................... 82
ROUTE TRACE ..................................... 85
1. NAVIGATION SETTINGS ............. 86
SETTING UP THE “Home” .................... 86
SETTING UP THE “Preset Destinations” ................... 88
SETTING UP THE “Address Book” ....... 91
SETTING UP THE “Areas to Avoid” ...... 95
DELETING PREVIOUS DESTINATIONS .................................. 99
1. DETAILED NAVIGATION SETTINGS ................................. 100
SCREENS FOR NAVIGATION
SETTINGS ........................................ 100
2. VEHICLE SETTINGS .................. 107
MAINTENANCE ................................... 107
1. LIMITATIONS OF THE NAVIGATION
SYSTEM .......... ....................... ... 111
2ROUTE GUIDANCE3ADDRESS BOOK
4SETUP
5GPS (GLOBAL POSITIONING
SYSTEM)
NAVIGATION SYSTEM
Page 53 of 328
53
1. DESTINATION SEARCH
3
NAVIGATION SYSTEM
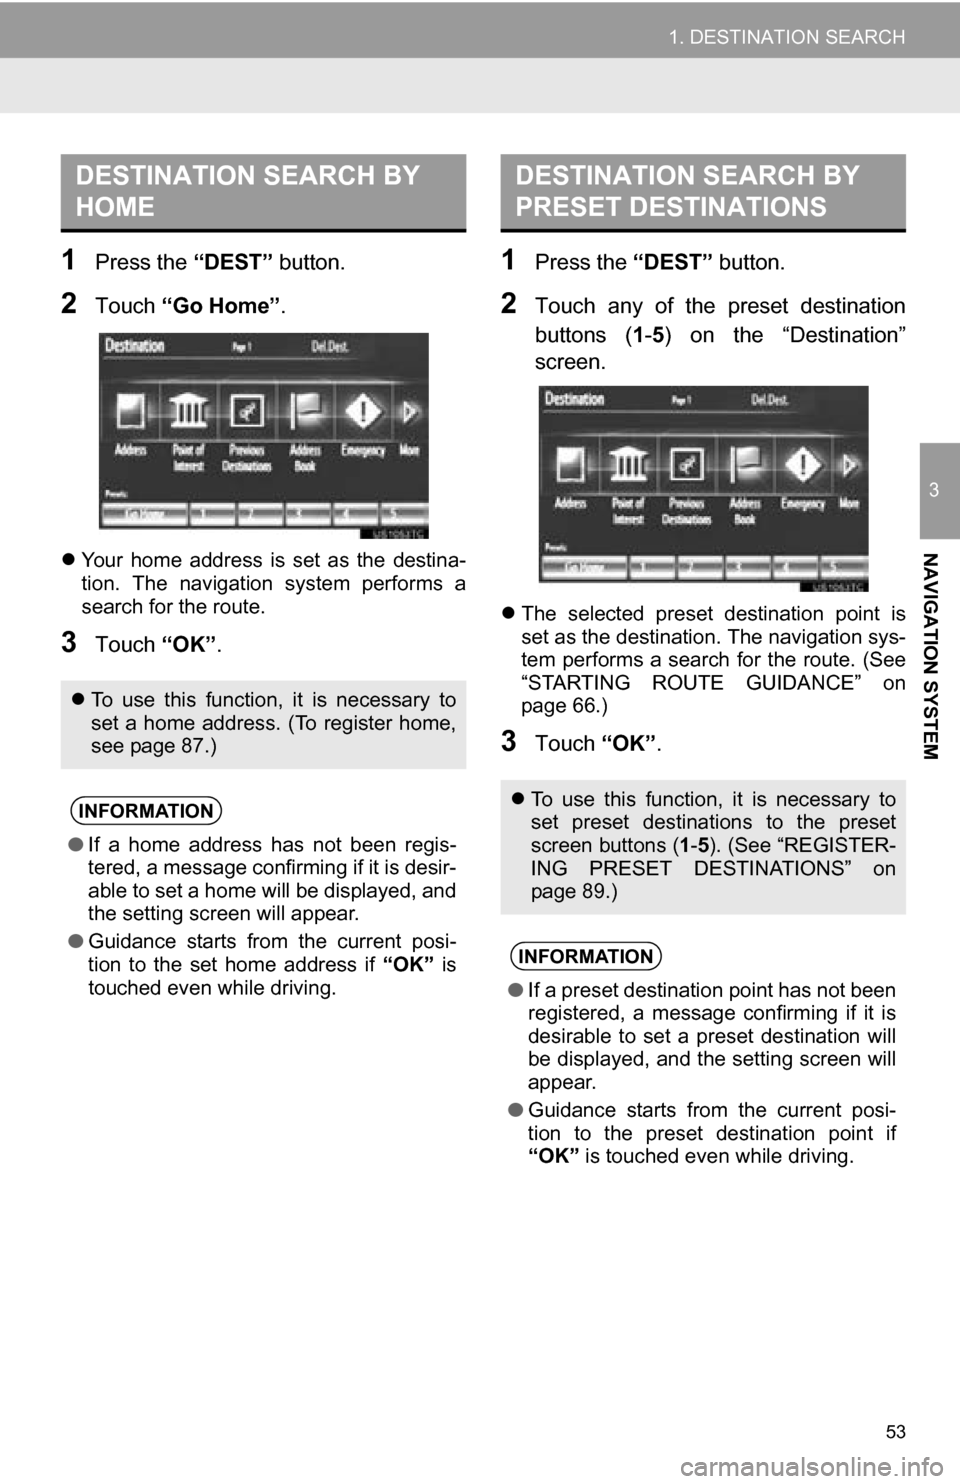
1Press the “DEST” button.
2Touch “Go Home” .
Your home address is set as the destina-
tion. The navigation system performs a
search for the route.
3Touch “OK”.
1Press the “DEST” button.
2Touch any of the preset destination
buttons (1-5 ) on the “Destination”
screen.
The selected preset destination point is
set as the destination. The navigation sys-
tem performs a search for the route. (See
“STARTING ROUTE GUIDANCE” on
page 66.)
3Touch “OK”.
DESTINATION SEARCH BY
HOME
To use this function, it is necessary to
set a home address. (To register home,
see page 87.)
INFORMATION
● If a home address has not been regis-
tered, a message confirming if it is desir-
able to set a home will be displayed, and
the setting screen will appear.
● Guidance starts from the current posi-
tion to the set home address if “OK” is
touched even while driving.
DESTINATION SEARCH BY
PRESET DESTINATIONS
To use this function, it is necessary to
set preset destinations to the preset
screen buttons ( 1-5 ). (See “REGISTER-
ING PRESET DESTINATIONS” on
page 89.)
INFORMATION
● If a preset destination point has not been
registered, a message confirming if it is
desirable to set a preset destination will
be displayed, and the setting screen will
appear.
● Guidance starts from the current posi-
tion to the preset destination point if
“OK” is touched even while driving.
Page 86 of 328
86
3. ADDRESS BOOK
1. NAVIGATION SETTINGS
1Press the “SETUP” button.
2Touch “Navigation” .
3Touch the desired items to be set.
On this screen, the following operations
can be performed:
1Press the “SETUP” button.
2Touch “Navigation” on the “Setup”
screen.
3Touch “Home” .
Points or areas on the map can be reg-
istered.
The registered points can be used on
the “Destination” screen. (See “DESTI-
NATION SEARCH BY HOME” on
page 53, and “DESTINATION
SEARCH BY ‘Address Book’” on page
61.)
Registered areas to avoid, will be
avoided when the system searches for
a route.
No.FunctionPage
Touch to set home.86
Touch to set preset desti-
nations.88
Touch to set the address
book.91
Touch to set areas to
avoid.95
Touch to delete previous
destinations.99
Touch to set detailed navi-
gation settings.100
SETTING UP THE “Home”
If home has been registered, that infor-
mation can be recalled by touching
“Go Home” on the “Destination”
screen. (See “DESTINATION
SEARCH BY HOME” on page 53.)
Page 88 of 328
88
3. ADDRESS BOOK
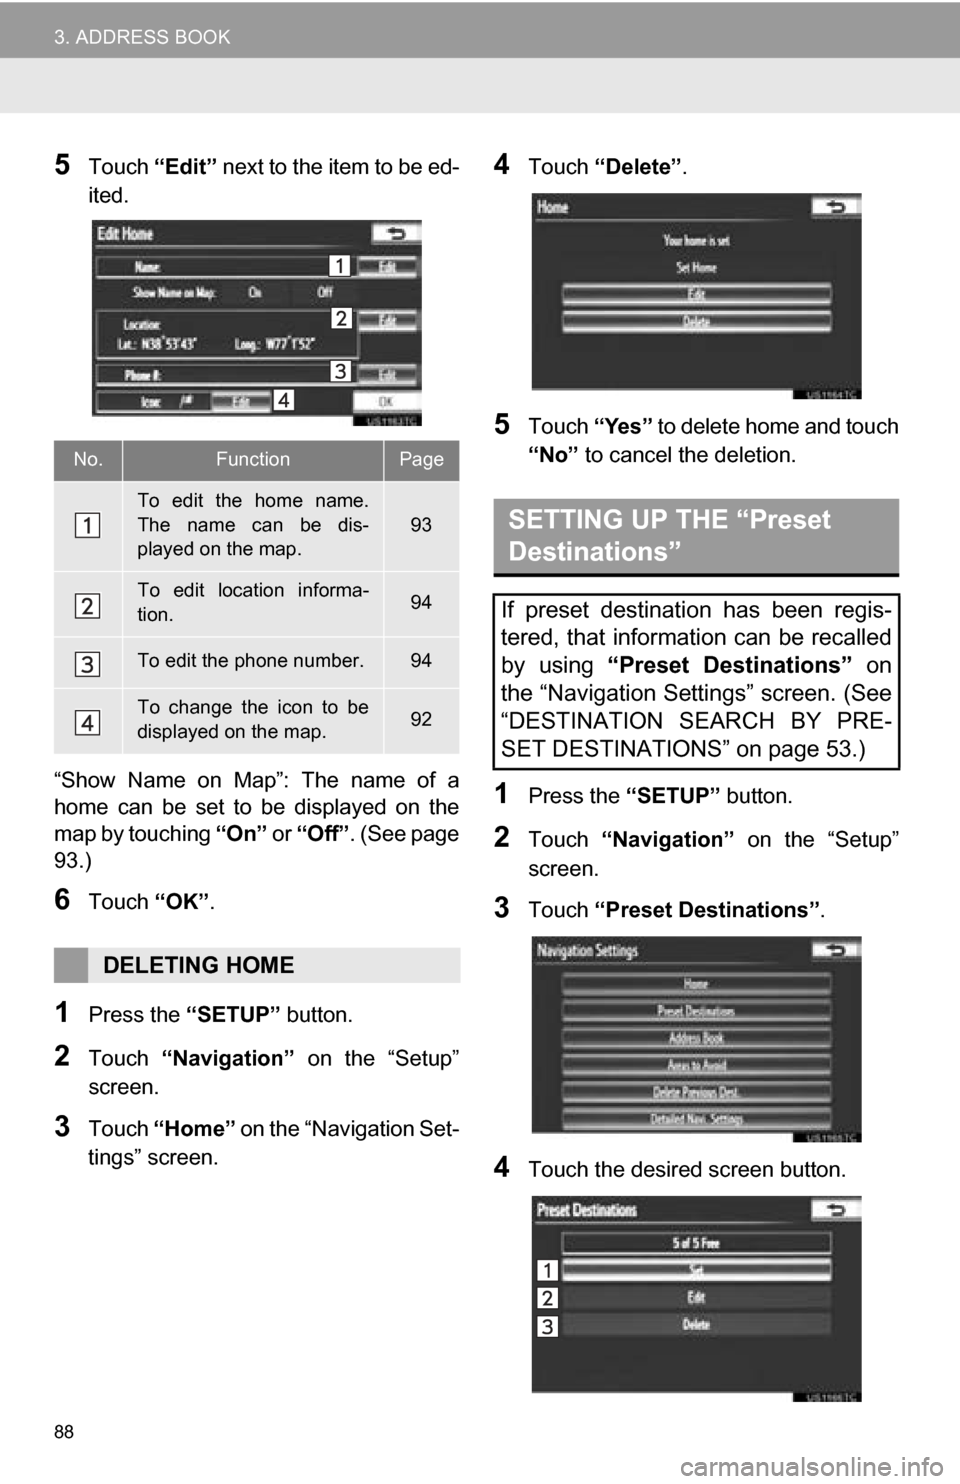
5Touch “Edit” next to the item to be ed-
ited.
“Show Name on Map”: The name of a
home can be set to be displayed on the
map by touching “On” or “Off” . (See page
93.)
6Touch “OK”.
1Press the “SETUP” button.
2Touch “Navigation” on the “Setup”
screen.
3Touch “Home” on the “Navigation Set-
tings” screen.
4Touch “Delete” .
5Touch “Yes” to delete home and touch
“No” to cancel the deletion.
1Press the “SETUP” button.
2Touch “Navigation” on the “Setup”
screen.
3Touch “Preset Destinations” .
4Touch the desired screen button.
No.FunctionPage
To edit the home name.
The name can be dis-
played on the map.
93
To edit location informa-
tion.94
To edit the phone number.94
To change the icon to be
displayed on the map.92
DELETING HOME
SETTING UP THE “Preset
Destinations”
If preset destination has been regis-
tered, that information can be recalled
by using “Preset Destinations” on
the “Navigation Settings” screen. (See
“DESTINATION SEARCH BY PRE-
SET DESTINATIONS” on page 53.)
Page 89 of 328
89
3. ADDRESS BOOK
3
NAVIGATION SYSTEM
1Press the “SETUP” button.
2Touch “Navigation” on the “Setup”
screen.
3Touch “Preset Destinations” on the
“Navigation Settings” screen.
4Touch “Set”.
5Touch the desired screen button and
enter the location in the same way as
for a destination search. (See “DESTI-
NATION SEARCH” on page 52.)
6Touch a position for this preset desti-
nation.
When registration of a preset destination
is completed, the “Edit Preset Destination”
screen will be displayed.
7Touch “OK”.
1Press the “SETUP” button.
2Touch “Navigation” on the “Setup”
screen.
3Touch “Preset Destinations” on the
“Navigation Settings” screen.
4Touch “Edit”.
No.FunctionPage
Registering a preset desti-
nation89
Editing a preset destination89
Deleting a preset destina-
tion90
REGISTERING PRESET
DESTINATIONS
To edit registered information, see
“EDITING PRESET DESTINATIONS”
on page 89.
EDITING PRESET
DESTINATIONS
Page 90 of 328
90
3. ADDRESS BOOK
5Touch the screen button of the desired
preset destination.
6Touch “Edit” next to the item to be ed-
ited.
“Show Name on Map”: The name of a pre-
set destination can be set to be displayed
on the map by touching “On” or “Off” .
(See page 93.)
7Touch “OK”.
1Press the “SETUP” button.
2Touch “Navigation” on the “Setup”
screen.
3Touch “Preset Destinations” on the
“Navigation Settings” screen.
4Touch “Delete” .
5Touch the preset destination to be de-
leted.
6Touch “Delete” .
7Touch “Yes” to delete the preset des-
tination and touch “No” to cancel the
deletion.
No.FunctionPage
To edit the preset destina-
tion name. The name can
be displayed on the map.
93
To edit location informa-
tion.94
To edit the phone number.94
To change the icon to be
displayed on the map.92
DELETING PRESET
DESTINATIONS
Screen buttonFunction
“Select All”Touch to select all preset
destinations.
“Unselect All”Touch to cancel the “Se-
lect All” function.
Page 101 of 328
101
4. SETUP
3
NAVIGATION SYSTEM
To reset all setup items, touch “Default”.
1Press the “SETUP” button.
2Touch “Navigation” on the “Setup”
screen.
3Touch “Detailed Navi. Settings” on
the “Navigation Settings” screen.
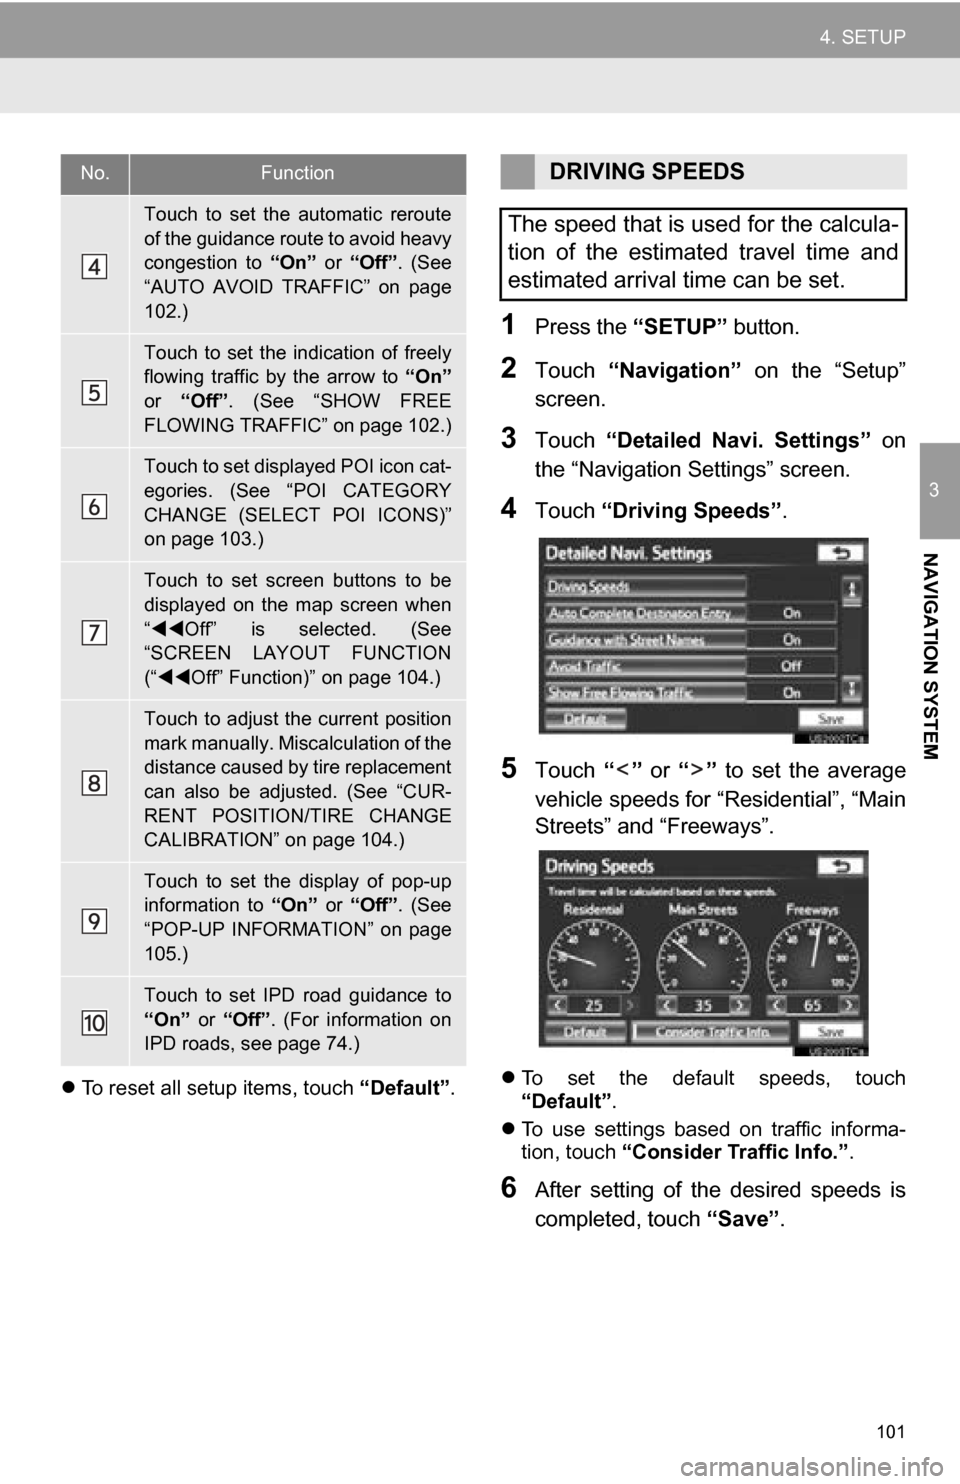
4Touch “Driving Speeds” .
5Touch “” or “” to set the average
vehicle speeds for “Residential”, “Main
Streets” and “Freeways”.
To set the default speeds, touch
“Default”.
To use settings based on traffic informa-
tion, touch “Consider Traffic Info.” .
6After setting of the desired speeds is
completed, touch “Save”.
Touch to set the automatic reroute
of the guidance route to avoid heavy
congestion to “On” or “Off”. (See
“AUTO AVOID TRAFFIC” on page
102.)
Touch to set the indication of freely
flowing traffic by the arrow to “On”
or “Off” . (See “SHOW FREE
FLOWING TRAFFIC” on page 102.)
Touch to set displayed POI icon cat-
egories. (See “POI CATEGORY
CHANGE (SELECT POI ICONS)”
on page 103.)
Touch to set screen buttons to be
displayed on the map screen when
“ Off” is selected. (See
“SCREEN LAYOUT FUNCTION
(“ Off” Function)” on page 104.)
Touch to adjust the current position
mark manually. Miscalculation of the
distance caused by tire replacement
can also be adjusted. (See “CUR-
RENT POSITION/TIRE CHANGE
CALIBRATION” on page 104.)
Touch to set the display of pop-up
information to “On” or “Off”. (See
“POP-UP INFORMATION” on page
105.)
Touch to set IPD road guidance to
“On” or “Off”. (For information on
IPD roads, see page 74.)
No.FunctionDRIVING SPEEDS
The speed that is used for the calcula-
tion of the estimated travel time and
estimated arrival time can be set.
Page 108 of 328
108
4. SETUP
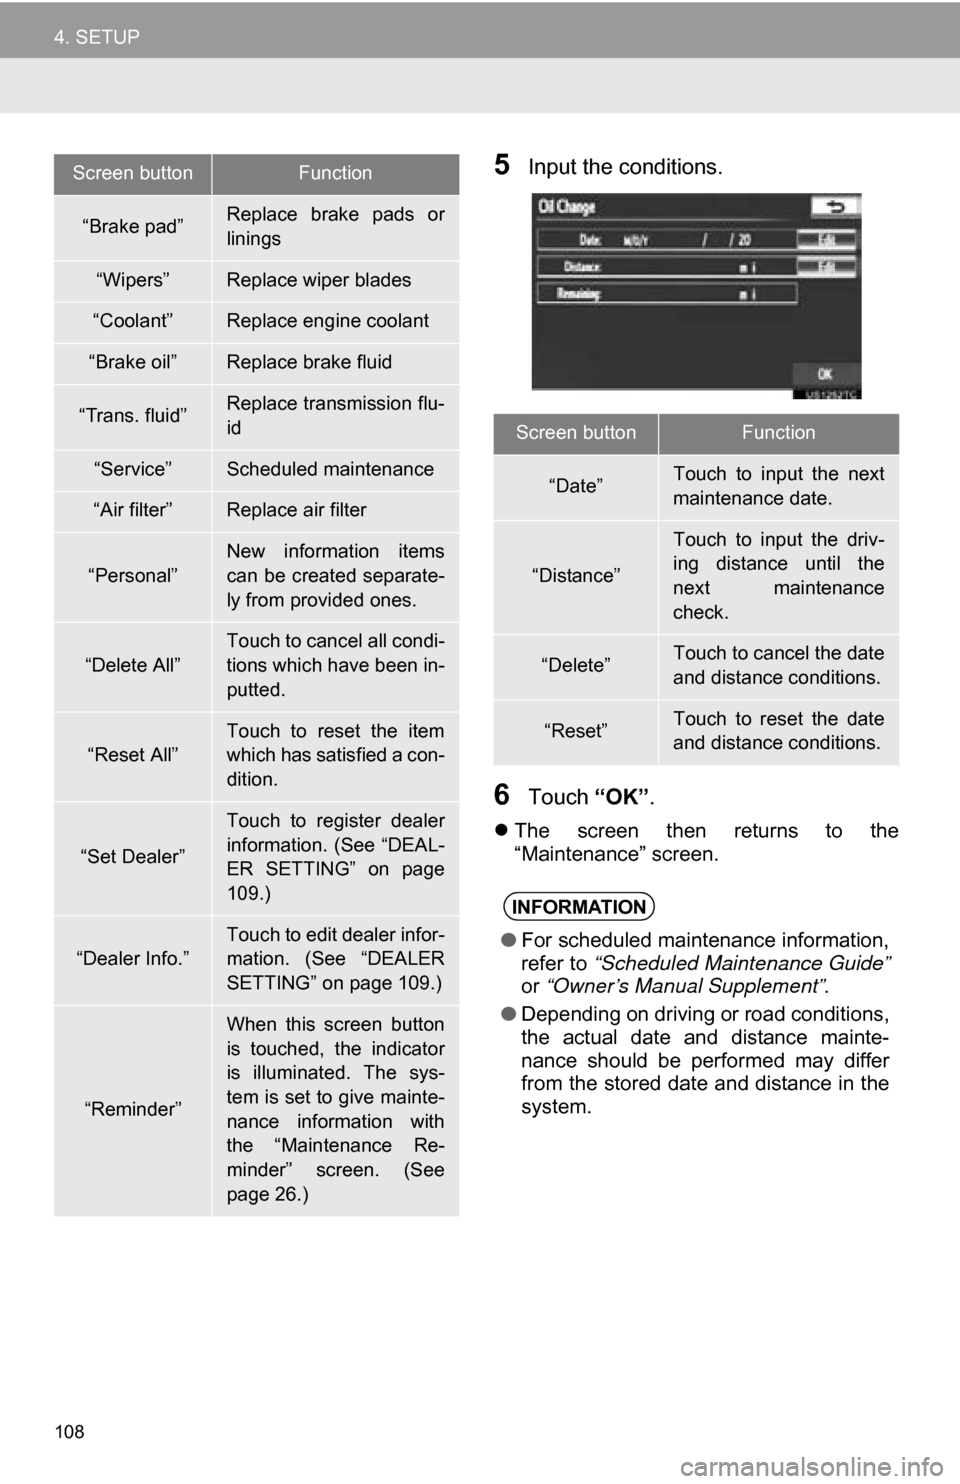
5Input the conditions.
6Touch “OK”.
The screen then returns to the
“Maintenance” screen.
“Brake pad”Replace brake pads or
linings
“Wipers”Replace wiper blades
“Coolant”Replace engine coolant
“Brake oil”Replace brake fluid
“Trans. fluid”Replace transmission flu-
id
“Service”Scheduled maintenance
“Air filter”Replace air filter
“Personal”New information items
can be created separate-
ly from provided ones.
“Delete All”
Touch to cancel all condi-
tions which have been in-
putted.
“Reset All”
Touch to reset the item
which has satisfied a con-
dition.
“Set Dealer”
Touch to register dealer
information. (See “DEAL-
ER SETTING” on page
109.)
“Dealer Info.”
Touch to edit dealer infor-
mation. (See “DEALER
SETTING” on page 109.)
“Reminder”
When this screen button
is touched, the indicator
is illuminated. The sys-
tem is set to give mainte-
nance information with
the “Maintenance Re-
minder” screen. (See
page 26.)
Screen buttonFunction
Screen buttonFunction
“Date”Touch to input the next
maintenance date.
“Distance”
Touch to input the driv-
ing distance until the
next maintenance
check.
“Delete”Touch to cancel the date
and distance conditions.
“Reset”Touch to reset the date
and distance conditions.
INFORMATION
●For scheduled maintenance information,
refer to “Scheduled Maintenance Guide”
or “Owner’s Manual Supplement” .
● Depending on driving or road conditions,
the actual date and distance mainte-
nance should be performed may differ
from the stored date and distance in the
system.