2013 SUZUKI ERTIGA Parking
[x] Cancel search: ParkingPage 11 of 207

Downloaded from www.Manualslib.com manuals search engine ILLUSTRATED TABLE OF CONTENTS
60MK0-14E
INTERIOR1. Inside Rearview Mirror (P.2-13)
2. Interior Light (P.5-40, 7-27)
3. Sun Visor (P.5-39)4. Electric Mirrors Control Switch (P.2-13)/
Electric Window Controls (P.2-11)5. Overhead Rear Air Conditioning Sys-
tem (if equipped) (P.
5-3
)
6. Assist Grips (P.5-42)
7. Seat Belts (P.2-20)
8. Gearshift Lever (P.3-9)9. Front Seats (P.2-14)
10. Parking Brake Lever (P.3-5)
11. Rear Seats (P.2-16)
60MK039
13
4
2
2
6
7
8
9
11
11
10
7
5
EXAMPLE
Page 24 of 207

Downloaded from www.Manualslib.com manuals search engine 2-9BEFORE DRIVING
60MK0-14E
How to stop the alarm
Should the alarm be triggered accidentally,
turn the ignition switch to “ON” position.
The alarm will then stop.
NOTE:
Even after the alarm has stopped, if you
lock the doors using the keyless entry
system transmitter, the theft deterrent
alarm system will be rearmed with a
delay of about 20 seconds.
If you disconnect the battery while the
theft deterrent alarm system is in the
armed condition or the alarm is actually
in operation, the alarm will be triggered
or re-triggered when the battery is then
reconnected, although, in the latter case,
the alarm remains stopped for the period
between disconnection and reconnec-
tion of the battery.
Even after the alarm has stopped at the
end of the predetermined operation time,
it will be triggered again if any door is
opened without disarming the theft
deterrent alarm system.Checking whether the alarm has been
triggered during parking
If the alarm was triggered due to an unau-
thorized entry into the vehicle and you then
turn the ignition switch to “ON” position, the
theft deterrent light will blink rapidly for
about 8 seconds and a buzzer will beep 4
times during this period. If this happens,
check whether your vehicle has been bro-
ken into while you were away from it.
Enabling and disabling the theft deter-
rent alarm system
The theft deterrent alarm system can be
either “enabled” or “disabled”.
When enabled (factory setting)
When the system is enabled, it causes the
hazard warning lights to flash for about 40
seconds if any of the alarm trigger condi-
tions is met. The system also causes the
interior buzzer to beep intermittently for
about 10 seconds, which is followed by
intermittent sounding of the horn for about
30 seconds.
The theft deterrent light continues to blink
during this time.
When disabled
When the system is disabled, it stays dis-
armed even if you perform any system
arming operation.How to switch the state of the theft
deterrent alarm system
You can switch the theft deterrent alarm
system from the enabled state to the dis-
abled state, and vice versa, using the fol-
lowing method.
58MST0204
(1)(3)
(2)
EXAMPLE
Page 53 of 207

Downloaded from www.Manualslib.com manuals search engine 2-38
BEFORE DRIVING
60MK0-14E
Warning and Indicator LightsBrake System Warning Light
65D477
Three different types of operations exist
depending on the vehicle’s specification.
1) The light comes on briefly when the
ignition switch is turned to the “ON”
position.
2) The light comes on when the parking
brake is engaged with the ignition
switch in the “ON” position.
3) The light comes on when under either
or both of above two conditions.
The light also comes on when the fluid in
the brake fluid reservoir falls below the
specified level.
The light should go out after starting the
engine and fully releasing the parking
brake, if the fluid level in the brake fluid res-
ervoir is adequate.
The light also comes on together with the
ABS warning light when the rear brake
force control function (proportioning valve
function) of the ABS system fails.If the brake system warning light comes on
while you are driving the vehicle, it may
mean that there is something wrong with
the vehicle’s brake system. If this happens,
you should:
1) Pull off the road and stop carefully.
2) Test the brakes by carefully starting and
stopping on the shoulder of the road.
– If you determine that it is safe, drive
cautiously at low speed to the nearest
dealer for repairs, or
– Have the vehicle towed to the nearest
dealer for repairs.NOTE:
Because the brake system is self-adjust-
ing, the fluid level will drop as the brake
pads become worn. Replenishing the
brake fluid reservoir is considered normal
periodic maintenance.
NOTE:
(Parking Brake Reminder Buzzer)
A buzzer sounds intermittently to remind
you to release the parking brake if you
start the vehicle without releasing the park-
ing brake. Make sure that the parking
brake is fully released and the brake sys-
tem warning light turns off.
WARNING
Remember that stopping distance
may be longer, you may have to push
harder on the pedal, and the pedal
may go down farther than normal.
WARNING
If any of the following conditions
occur, you should immediately ask
your SUZUKI dealer to inspect the
brake system.
If the brake system warning light
does not go out after the engine
has been started and the parking
brake has been fully released.
If the brake system warning light
does not come on when the igni-
tion switch is turned to the “ON”
position.
If the brake system warning light
comes on at any time during vehi-
cle operation.
Page 68 of 207

Downloaded from www.Manualslib.com manuals search engine 2-53BEFORE DRIVING
60MK0-14E
Lane change signal
60MK014
Sometimes, such as when changing lanes,
the steering wheel is not turned far enough
to cancel the turn signal. For convenience,
you can flash the turn signal by moving the
lever part way and holding it there. The
lever will return to its normal position when
you release it.
NOTE:
The turn signal and its indicator flash three
times even if you return the lever immedi-
ately after moving it.
Hazard Warning Switch
74LHT0229
Push in the hazard warning switch to acti-
vate the hazard warning lights. All turn sig-
nal lights and both turn signal indicators
will flash simultaneously. To turn off the
lights, push the switch again.
Use the hazard warning lights to warn
other traffic during emergency parking or
when your vehicle could otherwise become
a traffic hazard.
Windshield Wiper and Washer
Lever
57L21128
EXAMPLE
WARNING
To avoid possible injury, do not oper-
ate controls by reaching through the
steering wheel.
Page 73 of 207

Downloaded from www.Manualslib.com manuals search engine OPERATING YOUR VEHICLE
3
60MK0-14E
60G408
OPERATING YOUR VEHICLEExhaust Gas Warning ......................................................... 3-1
Daily Inspection Checklist .................................................. 3-1
Engine Oil Consumption .................................................... 3-2
Ignition Switch ..................................................................... 3-3
Parking Brake Lever ........................................................... 3-5
Pedal ..................................................................................... 3-7
Starting the Engine ............................................................. 3-8
Using the Transaxle ............................................................ 3-9
Braking ................................................................................. 3-12
Page 75 of 207

Downloaded from www.Manualslib.com manuals search engine 3-2
OPERATING YOUR VEHICLE
60MK0-14E
4) Make sure the hood is fully closed and
latched.
5) Check the headlights, turn signal lights,
brake lights and horn for proper opera-
tion.
6) Adjust the seat and head restraint (if
equipped).
7) Check the brake pedal and the parking
brake lever.
8) Adjust the mirrors.
9) Make sure that you and all passengers
have properly fastened your seat belts.
10)Make sure that all warning lights come
on as the key is turned to the “ON” posi-
tion.
11)Check all gauges.
12)Make sure that the BRAKE SYSTEM
WARNING light turns off when the
parking brake is released.
Once a week, or each time you fill your fuel
tank, perform the following under-hood
checks:
1) Engine oil level
2) Coolant level
3) Brake fluid level
4) Battery solution level
5) Windshield washer fluid level
6) Hood latch operation
Pull the hood release handle inside the
vehicle. Make sure that you cannot
open the hood all the way without
releasing the secondary latch. Be sure
to close the hood securely after check-
ing for proper latch operation. See theitem “All latches, hinges and locks” of
“CHASSIS AND BODY” in the “Periodic
Maintenance Schedule” in the
“INSPECTION AND MAINTENANCE”
section for lubrication schedule.
Once a month, or each time you fill your
fuel tank, check the tire pressure using a
tire pressure gauge. Also check the tire
pressure of the spare tire.
Engine Oil ConsumptionIt is normal for the engine to consume
some engine oil during normal vehicle
operation.
The amount of engine oil consumed
depends on the viscosity of the oil, the
quality of the oil and the conditions the
vehicle is driven under.
More oil is consumed during high-speed
driving and when there is frequent acceler-
ation and deceleration. Under high loads,
your engine also will consume more oil.
A new engine also consumes more oil,
since its pistons, piston rings and cylinder
walls have not yet become conditioned.
New engines reach the normal level of oil
consumption only after approximately 5000
km (3000 miles) driving.
Oil consumption:
Max. 1.0 L per 1000 km
(1 Qt. per 600 miles)
When judging the amount of oil consump-
tion, note that the oil may become diluted
and make it difficult to accurately judge the
true oil level.
As an example, if a vehicle is used for
repeated short trips, and consumes a nor-
mal amount of oil, the dipstick may not
show any drop in the oil level at all, even
after 1000 km (600 miles) or more of driv-
ing. This is because the oil is gradually
becoming diluted with fuel or moisture,
WARNING
Make sure the hood is fully closed
and latched before driving. If it is not,
it can fly up unexpectedly during
driving, obstructing your view and
resulting in an accident.
Page 76 of 207

Downloaded from www.Manualslib.com manuals search engine 3-3OPERATING YOUR VEHICLE
60MK0-14E
making it appear that the oil level has not
changed.
You should also be aware that the diluting
ingredients evaporate out when the vehicle
is subsequently driven at high speeds,
such as on an expressway, making it
appear that oil is excessively consumed
after high-speed driving.
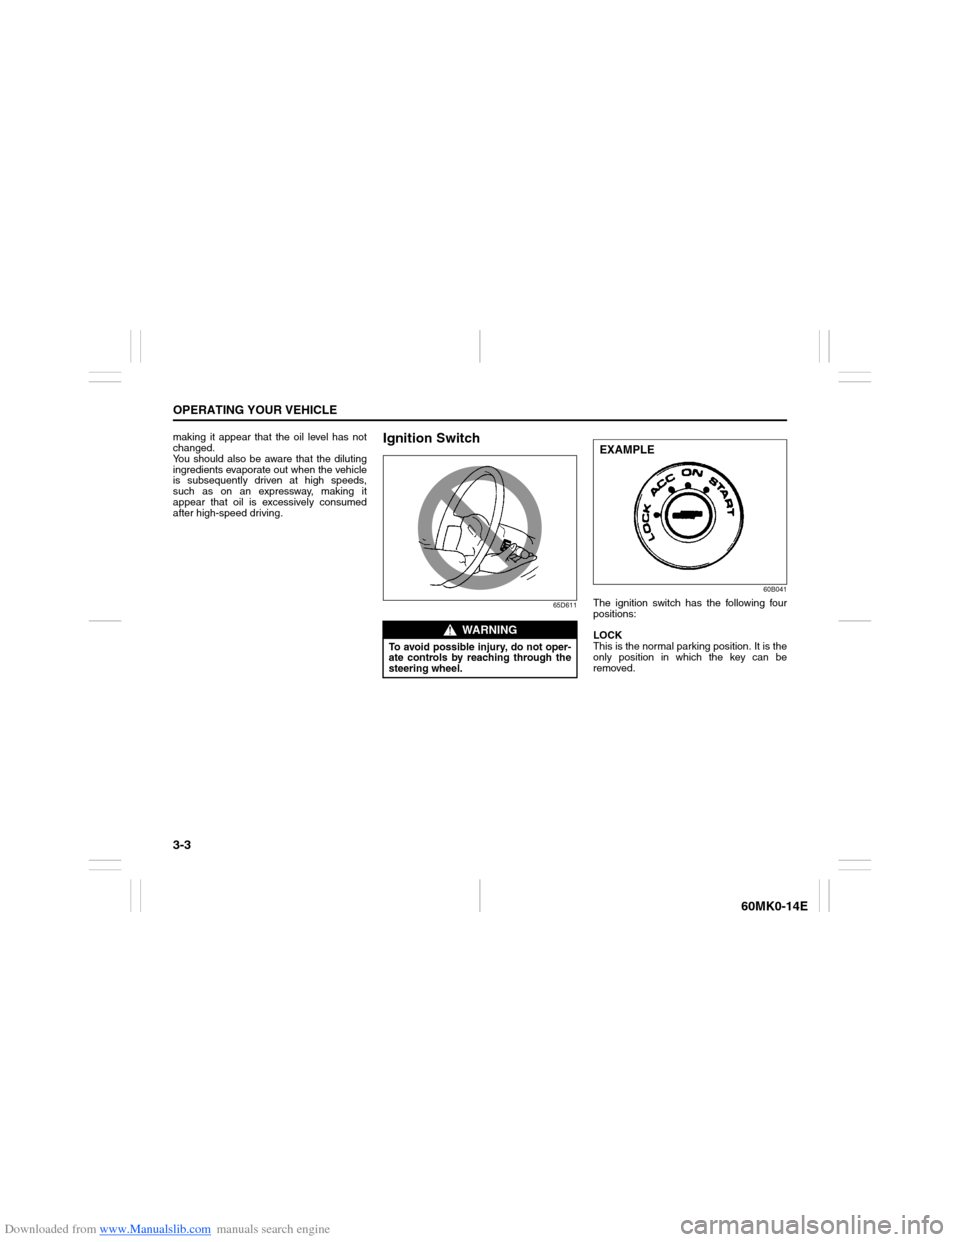
Ignition Switch
65D61160B041
The ignition switch has the following four
positions:
LOCK
This is the normal parking position. It is the
only position in which the key can be
removed.
WARNING
To avoid possible injury, do not oper-
ate controls by reaching through the
steering wheel.
EXAMPLE
Page 78 of 207

Downloaded from www.Manualslib.com manuals search engine 3-5OPERATING YOUR VEHICLE
60MK0-14E
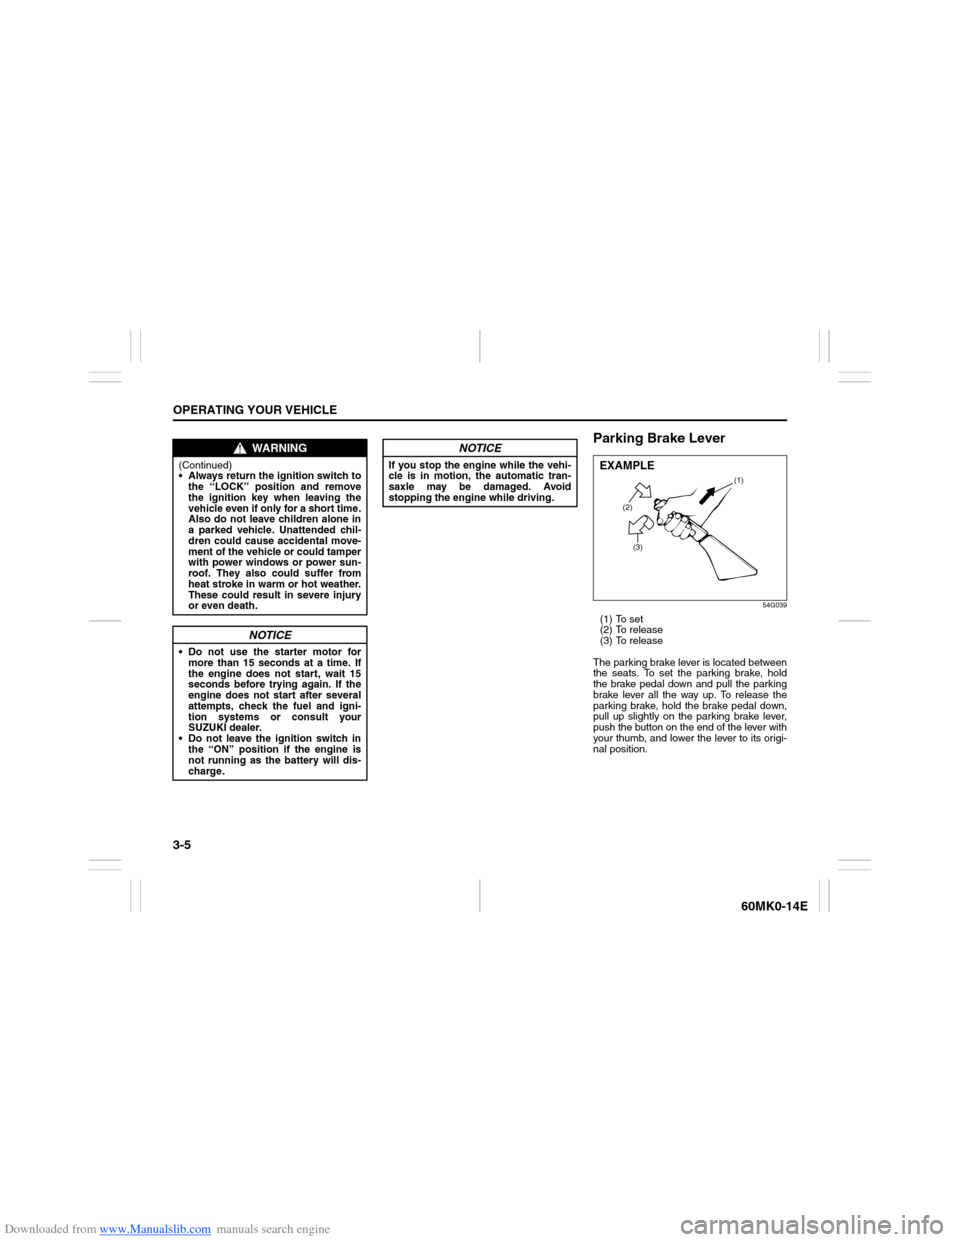
Parking Brake Lever
54G039
(1) To set
(2) To release
(3) To release
The parking brake lever is located between
the seats. To set the parking brake, hold
the brake pedal down and pull the parking
brake lever all the way up. To release the
parking brake, hold the brake pedal down,
pull up slightly on the parking brake lever,
push the button on the end of the lever with
your thumb, and lower the lever to its origi-
nal position.
WARNING
(Continued)
Always return the ignition switch to
the “LOCK” position and remove
the ignition key when leaving the
vehicle even if only for a short time.
Also do not leave children alone in
a parked vehicle. Unattended chil-
dren could cause accidental move-
ment of the vehicle or could tamper
with power windows or power sun-
roof. They also could suffer from
heat stroke in warm or hot weather.
These could result in severe injury
or even death.
NOTICE
Do not use the starter motor for
more than 15 seconds at a time. If
the engine does not start, wait 15
seconds before trying again. If the
engine does not start after several
attempts, check the fuel and igni-
tion systems or consult your
SUZUKI dealer.
Do not leave the ignition switch in
the “ON” position if the engine is
not running as the battery will dis-
charge.
NOTICE
If you stop the engine while the vehi-
cle is in motion, the automatic tran-
saxle may be damaged. Avoid
stopping the engine while driving.
(2)
(3)(1)
EXAMPLE