Page 30 of 207

Downloaded from www.Manualslib.com manuals search engine 2-15BEFORE DRIVING
60MK0-14E
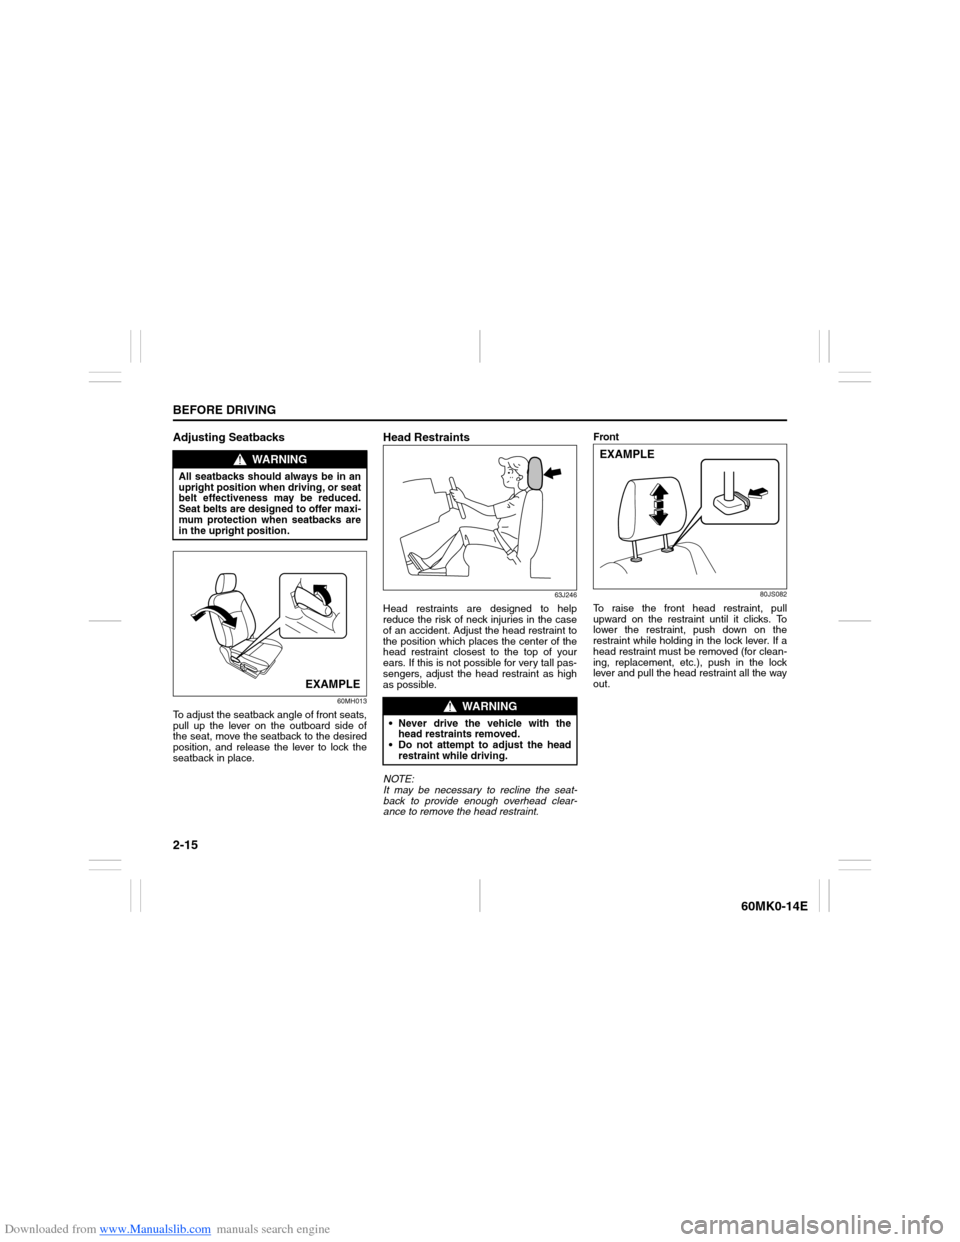
Adjusting Seatbacks
60MH013
To adjust the seatback angle of front seats,
pull up the lever on the outboard side of
the seat, move the seatback to the desired
position, and release the lever to lock the
seatback in place.
Head Restraints
63J246
Head restraints are designed to help
reduce the risk of neck injuries in the case
of an accident. Adjust the head restraint to
the position which places the center of the
head restraint closest to the top of your
ears. If this is not possible for very tall pas-
sengers, adjust the head restraint as high
as possible.
NOTE:
It may be necessary to recline the seat-
back to provide enough overhead clear-
ance to remove the head restraint.Front
80JS082
To raise the front head restraint, pull
upward on the restraint until it clicks. To
lower the restraint, push down on the
restraint while holding in the lock lever. If a
head restraint must be removed (for clean-
ing, replacement, etc.), push in the lock
lever and pull the head restraint all the way
out.
WARNING
All seatbacks should always be in an
upright position when driving, or seat
belt effectiveness may be reduced.
Seat belts are designed to offer maxi-
mum protection when seatbacks are
in the upright position.
EXAMPLE
WARNING
Never drive the vehicle with the
head restraints removed.
Do not attempt to adjust the head
restraint while driving.
EXAMPLE
Page 32 of 207

Downloaded from www.Manualslib.com manuals search engine 2-17BEFORE DRIVING
60MK0-14E
Walk-in Type Seats
(for 2nd row seats)
60MH016
NOTE:
To enter to or exit from the 3rd row seat,
hook the webbing of the outboard lap-
shoulder belt of 2nd row seat before mov-
ing the 2nd row seat.
60MH017
The walk-in type seat can be moved to pro-
vide easy entry to and exit from the 3rd row
seats. You can move a walk-in seat by pull-
ing up the lever on the outboard side of the
seatback and pushing the seatback for-
ward.
Head Restraints (if equipped)Head restraints are designed to help
reduce the risk of neck injuries in the case
of an accident.
NOTE:
It may be necessary to fold forward the
seatback to provide enough overhead
clearance to remove the head restraint.
Adjust the head restraint to the position
which places the center of the head
restraint closest to the top of your ears. If
this is not possible for very tall passengers,
adjust the head restraint as high as possi-
ble.
WARNING
After using the walk-in function, be
sure to return the folded seat back
to an upright position.
Before returning a walk-in seat to
its normal seating position, make
sure that the feet of the passenger
in the 3rd row seat are out of the
way.
After returning the seat to its nor-
mal seating position, make sure it
is securely latched.EXAMPLE
WARNING
Never drive the vehicle with the
head restraints removed.
Do not attempt to adjust the head
restraint while driving.
Page 33 of 207

Downloaded from www.Manualslib.com manuals search engine 2-18
BEFORE DRIVING
60MK0-14E
2nd row seats (if equipped)
60MH018
3rd row seats (if equipped)
60MH019
To raise the rear head restraint, pull
upward on the restraint until it clicks. To
lower the restraint, push down on the
restraint while holding in the lock lever. If a
head restraint must be removed (for clean-
ing, replacement, etc.), push in the lock
lever and pull the head restraint all the way
out.
When installing a child restraint system,
raise the head restraint to the most upper
position.
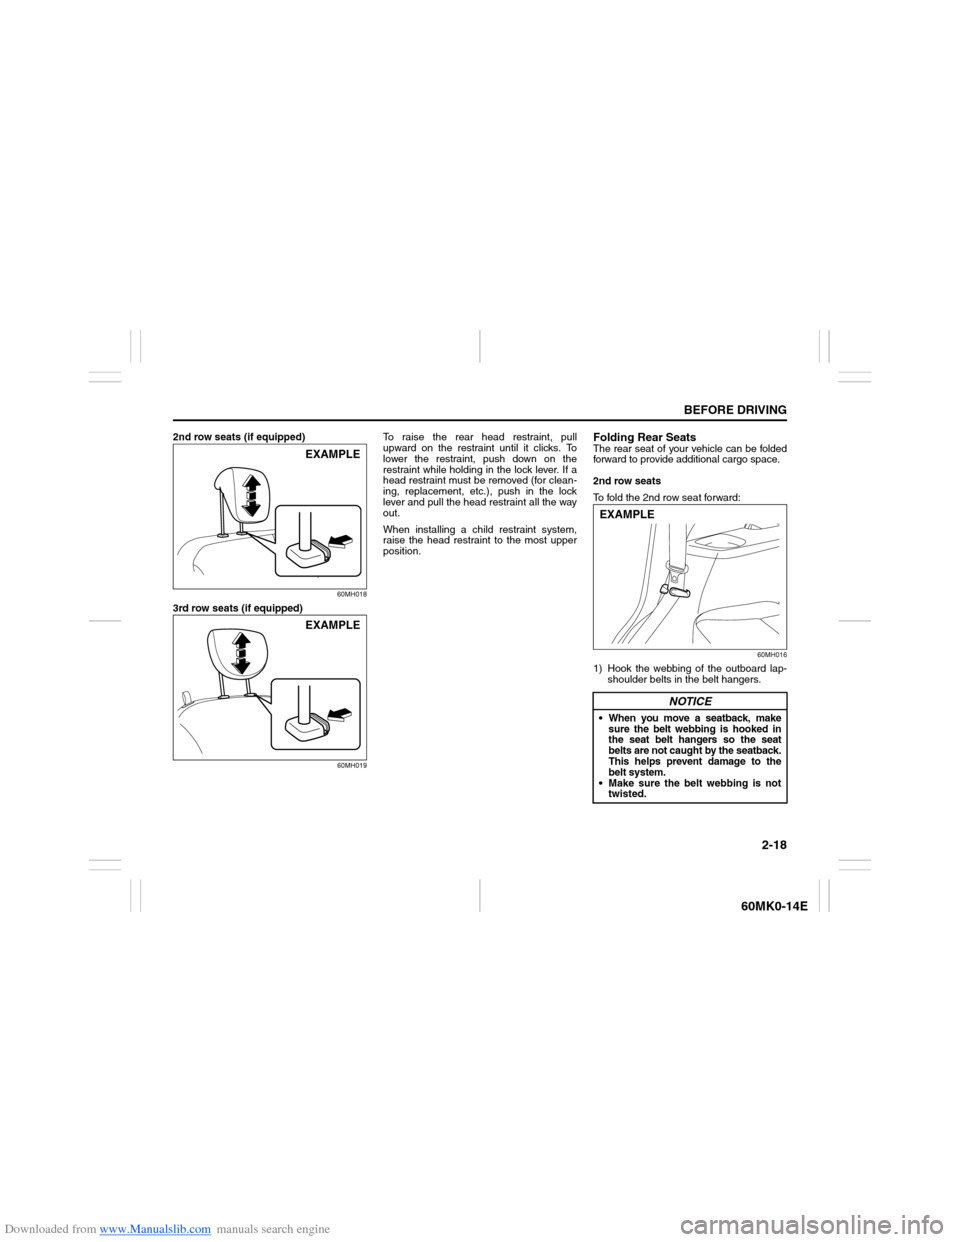
Folding Rear SeatsThe rear seat of your vehicle can be folded
forward to provide additional cargo space.
2nd row seats
To fold the 2nd row seat forward:
60MH016
1) Hook the webbing of the outboard lap-
shoulder belts in the belt hangers.
EXAMPLEEXAMPLE
NOTICE
When you move a seatback, make
sure the belt webbing is hooked in
the seat belt hangers so the seat
belts are not caught by the seatback.
This helps prevent damage to the
belt system.
Make sure the belt webbing is not
twisted.EXAMPLE
Page 78 of 207

Downloaded from www.Manualslib.com manuals search engine 3-5OPERATING YOUR VEHICLE
60MK0-14E
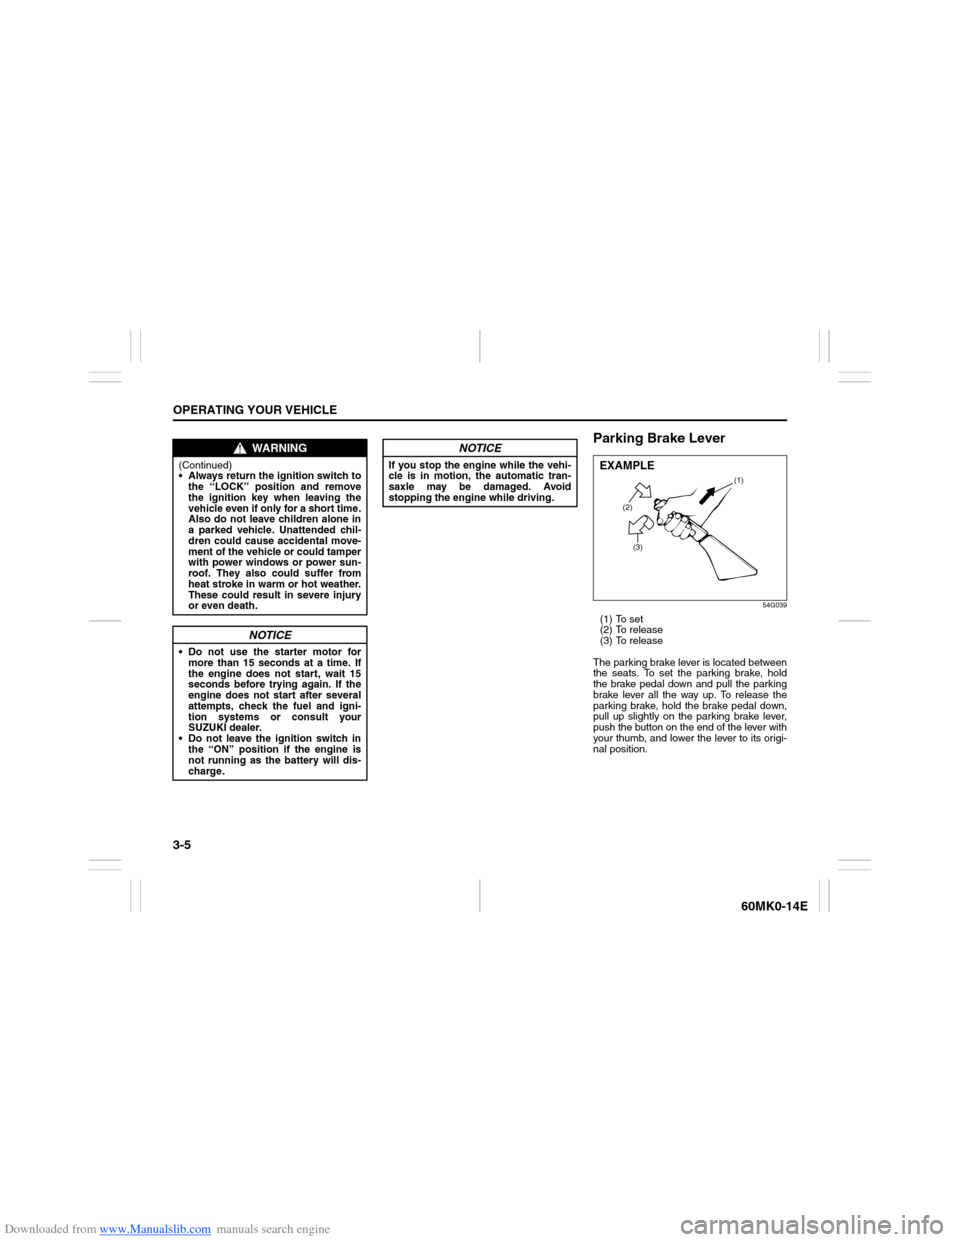
Parking Brake Lever
54G039
(1) To set
(2) To release
(3) To release
The parking brake lever is located between
the seats. To set the parking brake, hold
the brake pedal down and pull the parking
brake lever all the way up. To release the
parking brake, hold the brake pedal down,
pull up slightly on the parking brake lever,
push the button on the end of the lever with
your thumb, and lower the lever to its origi-
nal position.
WARNING
(Continued)
Always return the ignition switch to
the “LOCK” position and remove
the ignition key when leaving the
vehicle even if only for a short time.
Also do not leave children alone in
a parked vehicle. Unattended chil-
dren could cause accidental move-
ment of the vehicle or could tamper
with power windows or power sun-
roof. They also could suffer from
heat stroke in warm or hot weather.
These could result in severe injury
or even death.
NOTICE
Do not use the starter motor for
more than 15 seconds at a time. If
the engine does not start, wait 15
seconds before trying again. If the
engine does not start after several
attempts, check the fuel and igni-
tion systems or consult your
SUZUKI dealer.
Do not leave the ignition switch in
the “ON” position if the engine is
not running as the battery will dis-
charge.
NOTICE
If you stop the engine while the vehi-
cle is in motion, the automatic tran-
saxle may be damaged. Avoid
stopping the engine while driving.
(2)
(3)(1)
EXAMPLE
Page 162 of 207

Downloaded from www.Manualslib.com manuals search engine 7-17INSPECTION AND MAINTENANCE
60MK0-14E
68LM707
6) The handle of the A/T fluid dipstick is
colored red for easy identification.
Remove the dipstick, clean it and push
it back in until the cap seats. Then pull
out the dipstick.
7) Check both sides of the dipstick, and
read the lowest level. The fluid level
should be between the two marks in the
“HOT” range on the dipstick.
54G317
(1) FULL HOT
(2) LOW HOT
(3) The lowest point = Fluid level
8) Add just enough specified fluid through
the dipstick hole to fill the transaxle oil
to the proper level.Changing OilSince special procedures, materials, and
tools are required to change the automatic
transaxle oil, it is recommended that you
trust this job to your authorized SUZUKI
dealer.
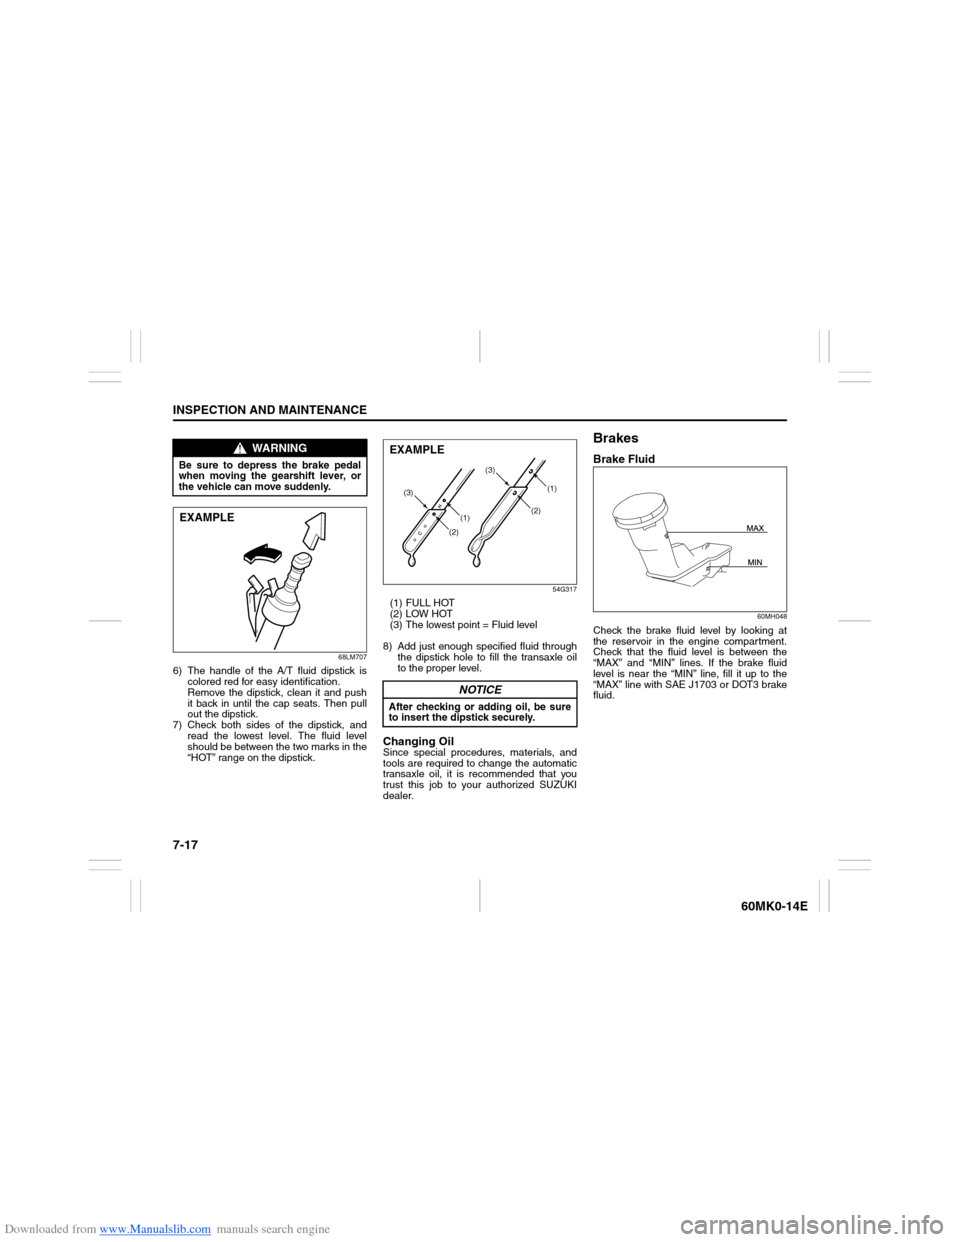
BrakesBrake Fluid
60MH048
Check the brake fluid level by looking at
the reservoir in the engine compartment.
Check that the fluid level is between the
“MAX” and “MIN” lines. If the brake fluid
level is near the “MIN” line, fill it up to the
“MAX” line with SAE J1703 or DOT3 brake
fluid.
WARNING
Be sure to depress the brake pedal
when moving the gearshift lever, or
the vehicle can move suddenly.EXAMPLE
NOTICE
After checking or adding oil, be sure
to insert the dipstick securely.
(1)(2) (3)(1)
(2)(3)
EXAMPLE