2013 SUZUKI ERTIGA automatic
[x] Cancel search: automaticPage 161 of 207
Downloaded from www.Manualslib.com manuals search engine 7-16
INSPECTION AND MAINTENANCE
60MK0-14E
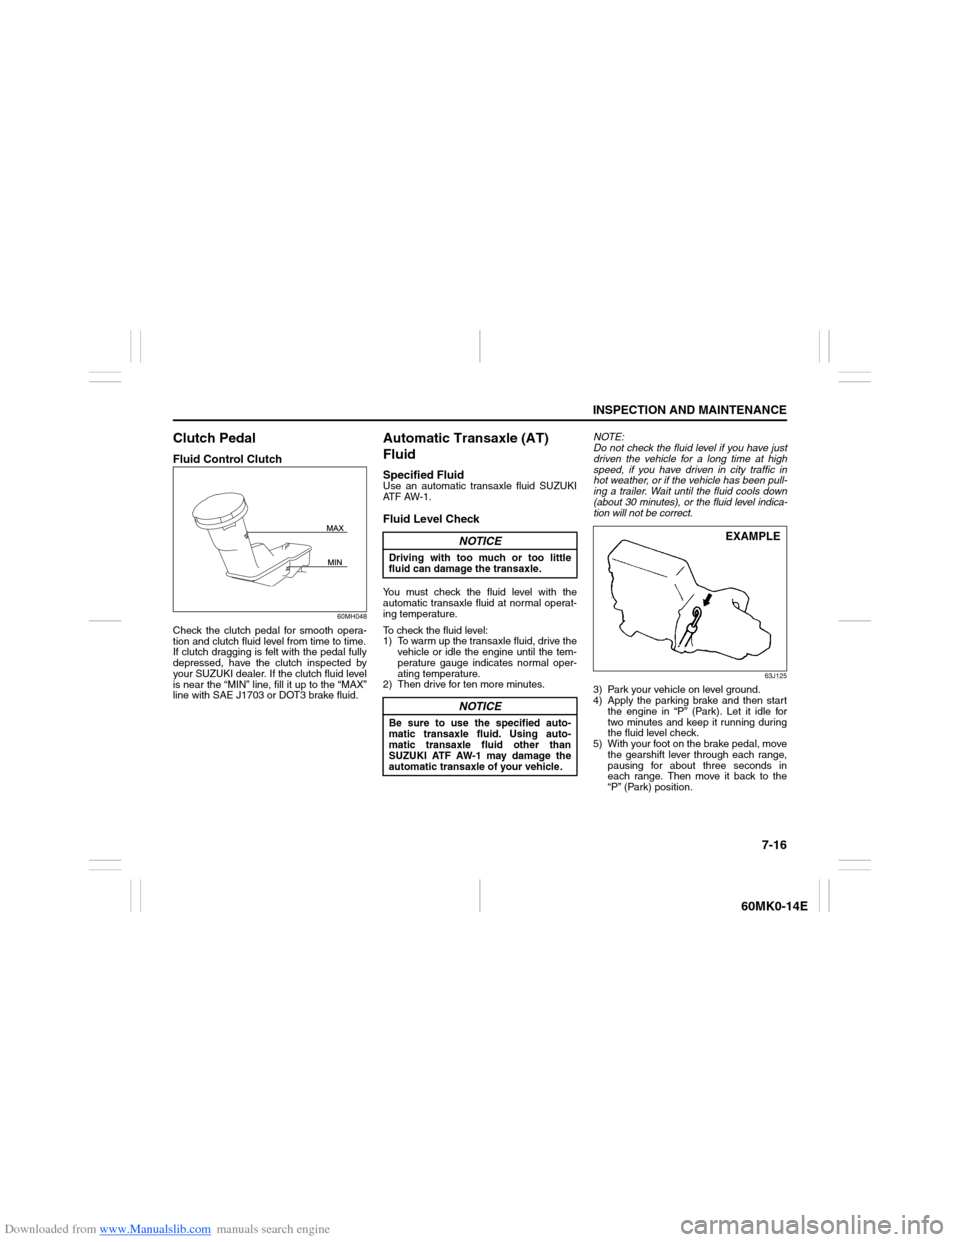
Clutch PedalFluid Control Clutch
60MH048
Check the clutch pedal for smooth opera-
tion and clutch fluid level from time to time.
If clutch dragging is felt with the pedal fully
depressed, have the clutch inspected by
your SUZUKI dealer. If the clutch fluid level
is near the “MIN” line, fill it up to the “MAX”
line with SAE J1703 or DOT3 brake fluid.
Automatic Transaxle (AT)
FluidSpecified FluidUse an automatic transaxle fluid SUZUKI
AT F A W - 1 .Fluid Level CheckYou must check the fluid level with the
automatic transaxle fluid at normal operat-
ing temperature.
To check the fluid level:
1) To warm up the transaxle fluid, drive the
vehicle or idle the engine until the tem-
perature gauge indicates normal oper-
ating temperature.
2) Then drive for ten more minutes.NOTE:
Do not check the fluid level if you have just
driven the vehicle for a long time at high
speed, if you have driven in city traffic in
hot weather, or if the vehicle has been pull-
ing a trailer. Wait until the fluid cools down
(about 30 minutes), or the fluid level indica-
tion will not be correct.
63J125
3) Park your vehicle on level ground.
4) Apply the parking brake and then start
the engine in “P” (Park). Let it idle for
two minutes and keep it running during
the fluid level check.
5) With your foot on the brake pedal, move
the gearshift lever through each range,
pausing for about three seconds in
each range. Then move it back to the
“P” (Park) position.
NOTICE
Driving with too much or too little
fluid can damage the transaxle.
NOTICE
Be sure to use the specified auto-
matic transaxle fluid. Using auto-
matic transaxle fluid other than
SUZUKI ATF AW-1 may damage the
automatic transaxle of your vehicle.
EXAMPLE
Page 162 of 207
Downloaded from www.Manualslib.com manuals search engine 7-17INSPECTION AND MAINTENANCE
60MK0-14E
68LM707
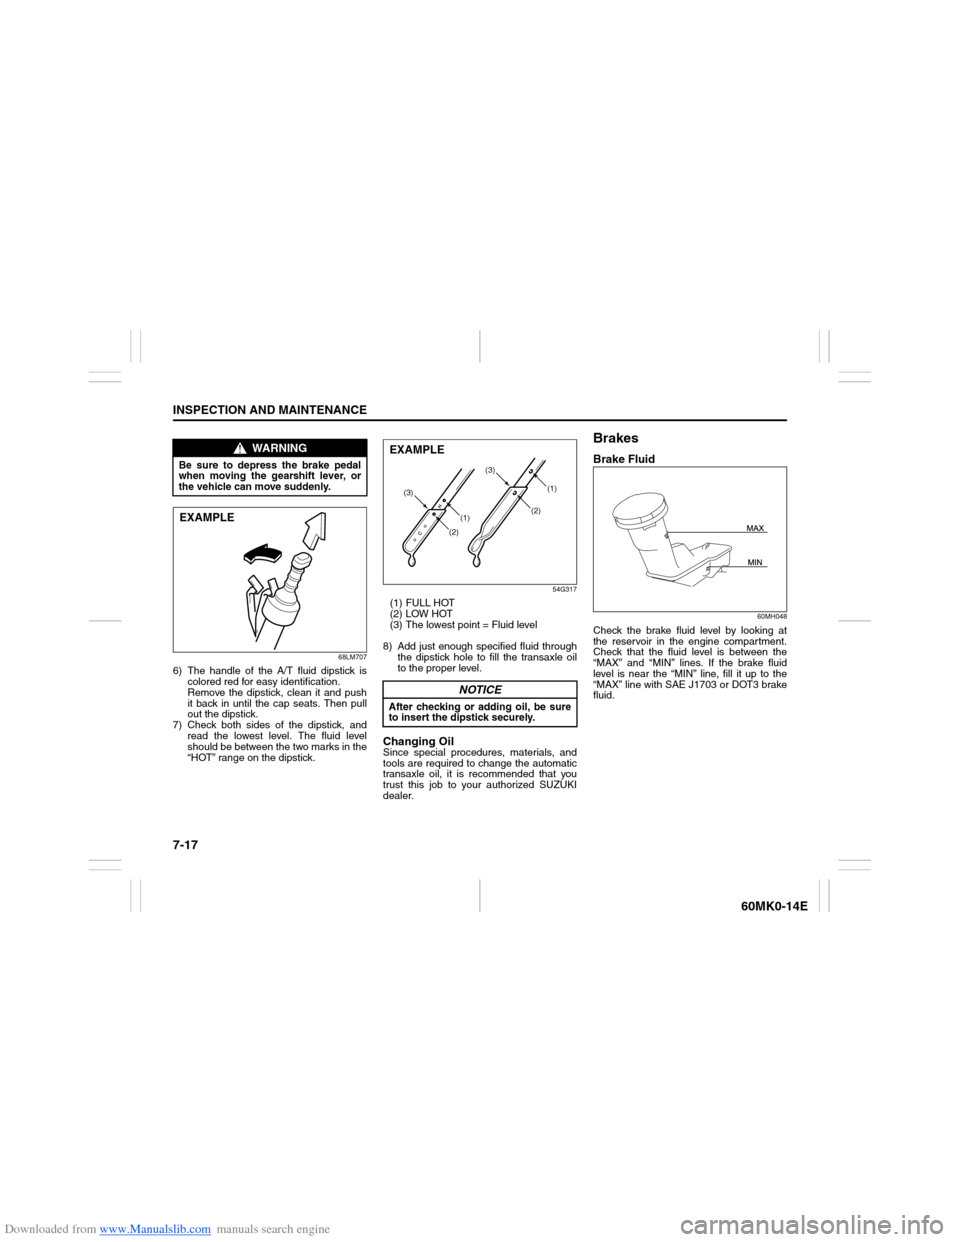
6) The handle of the A/T fluid dipstick is
colored red for easy identification.
Remove the dipstick, clean it and push
it back in until the cap seats. Then pull
out the dipstick.
7) Check both sides of the dipstick, and
read the lowest level. The fluid level
should be between the two marks in the
“HOT” range on the dipstick.
54G317
(1) FULL HOT
(2) LOW HOT
(3) The lowest point = Fluid level
8) Add just enough specified fluid through
the dipstick hole to fill the transaxle oil
to the proper level.Changing OilSince special procedures, materials, and
tools are required to change the automatic
transaxle oil, it is recommended that you
trust this job to your authorized SUZUKI
dealer.
BrakesBrake Fluid
60MH048
Check the brake fluid level by looking at
the reservoir in the engine compartment.
Check that the fluid level is between the
“MAX” and “MIN” lines. If the brake fluid
level is near the “MIN” line, fill it up to the
“MAX” line with SAE J1703 or DOT3 brake
fluid.
WARNING
Be sure to depress the brake pedal
when moving the gearshift lever, or
the vehicle can move suddenly.EXAMPLE
NOTICE
After checking or adding oil, be sure
to insert the dipstick securely.
(1)(2) (3)(1)
(2)(3)
EXAMPLE
Page 183 of 207
Downloaded from www.Manualslib.com manuals search engine 8-2
EMERGENCY SERVICE
60MK0-14E
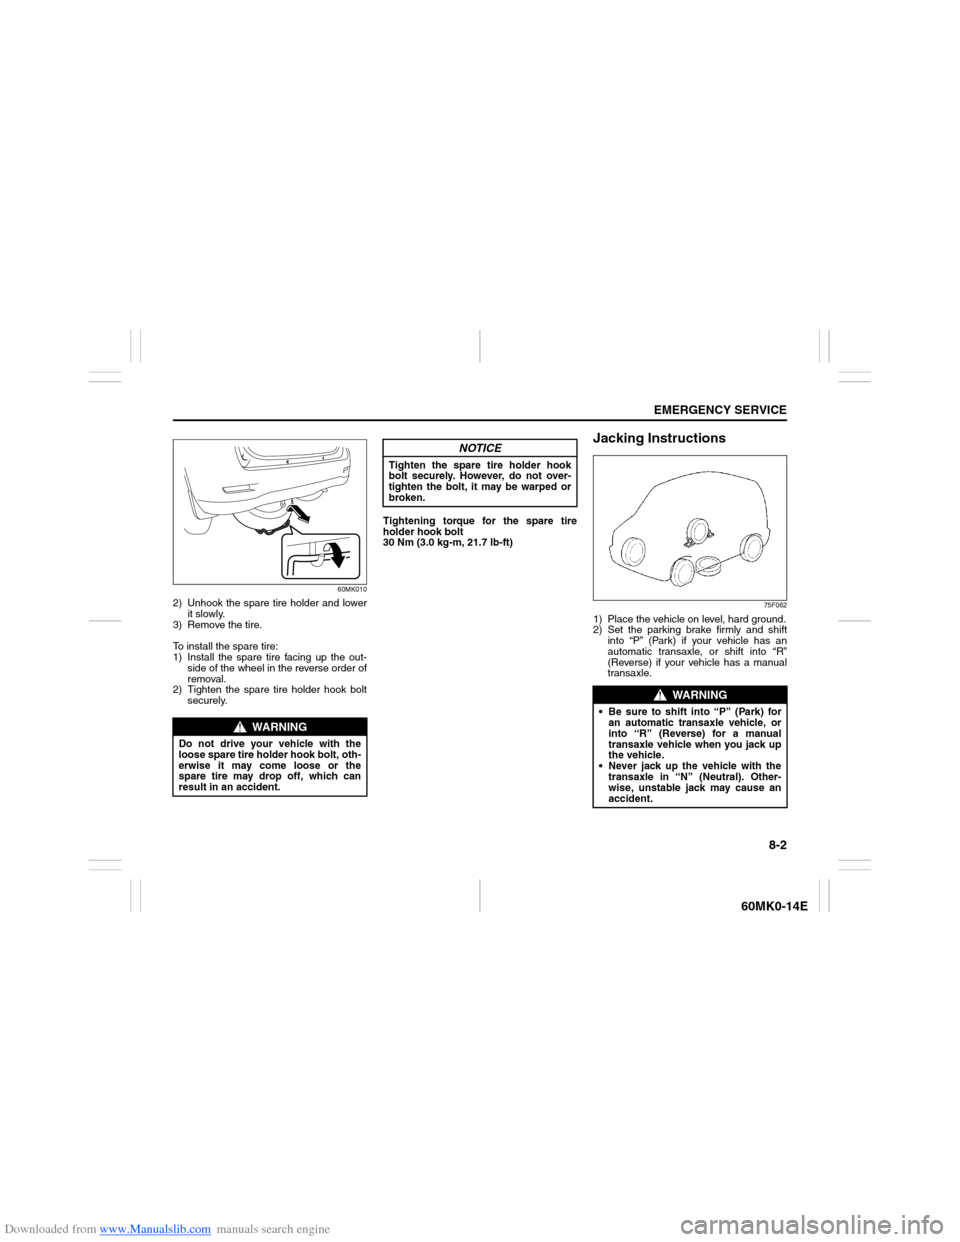
60MK010
2) Unhook the spare tire holder and lower
it slowly.
3) Remove the tire.
To install the spare tire:
1) Install the spare tire facing up the out-
side of the wheel in the reverse order of
removal.
2) Tighten the spare tire holder hook bolt
securely.Tightening torque for the spare tire
holder hook bolt
30 Nm (3.0 kg-m, 21.7 lb-ft)
Jacking Instructions
75F062
1) Place the vehicle on level, hard ground.
2) Set the parking brake firmly and shift
into “P” (Park) if your vehicle has an
automatic transaxle, or shift into “R”
(Reverse) if your vehicle has a manual
transaxle.
WARNING
Do not drive your vehicle with the
loose spare tire holder hook bolt, oth-
erwise it may come loose or the
spare tire may drop off, which can
result in an accident.
NOTICE
Tighten the spare tire holder hook
bolt securely. However, do not over-
tighten the bolt, it may be warped or
broken.
WARNING
Be sure to shift into “P” (Park) for
an automatic transaxle vehicle, or
into “R” (Reverse) for a manual
transaxle vehicle when you jack up
the vehicle.
Never jack up the vehicle with the
transaxle in “N” (Neutral). Other-
wise, unstable jack may cause an
accident.
Page 186 of 207
Downloaded from www.Manualslib.com manuals search engine 8-5EMERGENCY SERVICE
60MK0-14E
Changing WheelsTo change a wheel, use the following pro-
cedure:
1) Remove the jack, tools and spare wheel
from the vehicle.
2) Loosen, but do not remove the wheel
nuts.
3) Jack up the vehicle (follow the jacking
instructions in this section).
4) Remove the wheel nuts and wheel.
5) Before installing the new wheel, clean
any mud or dirt off from the surface of
the wheel and hub with a clean cloth.
Clean the hub carefully; it may be hot
from driving.
6) Install the new wheel and replace the
wheel nuts with their cone shaped end
facing the wheel. Tighten each nuts
snugly by hand until the wheel is
securely seated on the hub.
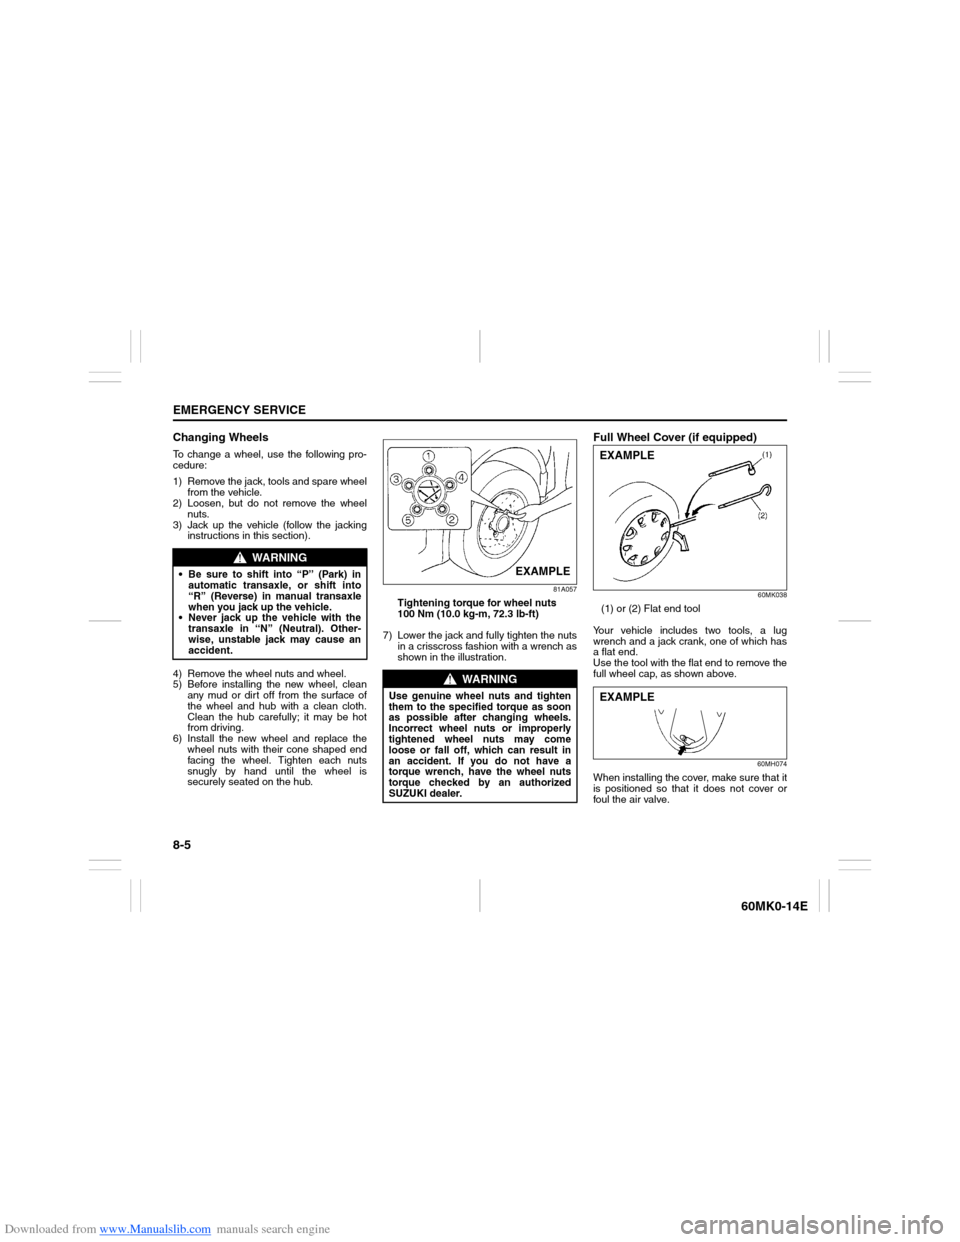
81A057
Tightening torque for wheel nuts
100 Nm (10.0 kg-m, 72.3 lb-ft)
7) Lower the jack and fully tighten the nuts
in a crisscross fashion with a wrench as
shown in the illustration.
Full Wheel Cover (if equipped)
60MK038
(1) or (2) Flat end tool
Your vehicle includes two tools, a lug
wrench and a jack crank, one of which has
a flat end.
Use the tool with the flat end to remove the
full wheel cap, as shown above.
60MH074
When installing the cover, make sure that it
is positioned so that it does not cover or
foul the air valve.
WARNING
Be sure to shift into “P” (Park) in
automatic transaxle, or shift into
“R” (Reverse) in manual transaxle
when you jack up the vehicle.
Never jack up the vehicle with the
transaxle in “N” (Neutral). Other-
wise, unstable jack may cause an
accident.
WARNING
Use genuine wheel nuts and tighten
them to the specified torque as soon
as possible after changing wheels.
Incorrect wheel nuts or improperly
tightened wheel nuts may come
loose or fall off, which can result in
an accident. If you do not have a
torque wrench, have the wheel nuts
torque checked by an authorized
SUZUKI dealer.
EXAMPLE
EXAMPLEEXAMPLE
Page 188 of 207
Downloaded from www.Manualslib.com manuals search engine 8-7EMERGENCY SERVICE
60MK0-14E
71LST0802
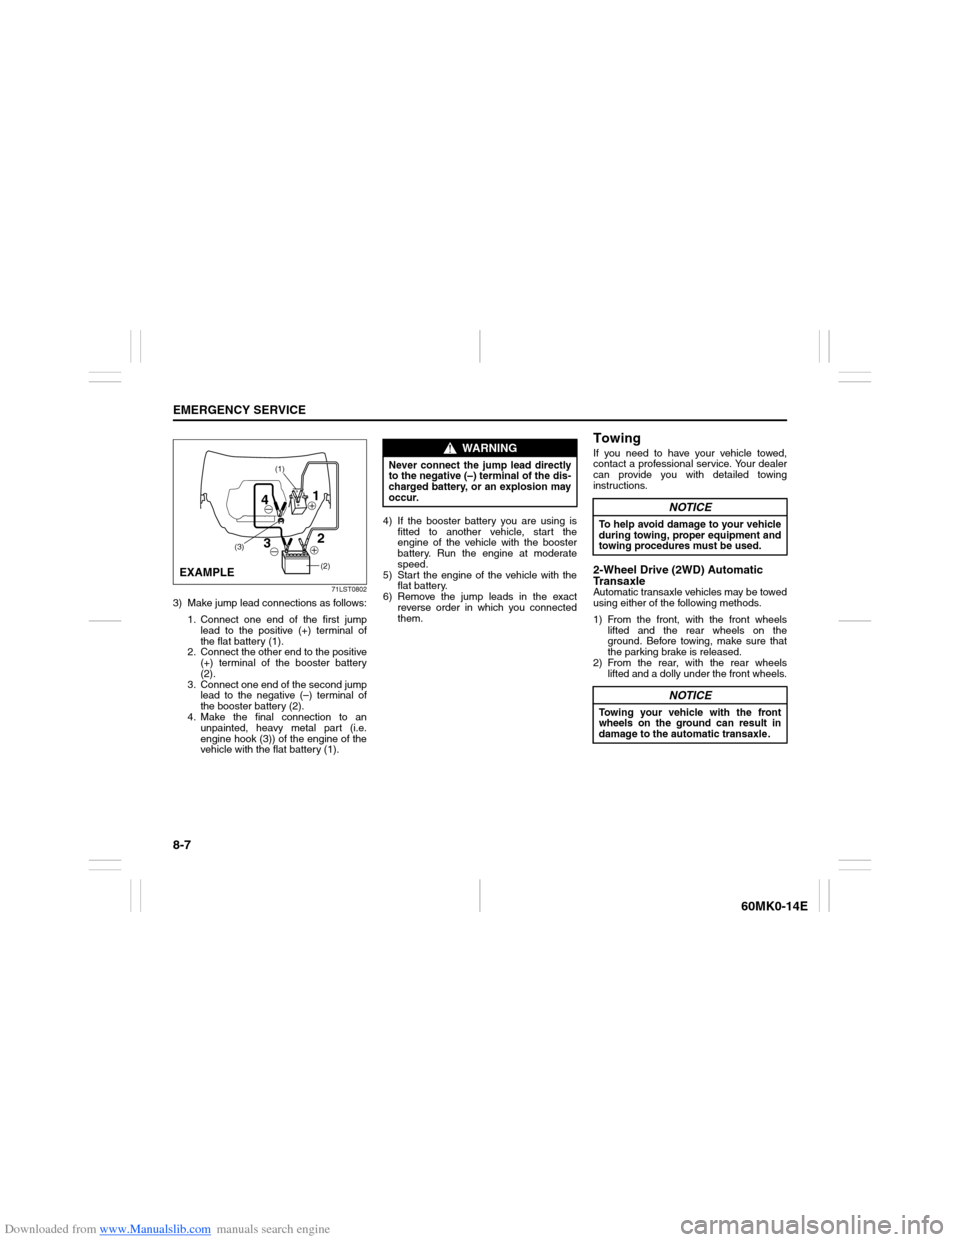
3) Make jump lead connections as follows:
1. Connect one end of the first jump
lead to the positive (+) terminal of
the flat battery (1).
2. Connect the other end to the positive
(+) terminal of the booster battery
(2).
3. Connect one end of the second jump
lead to the negative (–) terminal of
the booster battery (2).
4. Make the final connection to an
unpainted, heavy metal part (i.e.
engine hook (3)) of the engine of the
vehicle with the flat battery (1).4) If the booster battery you are using is
fitted to another vehicle, start the
engine of the vehicle with the booster
battery. Run the engine at moderate
speed.
5) Start the engine of the vehicle with the
flat battery.
6) Remove the jump leads in the exact
reverse order in which you connected
them.
TowingIf you need to have your vehicle towed,
contact a professional service. Your dealer
can provide you with detailed towing
instructions.2-Wheel Drive (2WD) Automatic
TransaxleAutomatic transaxle vehicles may be towed
using either of the following methods.
1) From the front, with the front wheels
lifted and the rear wheels on the
ground. Before towing, make sure that
the parking brake is released.
2) From the rear, with the rear wheels
lifted and a dolly under the front wheels.
(2)
(1)
(3)
1
2
3 4
EXAMPLE
WARNING
Never connect the jump lead directly
to the negative (–) terminal of the dis-
charged battery, or an explosion may
occur.
NOTICE
To help avoid damage to your vehicle
during towing, proper equipment and
towing procedures must be used.
NOTICE
Towing your vehicle with the front
wheels on the ground can result in
damage to the automatic transaxle.
Page 190 of 207

Downloaded from www.Manualslib.com manuals search engine 8-9EMERGENCY SERVICE
60MK0-14E
If the Engine OverheatsThe engine could overheat temporarily
under severe driving conditions. If the
engine coolant temperature gauge indi-
cates overheating during driving:
1) Turn off the air conditioner, if equipped.
2) Take the vehicle to a safe place and
park.
3) Let the engine run at the normal idle
speed for a few minutes until the indica-
tor is within the normal, acceptable
temperature range between “H” and
“C”.If the temperature indication does not
come down to within the normal, accept-
able range:
1) Turn off the engine and check that the
water pump belt and pulleys are not
damaged or slipping. If any abnormality
is found, correct it.
2) Check the coolant level in the reservoir.
If it is found to be lower than the “LOW”
line, look for leaks at the radiator, water
pump, and radiator and heater hoses. If
you locate any leaks that may have
caused the overheating, do not run the
engine until these problems have been
corrected.
3) If you do not find a leak, carefully add
coolant to the reservoir and then the
radiator, if necessary. (Refer to “Engine
Coolant” in the “INSPECTION AND
MAINTENANCE” section.)
NOTE:
If your engine overheats and you are
unsure what to do, contact your SUZUKI
dealer.
79J007
WARNING
If you see or hear escaping steam,
stop the vehicle in a safe place and
immediately turn off the engine to let
it cool. Do not open the hood when
steam is present. When the steam
can no longer be seen or heard, open
the hood to see if the coolant is still
boiling. If it is, you must wait until it
stops boiling before you proceed.
WARNING
It is hazardous to remove the radia-
tor cap (or degassing tank cap for a
diesel engine) when the water tem-
perature is high, because scalding
fluid and steam may be blown out
under pressure. The cap should
only be taken off when the coolant
temperature has lowered.
To help prevent personal injury,
keep hands, tools and clothing
away from the engine cooling fan
and air-conditioner fan (if
equipped). These electric fans can
automatically turn on without warn-
ing.
Page 196 of 207
Downloaded from www.Manualslib.com manuals search engine 9-5APPEARANCE CARE
60MK0-14E
2. Stir the paint and “touch-up” the
damaged spots lightly using a small
brush.
3. Allow the paint to dry completely.
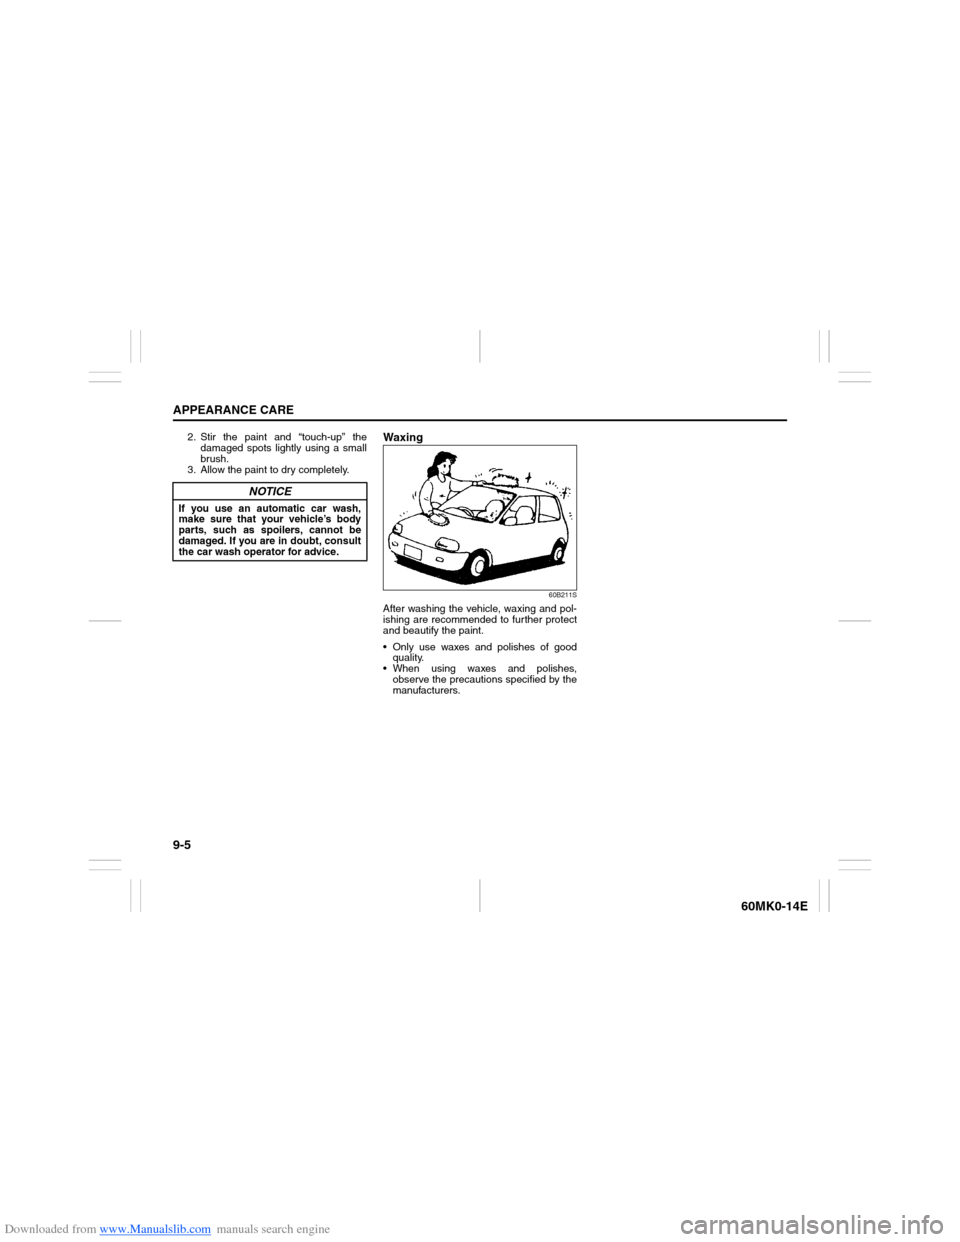
Waxing
60B211S
After washing the vehicle, waxing and pol-
ishing are recommended to further protect
and beautify the paint.
Only use waxes and polishes of good
quality.
When using waxes and polishes,
observe the precautions specified by the
manufacturers.
NOTICE
If you use an automatic car wash,
make sure that your vehicle’s body
parts, such as spoilers, cannot be
damaged. If you are in doubt, consult
the car wash operator for advice.
Page 199 of 207
Downloaded from www.Manualslib.com manuals search engine 11-1
SPECIFICATIONS
60MK0-14E
11
SPECIFICATIONSNOTE:
Specifications are subject to change with-
out notice.M/T: Manual transaxle
A/T: Automatic transaxle
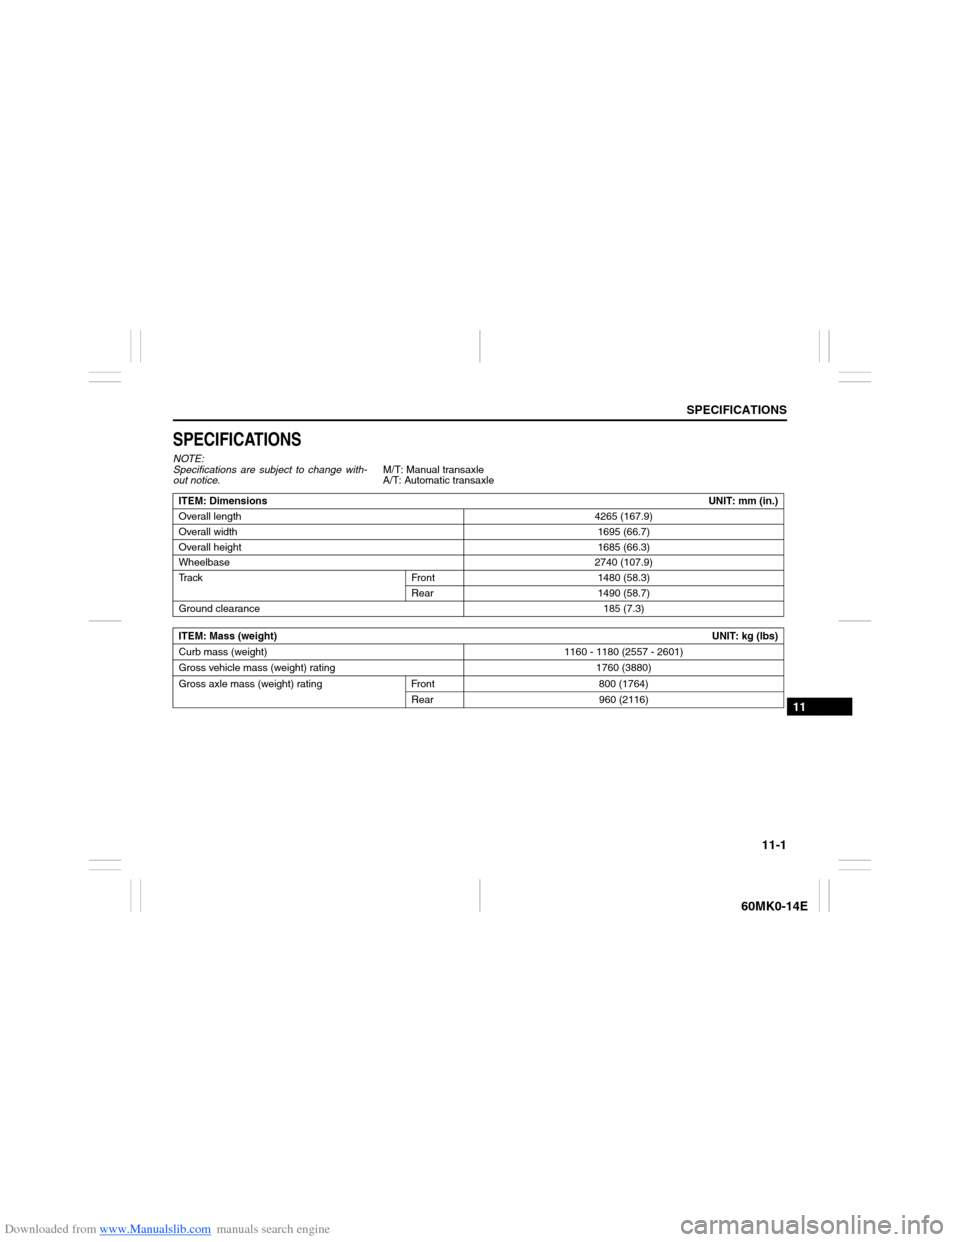
ITEM: DimensionsUNIT: mm (in.)
Overall length4265 (167.9)
Overall width1695 (66.7)
Overall height1685 (66.3)
Wheelbase2740 (107.9)
Track Front 1480 (58.3)
Rear 1490 (58.7)
Ground clearance185 (7.3)
ITEM: Mass (weight)UNIT: kg (lbs)
Curb mass (weight) 1160 - 1180 (2557 - 2601)
Gross vehicle mass (weight) rating 1760 (3880)
Gross axle mass (weight) rating Front 800 (1764)
Rear 960 (2116)