2013 SUZUKI ERTIGA automatic
[x] Cancel search: automaticPage 62 of 207
Downloaded from www.Manualslib.com manuals search engine 2-47BEFORE DRIVING
60MK0-14E
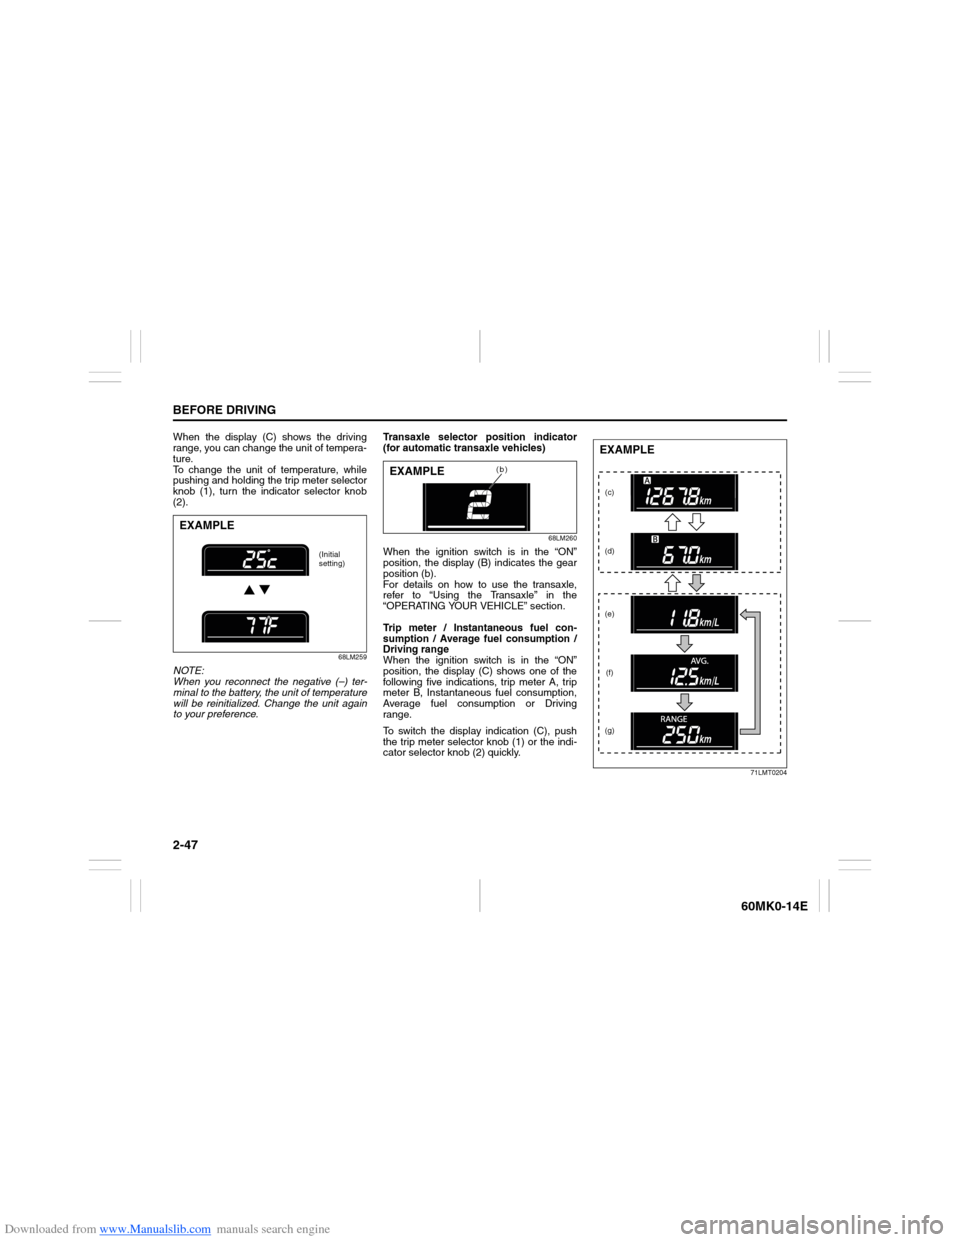
When the display (C) shows the driving
range, you can change the unit of tempera-
ture.
To change the unit of temperature, while
pushing and holding the trip meter selector
knob (1), turn the indicator selector knob
(2).
68LM259
NOTE:
When you reconnect the negative (–) ter-
minal to the battery, the unit of temperature
will be reinitialized. Change the unit again
to your preference.Transaxle selector position indicator
(for automatic transaxle vehicles)
68LM260
When the ignition switch is in the “ON”
position, the display (B) indicates the gear
position (b).
For details on how to use the transaxle,
refer to “Using the Transaxle” in the
“OPERATING YOUR VEHICLE” section.
Trip meter / Instantaneous fuel con-
sumption / Average fuel consumption /
Driving range
When the ignition switch is in the “ON”
position, the display (C) shows one of the
following five indications, trip meter A, trip
meter B, Instantaneous fuel consumption,
Average fuel consumption or Driving
range.
To switch the display indication (C), push
the trip meter selector knob (1) or the indi-
cator selector knob (2) quickly.
71LMT0204
EXAMPLE
(Initial
setting)
(b)
EXAMPLE
(c)
(d)
(e)
(f)
(g)EXAMPLE
Page 64 of 207

Downloaded from www.Manualslib.com manuals search engine 2-49BEFORE DRIVING
60MK0-14E
Average fuel consumption
If you selected average fuel consumption
the last time you drove the vehicle, the dis-
play shows the last value of average fuel
consumption from previous driving when
the ignition switch is turned to the “ON”
position. Unless you reset the value of
average fuel consumption, the display indi-
cates the value of average fuel consump-
tion which includes average fuel
consumption during previous driving.
To reset the average fuel consumption to
zero, push and hold the indicator selector
knob (2) for a while when the display
shows the average fuel consumption.
NOTE:
When you reset the indication or reconnect
the negative (–) terminal to the battery, the
value of average fuel consumption will be
shown after driving for a while.To change the unit of average fuel con-
sumption, while pushing and holding the
trip meter selector knob (1), turn the indi-
cator selector knob (2).
68LM262
NOTE:
When you change the units that average
fuel consumption is displayed in, the
instantaneous fuel consumption units
will be changed automatically.
When you reconnect the negative (–) ter-
minal to the battery, the unit of the aver-
age fuel consumption will be reinitialized.
Change the unit again to your prefer-
ence.Driving range
If you selected driving range the last time
you drove the vehicle, the display indicates
“---” for a few seconds and then indicates
the current driving range when the ignition
switch is turned to the “ON” position.
The driving range shown in the display is
the approximate distance you can drive
until the fuel gauge indicates “E”, based on
current driving conditions.
When the low fuel warning light comes on,
the display “---” will appear.
If the low fuel warning light comes on, fill
the fuel tank immediately regardless of the
value of driving range shown in the display.
As the driving range after refueling is cal-
culated based on the most recent driving
condition, the value is different each time
you refuel.
NOTE:
If you refuel when the ignition switch is in
the “ON” position, the driving range may
not indicate the correct value.
When you reconnect the negative (–) ter-
minal to the battery, the value of driving
range will be shown after driving for a
while.EXAMPLE
(Initial
setting)
Page 69 of 207

Downloaded from www.Manualslib.com manuals search engine 2-54
BEFORE DRIVING
60MK0-14E
Wiper and Washer Operation
When the ignition switch is in the “ON”
position, you can use the wiper/washer
lever or switch (if equipped).Windshield Wipers
74LHT0230
To turn the windshield wipers on, move the
lever down to one of the three operating
positions. In the “INT” position, the wipers
operate intermittently. The “INT” position is
very convenient for driving in mist or light
rain. In the “LO” position, the wipers oper-
ate at a steady low speed. In the “HI” posi-
tion, the wipers operate at a steady high
speed. To turn off the wipers, move the
lever back to the “OFF” position.
Move the lever up and hold it to the “MIST”
position, the windshield wipers will turn on
continuously at low speed.
Windshield Washer
74LHT0231
To spray windshield washer fluid, pull the
lever toward you. The windshield wipers
will automatically turn on at low speed if
they are not already on and the “INT” posi-
tion is equipped.
EXAMPLE
WARNING
To prevent windshield icing in cold
weather, turn on the defroster to
heat the windshield before and dur-
ing windshield washer use.
Do not use radiator antifreeze in
the windshield washer reservoir. It
can severely impair visibility when
sprayed on the windshield, and can
also damage your vehicle’s paint.
EXAMPLE
NOTICE
To help prevent damage to the wind-
shield wiper and washer system
components, you should take the fol-
lowing precautions:
Do not continue to hold in the lever
when there is no windshield
washer fluid being sprayed or the
washer motor can be damaged.
Do not attempt to remove dirt from
a dry windshield with the wipers or
you can damage the windshield
and the wiper blades. Always wet
the windshield with washer fluid
before operating the wipers.
Clear ice or packed snow from the
wiper blades before using the wip-
ers.
Check the washer fluid level regu-
larly. Check it often when the
weather is bad.
Only fill the washer fluid reservoir
3/4 full during cold weather to allow
room for expansion if the tempera-
ture falls low enough to freeze the
solution.
Page 77 of 207
Downloaded from www.Manualslib.com manuals search engine 3-4
OPERATING YOUR VEHICLE
60MK0-14E
60G033
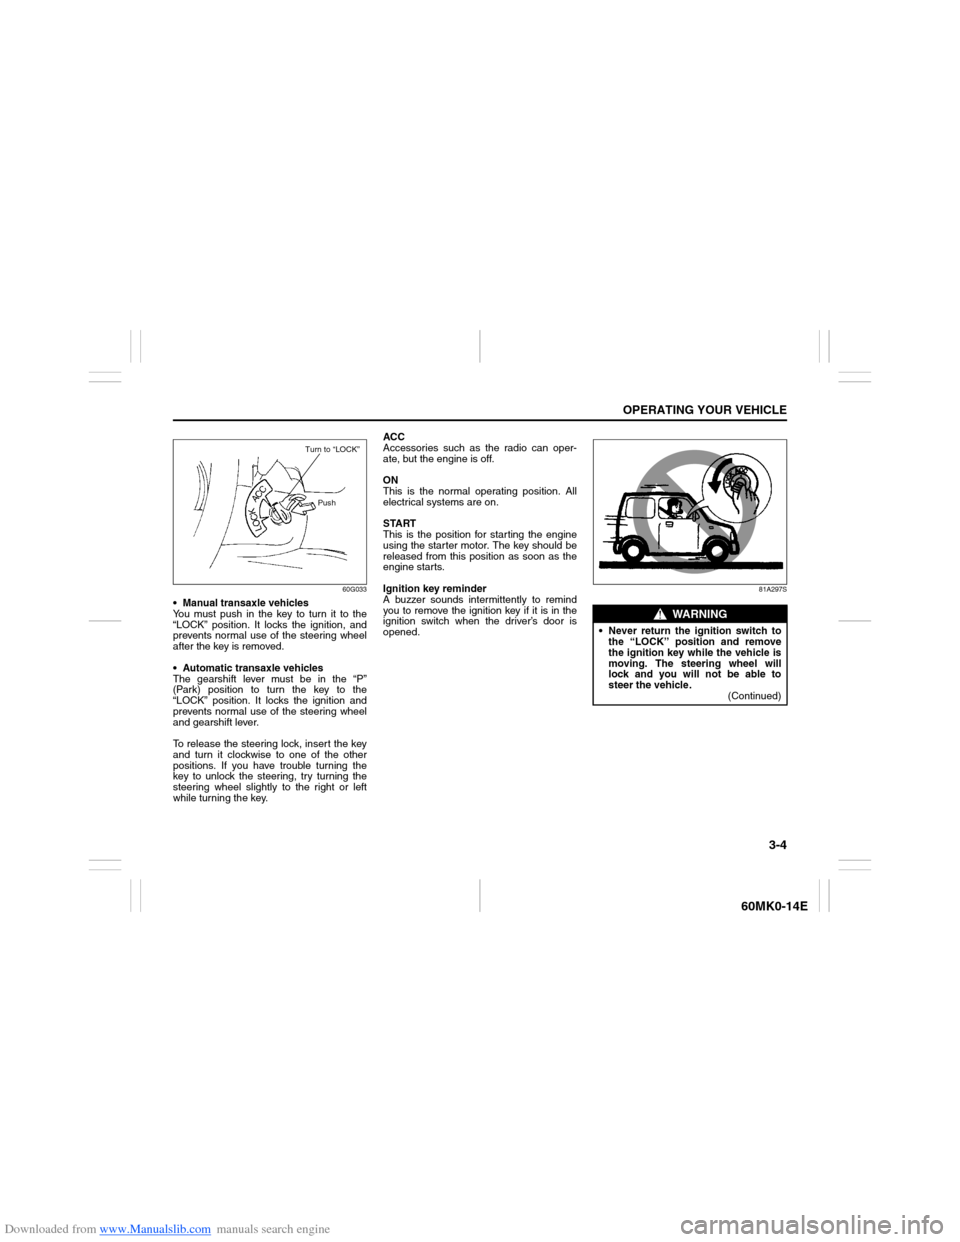
Manual transaxle vehicles
You must push in the key to turn it to the
“LOCK” position. It locks the ignition, and
prevents normal use of the steering wheel
after the key is removed.
Automatic transaxle vehicles
The gearshift lever must be in the “P”
(Park) position to turn the key to the
“LOCK” position. It locks the ignition and
prevents normal use of the steering wheel
and gearshift lever.
To release the steering lock, insert the key
and turn it clockwise to one of the other
positions. If you have trouble turning the
key to unlock the steering, try turning the
steering wheel slightly to the right or left
while turning the key.ACC
Accessories such as the radio can oper-
ate, but the engine is off.
ON
This is the normal operating position. All
electrical systems are on.
START
This is the position for starting the engine
using the starter motor. The key should be
released from this position as soon as the
engine starts.
Ignition key reminder
A buzzer sounds intermittently to remind
you to remove the ignition key if it is in the
ignition switch when the driver’s door is
opened.
81A297S
Turn to “LOCK”
Push
WARNING
Never return the ignition switch to
the “LOCK” position and remove
the ignition key while the vehicle is
moving. The steering wheel will
lock and you will not be able to
steer the vehicle.
(Continued)
Page 78 of 207
Downloaded from www.Manualslib.com manuals search engine 3-5OPERATING YOUR VEHICLE
60MK0-14E
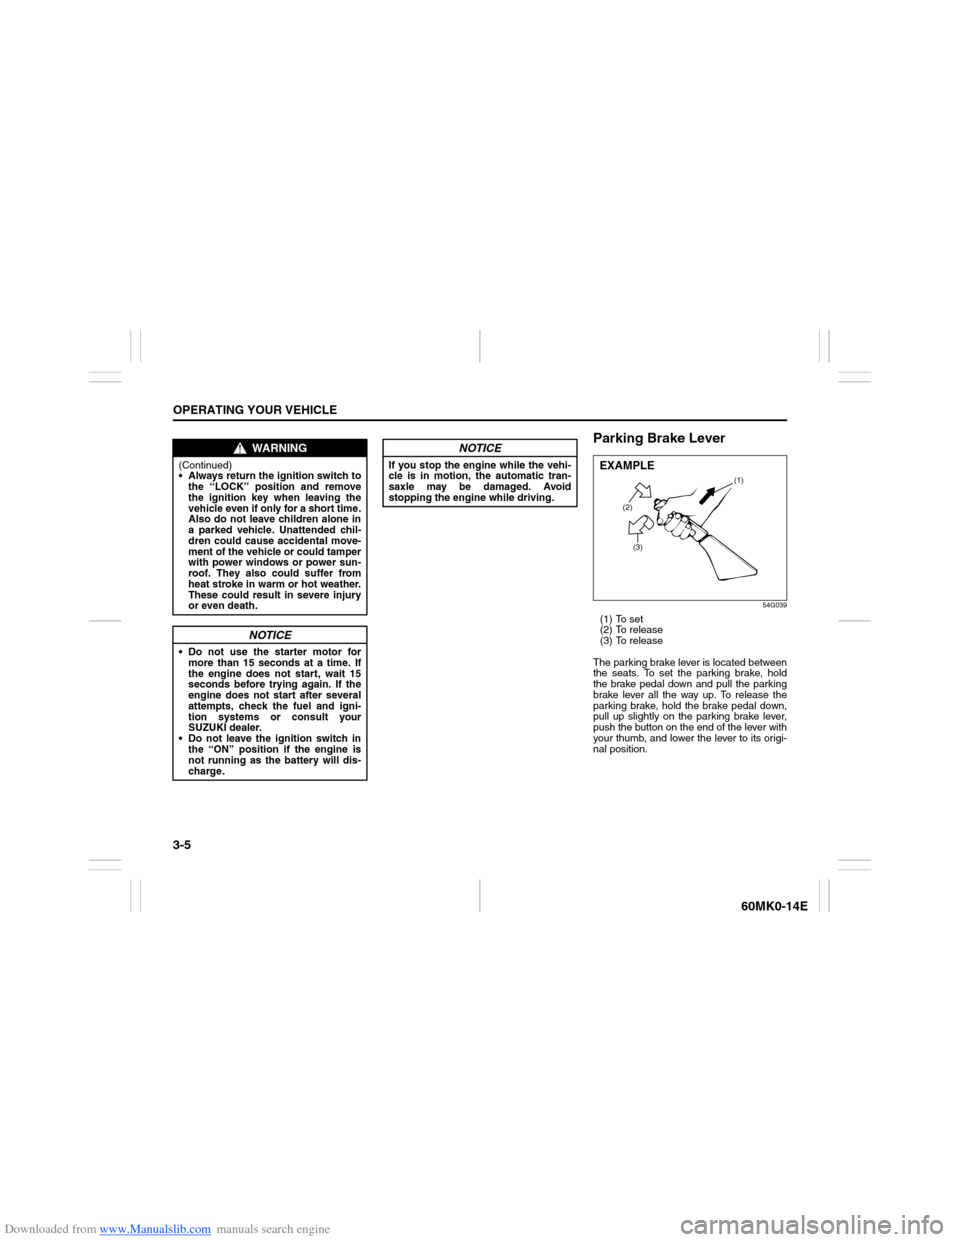
Parking Brake Lever
54G039
(1) To set
(2) To release
(3) To release
The parking brake lever is located between
the seats. To set the parking brake, hold
the brake pedal down and pull the parking
brake lever all the way up. To release the
parking brake, hold the brake pedal down,
pull up slightly on the parking brake lever,
push the button on the end of the lever with
your thumb, and lower the lever to its origi-
nal position.
WARNING
(Continued)
Always return the ignition switch to
the “LOCK” position and remove
the ignition key when leaving the
vehicle even if only for a short time.
Also do not leave children alone in
a parked vehicle. Unattended chil-
dren could cause accidental move-
ment of the vehicle or could tamper
with power windows or power sun-
roof. They also could suffer from
heat stroke in warm or hot weather.
These could result in severe injury
or even death.
NOTICE
Do not use the starter motor for
more than 15 seconds at a time. If
the engine does not start, wait 15
seconds before trying again. If the
engine does not start after several
attempts, check the fuel and igni-
tion systems or consult your
SUZUKI dealer.
Do not leave the ignition switch in
the “ON” position if the engine is
not running as the battery will dis-
charge.
NOTICE
If you stop the engine while the vehi-
cle is in motion, the automatic tran-
saxle may be damaged. Avoid
stopping the engine while driving.
(2)
(3)(1)
EXAMPLE
Page 79 of 207
Downloaded from www.Manualslib.com manuals search engine 3-6
OPERATING YOUR VEHICLE
60MK0-14E
For automatic transaxle vehicles, always
set the parking brake before moving the
gearshift lever to the “P” (PARK) position. If
you park on an incline and shift into “P”
before setting the parking brake, the
weight of the vehicle may make it difficult to
shift out of “P” when you are ready to drive
the vehicle.
When preparing to drive the vehicle, move
the gearshift lever out of the “P” position
before releasing the parking brake.Parking Brake Reminder Buzzer
A buzzer sounds intermittently to remind
you to release the parking brake if you
start the vehicle without releasing the park-
ing brake. Make sure that the parking
brake is fully released and the brake sys-
tem warning light turns off.
WARNING
Never drive your vehicle with the
parking brake on: rear brake effec-
tiveness can be reduced from over-
heating, brake life may be
shortened, or permanent brake
damage may result.
If the parking brake does not hold
the vehicle securely or does not
fully release, have your vehicle
inspected immediately by an autho-
rized SUZUKI dealer.
WARNING
Always set the parking brake fully
before leaving your vehicle or it may
move, causing injury or damage.
When parking, make sure the gear-
shift lever for manual transaxle vehi-
cles is in 1st gear or “R” (Reverse)
and the gearshift lever for automatic
transaxle vehicles is in “P” (Park).
Remember, even though the tran-
saxle is in gear, you must set the
parking brake fully.
WARNING
When parking the vehicle in
extremely cold weather, the following
procedure should be used:
1) Set the parking brake.
2) Manual transaxle - turn off the
engine, then shift into reverse or
first gear.
Automatic transaxle - shift into
“P” (Park) and turn off the engine.
3) Get out of the vehicle and put
chocks under the wheels.
4) Release the parking brake.
When you return to your vehicle,
you must remember to first set the
parking brake, then remove the
wheel chocks.
Page 80 of 207
Downloaded from www.Manualslib.com manuals search engine 3-7OPERATING YOUR VEHICLE
60MK0-14E
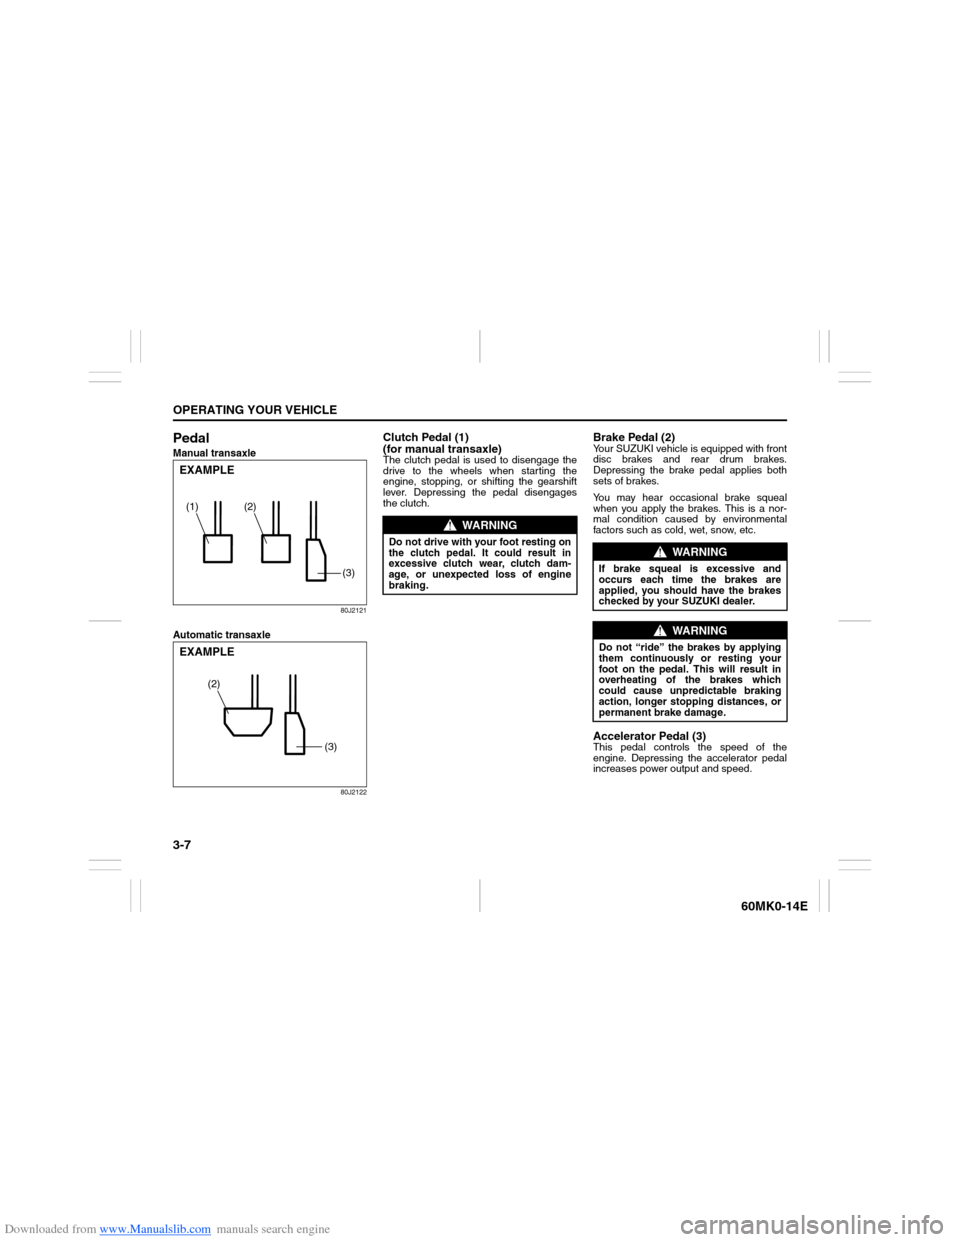
PedalManual transaxle
80J2121
Automatic transaxle
80J2122
Clutch Pedal (1)
(for manual transaxle)The clutch pedal is used to disengage the
drive to the wheels when starting the
engine, stopping, or shifting the gearshift
lever. Depressing the pedal disengages
the clutch.
Brake Pedal (2)Your SUZUKI vehicle is equipped with front
disc brakes and rear drum brakes.
Depressing the brake pedal applies both
sets of brakes.
You may hear occasional brake squeal
when you apply the brakes. This is a nor-
mal condition caused by environmental
factors such as cold, wet, snow, etc.Accelerator Pedal (3)This pedal controls the speed of the
engine. Depressing the accelerator pedal
increases power output and speed.
(2)
(1)
(3)EXAMPLE
(3)
(2)
EXAMPLE
WARNING
Do not drive with your foot resting on
the clutch pedal. It could result in
excessive clutch wear, clutch dam-
age, or unexpected loss of engine
braking.
WARNING
If brake squeal is excessive and
occurs each time the brakes are
applied, you should have the brakes
checked by your SUZUKI dealer.
WARNING
Do not “ride” the brakes by applying
them continuously or resting your
foot on the pedal. This will result in
overheating of the brakes which
could cause unpredictable braking
action, longer stopping distances, or
permanent brake damage.
Page 81 of 207
Downloaded from www.Manualslib.com manuals search engine 3-8
OPERATING YOUR VEHICLE
60MK0-14E
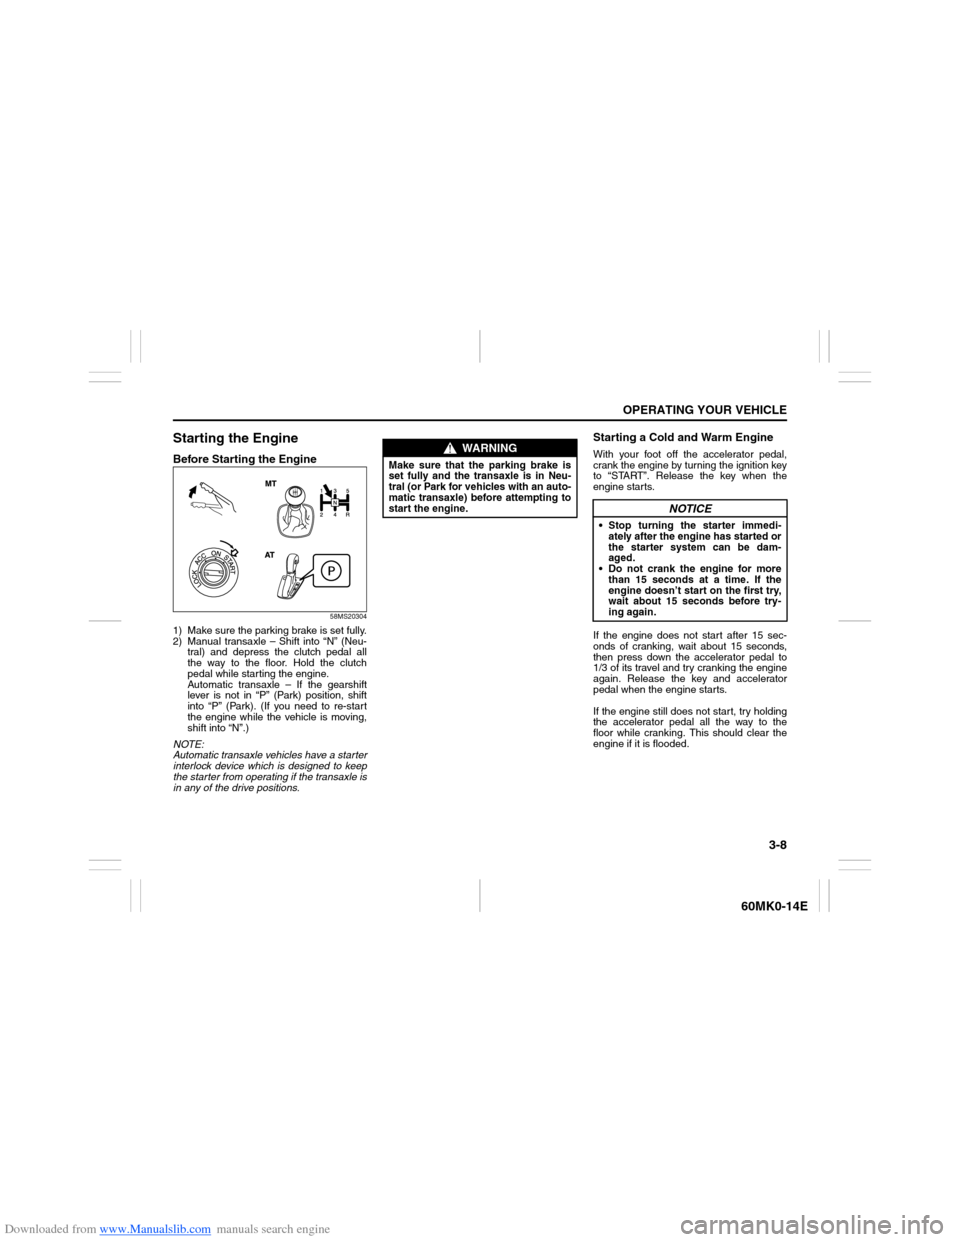
Starting the EngineBefore Starting the Engine
58MS20304
1) Make sure the parking brake is set fully.
2) Manual transaxle – Shift into “N” (Neu-
tral) and depress the clutch pedal all
the way to the floor. Hold the clutch
pedal while starting the engine.
Automatic transaxle – If the gearshift
lever is not in “P” (Park) position, shift
into “P” (Park). (If you need to re-start
the engine while the vehicle is moving,
shift into “N”.)
NOTE:
Automatic transaxle vehicles have a starter
interlock device which is designed to keep
the starter from operating if the transaxle is
in any of the drive positions.
Starting a Cold and Warm Engine With your foot off the accelerator pedal,
crank the engine by turning the ignition key
to “START”. Release the key when the
engine starts.
If the engine does not start after 15 sec-
onds of cranking, wait about 15 seconds,
then press down the accelerator pedal to
1/3 of its travel and try cranking the engine
again. Release the key and accelerator
pedal when the engine starts.
If the engine still does not start, try holding
the accelerator pedal all the way to the
floor while cranking. This should clear the
engine if it is flooded.
WARNING
Make sure that the parking brake is
set fully and the transaxle is in Neu-
tral (or Park for vehicles with an auto-
matic transaxle) before attempting to
start the engine.
NOTICE
Stop turning the starter immedi-
ately after the engine has started or
the starter system can be dam-
aged.
Do not crank the engine for more
than 15 seconds at a time. If the
engine doesn’t start on the first try,
wait about 15 seconds before try-
ing again.