Page 130 of 207
Downloaded from www.Manualslib.com manuals search engine 5-35OTHER CONTROLS AND EQUIPMENT
60MK0-14E
MP3/WMA
No playbackThe disc contains unsupported formatted
data.Check the file format.
Sound skips or noise producedSound skipping may occur when playing
VBR (Variable Bit Rate) files.It is not recommended to play VBR files.
USB
Playback does not start when the USB
device is connected.There is no supported format file to play
on this unit.Check the file format.
The current consumption of the USB
device exceeds 500 mA.Use an USB device with a current con-
sumption lower than 500 mA.
Problem
Possible cause
Possible solution
Page 131 of 207

Downloaded from www.Manualslib.com manuals search engine 5-36
OTHER CONTROLS AND EQUIPMENT
60MK0-14E
Error Display Messages
Display
Possible cause
Possible solution
CD
ERROR 1The disc cannot be read.Insert the disc with its label side up.
Check the disc if it is not warped or is free of flaws.
When ERROR 1 does not disappear even when a normal
disc is inserted, contact your dealer.
ERROR 3The player developed an error of an uni-
dentified cause.When the CD is in the unit, press the CD eject button to
remove the disc.
When the disc cannot be ejected, contact your dealer.
USB/iPod
®ERROR 1Inoperable due to an unidentified cause.Unplug the USB device and plug it again.
When ERROR 1 does not disappear, contact your dealer.
ERROR 2Impossible to communicate correctly with
the USB device.Unplug the USB device and plug it again.
Check the USB device.
ERROR 3The USB device is disconnected. Check the connection of the USB device.
ERROR 4The current consumption of the USB
device exceeds 500 mA.Check the USB device.
Page 148 of 207

Downloaded from www.Manualslib.com manuals search engine 7-3INSPECTION AND MAINTENANCE
60MK0-14E
For Item 2-1. “Nickel plugs”, replace every 50000 km if the local law requires.
*Interval: This interval should be judged by odome-
ter reading or months, whichever comes first.km (x1000) 15 30 45 60 75 90
miles (x1000)9 1827364554
months 12 24 36 48 60 72ENGINE
1-1. Engine accessory drive belt Tension check, *Adjustment, *Replacement – – I – – R*1-2.
Valve clearance
–
I
–
I
–
I
1-3. Engine oil and engine oil filterRRRRRR
1-4.
Engine coolant
–
–
R
–
–
R
*1-5. Exhaust system (except catalyst)–I–I–I
IGNITION
2-1. Spark plugs
When unleaded fuel is used
Nickel plug
–
–
R
–
–
R
When leaded fuel is used, refer to “Severe Driving Condition” schedule.
FUEL
3-1. Air cleaner filter element Paved-road I I R I I R
Dusty condition
Refer to “Severe Driving condition” schedule.
*3-2. Fuel lines–I–I–I
*3-3.
Fuel filter
–
–
R
–
–
R
*3-4. Fuel tank–– I –– I
EMISSION CONTROL SYSTEM
*4-1. PCV valve––––– I*4-2.
Fuel evaporative emission control system
–
–
–
–
–
I
Page 149 of 207

Downloaded from www.Manualslib.com manuals search engine 7-4
INSPECTION AND MAINTENANCE
60MK0-14E
*Interval: This interval should be judged by odome-
ter reading or months, whichever comes first.km (x1000) 15 30 45 60 75 90
miles (x1000)9 1827364554
months 12 24 36 48 60 72BRAKE
*5-1. Brake discs and pads (front)IIIIII
Brake drums and shoes (rear)
–
I
–
I
–
I
*5-2. Brake hoses and pipes–I–I–I
5-3.
Brake fluid
Check, *Replacement
–
R
–
R
–
R
5-4. Brake lever and cable Check, *Adjustment (1st 15000 km only) I–––––
CHASSIS AND BODY
*6-1. Clutch (pedal and fluid level)IIIIII6-2.
Tires/Wheels
I
I
I
I
I
I
*6-3. Drive axle boots–– I –– I
*6-4.
Suspension system
–
I
–
I
–
I
*6-5. Steering system–I–I–I
*6-6.
Manual transaxle oil
(I: 1st 15000 km only)
I
–
R
–
–
R
6-7. Automatic transaxle Fluid level – I – I – I
* Fluid change
Replace every 165000 km (99000 miles)
* Fluid hose – – – I – –
6-8.
All latches, hinges and locks
–
I
–
I
–
I
*6-9. Air conditioner filter element (if equipped) – I R – I R
WARNING
The shock absorbers are filled with high pressure gas. Never attempt to disassemble them or throw them into a fire. Avoid
storing them near a heater or heating device. When scrapping the absorber, the gas must be released from the absorber
safely. Ask your dealer for assistance.
Page 153 of 207

Downloaded from www.Manualslib.com manuals search engine 7-8
INSPECTION AND MAINTENANCE
60MK0-14E
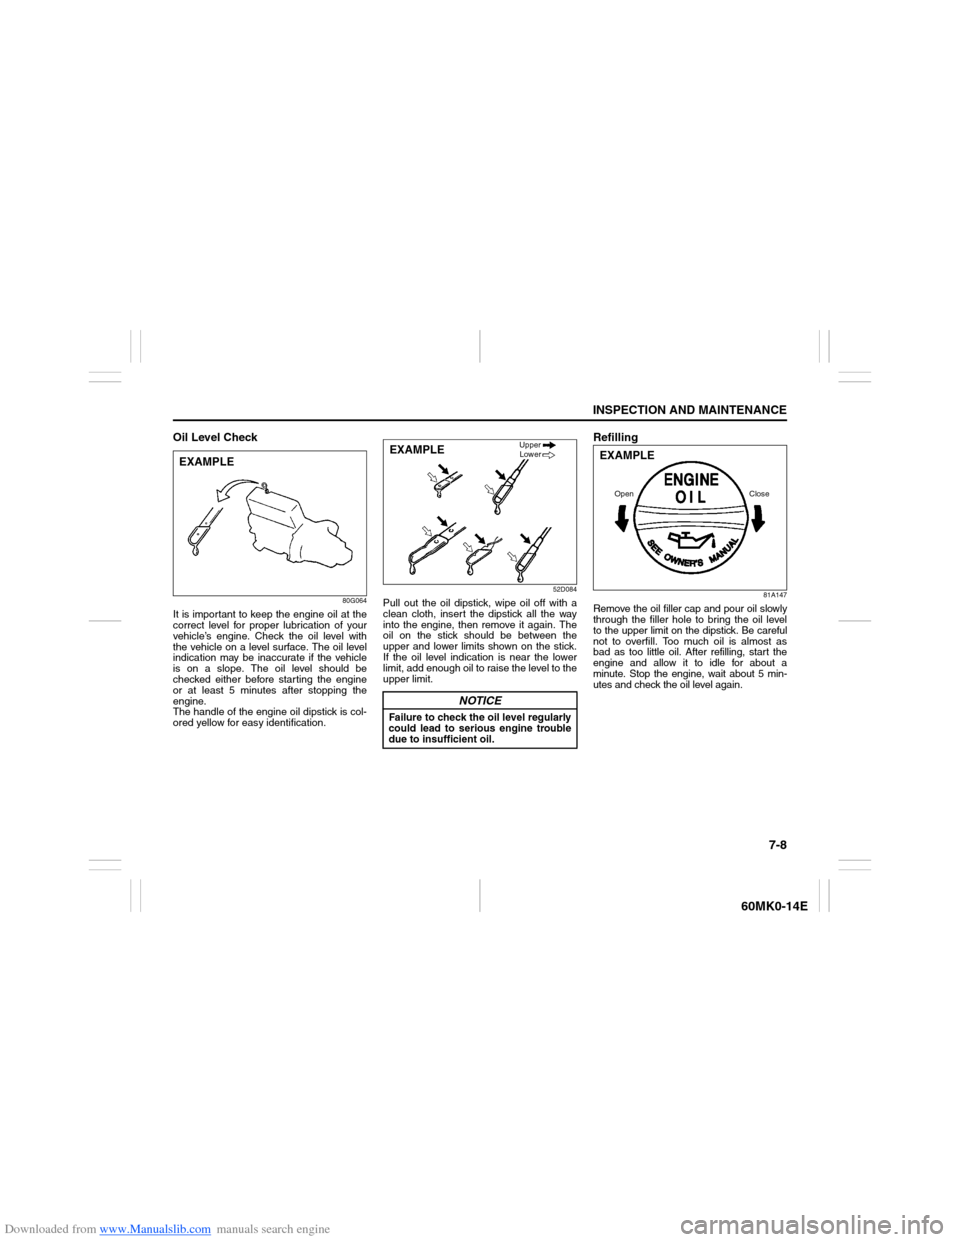
Oil Level Check
80G064
It is important to keep the engine oil at the
correct level for proper lubrication of your
vehicle’s engine. Check the oil level with
the vehicle on a level surface. The oil level
indication may be inaccurate if the vehicle
is on a slope. The oil level should be
checked either before starting the engine
or at least 5 minutes after stopping the
engine.
The handle of the engine oil dipstick is col-
ored yellow for easy identification.
52D084
Pull out the oil dipstick, wipe oil off with a
clean cloth, insert the dipstick all the way
into the engine, then remove it again. The
oil on the stick should be between the
upper and lower limits shown on the stick.
If the oil level indication is near the lower
limit, add enough oil to raise the level to the
upper limit.
Refilling
81A147
Remove the oil filler cap and pour oil slowly
through the filler hole to bring the oil level
to the upper limit on the dipstick. Be careful
not to overfill. Too much oil is almost as
bad as too little oil. After refilling, start the
engine and allow it to idle for about a
minute. Stop the engine, wait about 5 min-
utes and check the oil level again.
EXAMPLE
NOTICE
Failure to check the oil level regularly
could lead to serious engine trouble
due to insufficient oil.EXAMPLE
Upper
Lower
Close Open
EXAMPLE
Page 156 of 207

Downloaded from www.Manualslib.com manuals search engine 7-11INSPECTION AND MAINTENANCE
60MK0-14E
Refill with Oil and Check for Leaks1) Pour oil through the filler hole and
install the filler cap.
For the approximate capacity of the oil,
refer to the “Capacities” item in the
“SPECIFICATIONS” section.
2) Start the engine and look carefully for
leaks at the oil filter and drain plug. Run
the engine at various speeds for at least
5 minutes.
3) Stop the engine and wait about 5 min-
utes. Check the oil level again and add
oil if necessary. Check for leaks again.
Engine CoolantSelection of CoolantTo maintain optimum performance and
durability of your engine, use SUZUKI
Genuine Coolant or equivalent.
This type of coolant is best for your cooling
system as it:
Helps maintain proper engine tempera-
ture.
Gives proper protection against freezing
and boiling.
Gives proper protection against corro-
sion and rust.Failure to use the proper coolant can dam-
age your cooling system. Your authorized
SUZUKI dealer can help you select the
proper coolant.
NOTICE
When replacing the oil filter, it is
recommended that you use a genu-
ine SUZUKI replacement filter. If
you use an aftermarket filter, make
sure it is of equivalent quality and
follow the manufacturer’s instruc-
tions.
Oil leaks from around the oil filter
or drain plug indicate incorrect
installation or gasket damage. If
you find any leaks or are not sure
that the filter has been properly
tightened, have the vehicle
inspected by your SUZUKI dealer.
NOTICE
To avoid damaging your cooling sys-
tem:
Always use a high quality ethylene
glycol base non-silicate type cool-
ant diluted with distilled water at
the correct mixture concentration.
Make sure that the proper mix is 50/
50 coolant to distilled water and in
no case higher than 70/30. Concen-
trations greater than 70/30 coolant
to distilled water will cause over-
heating conditions.
Do not use straight coolant nor
plain water.
Do not add extra inhibitors or addi-
tives. They may not be compatible
with your cooling system.
Do not mix different types of base
coolants. Doing so may result in
accelerated seal wear and/or the
possibility of severe overheating
and extensive engine/automatic
transaxle damage.
Page 157 of 207

Downloaded from www.Manualslib.com manuals search engine 7-12
INSPECTION AND MAINTENANCE
60MK0-14E
Coolant Level CheckCheck the coolant level at the reservoir
tank, not at the radiator. With the engine
cool, the coolant level should be between
the “FULL” and “LOW” marks.Adding Coolant
60MH043
If the coolant level is below the “LOW”
mark, more coolant should be added.
Remove the reservoir tank cap and add
coolant until the reservoir tank level
reaches the “FULL” mark. Never fill the res-
ervoir tank above the “FULL” mark.
Coolant ReplacementSince special procedures are required, we
recommend you take your vehicle to your
SUZUKI dealer for coolant replacement.
WARNING
Engine coolant is harmful or fatal if
swallowed or inhaled. Do not drink
antifreeze or coolant solution. If swal-
lowed, do not induce vomiting. Imme-
diately contact a poison control
center or a physician. Avoid inhaling
mist or hot vapors; if inhaled, remove
to fresh air. If coolant gets in eyes,
flush eyes with water and seek medi-
cal attention. Wash thoroughly after
handling. Solution can be poisonous
to animals. Keep out of the reach of
children and animals.
NOTICE
The mixture you use should con-
tain 50% concentration of anti-
freeze.
If the lowest ambient temperature
in your area is expected to be –35°C
(–31°F) or below, use higher con-
centrations up to 60% following the
instructions on the antifreeze con-
tainer.
NOTICE
When putting the cap on the reser-
voir tank, line up the mark on the cap
and the mark on the tank. Failure to
follow this can result in coolant leak-
age.FULL
LOW
Page 160 of 207

Downloaded from www.Manualslib.com manuals search engine 7-15INSPECTION AND MAINTENANCE
60MK0-14E
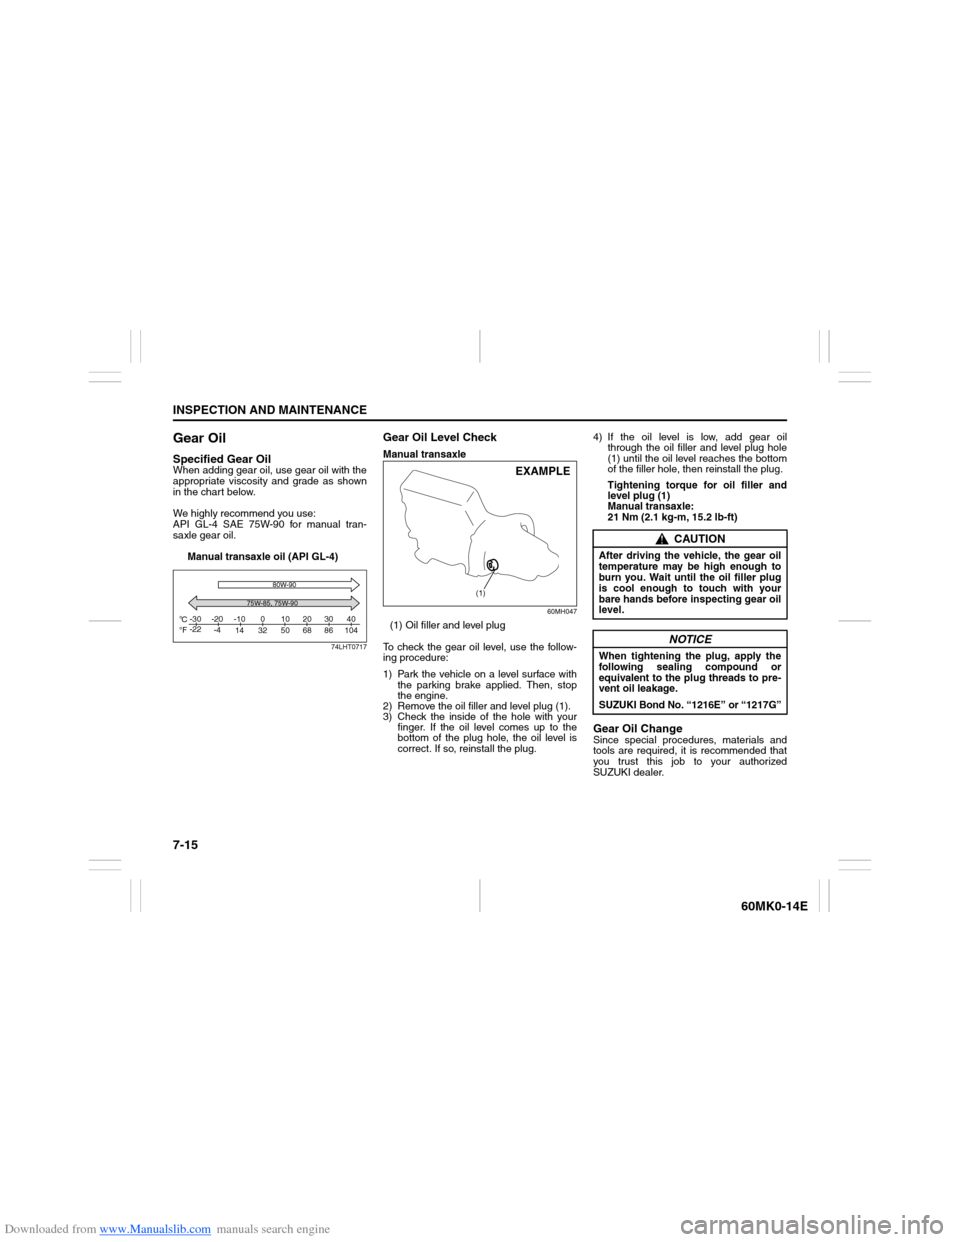
Gear OilSpecified Gear OilWhen adding gear oil, use gear oil with the
appropriate viscosity and grade as shown
in the chart below.
We highly recommend you use:
API GL-4 SAE 75W-90 for manual tran-
saxle gear oil.
Manual transaxle oil (API GL-4)
74LHT0717
Gear Oil Level CheckManual transaxle
60MH047
(1) Oil filler and level plug
To check the gear oil level, use the follow-
ing procedure:
1) Park the vehicle on a level surface with
the parking brake applied. Then, stop
the engine.
2) Remove the oil filler and level plug (1).
3) Check the inside of the hole with your
finger. If the oil level comes up to the
bottom of the plug hole, the oil level is
correct. If so, reinstall the plug.4) If the oil level is low, add gear oil
through the oil filler and level plug hole
(1) until the oil level reaches the bottom
of the filler hole, then reinstall the plug.
Tightening torque for oil filler and
level plug (1)
Manual transaxle:
21 Nm (2.1 kg-m, 15.2 lb-ft)
Gear Oil ChangeSince special procedures, materials and
tools are required, it is recommended that
you trust this job to your authorized
SUZUKI dealer.
C
Fo o-30
-22-20
-4-10
14 32 50 68 86 104010203040
75W-85, 75W-9080W-90
(1)
EXAMPLE
CAUTION
After driving the vehicle, the gear oil
temperature may be high enough to
burn you. Wait until the oil filler plug
is cool enough to touch with your
bare hands before inspecting gear oil
level.
NOTICE
When tightening the plug, apply the
following sealing compound or
equivalent to the plug threads to pre-
vent oil leakage.
SUZUKI Bond No. “1216E” or “1217G”