2013 SUBARU FORESTER reset
[x] Cancel search: resetPage 148 of 436

button, the compass display is toggled on
or off. When the compass is on, an
illuminated compass reading will appear
in the upper right corner of the mirror.
Even with the mirror in anti-glare mode,
the mirror surface turns bright if the
transmission is shifted into reverse. This
is to ensure good rearward visibility duringreversing. !Photosensors
The mirror has a photosensor attached on
both the front and back sides. If the glare
from the headlights of vehicles behind you
strikes the mirror, these sensors detect it
and make the reflection surface of the
mirror dimmer to help prevent you from
being blinded. For this reason, use care
not to cover the sensors with stickers, or other similar items. Periodically wipe the
sensors clean using a piece of dry soft
cotton cloth or an applicator. !
Compass zone adjustment
Compass calibration zones
1. The zone setting is factory preset to
Zone 8. Refer to the “Compass calibration
zones ”map shown above to verify that the
compass zone setting is correct for your
geographical location.
2. Press and hold the right button for 3
seconds then release, and the word“ ZONE ”will briefly appear and then the
zone number will be displayed.
3. Press the right-hand button repeatedly
to cycle the display through all possible
zone settings. Stop cycling when the
correct zone setting for your location is displayed.
4. Releasing the button for 3 seconds will
exit the zone setting mode. !
Compass calibration
1. For optimum calibration, switch off all
nonessential electrical accessories (rear
window defogger, heater/air conditioning
system, spotlight, etc.) and ensure all
doors are shut.
2. Drive to an open, level area away from
large metallic objects or structures and
make certain the ignition switch is in the“ ON ”position.
3. Press and hold the right button for 6 - 7
seconds then release, and the compass
will enter the calibration mode. “CAL ”and
direction will be displayed.
4. Drive slowly in a circle until “CAL ”
disappears from the display (approxi-
mately two to three circles). The compass
is now calibrated.
5. Further calibration may be necessary
should outside influences cause the mirror
to read inaccurately. You will know that
this has occurred if your compass begins
to read in only limited directions. Should
you encounter this situation, return to step
one of the above procedure and recali-
brate the mirror. Instruments and controls
3-37
– CONTINUED –
Page 174 of 436

Antenna system.................................................. 5-3
Roof antenna (Rod type) ...................................... 5-3
FM reception ....................................................... 5-3
Installation of accessories .................................. 5-4
Audio set ............................................................. 5-4
Type A audio set (if equipped) ............................. 5-5
Type B audio set (if equipped) ............................. 5-6
Type C audio set (if equipped) ............................. 5-7
Type D audio set (if equipped) ............................. 5-8
Power and audio controls .................................. 5-9
Power switch and volume control ........................ 5-9
Sound controls and audio settings ...................... 5-9
FM/AM radio operation ...................................... 5-13
FM/AM selection ................................................. 5-13
Tuning ............................................................... 5-13
HD Radio
TMTechnology (Digital AM and FM
Radio) (type D audio) ........................................ 5-15
Displaying radio PS (Program Service Name) and RT (Radio Text) ................................................ 5-16
Station preset .................................................... 5-17
Satellite radio operation (if equipped) .............. 5-18
Sirius XM
TMsatellite radio (U.S.A. only).... ........... 5-18
Satellite radio reception ...................................... 5-18
Displaying satellite radio ID of tuner ................... 5-19
Band selection ................................................... 5-20
Channel and category selection .......................... 5-20
Channel preset ................................................... 5-21
Display selection (type A, B and C audio) ........... 5-22
CD player operation ........................................... 5-22
Play file. ............................................................. 5-22
How to insert a CD (type A, C and D) .................. 5-23How to insert a CD(s) (type B) ..
.......................... 5-23
How to play back a CD ...................................... 5-24
To select a track from the beginning .................. 5-24
Fast-forwarding and rewinding . .......................... 5-25
Repeating .......................................................... 5-25
Random playback .............................................. 5-26
Scan (type A, B and C audio) ... .......................... 5-27
Display selection (type A, B and C audio) ........... 5-27
Folder selection ................................................. 5-28
How to eject a CD from the player (type A, C and D audio) .............................................................. 5-28
How to eject CDs from the player (type B) ..... ..... 5-28
When the following messages are displayed. . ..... 5-29
Auxiliary input jack (if equipped). ..................... 5-29
Precautions to observe when handling a compact disc ................................................... 5-30
USB storage device / iPod
®operations
(type C and D audio) ...................................... 5-32
Play file ............................................................. 5-32
Connectable USB storage device ....................... 5-32
Connectable iPod
®models ................................. 5-33
Connecting USB storage device / iPod®............. 5-33
How to play back ............................................... 5-34
To select a track from the beginning .................. 5-34
To select a chapter from the beginning when connecting iPod
®............................................. 5-34
Fast-forwarding and rewinding . .......................... 5-34
Repeating .......................................................... 5-35
Random playback .............................................. 5-35
SCAN (only when connecting USB storage device) (type C audio) ...................................... 5-36Audio
5
Page 190 of 436

&Station preset
! How to preset stations
1. Press the “FM/AM ”button to select the
preferred reception mode.
2. Select the preferred station.
3. Press and hold one of the preset
buttons (from
to) for more
than 1.5 seconds to store the frequency. If
the button is pressed and held for less
than 1.5 seconds, the preceding selection
will remain in memory. NOTE . Up to six stations for each reception
mode may be preset. . If the connection between the radio
and battery is broken for any reason
such as vehicle maintenance or radio
removal, all stations stored in the
preset buttons are cleared. If this
occurs, it is necessary to reset the
preset buttons.. If a cell phone is placed near the
radio, it may cause the radio to emit
noise when it receives calls. This noise
does not indicate a radio malfunction. ! Selecting preset stations
1. Press the “FM/AM ”button to select the
preferred reception mode. 2. Press the preferred preset button (from
to) briefly.
! Auto-store (type D audio)
Using the Auto-store function, you can
automatically store 6 stations on the
current waveband (FM-AS or AM-AS) by
pressing and holding the
button for
1.5 seconds or longer. Use Auto-store to
quickly find the strongest stations, for
example when traveling through different
reception areas. NOTE . When the HD Radio function is
turned on, Auto-store cannot be used
while receiving the broadcasting sta-
tion with SPS (Supplemental ProgramService).. When you use Auto-store, the new
stations replace any stations pre-
viously stored.. Interrupting Auto-store: If you acci-
dentally press the
(Auto-store)
button, you can cancel the Auto-store
function before it has been completed
as follows.
–Switching to the other source
mode – Pressing the
button
– Switching to the other band
– Turning the “TUNE/TRACK/CH ”dial –
Pressing the “SCAN ”button
! Displaying and selecting preset
stations (type D audio)
1. Press and hold the
button for 1.5
seconds or longer during AM/FM recep-
tion to display the radio screen.
2. Operate the “TUNE/TRACK/CH ”dial
to select the stations. Audio
5-17
Page 194 of 436

Type A and B audio:Category up by one step
Category down by
one step
Type C audio:Category up by one step
Category down by
one step
When a category is selected, turning the “ TUNE/TRACK/CH ”dial selects channels
only within the selected category.
The control function returns to the normal
mode after approximately 10 seconds. ! Type D audio
When in the SAT mode, press the
button to change the category search mode.
When in the category search mode, press
the following button to change the cate-
gory up or down. Category up by one step
Category down by
one step
When a category is selected, turning the “
TUNE/TRACK/CH ”dial selects channels
only within the selected category. The
control function returns to the normal
mode after approximately 10 seconds. ! Channel scan
Type A and B audio*
1
Type C audio*1
Type D audio*2
*1: Press the button briefly.
*2: Press and hold the button.
Press the “SCAN ”button to change the
radio to the SCAN mode. In this mode,
under the selected category, the radio
scans through the channel until a station
is found. The radio will stop at the station
for 5 seconds while displaying the channel
number, after which scanning will continue until the entire channel has been scanned
from the low end to the high end.
Press the
“SCAN ”button again to cancel
the SCAN mode and to stop on any
displayed channel. & Channel preset
! How to preset channels
1. Press the “SAT ”button to select SAT1,
SAT2 or SAT3 reception mode.
2. Select the desired channel.
3. Press and hold one of the preset
buttons (from
to) for more
than 1.5 seconds to store the channel. If
the button is pressed and held for less
than 1.5 seconds, the preceding selection
will remain in memory. NOTE . Up to six SAT1, SAT2 and SAT3
channels each may be preset. . If the connection between the radio
and battery is broken for any reason
such as vehicle maintenance or radio
removal, all channels stored in the
preset buttons are cleared. If this
occurs, it is necessary to reset the
preset buttons. Audio
5-21
– CONTINUED –
Page 195 of 436

5-22Audio
!Selecting preset channels
1. Press the “SAT ”button to select SAT1,
SAT2 or SAT3 reception mode.
2. Press the preferred preset button (from
to) briefly.
! Displaying and selecting preset
stations (type D audio)
1. Press and hold the
button for 1.5
seconds or longer during satellite radio
reception to display the radio screen.
2. Operate the “TUNE/TRACK/CH ”dial
to select the stations.
& Display selection (type A, B
and C audio)
Type A and B audio
Type C audio
Press the “TEXT ”button while receiving
the satellite radio to change the display as follows.
CD player operation NOTE . Make sure to always insert a disc
with the label side up. If a disc is
inserted with the label side down, the
player displays “CHECK DISC ”. Refer
to “When the following messages are
displayed ”F 5-29.
. If a disc is inserted during a radio
broadcast, the disc will interrupt thebroadcast.. After the last song finishes, the disc
will automatically return to track 1 (the
first track on the disc) and will auto-
matically play back. . The player is designed to be able to
play music CD-Rs and music CD-RWs,
but it may not be able to play certainones.. Mini CDs (i.e., 8 cm/3 inch CDs) are
not supported, and if inserted, they will
be immediately ejected.. CDs that can be played back are
accompanied by the following restric-tions.
–Maximum number of folders: 255
– Maximum number of tracks in a
folder: 255 –
Maximum number of files on a
CD: 510 (type A, B and C audio)/999
(type D audio)
& Play file
NOTE . Copyright protected MP3/WMA/AAC
files will not be played by the system.
The player will automatically skip to the
next file (track).. WMA9 Lossless, WMA9 Profes-
sional and WMA9 voice cannot beplayed. MP3: . Based on MPEG1, 2 and 2.5 Layer3
. Sampling rate (kHz): 48, 44.1, 32, 24,
22.05, 16, 12, 11.025, 8. Bit rate (kbps): 8 to 320
. Supports variable bit rates
WMA (type A, B and C audio):. Based on Windows Media Audio 9
. Sampling rate (kHz): 48, 44.1, 32
. Bit rate (kbps): 32 to 192
WMA (type D audio):. Based on Windows Media Audio 7, 8
and 9. Sampling rate (kHz): 48, 44.1, 32
. Bit rate (kbps): 32 to 192
Page 207 of 436

5-34Audio
to in-vehicle equipment will be charged
when the ignition switch is in the “ON ”
or “Acc ”position. However, activation
of the iPod
®may be delayed if the
battery charge of the iPod®is low.
. If an iPod®does not activate after
operation, disconnect the connection
cable from the iPod
®and reset it. For
the resetting procedure, see the User ’s
Guide that comes with the iPod
®.
. If an iPod®and the connection cable
are connected improperly, the iPod®
cannot be powered on or will not be
recognized by in-vehicle equipment. In
this case, disconnect the connection
cable from the iPod
®, and then connect
it again.
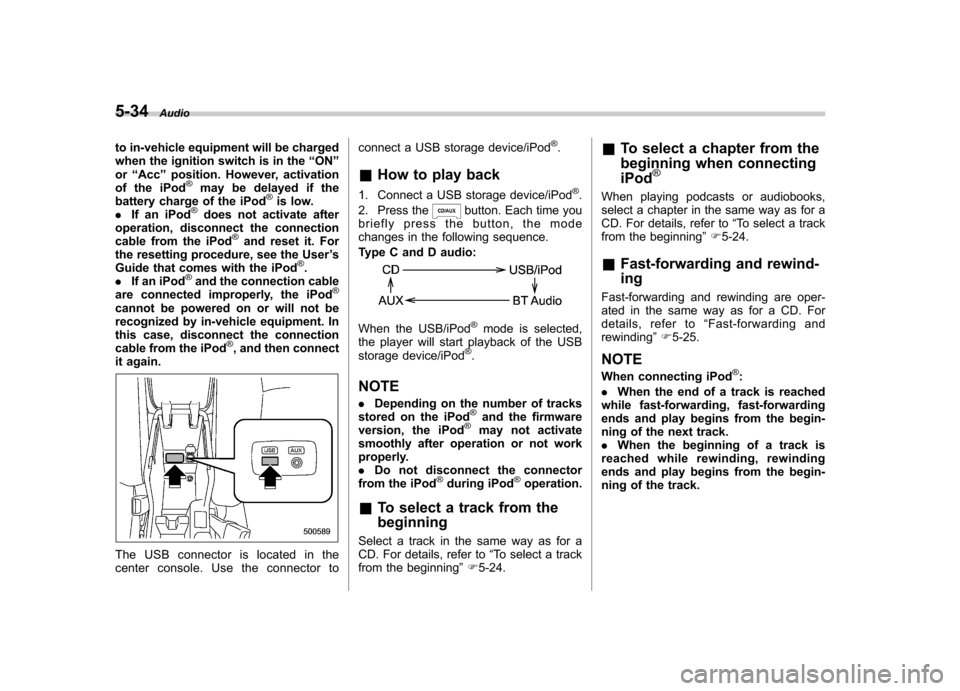
The USB connector is located in the
center console. Use the connector to connect a USB storage device/iPod
®.
& How to play back
1. Connect a USB storage device/iPod
®.
2. Press the
button. Each time you
briefly press the button, the mode
changes in the following sequence.
Type C and D audio:
When the USB/iPod®mode is selected,
the player will start playback of the USB
storage device/iPod
®.
NOTE . Depending on the number of tracks
stored on the iPod
®and the firmware
version, the iPod®may not activate
smoothly after operation or not work
properly.. Do not disconnect the connector
from the iPod
®during iPod®operation.
& To select a track from the beginning
Select a track in the same way as for a
CD. For details, refer to “To select a track
from the beginning ”F 5-24. &
To select a chapter from the
beginning when connecting iPod
®
When playing podcasts or audiobooks,
select a chapter in the same way as for a
CD. For details, refer to “To select a track
from the beginning ”F 5-24.
& Fast-forwarding and rewind- ing
Fast-forwarding and rewinding are oper-
ated in the same way as for a CD. For
details, refer to “Fast-forwarding and
rewinding ”F 5-25.
NOTE
When connecting iPod
®:
. When the end of a track is reached
while fast-forwarding, fast-forwarding
ends and play begins from the begin-
ning of the next track.. When the beginning of a track is
reached while rewinding, rewinding
ends and play begins from the begin-
ning of the track.
Page 212 of 436

!With radio mode selected
Press the “
”button or “”button briefly.
The radio will seek the next preset station
and stop on it.
Press and hold the “
”button or “”
button. The radio will seek the next
receivable station and stop on it.
That station ’s frequency will be shown on
the audio display. ! With CD mode selected
Press the “
”button to skip forward in the
track order. Press the “”button to skip
backward in the track order. The track
number will be shown on the audio
display.
When the MP3/WMA/AAC format track is
playing, press and hold the “
”button to
select the next folder. Press and hold the “
” button to go back to the previous
folder. ! With USB/iPod
®mode selected
Press the “
”button to skip forward in the
track order. Press the “”button to skip
backward in the track order. The track
number will be shown on the audio
display. ! With SAT mode selected
Press the “
”button to skip forward in the
channel order. Press the “”button to skip backward in the channel order.
The channel will be shown on the audio
display. &
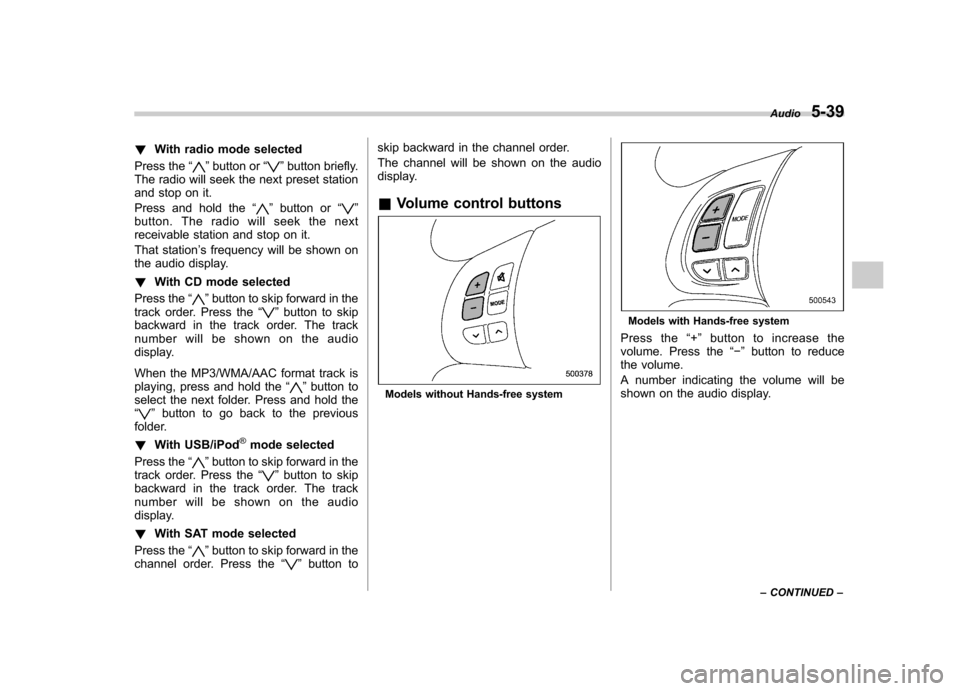
Volume control buttons
Models without Hands-free system
Models with Hands-free system
Press the “+ ” button to increase the
volume. Press the “� ” button to reduce
the volume.
A number indicating the volume will be
shown on the audio display. Audio
5-39
– CONTINUED –
Page 223 of 436

5-50Audio
5. Select the “CONFIRM ”menu. Then
“ STORED ”is displayed and the mode
changes to the registering speed dial
mode. Refer to “Registering speed dial ”
F 5-50.
NOTE
While inputting the phone numbers, if “ GO BACK ”(type C audio)/ “BS ”(type
D audio) is chosen using the “TUNE/
TRACK/CH ”dial, the character that was
input last is deleted. ! Registering from call history
1. Select the “CALL HISTORY ”menu.
2. Select “OUTGOING ”or “INCOMING ”
by operating the “TUNE/TRACK/CH ”dial.
3. Select the phone number by operating the “TUNE/TRACK/CH ”dial.
4. Perform either of the following proce-dures. –Select the “RECORD NAME ”menu
by operating the “TUNE/TRACK/CH ”
dial. – Press the talk switch
.
5. Say the name (voice tag) to be registered.
6. Select the “CONFIRM ”menu. Then
“ STORED ”is displayed and the mode
changes to the registering speed dial
mode. Refer to “Registering speed dial ”F
5-50.
! Registering from redial
1. Select the “REDIAL ”menu.
2. Select the phone number by operatingthe “TUNE/TRACK/CH ”dial.
3. Select the “STORE ”menu.
4. Select the “CONFIRM ”menu.
5. Perform either of the following proce-dures. –Select the “RECORD NAME ”menu
by operating the “TUNE/TRACK/CH ”
dial. – Press the talk switch
.
6. Say the name (voice tag) to be registered.
7. Select the “CONFIRM ”menu. Then
“ STORED ”is displayed and the mode
changes to the registering speed dial
mode. Refer to “Registering speed dial ”
F 5-50.
! Registering from call back
1. Select the “CALL BACK ”menu.
2. Select the phone number by operatingthe “TUNE/TRACK/CH ”dial.
3. Select the “STORE ”menu.
4. Select the “CONFIRM ”menu.
5. Perform either of the following proce-dures. –
Select the “RECORD NAME ”menu
by operating the “TUNE/TRACK/CH ”
dial. – Press the talk switch
.
6. Say the name (voice tag) to be registered.
7. Select the “CONFIRM ”menu. Then
“ STORED ”is displayed and the mode
changes to the registering speed dial
mode. Refer to “Registering speed dial ”
F 5-50.
! Registering speed dial
1. After registering phonebook data, se-
lect the “SPEED DIAL ”menu.
2. Press the preset button (from
to) to which you want to register the
phone number. NOTE
If the number to be used is already
registered in speed dial, “OVER-
WRITE? ”will be displayed.
! List names function
The voice tags registered in the phone-
book are spoken by using the list names
function. To use the list names function,
perform the following procedure.
1. Select the “LIST NAMES ”menu.
2. Choose the registered data by per-