2013 SKODA OCTAVIA sensor
[x] Cancel search: sensorPage 8 of 57

Note■Use a soft cloth and, if necessary, methylated spirits, to remove fingerprints
from the screen. When doing so, ensure that you do not cause damage to other parts of the interior.■
It is not possible to operate the screen with your fingernails or while wearing
gloves.
■
Do not affix anything to the area of the unit below the screen. This could affect
the functioning of the sensors for the zoom effect.
■
To protect the screen, you can use a suitable screen protector for touchpads
that does not affect its functionality.
■
The brightness of the screen is adjusted automatically depending on the bright-
ness of the interior lighting. The automatic setting can be adjusted manual-
ly » page 18 .
Switching the unit on/off
First read and observe the introductory information given on page 5.
›
Press the knob to switch the device on or off.
When the device is switched on, the audio source and operating mode that were active before switching off the device will be restored.
If telephone mode was active before you switched off the unit and the ignitionand Bluetooth ®
function is not switched on, the screen displays the mes-
sage » page 35 . Switch on the ignition or the Bluetooth ®
function » page 20 .
If the vehicle key is pulled out of the ignition lock while the unit is switched on,
the unit will switch off automatically. After switching on the ignition, the unit is
turned on automatically.
If the device was switched off using the knob
, then the device will not switch
on automatically after switching on the ignition.
If your vehicle is fitted with the KESSY system, the device will switch off automat-
ically after the engine has been turned off and the door opened. If you open the driver's door before switching off the engine, the device will also switch off.
When the ignition is switched off, the device switches off automatically after ap-
prox. half an hour (discharge protection of the vehicle battery).
Device menusFig. 2
Unit menus
First read and observe the introductory information given on page 5.
Call up the main menu
›
Press the button MENU.
Function keys in the main MENU - Radio » page 21
- Media » page 26
- Sound settings » page 18
- Unit settings » page 17
- Vehicle systems settings » page 44
- Phone menu » page 34
Adjusting volume
First read and observe the introductory information given on page 5.
Increase the volume
›
Turn the knob to the right.
Reduce the volume
›
Turn the knob to the left.
Muting
›
Press the MUTE button or rotate the
knob and adjust the audio volume to 0.
6Introductory information
Page 10 of 57
Device operation
operate via the device screen
Introduction
This chapter contains information on the following subjects:
Operation
8
Input screen with keyboard
9
Input screen with numeric keyboard
9
First and foremost, pay attention to the safety instructions » page 4 , Important
notes .
This chapter covers the instrument operation and the work with the touch screen and with various types of input keyboards.
Operation
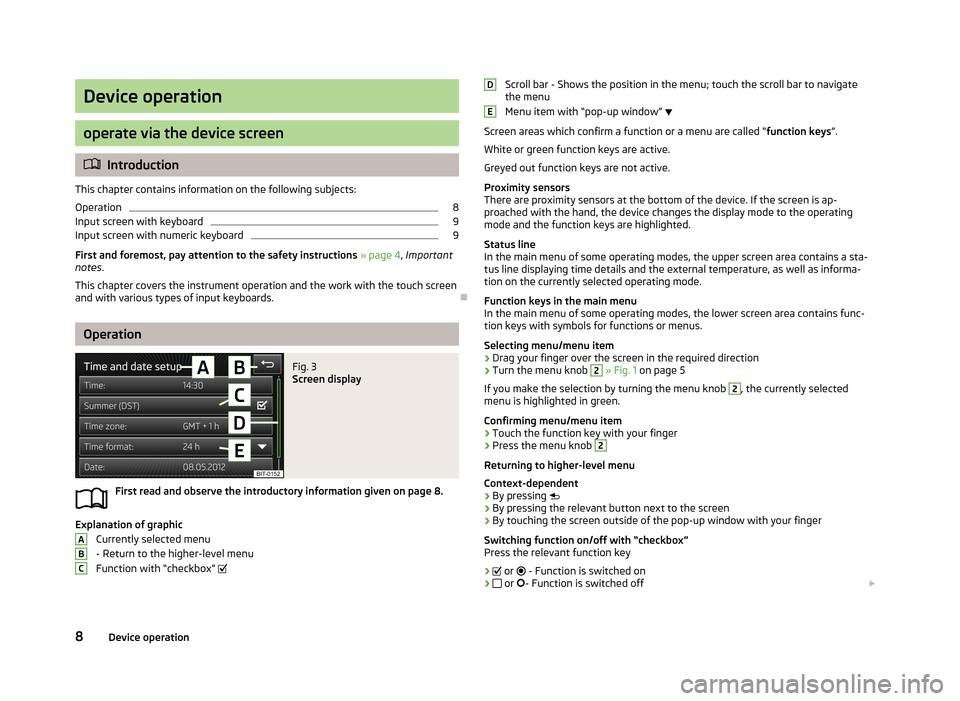
Fig. 3
Screen display
First read and observe the introductory information given on page 8.
Explanation of graphic
Currently selected menu
- Return to the higher-level menu
Function with “checkbox”
ABCScroll bar - Shows the position in the menu; touch the scroll bar to navigate
the menu
Menu item with “pop-up window”
Screen areas which confirm a function or a menu are called “ function keys”.
White or green function keys are active.
Greyed out function keys are not active.
Proximity sensors
There are proximity sensors at the bottom of the device. If the screen is ap- proached with the hand, the device changes the display mode to the operating
mode and the function keys are highlighted.
Status line
In the main menu of some operating modes, the upper screen area contains a sta-
tus line displaying time details and the external temperature, as well as informa- tion on the currently selected operating mode.
Function keys in the main menu
In the main menu of some operating modes, the lower screen area contains func-
tion keys with symbols for functions or menus.
Selecting menu/menu item
› Drag your finger over the screen in the required direction
› Turn the menu knob 2
» Fig. 1 on page 5
If you make the selection by turning the menu knob
2
, the currently selected
menu is highlighted in green.
Confirming menu/menu item
› Touch the function key with your finger
› Press the menu knob
2
Returning to higher-level menu
Context-dependent
› By pressing
› By pressing the relevant button next to the screen
› By touching the screen outside of the pop-up window with your finger
Switching function on/off with “checkbox” Press the relevant function key
›
or
- Function is switched on
›
or
- Function is switched off
DE8Device operation
Page 50 of 57
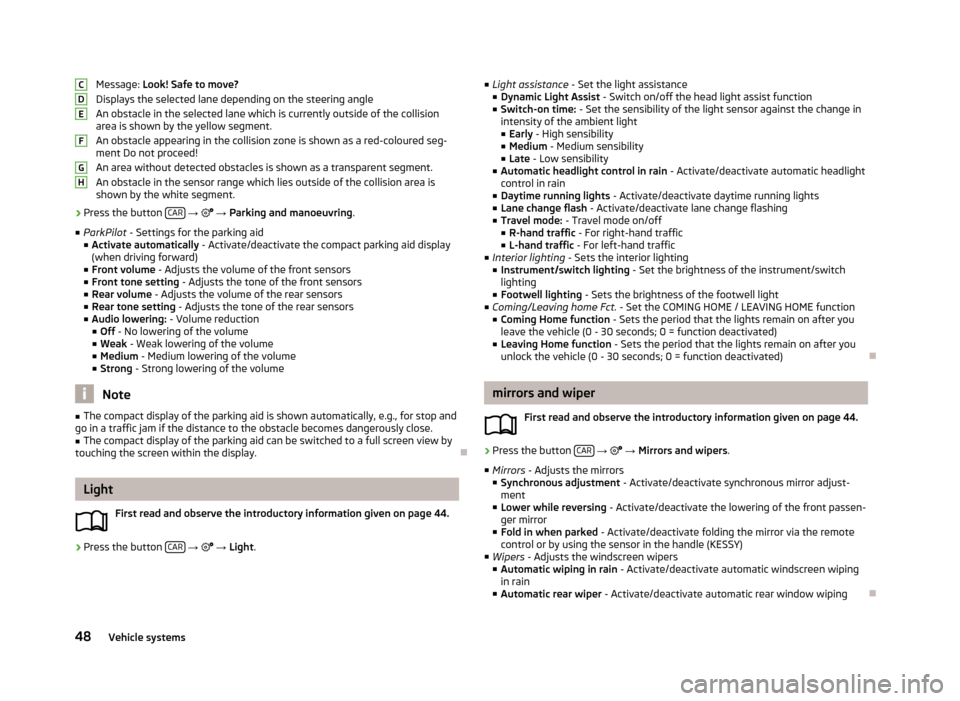
Message: Look! Safe to move?
Displays the selected lane depending on the steering angle An obstacle in the selected lane which is currently outside of the collisionarea is shown by the yellow segment.
An obstacle appearing in the collision zone is shown as a red-coloured seg- ment Do not proceed!
An area without detected obstacles is shown as a transparent segment.
An obstacle in the sensor range which lies outside of the collision area is shown by the white segment.›
Press the button CAR
→ → Parking and manoeuvring .
■ ParkPilot - Settings for the parking aid
■ Activate automatically - Activate/deactivate the compact parking aid display
(when driving forward)
■ Front volume - Adjusts the volume of the front sensors
■ Front tone setting - Adjusts the tone of the front sensors
■ Rear volume - Adjusts the volume of the rear sensors
■ Rear tone setting - Adjusts the tone of the rear sensors
■ Audio lowering: - Volume reduction
■ Off - No lowering of the volume
■ Weak - Weak lowering of the volume
■ Medium - Medium lowering of the volume
■ Strong - Strong lowering of the volume
Note
■
The compact display of the parking aid is shown automatically, e.g., for stop and
go in a traffic jam if the distance to the obstacle becomes dangerously close.■
The compact display of the parking aid can be switched to a full screen view by
touching the screen within the display.
Light
First read and observe the introductory information given on page 44.
›
Press the button CAR
→
→ Light .
CDEFGH
■
Light assistance - Set the light assistance
■ Dynamic Light Assist - Switch on/off the head light assist function
■ Switch-on time: - Set the sensibility of the light sensor against the change in
intensity of the ambient light
■ Early - High sensibility
■ Medium - Medium sensibility
■ Late - Low sensibility
■ Automatic headlight control in rain - Activate/deactivate automatic headlight
control in rain
■ Daytime running lights - Activate/deactivate daytime running lights
■ Lane change flash - Activate/deactivate lane change flashing
■ Travel mode: - Travel mode on/off
■ R-hand traffic - For right-hand traffic
■ L-hand traffic - For left-hand traffic
■ Interior lighting - Sets the interior lighting
■ Instrument/switch lighting - Set the brightness of the instrument/switch
lighting
■ Footwell lighting - Sets the brightness of the footwell light
■ Coming/Leaving home Fct. - Set the COMING HOME / LEAVING HOME function
■ Coming Home function - Sets the period that the lights remain on after you
leave the vehicle (0 - 30 seconds; 0 = function deactivated)
■ Leaving Home function - Sets the period that the lights remain on after you
unlock the vehicle (0 - 30 seconds; 0 = function deactivated)
mirrors and wiper
First read and observe the introductory information given on page 44.
›
Press the button CAR
→
→ Mirrors and wipers .
■ Mirrors - Adjusts the mirrors
■ Synchronous adjustment - Activate/deactivate synchronous mirror adjust-
ment
■ Lower while reversing - Activate/deactivate the lowering of the front passen-
ger mirror
■ Fold in when parked - Activate/deactivate folding the mirror via the remote
control or by using the sensor in the handle (KESSY)
■ Wipers - Adjusts the windscreen wipers
■ Automatic wiping in rain - Activate/deactivate automatic windscreen wiping
in rain
■ Automatic rear wiper - Activate/deactivate automatic rear window wiping
48Vehicle systems
Page 54 of 57
input screenlanguage characters19
Input screen with keyboard9
Input screen with numeric keyboard9
Instrument lighting48
Introductory information4
iPod32
K
keyboard
9
Keyboard19
L
Lane Assist
47
Lane change flash48
LEAVING HOME48
Light sensor - light switch-on time48
List of available stations Radio
22
M
Main menu Media
26
Telephone35
MAXI DOT-Display11
Telephone12
MAXI DOT display operation
10
media SD memory card
31
voice control13
Media26
AUX31
Bluetooth audio29
CD30
File formats28
Folder list27
Main menu26
MEDIA IN32
Multifunction steering wheel11
Operation26
Playback27
Requirements and Limitations29
Scan27
Select signal source26
Settings27
Signal source28
Supported media28
USB31
MEDIA IN32
Memory function of the remote control key49
menu device settings
17
setup17
Menu Media
26
Radio21
Telephone34
Multifunction display49
Multifunction steering wheel Media
11
Radio11
Telephone12
Multimedia AUX
31
USB31
Mute6
O
Operating lever
10
Operation Radio
21
P
Pair device
38
Parking aid47
Phone Bluetooth - profile37
Call-lists42
Enter phone number41
Phone book42
Speed dialling a phone number40
Phonebox36
Playback Media
27
Proactive passenger protection47
R
radio voice control
13
Radio21
DAB - settings25
FM - settings25
List of available stations22
Main menu21
Multifunction steering wheel11
Operation21
Preface21
Search22
Semi-automatic search22
Settings24
Station logo23
Store radio station22
traffic programme (TP)23
Radio station Automatic search
22
Logo23
search22
See main menu21
Store22
Radio station logo23
S
Save radio station
22
52Index