2013 NISSAN TITAN reset
[x] Cancel search: resetPage 5 of 26

TIRE PRESSURE MONITORING SYSTEM (TPMS)
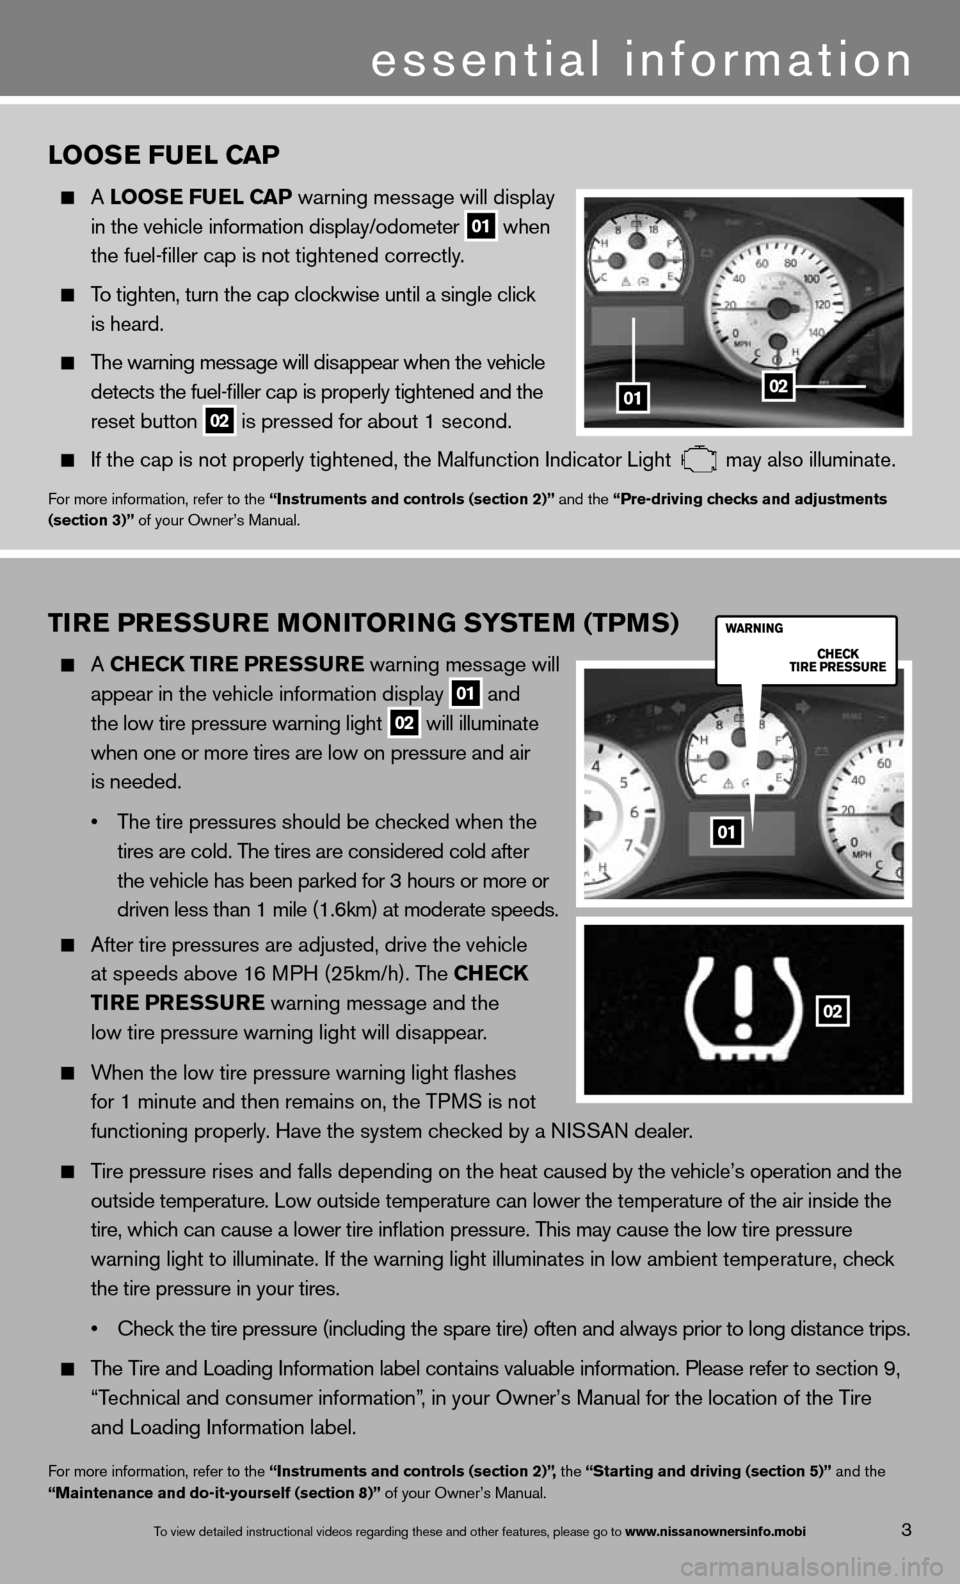
A ChEC k TIRE PRESSURE warning message will
appear in the vehicle information display
01 and
the low tire pressure warning light 02 will illuminate
when one or more tires are low on pressure and air
is needed.
• The tire pressures should be checked when the
tires are cold. The tires are considered cold after
the vehicle has been parked for 3 hours or more or
driven less than 1 mile (1.6km) at moderate speeds.
After tire pressures are adjusted, drive the vehicle
at speeds above 16 MPH (25km/h). The Ch ECk
TIRE PRESSURE warning message and the
low tire pressure warning light will disappear.
When the low tire pressure warning light flashes
for 1 minute and then remains on, the TPMS is not
functioning properly. Have the system checked by a ni SSAn dealer.
Tire pressure rises and falls depending on the heat caused by the vehicle’s operation and the
outside temperature. Low outside temperature can lower the temperature o\
f the air inside the
tire, which can cause a lower tire inflation pressure. This may cause the low tire pressure
warning light to illuminate. if the warning light illuminates in low ambient temperature, check
the tire pressure in your tires.
• Check the tire pressure (including the spare tire) often and always prior to long distance trips.
The Tire and Loading information label contains valuable information. Please refer to section 9,
“Technical and consumer information”, in your Owner’s Manual for the location of the Tire
and Loading information label.
for more information, refer to the “Instruments and controls (section 2)”, the “Starting and driving (section 5)” and the
“Maintenance and do-it-yourself (section 8)” of your Owner’s Manual.
LOOSE FUEL CAP
A LOOSE FUEL CAP warning message will display
in the vehicle information display/odometer
01 when
the fuel-filler cap is not tightened correctly.
To tighten, turn the cap clockwise until a single click
is heard.
The warning message will disappear when the vehicle
detects the fuel-filler cap is properly tightened and the
reset button
02 is pressed for about 1 second.
if the cap is not properly tightened, the Malfunction indicator Light may also illuminate.
f
or more information, refer to the “Instruments and controls (section 2)” and the “Pre-driving checks and adjustments
(section 3)” of your Owner’s Manual.
01
02
3
essential information
To view detailed in\fstructional videos\f regarding these a\fnd other features\f \fplease go to www.nissanownersin\hfo.mobi
0102
01
Page 13 of 26

ON
2013 Titan delivery checklist
eleCtroniC QuiCK referenCe gui\be (eQrg) yes
1. Explain that addit\fional vehicle oper\fation information c\fan be viewed via t\fhe
Nissan EQRG websit\fe at www.nissanownersinfo.mo\fbi
2. Explain that EQRG \finformation can be \fviewed via SmartPh\fone or personal co\fmputer
3. Identify where on th\fe vehicle’s Quick \fReference Guide the\fy can find the inter\fnet
address (P\b viewing\f) or Quick Respons\fe \bode (SmartPhone \fviewing) to access\f
the Nissan EQRG si\fte
All information\f specifications\f photographs and illustrations are those in effect at the time of printing.
NISSAN reserves the right to change specifications or design without notice and without obligation.
For additional information\f see your NISSAN dealer or contact NISSAN North America\f Inc. See
Owner’s Manual for \fimportant warnings\f and details on ve\fhicle operation an\fd maintenance. Sales \bonsultant Si\fgnature Date
Sales Manager Sign\fature Date
\bustomer Signature Date
Nissan\f the Nissan \fBrand Symbol\f Z and
Nissan model names\f are Nissan tradem\farks.
© 2012 Nissan North Ame\frica\f Inc.
QR
3E 0A60U0
Printing: July 2012 (19)
au\bio system
\bemonstrate yes
1. How to tune to the\f next broadcast st\fation and skip
to the next catego\fry (if so equipped) \for \bD track
2. How to store a rad\fio station in a pr\feset
3. How to scan the br\foadcast stations
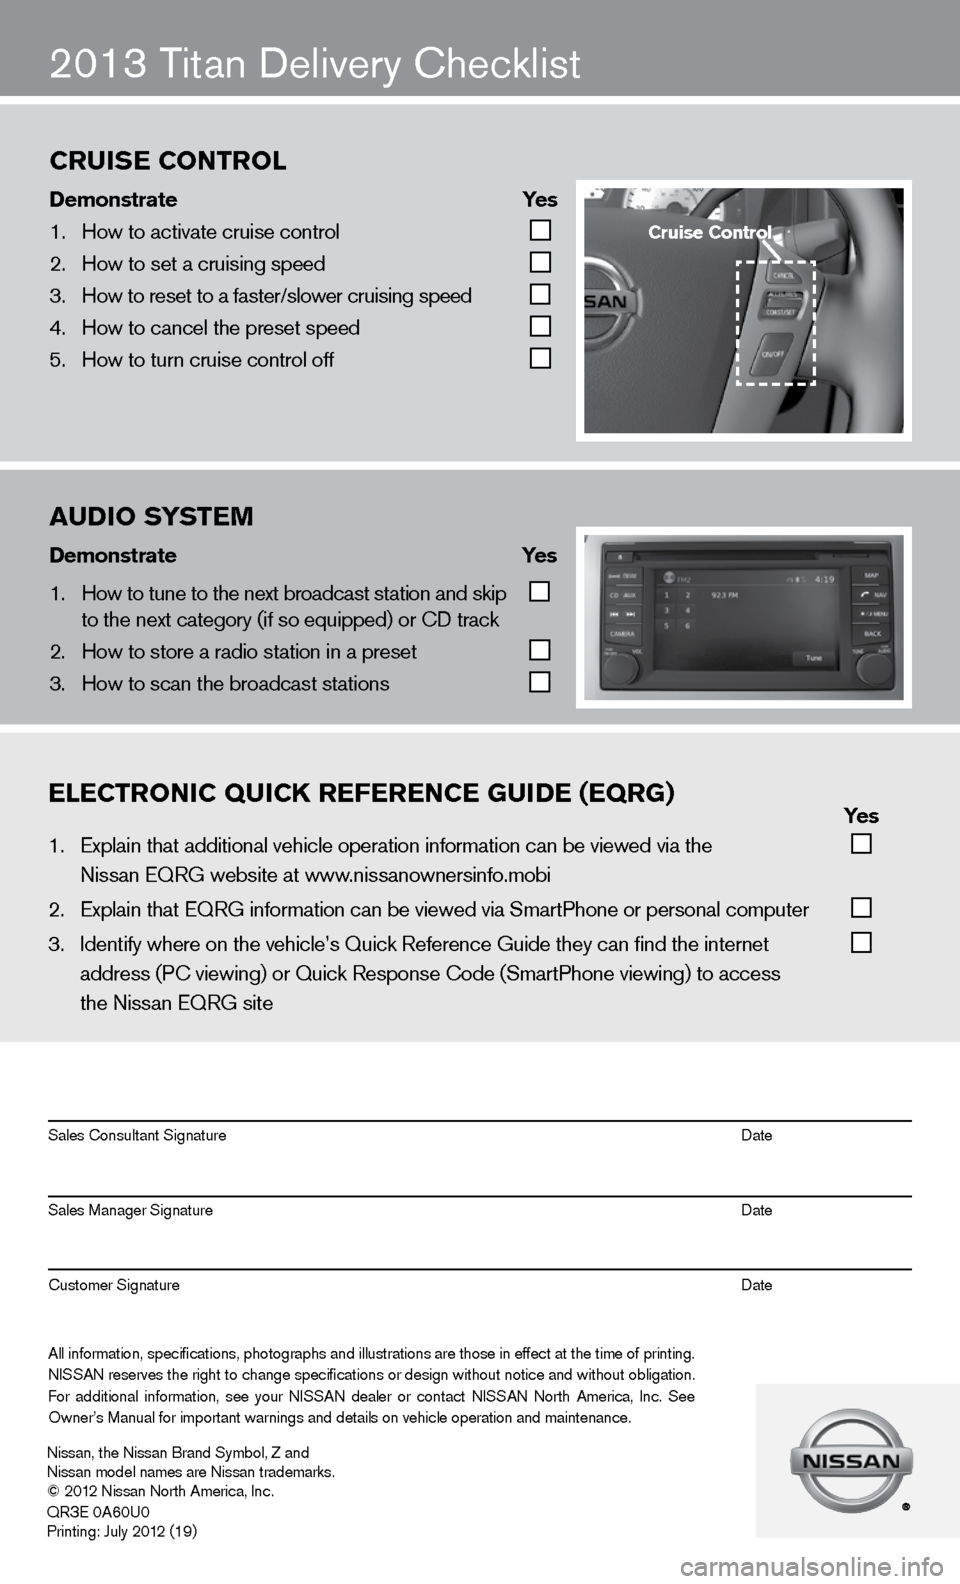
Cruise Control
\bemonstrate yes
1. How to activate cr\fuise control
2. How to set a cruis\fing speed
3. How to reset to a \ffaster/slower cruis\fing speed
4. How to cancel the \fpreset speed
5. How to turn cruise\f control off
Cruise Control
Page 14 of 26

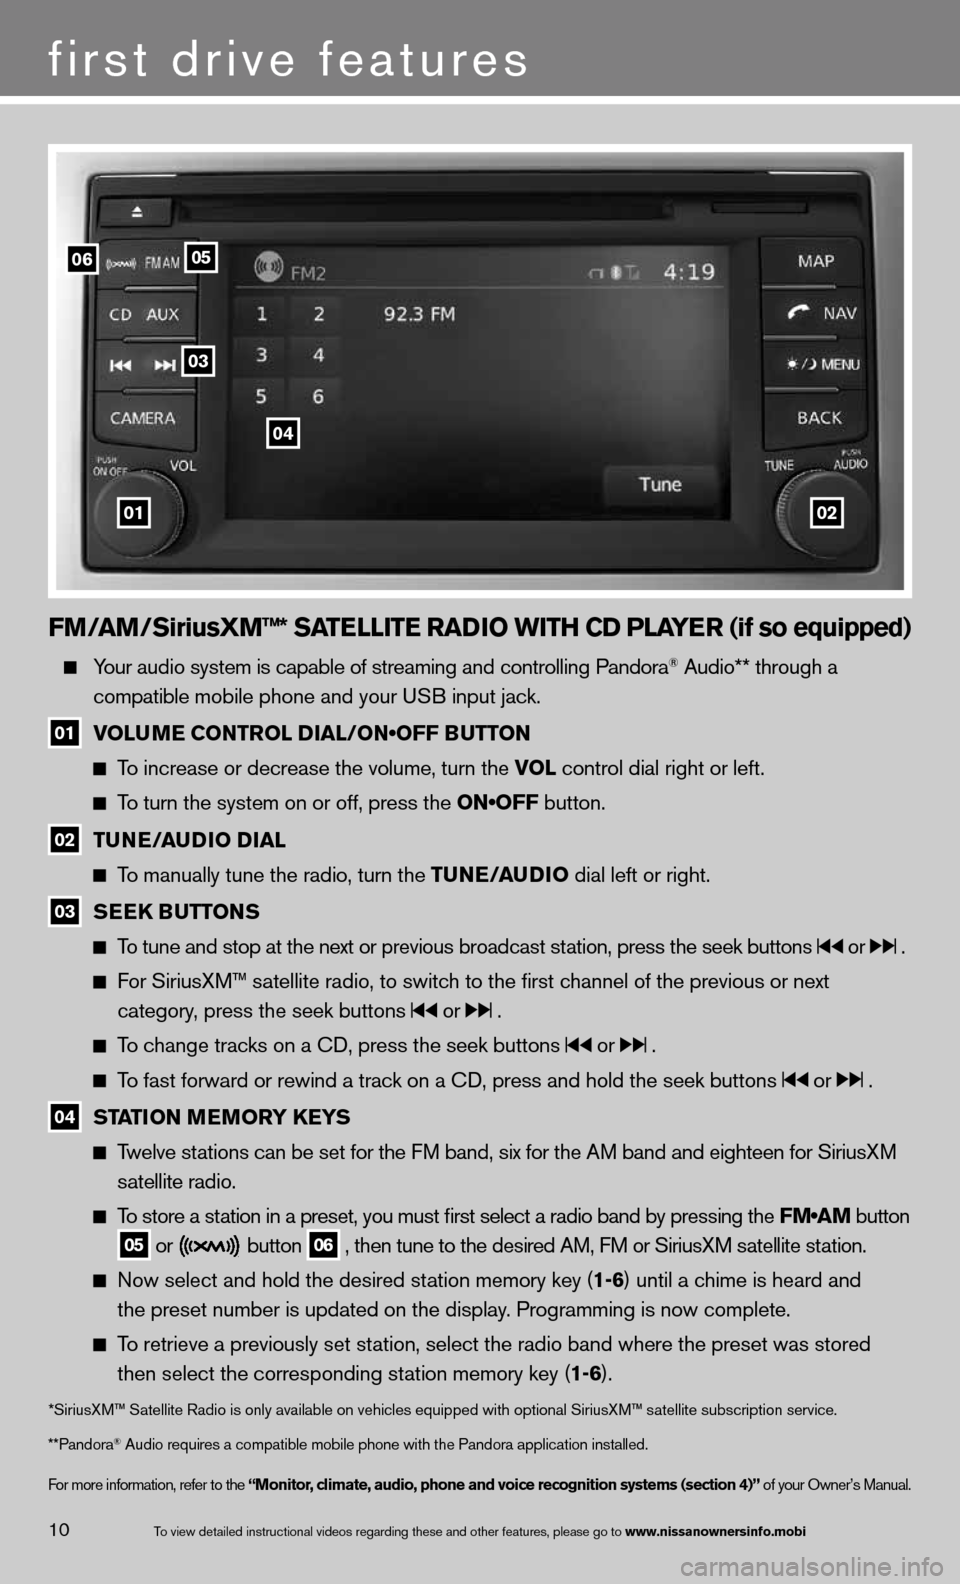
FM/AM/SiriusXM™* SATELLITE RADIO WITh CD PLAYER (if so equipped)
Your audio system is capable of streaming and controlling Pandora® Audio** through a
compatible mobile phone and your u SB input jack.
01 VOLUME CONTROL DIAL/ON•OFF BUTTON
To increase or decrease the volume, turn the vOL control dial right or left.
To turn the system on or off, press the ON•OFF button.
02 TUNE/AUDIO DIAL
To manually tune the radio, turn the TUNE/AUDIO dial left or right.
03 SEEk
BUTTONS
To tune and stop at the next or previous broadcast station, press the seek buttons or .
For SiriusXM™ satellite radio, to switch to the first channel of the previous or next
category, press the seek buttons
or .
To change tracks on a cd, press the seek buttons or .
To fast forward or rewind a track on a cd, press and hold the seek buttons or .
04 STATION MEMORY k
EYS
Twelve stations can be set for the FM band, six for the AM band and eighteen for SiriusXM
satellite radio.
To store a station in a preset, you must first select a radio band by pressing the \
FM•AM button
05 or button
06 , then tune to the desired AM, f
M or SiriusXM satellite station.
now select and hold the desired station memory key (1-6) until a chime is heard and
the preset number is updated on the display. Programming is now complete.
To retrieve a previously set station, select the radio band where the preset was stored
then select the corresponding station memory key (1-6).
*SiriusXM™ Satellite Radio is only available on vehicles equipped with optional Siri\
usXM™ satellite subscription service.
**Pandora
® Audio requires a \fcompatible mobile \fphone with the Pan\fdora application i\fnstalled.
for more information, refer to the “Monitor, climate, audio, phone and voice recognition systems (section 4)” of your Owner’s Manual.
first drive features
10To view detailed in\fstructional videos\f regarding these a\fnd other features\f \fplease go to www.nissanownersin\hfo.mobi
0102
06
03
04
05
Page 15 of 26

11To view detailed in\fstructional videos\f regarding these a\fnd other features\f \fplease go to www.nissanownersin\hfo.mobi
CRUISE CONTROL (if so equipped)
The cruise control system enables you to set a constant
cruising speed once the vehicle has reached 25 mph.
The system will automatically maintain the set speed
until you tap the brake pedal, accelerate, cancel or
turn the system off.
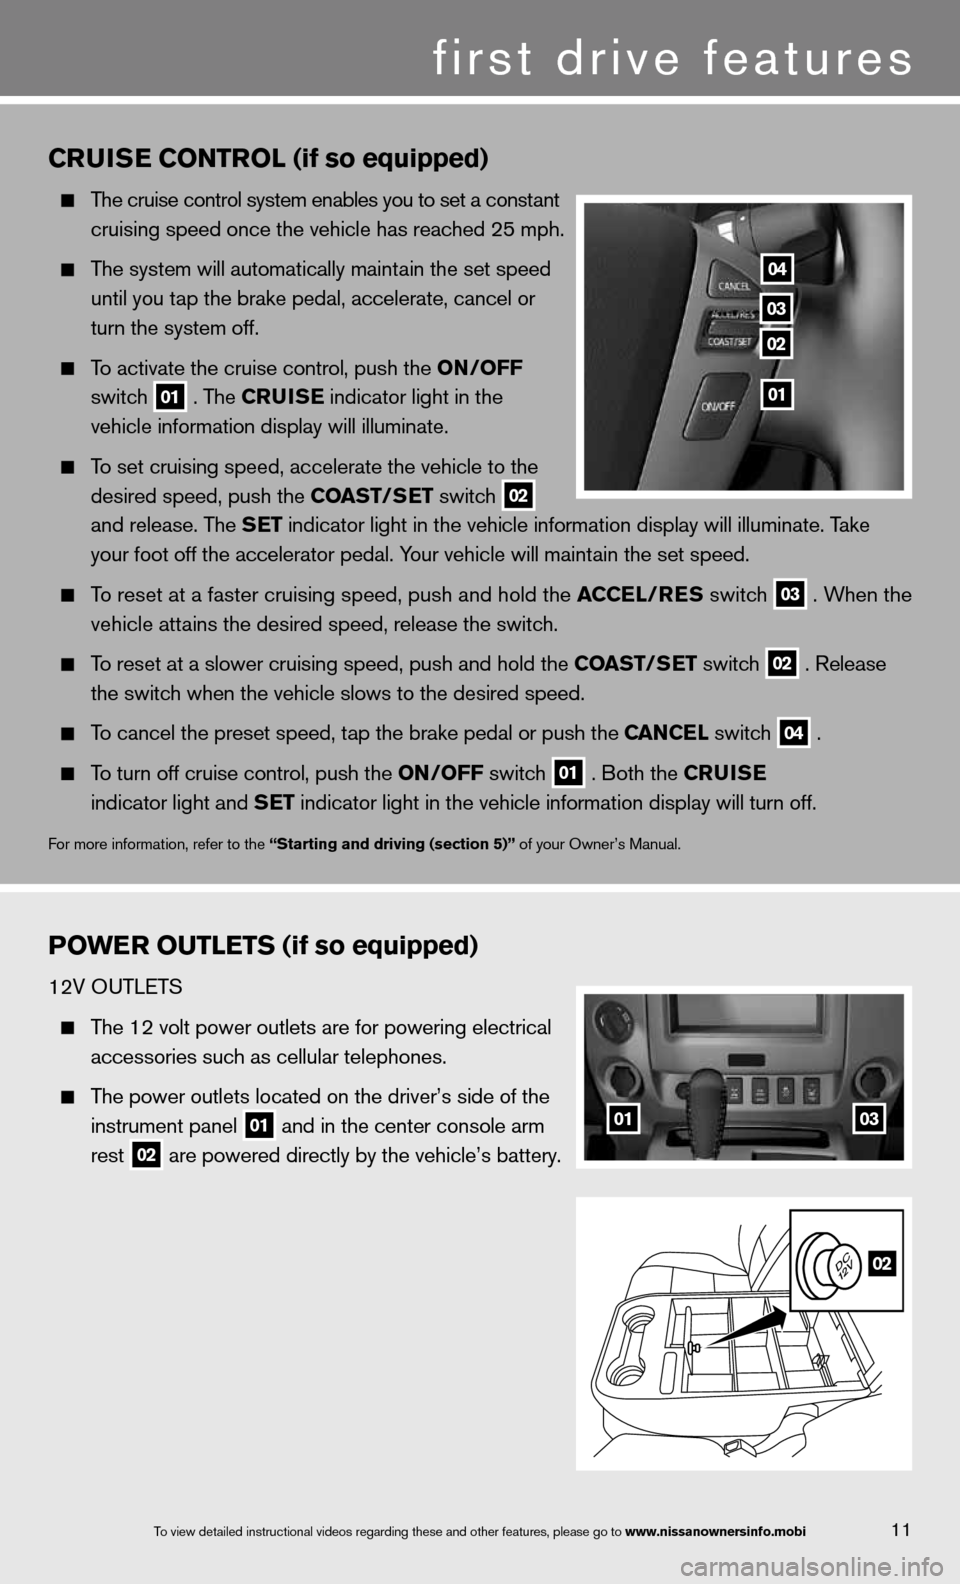
To activate the cruise control, push the ON/OFF
switch
01 . The CRUISE
indicator light in the
vehicle information display will illuminate.
To set cruising speed, accelerate the vehicle to the
desired speed, push the COAST/SET switch
02
and release. The SET indicator light in the vehicle information display will illuminate. Take
your foot off the accelerator pedal. Your vehicle will maintain the set speed.
To reset at a faster cruising speed, push and hold the ACCEL/RES switch
03 . When the
vehicle attains the desired speed, release the switch.
To reset at a slower cruising speed, push and hold the COAST/SET switch
02 . Release
the switch when the vehicle slows to the desired speed.
To cancel the preset speed, tap the brake pedal or push the CANCEL switch
04 .
To turn off cruise control, push the ON/OFF switch
01 . Both the CRUISE
indicator light and SET indicator light in the vehicle information display will turn off.
for more information, refer to the “Starting and driving (section 5)” of your Owner’s Manual.
POWER OUTLETS (if so equipped)
12V OuTLeTS
The 12 volt power outlets are for powering electrical
accessories such as cellular telephones.
The power outlets located on the driver’s side of the
instrument panel
01 and in the center console arm
rest
02 are powered directly by the vehicle’s battery.
04
03
02
01
0103
02
first drive features