2013 NISSAN LEAF radio
[x] Cancel search: radioPage 145 of 275
BLUETOOTH®STREAMING AUDIO
.Some Bluetooth®audio devices may not be
recognized by the in-vehicle audio system.
. It is necessary to set up the wireless
connection between a compatible Blue-
tooth
®audio device and the in-vehicle
Bluetooth®module before using the Blue-
tooth®streaming audio.
. The Bluetooth®streaming audio may be
stopped under the following conditions:
— Receiving a hands-free call.
— Checking the connection to the hands-
free phone.
— Connecting the hands-free phone or the audio device.
— Downloading the phonebook memory from the connected cellular phone.
. Do not place a Bluetooth
®audio device in
an area surrounded by metal or far away
from the in-vehicle Bluetooth
®module to
prevent tone quality degradation and wire-
less connection disruption.
. While an audio device is connected through
a Bluetooth
®wireless connection, the bat-
tery of the device may discharge quicker
than usual. .
This system supports the Bluetooth
®Audio
Distribution Profile (A2DP, AVRCP).
. Wireless LAN (Wi-Fi) and the Bluetooth
®
functions share the same frequency band
(2.4 GHz) . Using the Bluetooth®and the
wireless LAN functions at the same time may
slow down or disconnect the communica-
tion and cause undesired noise. It is
recommended that you turn off the wireless
LAN (Wi-Fi) when using the Bluetooth
®
functions.
. Bluetooth®trademark:
Bluetooth®is a trademark owned
by Bluetooth SIG, Inc., and
licensed to Clarion.
AUDIO MAIN OPERATION
Turning audio system on/off
Push the power switch to the "ACC" or "ON"
position, and then push thebutton while the
system is off to turn on the last audio source,
that was playing immediately before the system
was turned off. While the system is on, pushing
the
button turns the system off.
Switching audio screen
. FM/AM radio band select:
Pushing the FM·AMbutton will change the
band as follows:
AM ?FM1 ?FM2 ?AM
. SiriusXM satellite radio band select:
Pushing the XMbutton will change the
band as follows:
XM1 ?XM2 ?XM3 ?XM1
. Audio mode select:
Pushing the CD·AUXbutton will switch the
displays as follows:
USB memory/iPod
®player*1/Pandora® *1*2
? CD ?Bluetooth®streaming audio*1?
AUX ?USB memory/iPod®player*1/Pan-
dora®*1*2
*1 Screen only displays when a device capable of
playback is connected.
Audio system4-11
FM-AM-SAT RADIO WITH
COMPACT DISC (CD) PLAYER
Page 146 of 275
![NISSAN LEAF 2013 1.G Navigation Manual 4-12Audio system
*2 The Pandora®is only available in U.S.
Audio settings
It is possible to adjust the speaker tone quality
and sound balance.
1. Push theMENUbutton and touch [Set-
tings].
2. Touch [A NISSAN LEAF 2013 1.G Navigation Manual 4-12Audio system
*2 The Pandora®is only available in U.S.
Audio settings
It is possible to adjust the speaker tone quality
and sound balance.
1. Push theMENUbutton and touch [Set-
tings].
2. Touch [A](/manual-img/5/324/w960_324-145.png)
4-12Audio system
*2 The Pandora®is only available in U.S.
Audio settings
It is possible to adjust the speaker tone quality
and sound balance.
1. Push theMENUbutton and touch [Set-
tings].
2. Touch [Audio].
3. Touch the item you would like to adjust.
Available settings
. [Bass]:
Adjust the tone quality of the bass by
touching [+] or [-].
. [Treble]:
Adjust the tone quality of the treble by
touching [+] or [-].
. [Balance]:
Adjust the sound level between the left and
right speakers by touching [L] or [R]. .
[Fade]:
Adjust the sound level between the front and
rear speakers by touching [R] or [F].
. [Speed Sensitive Vol.]:
The sound volume is increased based on the
vehicle speed. Touch [+] or [-] to adjust the
effect level from 0 (OFF) to 3.
FM-AM-SAT RADIO OPERATION
When the FM·AMbutton or the XMbutton is
pushed while the power switch is in the "ACC"
or "ON" position, the radio will turn on at the
channel last played.
The last channel played will also turn on when
the
button is pushed to ON. The satellite
radio is not available in Alaska, Hawaii and
Guam.
If another audio source is playing when the
FM·AM button or the XMbutton is turned to
ON, the audio source will automatically be
turned off and the last radio channel played will
turn on.
When the stereo broadcast signal is weak, the
radio will automatically change from stereo to
monaural reception.
The satellite radio mode requires an active
SiriusXM Satellite Radio subscription. The sa-
tellite radio is not available in Alaska, Hawaii and
Guam. It may take some time to receive the activation
signal after subscribing the SiriusXM Satellite
Radio. After receiving the activation signal, an
available channel list will be automatically
updated in the radio. Push the power switch
from LOCK to ACC to update the channel list.
Selecting FM/AM/SAT radio band
FM/AM radio band select:
Pushing the
FM·AMbutton will change the
band as follows:
AM ?FM1 ?FM2 ?AM
SiriusXM Satellite Radio band select:
Pushing the XMbutton will change the band as
follows:
XM1 ?XM2 ?XM3 ?XM1
How to view radio screen
Page 147 of 275
![NISSAN LEAF 2013 1.G Navigation Manual FM/AM radio screen:
*1Displays the broadcasting station and category
currently being received.
*2Displays the frequency currently being received.
*3[Info]:
Displays the broadcasting station informatio NISSAN LEAF 2013 1.G Navigation Manual FM/AM radio screen:
*1Displays the broadcasting station and category
currently being received.
*2Displays the frequency currently being received.
*3[Info]:
Displays the broadcasting station informatio](/manual-img/5/324/w960_324-146.png)
FM/AM radio screen:
*1Displays the broadcasting station and category
currently being received.
*2Displays the frequency currently being received.
*3[Info]:
Displays the broadcasting station information
currently being received.
*4[SCAN]:
Touch to tune from low to high frequencies and
stop at each broadcasting station for 5 seconds.
*5Displays the preset channel list. If 1 of the 6
preset stations listed is touched and held, the
current station will be stored as the new preset.
SiriusXM Satellite Radio screen:
*1Indicates the channel, category, program and title
currently being received.
*2Indicates the frequency currently being received.
*3[CAT]:
Displays a category list for SiriusXM Satellite
Radio. When a category is selected, the channel
list will be displayed.
*4[Direct]:
Input the channel number by using a keypad.
*5[Info]:
Indicates the broadcasting station information
currently being received.
*6[SCAN]:
Touch to tune from low to high frequencies and
stop at each broadcasting channel for 5 seconds.
*7Displays the preset channel list. If 1 of the 6
preset stations listed is touched and held, the
current station will be stored as the new preset.
Selecting channel/category
TUNE (Tuning):
For AM and FM radio:
Push theTUNE SEEK CH button for manual
tuning.
For SiriusXM Satellite Radio:
Push the TUNE SEEK CH button to seek
channels from all of the categories.
During satellite radio reception, the following
messages will be displayed under certain
conditions.
. No Signal (No signal is received while the
SAT tuner is connected)
. Channel Off Air (Broadcasting signed off)
. Check Antenna (Antenna connection error) .
Loading (The system is receiving the music
or information that is provided from the
selected channel)
. Channel Not Available (No channels are
searched)
. Channel Not Authorized (There is no user
subscription to this channel)
SEEK tuning:
For AM and FM radio:
Push the TUNE SEEK CH button for less than
1.5 seconds to tune from low to high or high to
low frequencies and to stop at the next broad-
casting station.
When the TUNE SEEK CH button is pushed
and held, radio frequencies will increase or
decrease by skipping the broadcasting stations.
When the button is released, the next broad-
casting station is selected.
SCAN tuning:
Touch [SCAN] to tune from low to high
frequencies and stop at each broadcasting
station/channel for 5 seconds.
Touch [SCAN] again during this 5 second
period to stop SCAN tuning. The radio will
remain tuned to that station/channel.
If [SCAN] is not touched within 5 seconds,
SCAN tuning moves to the next station/channel.
Audio system4-13
Page 148 of 275
4-14Audio system
Storing stations/channels
12 stations/channels can be set for the FM band
(6 each for FM1 and FM2) , 18 for SiriusXM
Satellite Radio (6 each for XM1, XM2 and XM3)
and 6 stations can be set for the AM band.
1. Choose the radio band pushing theFM·AM
button or XMbutton.
2. Tune to the preferred station/channel push- ing the TUNE SEEK CH button.
3. Touch and hold one of the preset lists to register the chosen broadcasting station or
channel.
COMPACT DISC (CD) PLAYER OP-
ERATION
Playing CD
1. Push the power switch to the "ACC" or"ON" position.
2. Push the OPEN/TILTbutton to open the
monitor.
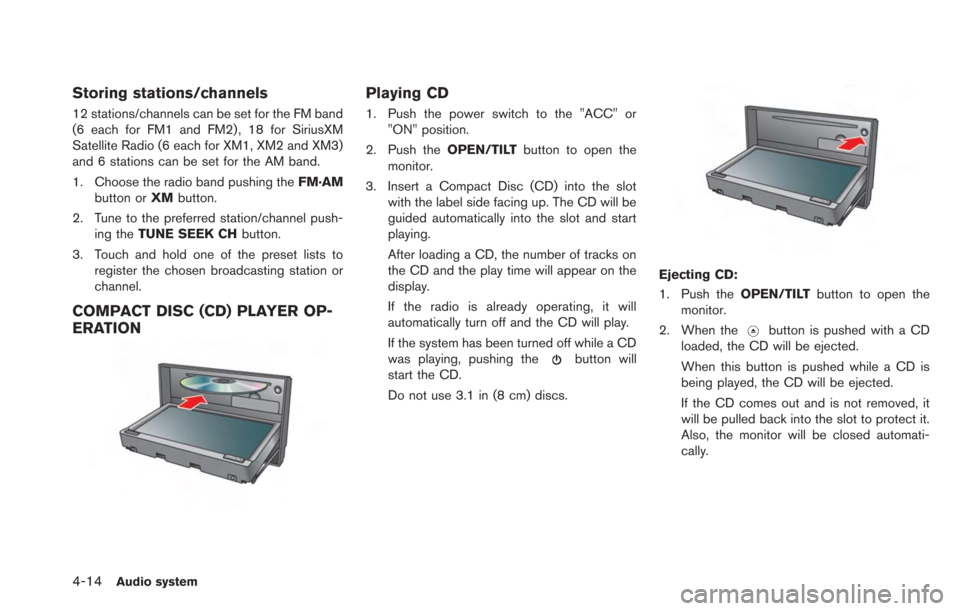
3. Insert a Compact Disc (CD) into the slot with the label side facing up. The CD will be
guided automatically into the slot and start
playing.
After loading a CD, the number of tracks on
the CD and the play time will appear on the
display.
If the radio is already operating, it will
automatically turn off and the CD will play.
If the system has been turned off while a CD
was playing, pushing the
button will
start the CD.
Do not use 3.1 in (8 cm) discs.
Ejecting CD:
1. Push the OPEN/TILTbutton to open the
monitor.
2. When the
button is pushed with a CD
loaded, the CD will be ejected.
When this button is pushed while a CD is
being played, the CD will be ejected.
If the CD comes out and is not removed, it
will be pulled back into the slot to protect it.
Also, the monitor will be closed automati-
cally.
Page 151 of 275
Next/Previous Track and Fast For-
ward/Rewind
Push theTUNE SEEK CH button for more than
1.5 seconds while an iPod®is playing to fast
forward or rewind through the current track.
When the button is released, the iPod
®will
return to the normal play speed.
When the TUNE SEEK CH button is pushed for
less than 1.5 seconds while an iPod
®is playing,
the next track or the beginning of the current
track on the iPod
®will be played.
Select play mode
The play mode setting display will appear when
[Mode] is touched.
Select the preferred play mode from the
following items.
. Shuffle
Choose "Off", "Songs" or "Albums".
. Repeat
Choose "One" or "All".
iPod®settings
The following items can be chosen from the
menu list screen. For further information about
each item, see the iPod
®Owner’s Manual.
. Now Playing .
Playlists
. Artists
. Albums
. Songs
. Podcasts
. Genres
. Composers
PANDORA®OPERATION (if so
equipped)
Connecting iPhone
®
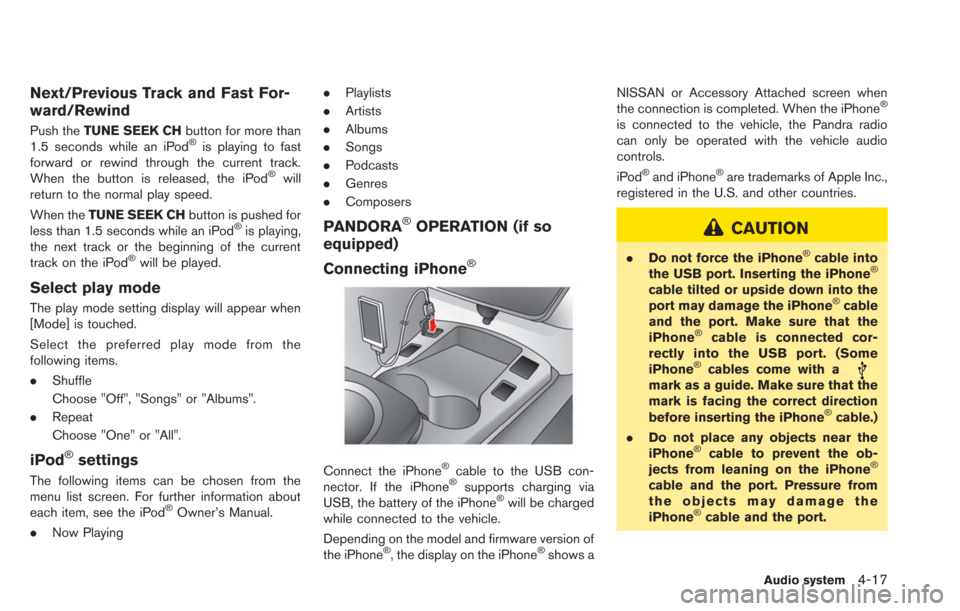
Connect the iPhone®cable to the USB con-
nector. If the iPhone®supports charging via
USB, the battery of the iPhone®will be charged
while connected to the vehicle.
Depending on the model and firmware version of
the iPhone
®, the display on the iPhone®shows a NISSAN or Accessory Attached screen when
the connection is completed. When the iPhone
®
is connected to the vehicle, the Pandra radio
can only be operated with the vehicle audio
controls.
iPod
®and iPhone®are trademarks of Apple Inc.,
registered in the U.S. and other countries.
CAUTION
. Do not force the iPhone®cable into
the USB port. Inserting the iPhone®
cable tilted or upside down into the
port may damage the iPhone®cable
and the port. Make sure that the
iPhone
®cable is connected cor-
rectly into the USB port. (Some
iPhone
®cables come with amark as a guide. Make sure that the
mark is facing the correct direction
before inserting the iPhone
®cable.)
. Do not place any objects near the
iPhone
®cable to prevent the ob-
jects from leaning on the iPhone®
cable and the port. Pressure from
the objects may damage the
iPhone
®cable and the port.
Audio system4-17
Page 158 of 275
4-24Audio system
.High
STEERING WHEEL SWITCHES FOR
AUDIO CONTROL
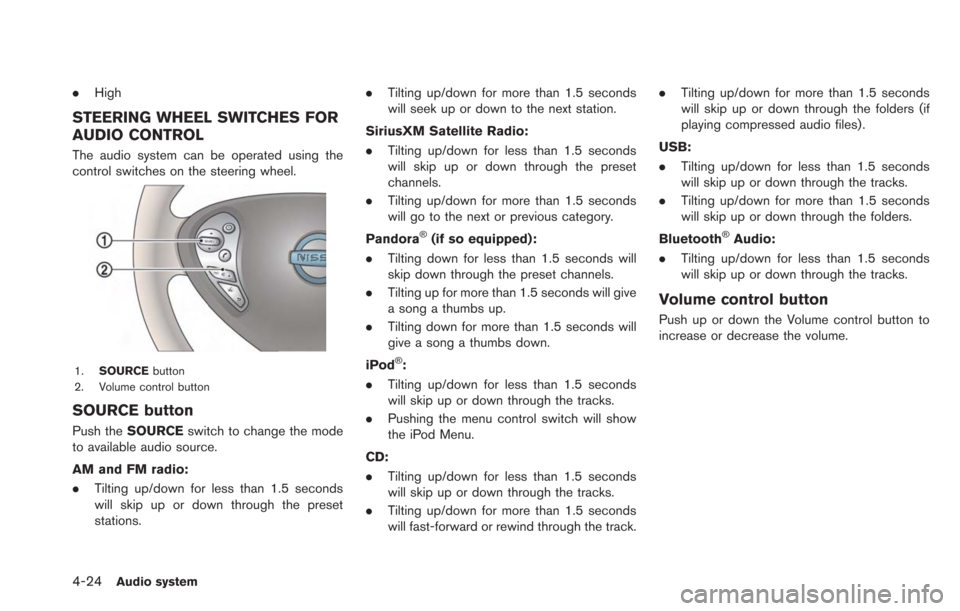
The audio system can be operated using the
control switches on the steering wheel.
1. SOURCE button
2. Volume control button
SOURCE button
Push the SOURCE switch to change the mode
to available audio source.
AM and FM radio:
. Tilting up/down for less than 1.5 seconds
will skip up or down through the preset
stations. .
Tilting up/down for more than 1.5 seconds
will seek up or down to the next station.
SiriusXM Satellite Radio:
. Tilting up/down for less than 1.5 seconds
will skip up or down through the preset
channels.
. Tilting up/down for more than 1.5 seconds
will go to the next or previous category.
Pandora
®(if so equipped):
. Tilting down for less than 1.5 seconds will
skip down through the preset channels.
. Tilting up for more than 1.5 seconds will give
a song a thumbs up.
. Tilting down for more than 1.5 seconds will
give a song a thumbs down.
iPod
®:
. Tilting up/down for less than 1.5 seconds
will skip up or down through the tracks.
. Pushing the menu control switch will show
the iPod Menu.
CD:
. Tilting up/down for less than 1.5 seconds
will skip up or down through the tracks.
. Tilting up/down for more than 1.5 seconds
will fast-forward or rewind through the track. .
Tilting up/down for more than 1.5 seconds
will skip up or down through the folders (if
playing compressed audio files) .
USB:
. Tilting up/down for less than 1.5 seconds
will skip up or down through the tracks.
. Tilting up/down for more than 1.5 seconds
will skip up or down through the folders.
Bluetooth
®Audio:
. Tilting up/down for less than 1.5 seconds
will skip up or down through the tracks.
Volume control button
Push up or down the Volume control button to
increase or decrease the volume.
Page 161 of 275
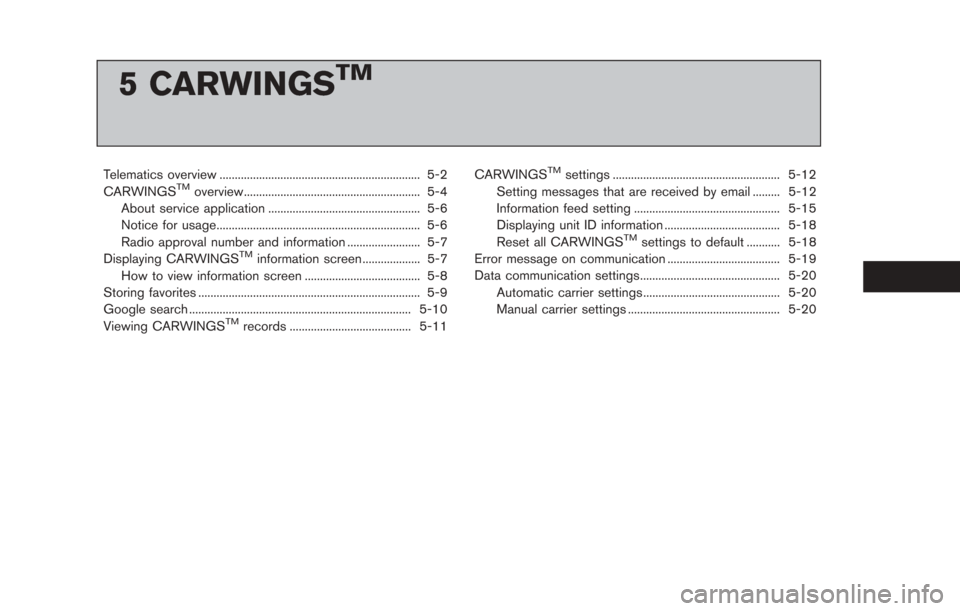
5 CARWINGSTM
Telematics overview .................................................................. 5-2
CARWINGSTMoverview.......................................................... 5-4
About service application .................................................. 5-6
Notice for usage................................................................... 5-6
Radio approval number and information ........................ 5-7
Displaying CARWINGS
TMinformation screen ................... 5-7
How to view information screen ...................................... 5-8
Storing favorites ........................................................................\
. 5-9
Google search ........................................................................\
. 5-10
Viewing CARWINGS
TMrecords ........................................ 5-11 CARWINGS
TMsettings ....................................................... 5-12
Setting messages that are received by email ......... 5-12
Information feed setting ................................................ 5-15
Displaying unit ID information ...................................... 5-18
Reset all CARWINGS
TMsettings to default ........... 5-18
Error message on communication ..................................... 5-19
Data communication settings.............................................. 5-20 Automatic carrier settings ............................................. 5-20
Manual carrier settings .................................................. 5-20
Page 163 of 275
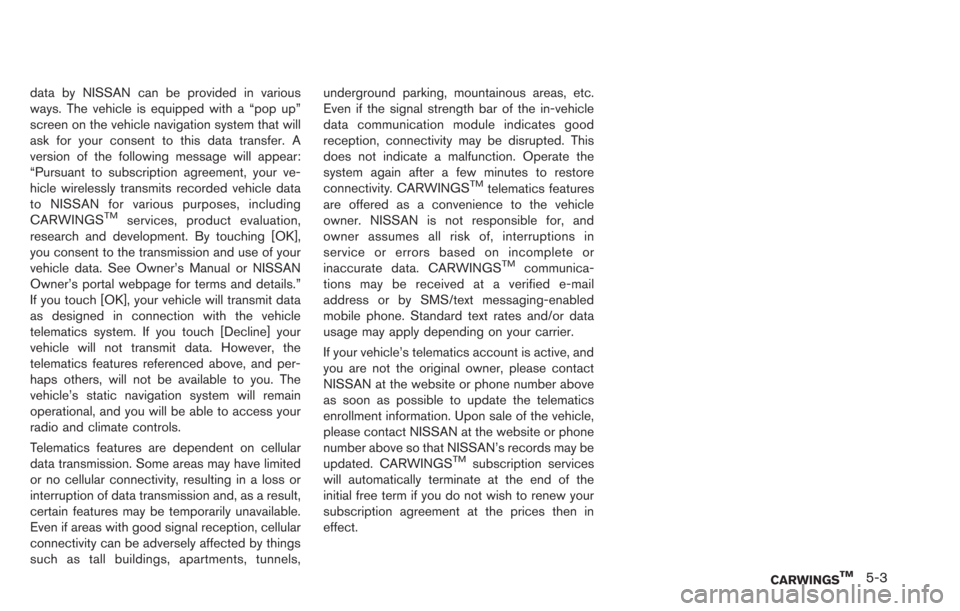
data by NISSAN can be provided in various
ways. The vehicle is equipped with a “pop up”
screen on the vehicle navigation system that will
ask for your consent to this data transfer. A
version of the following message will appear:
“Pursuant to subscription agreement, your ve-
hicle wirelessly transmits recorded vehicle data
to NISSAN for various purposes, including
CARWINGS
TMservices, product evaluation,
research and development. By touching [OK],
you consent to the transmission and use of your
vehicle data. See Owner’s Manual or NISSAN
Owner’s portal webpage for terms and details.”
If you touch [OK], your vehicle will transmit data
as designed in connection with the vehicle
telematics system. If you touch [Decline] your
vehicle will not transmit data. However, the
telematics features referenced above, and per-
haps others, will not be available to you. The
vehicle’s static navigation system will remain
operational, and you will be able to access your
radio and climate controls.
Telematics features are dependent on cellular
data transmission. Some areas may have limited
or no cellular connectivity, resulting in a loss or
interruption of data transmission and, as a result,
certain features may be temporarily unavailable.
Even if areas with good signal reception, cellular
connectivity can be adversely affected by things
such as tall buildings, apartments, tunnels, underground parking, mountainous areas, etc.
Even if the signal strength bar of the in-vehicle
data communication module indicates good
reception, connectivity may be disrupted. This
does not indicate a malfunction. Operate the
system again after a few minutes to restore
connectivity. CARWINGS
TMtelematics features
are offered as a convenience to the vehicle
owner. NISSAN is not responsible for, and
owner assumes all risk of, interruptions in
service or errors based on incomplete or
inaccurate data. CARWINGS
TMcommunica-
tions may be received at a verified e-mail
address or by SMS/text messaging-enabled
mobile phone. Standard text rates and/or data
usage may apply depending on your carrier.
If your vehicle’s telematics account is active, and
you are not the original owner, please contact
NISSAN at the website or phone number above
as soon as possible to update the telematics
enrollment information. Upon sale of the vehicle,
please contact NISSAN at the website or phone
number above so that NISSAN’s records may be
updated. CARWINGS
TMsubscription services
will automatically terminate at the end of the
initial free term if you do not wish to renew your
subscription agreement at the prices then in
effect.
CARWINGSTM5-3